Page 202 of 573
Courtesy/Interior Lighting
At the forward end of the console are two courtesy lights
(standard dome light has two buttons). The lights turn on
when a front door, a sliding door or the liftgate is opened.
If your vehicle is equipped with Remote Keyless Entry
(RKE) the lights will also turn on when the UNLOCK
button on the RKE transmitter is pressed.
The courtesy lights also function as reading lights. Press
in on each lens to turn these lights on while inside the
vehicle. Press a second time to turn each light off. You
may adjust the direction of these lights by pressing the
outside ring, which is identified with four directional
arrows (LED lamps only).
The area around the instrument panel cupholders is also
illuminated from a light in the overhead console (pre-
mium console only). This light is turned on when the
headlight switch is on, and will adjust in brightness when
the dimmer control is rotated up or down.
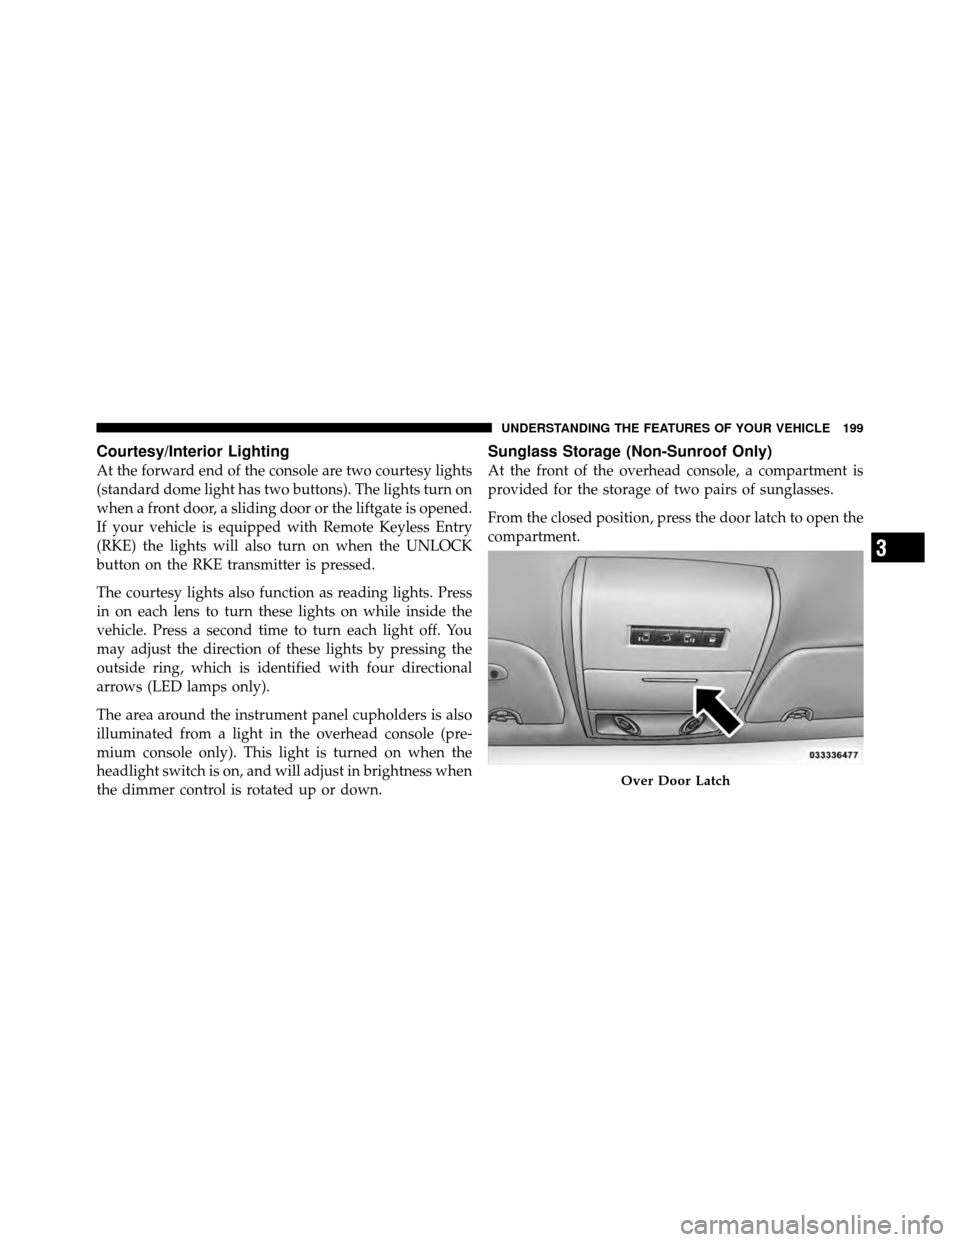
Sunglass Storage (Non-Sunroof Only)
At the front of the overhead console, a compartment is
provided for the storage of two pairs of sunglasses.
From the closed position, press the door latch to open the
compartment.
Over Door Latch
3
UNDERSTANDING THE FEATURES OF YOUR VEHICLE 199
Page 204 of 573
Rear Courtesy/Reading Lights — If Equipped
The overhead console has two sets of courtesy lights. The
lights turn on when a front door, a sliding door or the
liftgate is opened. If your vehicle is equipped with
Remote Keyless Entry (RKE) the lights will also turn on
when the UNLOCK button on the RKE transmitter is
pressed.
The courtesy lights also function as reading lights. Press
in on each lens to turn these lights on while inside the
vehicle. Press the lens a second time to turn each light off.
You may adjust the direction of these lights by pressing
the outside ring, which is identified with four directional
arrows.
Rear Overhead Consoles — If Equipped
The rear overhead storage system is available in two
versions: with or without sunroof.
Reading Lights
3
UNDERSTANDING THE FEATURES OF YOUR VEHICLE 201
Page 251 of 573
▫Keyless Enter-N-Go Display —
If Equipped ........................ 283
▫ Compass / Temperature Display ......... 283
▫ Customer-Programmable Features
(System Setup) ...................... 285
� Media Center 730N/430/430N (RHR/RER/
RBZ/RHB) CD/DVD/HDD/NAV —
If Equipped .......................... 292
▫ Operating Instructions
(Voice Command System) — If Equipped . . . 292
▫ Operating Instructions
(Uconnect™ Phone) — If Equipped ....... 292
� Media Center 130 (Sales Code RES) ......... 293
▫ Operating Instructions — Radio Mode ..... 293▫
Operation Instructions — CD Mode For CD
And MP3 Audio Play ................. 296
▫ Notes On Playing MP3 Files ............ 298
▫ Operation Instructions - Auxiliary Mode .... 301
� Media Center 130 With Satellite Radio
(Sales Code RES+RSC) ................... 301
▫ Operating Instructions — Radio Mode ..... 302
▫ Operation Instructions — CD Mode For CD
And MP3 Audio Play ................. 307
▫ Notes On Playing MP3 Files ............ 309
▫ List Button (CD Mode For MP3 Play) ...... 312
▫ Info Button (CD Mode For MP3 Play) ...... 312
▫ Uconnect™ Multimedia (Satellite Radio) —
If Equipped ........................ 313
248 UNDERSTANDING YOUR INSTRUMENT PANEL
Page 277 of 573
•Remote start active — Push Start Button
•Remote start active — Key to Run
•Wrong Key
•Damaged Key
•Key not programmed
•Vehicle Not in Park
•Key Left Vehicle
•Key Not Detected
•Press Brake Pedal and Push Button to Start
•Door(s) Ajar (with a single chime, if vehicle is in
motion)
•Liftgate Ajar (chime will sound when vehicle starts
moving)
•Low Tire Pressure
•Service TPM System (refer to “Tire Pressure Monitor-
ing System” in “Starting And Operating”)
•Turn Signal On
•RKE Battery Low
•Service Keyless System
•LOW WASHER FLUID
•Oil Change Required
•Check Gascap
•Left Front Turn Signal Light Out
•Left Rear Turn Signal Light Out
•Right Front Turn Signal Light Out
•Right Rear Turn Signal Light Out
•Park Assist Disabled
274 UNDERSTANDING YOUR INSTRUMENT PANEL
Page 282 of 573
WARNING!
If the Transmission Temperature Warning Light is
illuminated and you continue operating the vehicle,
in some circumstances you could cause the fluid to
boil over, come in contact with hot engine or exhaust
components and cause a fire.
Oil Change Required
Your vehicle is equipped with an engine oil change
indicator system. TheOil Change Required message will
flash in the EVIC display for approximately 10 seconds,
after a single chime has sounded, to indicate the next
scheduled oil change interval. The engine oil change
indicator system is duty-cycle based, which means the
engine oil change interval may fluctuate dependent upon
your personal driving style. Unless reset, this message will continue to display each
time you turn the ignition switch to the ON/RUN
position or cycle the ignition to the ON/RUN position if
equipped with Keyless Enter-N-Go. To turn off the
message temporarily, press and release the MENU but-
ton. To reset the oil change indicator system (after
performing the scheduled maintenance) refer to the fol-
lowing procedure.
Vehicles Equipped With Keyless Enter-N-Go
1. Without pressing the brake pedal, push the ENGINE
START/STOP button and cycle the ignition to the ON/
RUN position (Do not start the engine.)
2. Fully depress the accelerator pedal, slowly, three times
within 10 seconds.
3. Without pressing the brake pedal, push the ENGINE
START/STOP button once to return the ignition to the
OFF/LOCK position.
4
UNDERSTANDING YOUR INSTRUMENT PANEL 279
Page 283 of 573
Vehicles Not Equipped With Keyless Enter-N-Go
1. Turn the ignition switch to the ON/RUN position (Do
not start the engine.)
2. Fully depress the accelerator pedal, slowly, three times
within 10 seconds.
3. Turn the ignition switch to the OFF/LOCK position.
NOTE:If the indicator message illuminates when you
start the engine, the oil change indicator system did not
reset. If necessary, repeat these steps.
Fuel Economy
Press and release the UP or DOWN button until “Fuel
Economy” displays highlighted in the EVIC and press
the SELECT button. The following Fuel Economy func-
tions display in the EVIC:
•Average Fuel Economy
•Distance To Empty (DTE)
•Miles Per Gallon (MPG)
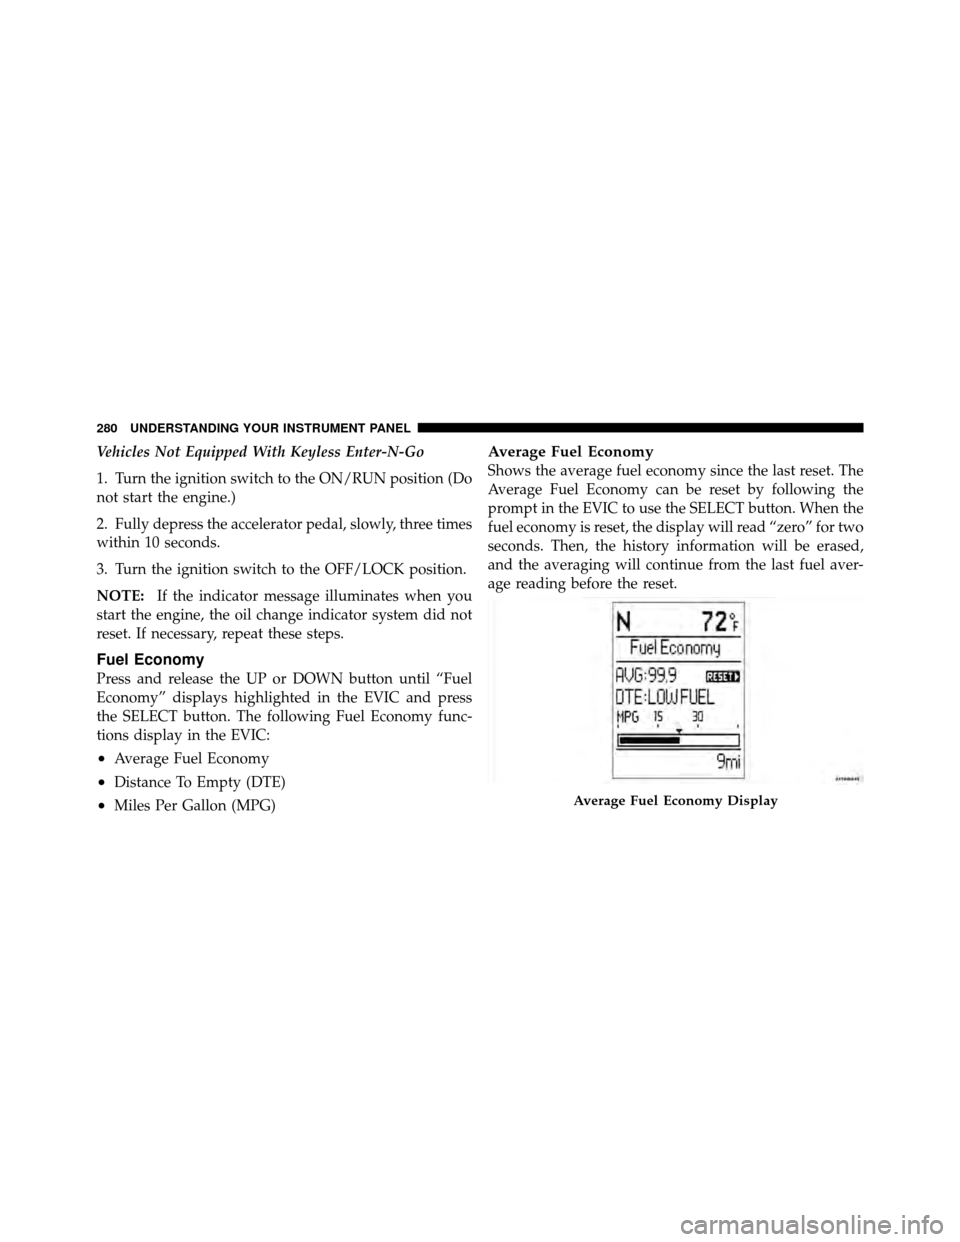
Average Fuel Economy
Shows the average fuel economy since the last reset. The
Average Fuel Economy can be reset by following the
prompt in the EVIC to use the SELECT button. When the
fuel economy is reset, the display will read “zero” for two
seconds. Then, the history information will be erased,
and the averaging will continue from the last fuel aver-
age reading before the reset.
Average Fuel Economy Display
280 UNDERSTANDING YOUR INSTRUMENT PANEL
Page 286 of 573
Keyless Enter-N-Go Display — If Equipped
When the ENGINE START/STOP button is pressed to
change ignition switch position, current ignition status
will be displayed in the lower right corner of the EVIC
display to the right of the odometer value.
Refer to “Keyless Enter-N-Go” in “Starting And Operat-
ing” for more information.
Compass / Temperature Display
The compass readings indicate the direction the vehicle is
facing. The EVIC will display one of eight compass
readings and the outside temperature.
NOTE:The system will display the last known outside
temperature when starting the vehicle and may need to
be driven several minutes before the updated tempera-
ture is displayed. Engine temperature can also affect the
displayed temperature; therefore, temperature readings
are not updated when the vehicle is not moving.
Automatic Compass Calibration
This compass is self-calibrating, which eliminates the
need to manually reset the compass. When the vehicle is
new, the compass may appear erratic and the EVIC will
display CAL until the compass is calibrated. You may
also calibrate the compass by completing one or more
360–degree turns (in an area free from large metal or
metallic objects) until the CAL indicator displayed in the
EVIC turns off. The compass will now function normally.
NOTE: A good calibration requires a level surface and
an environment free from large metallic objects such as
buildings, bridges, underground cables, railroad tracks,
etc.
Manual Compass Calibration — If Equipped
If the compass appears erratic and the CAL indicator
does not appear in the EVIC display, you must put the
compass into the Calibration Mode manually, as follows:
1. Turn ON the ignition switch.
4
UNDERSTANDING YOUR INSTRUMENT PANEL 283
Page 289 of 573
press the SELECT button to enter the System Setup
sub-menu. Press and release the UP or DOWN button to
select a feature form the following choices:
Language
When in this display you may select one of five lan-
guages for all display nomenclature, including the trip
functions and the navigation system (if equipped). Press
the UP or DOWN button while in this display and scroll
through the language choices. Press the SELECT button
to select English, Spanish (Español), French (Français).
Then, as you continue, the information will display in the
selected language.
Enable/Disable the Rear Park Assist System
The Rear Park Assist system will scan for objects behind
the vehicle when the transmission is in the REVERSE
position and the vehicle speed is less than 11 mph
(18 km/h). The system can be enabled with Sound Only,
Sound and Display, or turned OFF through the EVIC. Tomake your selection, press and release the SELECT
button until a check-mark appears next to the feature
showing the system has been activated or the check-mark
is removed showing the system has been deactivated.
Refer to “Rear Park Assist System” in “Understanding
The Features Of Your Vehicle” for system function and
operating information.
Auto Unlock Doors Exit
When ON is selected, all doors will unlock when the
vehicle is stopped and the transmission is in the PARK or
NEUTRAL position and the driver’s door is opened. To
make your selection, press and release the SELECT
button until a check-mark appears next to the feature
showing the system has been activated or the check-mark
is removed showing the system has been deactivated.
Remote Unlock Sequence
When
Driver Door 1st Press is selected, only the driver’s
door will unlock on the first press of the Remote Keyless
286 UNDERSTANDING YOUR INSTRUMENT PANEL