Page 307 of 376
Black plate (61,1)Chevrolet Impala Owner Manual - 2011
Vehicle Care 10-61
Tire Changing
Removing the Spare Tire and
Tools
The equipment you will need is
located in the trunk.
1. Open the trunk. SeeTrunk on
page 2‑10.
2. Remove the convenience net if the vehicle has one.
3. Remove the spare tire cover.
4. Turn the wing nut counterclockwise and remove it. 5. Remove the compact spare tire.
6. Turn the nut holding the jack
counterclockwise and remove it.
Then remove the jack and
wrench.
The tools you will need to change a
tire include the jack (A), extension
and protection guide (B), and wheel
wrench (C).
Page 308 of 376

Black plate (62,1)Chevrolet Impala Owner Manual - 2011
10-62 Vehicle Care
Removing the Flat Tire and
Installing the Spare Tire
This vehicle may have aluminum
wheels with exposed wheel nuts.
Use the wheel wrench to loosen all
the wheel nuts. Do not remove
them yet.
Or, this vehicle may have steel
wheels with plastic covers.
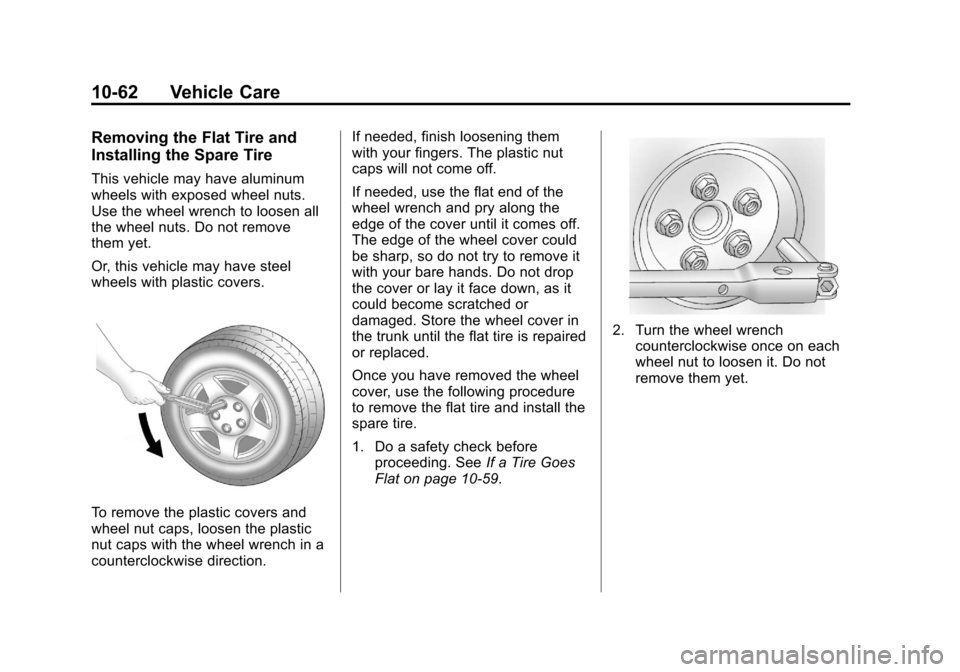
To remove the plastic covers and
wheel nut caps, loosen the plastic
nut caps with the wheel wrench in a
counterclockwise direction.If needed, finish loosening them
with your fingers. The plastic nut
caps will not come off.
If needed, use the flat end of the
wheel wrench and pry along the
edge of the cover until it comes off.
The edge of the wheel cover could
be sharp, so do not try to remove it
with your bare hands. Do not drop
the cover or lay it face down, as it
could become scratched or
damaged. Store the wheel cover in
the trunk until the flat tire is repaired
or replaced.
Once you have removed the wheel
cover, use the following procedure
to remove the flat tire and install the
spare tire.
1. Do a safety check before
proceeding. See If a Tire Goes
Flat on page 10‑59.
2. Turn the wheel wrench counterclockwise once on each
wheel nut to loosen it. Do not
remove them yet.
Page 310 of 376
Black plate (64,1)Chevrolet Impala Owner Manual - 2011
10-64 Vehicle Care
5. Raise the vehicle by turning thejack handle clockwise. Raise the
vehicle far enough off the
ground to install the compact
spare tire.
6. Remove all wheel nuts and the flat tire.
{WARNING
Rust or dirt on a wheel, or on the
parts to which it is fastened, can
make wheel nuts become loose
after time. The wheel could come
off and cause an accident. When
changing a wheel, remove any
rust or dirt from places where the
wheel attaches to the vehicle. In
an emergency, use a cloth or a
paper towel to do this; but be sure
to use a scraper or wire brush
later, if needed, to get all the rust
or dirt off. See If a Tire Goes Flat
on page 10‑59.
7. Remove any rust or dirt from the wheel bolts, mounting surfaces,
and spare wheel.
8. Install the compact spare tire.
{WARNING
Never use oil or grease on bolts
or nuts because the nuts might
come loose. The vehicle's wheel
could fall off, causing a crash.
Page 311 of 376
Black plate (65,1)Chevrolet Impala Owner Manual - 2011
Vehicle Care 10-65
9. Reinstall the wheel nuts with therounded end of the nuts toward
the wheel. Tighten each nut
clockwise by hand until the
wheel is held against the hub.10. Lower the vehicle by turning the jack handle
counterclockwise.
Lower the jack completely.
{WARNING
Wheel nuts that are improperly or
incorrectly tightened can cause
the wheels to become loose or
come off. The wheel nuts should
be tightened with a torque wrench
to the proper torque specification
after replacing. Follow the torque
specification supplied by the
aftermarket manufacturer when
using accessory locking wheel
nuts. See Capacities and
Specifications on page 12‑2 for
original equipment wheel nut
torque specifications.
Page 317 of 376

Black plate (71,1)Chevrolet Impala Owner Manual - 2011
Vehicle Care 10-71
3. Turn off the ignition on bothvehicles. Unplug unnecessary
accessories plugged into the
cigarette lighter or the accessory
power outlets. Turn off the radio
and all lamps that are not
needed. This will avoid sparks
and help save both batteries.
And it could save the radio!
4. Open the hoods and locate the batteries. Find the positive (+)
and negative (−) terminal
locations on each vehicle.
You will not need to access your
battery for jump starting. Your
vehicle has a remote positive (+)
jump starting terminal for that
purpose. The remote positive (+)
terminal is located in the engine
compartment on the passenger
side of the vehicle, on the
underhood fuse block. See
Engine Compartment Overview
on page 10‑6 for more
information on location.
To uncover the remote
positive (+) terminal, remove
the fuse block cover. You
should always use the remote
positive (+) terminal instead
of the positive (+) terminal on
the battery.
{WARNING
An electric fan can start up even
when the engine is not running
and can injure you. Keep hands,
clothing and tools away from any
underhood electric fan.
{WARNING
Using an open flame near a
battery can cause battery gas to
explode. People have been hurt
doing this, and some have been
blinded. Use a flashlight if you
need more light.
Be sure the battery has enough
water. You do not need to add
water to the battery installed in
your new vehicle. But if a battery
has filler caps, be sure the right
amount of fluid is there. If it is low,
add water to take care of that
first. If you do not, explosive gas
could be present.
Battery fluid contains acid that
can burn you. Do not get it on
you. If you accidentally get it in
your eyes or on your skin, flush
the place with water and get
medical help immediately.
Page 319 of 376

Black plate (73,1)Chevrolet Impala Owner Manual - 2011
Vehicle Care 10-73
10. Now start the vehicle with thegood battery and run the
engine for a while.
11. Try to start the vehicle that had the dead battery. If it will not
start after a few tries, it
probably needs service.
Notice: If the jumper cables are
connected or removed in the
wrong order, electrical shorting
may occur and damage the
vehicle. The repairs would not be
covered by the vehicle warranty.
Always connect and remove the
jumper cables in the correct
order, making sure that the
cables do not touch each other or
other metal.
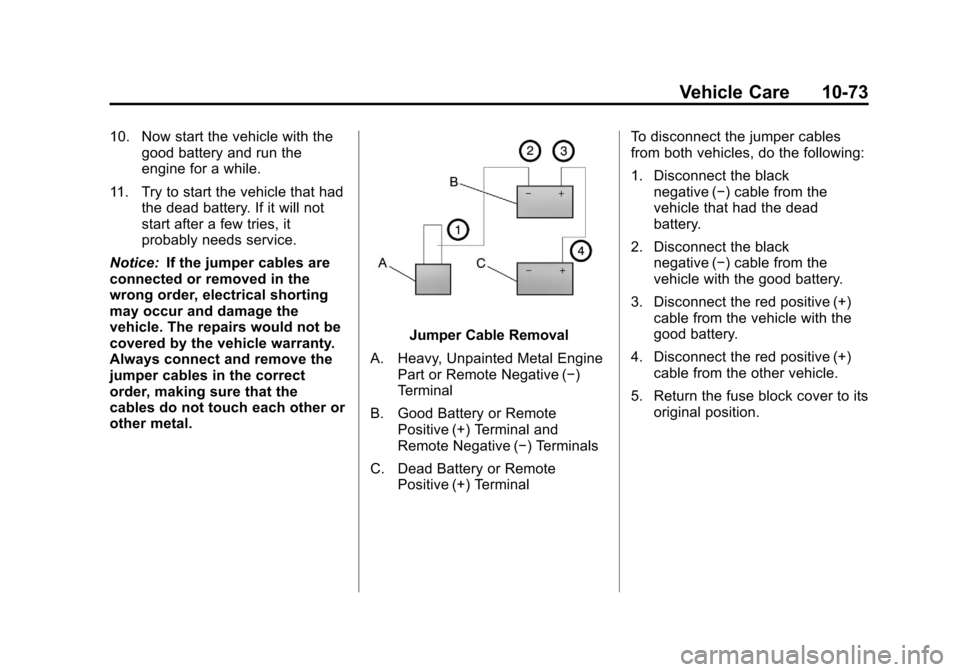
Jumper Cable Removal
A. Heavy, Unpainted Metal Engine Part or Remote Negative (−)
Terminal
B. Good Battery or Remote Positive (+) Terminal and
Remote Negative (−) Terminals
C. Dead Battery or Remote Positive (+) Terminal To disconnect the jumper cables
from both vehicles, do the following:
1. Disconnect the black
negative (−) cable from the
vehicle that had the dead
battery.
2. Disconnect the black negative (−) cable from the
vehicle with the good battery.
3. Disconnect the red positive (+) cable from the vehicle with the
good battery.
4. Disconnect the red positive (+) cable from the other vehicle.
5. Return the fuse block cover to its original position.
Page 321 of 376

Black plate (75,1)Chevrolet Impala Owner Manual - 2011
Vehicle Care 10-75
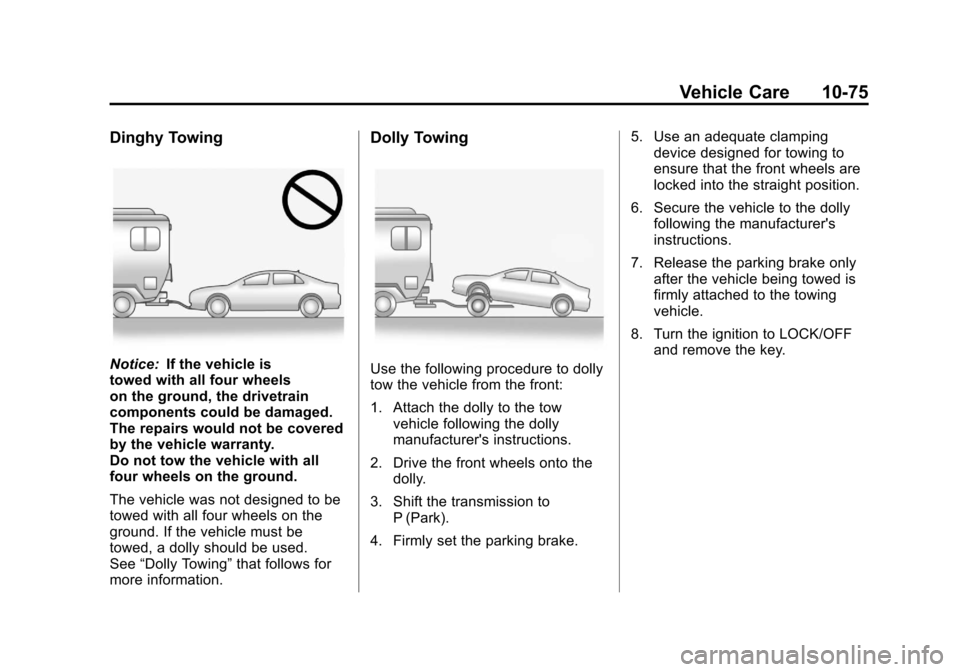
Dinghy Towing
Notice:If the vehicle is
towed with all four wheels
on the ground, the drivetrain
components could be damaged.
The repairs would not be covered
by the vehicle warranty.
Do not tow the vehicle with all
four wheels on the ground.
The vehicle was not designed to be
towed with all four wheels on the
ground. If the vehicle must be
towed, a dolly should be used.
See “Dolly Towing” that follows for
more information.
Dolly Towing
Use the following procedure to dolly
tow the vehicle from the front:
1. Attach the dolly to the tow vehicle following the dolly
manufacturer's instructions.
2. Drive the front wheels onto the dolly.
3. Shift the transmission to P (Park).
4. Firmly set the parking brake. 5. Use an adequate clamping
device designed for towing to
ensure that the front wheels are
locked into the straight position.
6. Secure the vehicle to the dolly following the manufacturer's
instructions.
7. Release the parking brake only after the vehicle being towed is
firmly attached to the towing
vehicle.
8. Turn the ignition to LOCK/OFF and remove the key.
Page 333 of 376

Black plate (3,1)Chevrolet Impala Owner Manual - 2011
Service and Maintenance 11-3
Reset the oil life system whenever
the oil is changed. SeeEngine Oil
Life System on page 10‑10.
Every Engine Oil Change
.Change engine oil and filter.
Reset oil life system. See
Engine Oil on page 10‑8 and
Engine Oil Life System on
page 10‑10. An Emission
Control Service.
.Engine coolant level check. See
Engine Coolant on page 10‑16.
.Engine cooling system
inspection. Visual inspection of
hoses, pipes, fittings, and
clamps and replacement,
if needed.
.Windshield washer fluid level
check. See Washer Fluid on
page 10‑22.
.Windshield wiper blade
inspection for wear, cracking,
or contamination and windshield
and wiper blade cleaning,
if contaminated. See Exterior
Care on page 10‑76. Worn or damaged wiper blade
replacement. See
Wiper Blade
Replacement on page 10‑27.
.Tire inflation pressures check.
See Tire Pressure on
page 10‑44.
.Tire wear inspection. See Tire
Inspection on page 10‑51.
.Rotate tires if necessary. See
Tire Rotation on page 10‑51.
.Fluids visual leak check (or
every 12 months, whichever
occurs first). A leak in any
system must be repaired and
the fluid level checked.
.Engine air cleaner filter
inspection. See Engine Air
Cleaner/Filter on page 10‑13.
.Brake system inspection
(or every 12 months, whichever
occurs first).
.Steering and suspension
inspection. Visual inspection for
damaged, loose, or missing
parts or signs of wear.
.Body hinges and latches, key
lock cylinders, folding seat
hardware, and rear compartment
hinges lubrication. See
Recommended Fluids and
Lubricants on page 11‑6. More
frequent lubrication may be
required when the vehicle is
exposed to a corrosive
environment. Applying silicone
grease on weatherstrips with a
clean cloth makes them last
longer, seal better, and not stick
or squeak.
.Restraint system component
check. See Safety System
Check on page 3‑24.
.Fuel system inspection for
damage or leaks.
.Exhaust system and nearby heat
shields inspection for loose or
damaged components.