2011 CHEVROLET HHR turn signal
[x] Cancel search: turn signalPage 9 of 430

Black plate (3,1)Chevrolet HHR Owner Manual - 2011
A.Outlet Adjustment on page 4‑20.
B. Cruise Control
on page 4‑8(If Equipped).
C. Turn Signal/Multifunction Lever on page 4‑4.
D. Instrument Panel Cluster on page 4‑23.
E. Windshield Wipers on page 4‑5.
Windshield Washer on page 4‑6.
F. Instrument Panel Storage on page 3‑42.
G. Traction Control System (TCS)
on page 5‑8(If Equipped).
Electronic Stability Control (ESC). See Electronic
Stability Control (ESC) on page 5‑6.
H. Passenger Airbag Status Indicator on page 4‑27.
I. Rear Side Cargo Door Buttons (If Equipped). See Rear Side Cargo Door on page 3‑11.
J. Hood Release on page 6‑13.
K. Driver Information Center (DIC) Buttons. See Driver Information Center (DIC) on page 4‑38.
L. Data Link Connector (DLC). See Malfunction
Indicator Lamp on page 4‑33. M.
Horn on page 4‑3.
N. Audio Steering Wheel Controls
on page 4‑79(If Equipped).
O. Instrument Panel Brightness on page 4‑14.
P. Audio System(s) on page 4‑50.
Q. Climate Control System on page 4‑18.
R. Rear Window Wiper/Washer on page 4‑7.
S. Shift Lever (Manual Shown). See Manual
Transmission Operation
on page 3‑29and
Automatic Transmission Operation on page 3‑26.
T. Accessory Power Outlet(s)
on page 4‑15(If Equipped).
Cigarette Lighter (If Equipped). See Ashtray(s)
and Cigarette Lighter on page 4‑17.
U. Fog Lamps
on page 4‑13(If Equipped).
V. Hazard Warning Flashers on page 4‑3.
W. Glove Box on page 3‑42.
1-3
Page 10 of 430
Black plate (4,1)Chevrolet HHR Owner Manual - 2011
Initial Drive Information
This section provides a brief overview about some of
the important features that may or may not be on your
specific vehicle.
For more detailed information, refer to each of the
features which can be found later in this owner manual.
Remote Keyless Entry (RKE) System
The RKE transmitter is used to remotely lock and
unlock the doors from up to 18 m (60 feet) away from
the vehicle.
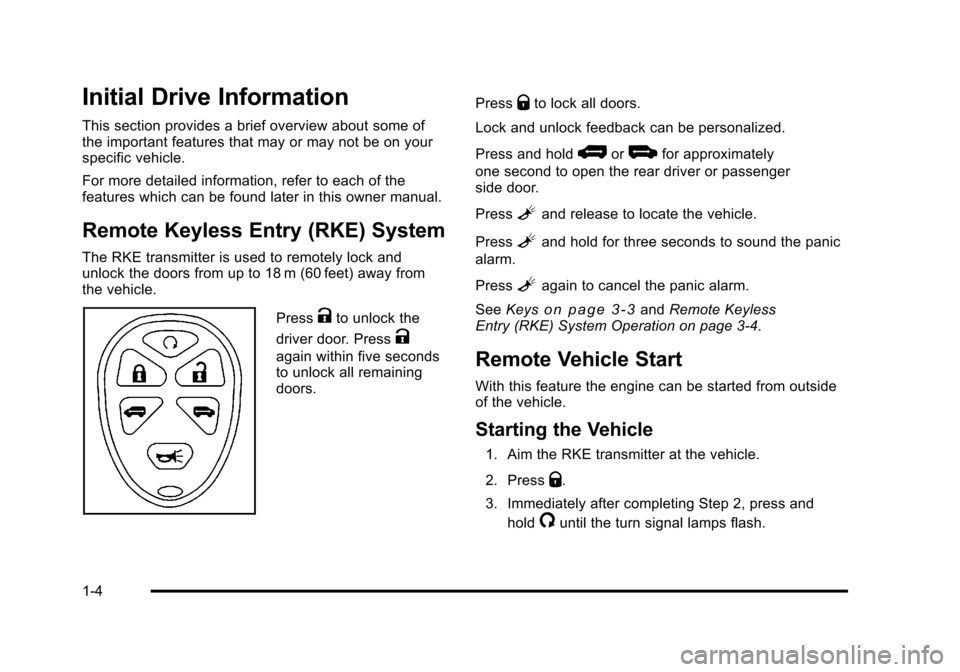
PressKto unlock the
driver door. Press
K
again within five seconds
to unlock all remaining
doors. Press
Qto lock all doors.
Lock and unlock feedback can be personalized.
Press and hold
*or+for approximately
one second to open the rear driver or passenger
side door.
Press
Land release to locate the vehicle.
Press
Land hold for three seconds to sound the panic
alarm.
Press
Lagain to cancel the panic alarm.
See Keys
on page 3‑3andRemote Keyless
Entry (RKE) System Operation on page 3‑4.
Remote Vehicle Start
With this feature the engine can be started from outside
of the vehicle.
Starting the Vehicle
1. Aim the RKE transmitter at the vehicle.
2. Press
Q.
3. Immediately after completing Step 2, press and hold
/until the turn signal lamps flash.
1-4
Page 30 of 430
Black plate (24,1)Chevrolet HHR Owner Manual - 2011
How OnStar Service Works
Q
:Push this blue button to connect to a specially
trained OnStar advisor to verify your account
information and to answer questions.
]: Push this red emergency button to get priority help
from specially trained OnStar emergency advisors.
X: Push this button for hands‐free, voice‐activated
calling and to give voice commands for Hands‐Free
Calling and Turn‐by‐Turn Navigation.
Automatic Crash Response, Emergency Services,
Crisis Assist, Stolen Vehicle Assistance, Vehicle
Diagnostics, Remote Door Unlock, Roadside
Assistance, Turn‐by‐Turn Navigation, and Hands‐Free
Calling are available on most vehicles. Not all OnStar
services are available on all vehicles. For more
information, see the OnStar Owner's Guide; visit
www.onstar.com (U.S.) or www.onstar.ca (Canada);
contact OnStar at 1-888-4-ONSTAR (1‐888‐466‐7827)
or TTY 1‐877‐248‐2080; or press
Qto speak with an
OnStar advisor 24 hours a day, 7 days a week.
For a full description of OnStar services and system
limitations, see the OnStar Owner's Guide in the
glove box.
OnStar service is subject to the OnStar terms and
conditions included in the OnStar Subscriber
Information. OnStar service requires wireless communication
networks and the Global Positioning System (GPS)
satellite network. Not all OnStar services are available
everywhere or on all vehicles at all times.
OnStar service can’t work unless your vehicle is in a
place where OnStar has an agreement with a wireless
service provider for service in that area, and the
wireless service provider has coverage, network
capacity, reception, and technology compatible with
OnStar's service. Service involving location information
about your vehicle can’t work unless GPS signals are
available, unobstructed, and compatible with the OnStar
hardware. The vehicle has to have a working electrical
system and adequate battery power for the OnStar
equipment to operate. OnStar service may not work if
the OnStar equipment isn’t properly installed or you
haven’t maintained it and your vehicle is in good
working order and in compliance with all government
regulations. If you try to add, connect, or modify any
equipment or software in your vehicle, OnStar service
may not work. Other problems OnStar can’t control may
prevent service to you, such as hills, tall buildings,
tunnels, weather, electrical system design and
architecture of your vehicle, damage to important parts
of your vehicle in a crash, or wireless phone network
congestion or jamming.
1-24
Page 113 of 430
Black plate (7,1)Chevrolet HHR Owner Manual - 2011
To start the engine using the remote start feature:1. Aim the RKE transmitter at the vehicle.
2. Press and release the transmitter's lock button, then immediately press and hold the remote
vehicle start button for four seconds or until the
vehicle's turn signal lamps flash.
When the vehicle's engine starts, the parking
lamps will turn on and remain on while the engine
is running. The vehicle's doors will be locked.
3. If it is the first remote start since the vehicle has been driven, repeat these steps, while the engine
is still running, to extend the engine running time
by 10 minutes. Remote start can be extended
one time.
After entering the vehicle during a remote start, insert
and turn the key to ON/RUN to drive the vehicle.
After a remote start, the engine will automatically shut
off after 10 minutes unless a time extension has been
done or the vehicle's key is inserted into the ignition
switch and turned to ON/RUN.
The maximum number of remote starts between ignition
cycles with the key is two.
If the remote start procedure is used again before the
first 10 minute time frame has ended, the first
10 minutes will immediately expire and the second
10 minute time frame will start. After your vehicle's engine has been started two times
using the remote start button, the vehicle's ignition
switch must be turned to ON/RUN and then back to
LOCK/OFF using the key before the remote start
procedure can be used again.
To manually shut off the engine after a remote start:
.Aim the RKE transmitter at the vehicle and press
the remote start button until the parking lamps
turn off.
.Turn on the hazard warning flashers. See
Hazard
Warning Flashers on page 4‑3.
.Insert the vehicle's key into the ignition switch and
turn the switch to ON/RUN and then back to
LOCK/OFF.
The remote vehicle start feature will not operate if:
.The vehicle's key is in the ignition.
.The vehicle's hood is open
.The hazard warning flashers are on.
.There is an emission control system malfunction.
See Malfunction Indicator Lamp on page 4‑33.
.The engine coolant temperature is too high.
.The oil pressure is low.
.Two remote vehicle starts have already been
provided.
3-7
Page 115 of 430
Black plate (9,1)Chevrolet HHR Owner Manual - 2011
Power Door Locks
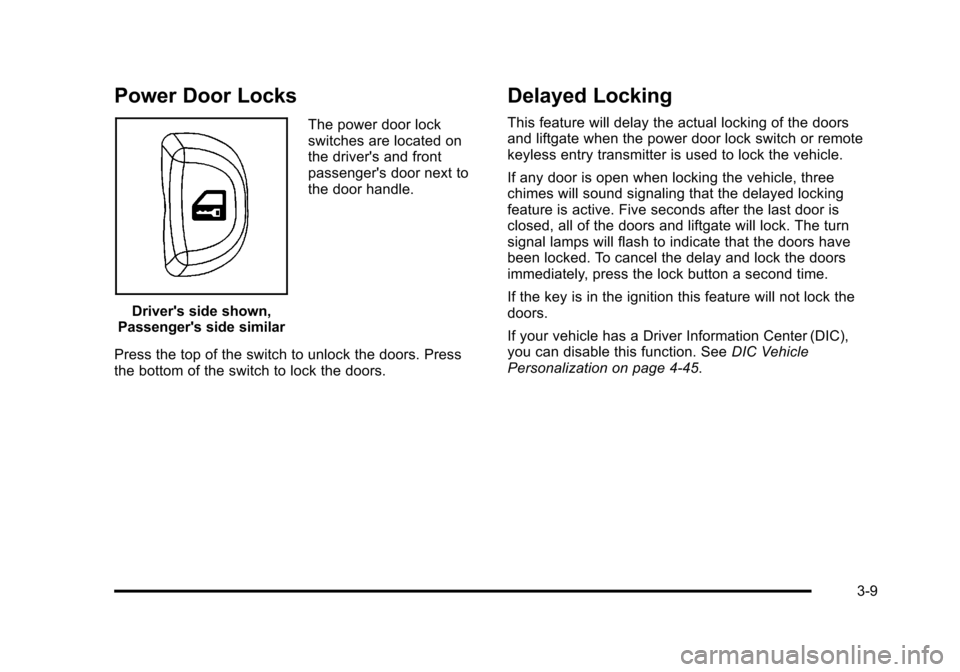
Driver's side shown,
Passenger's side similar The power door lock
switches are located on
the driver's and front
passenger's door next to
the door handle.
Press the top of the switch to unlock the doors. Press
the bottom of the switch to lock the doors.
Delayed Locking
This feature will delay the actual locking of the doors
and liftgate when the power door lock switch or remote
keyless entry transmitter is used to lock the vehicle.
If any door is open when locking the vehicle, three
chimes will sound signaling that the delayed locking
feature is active. Five seconds after the last door is
closed, all of the doors and liftgate will lock. The turn
signal lamps will flash to indicate that the doors have
been locked. To cancel the delay and lock the doors
immediately, press the lock button a second time.
If the key is in the ignition this feature will not lock the
doors.
If your vehicle has a Driver Information Center (DIC),
you can disable this function. See DIC Vehicle
Personalization on page 4‑45.
3-9
Page 147 of 430
Black plate (41,1)Chevrolet HHR Owner Manual - 2011
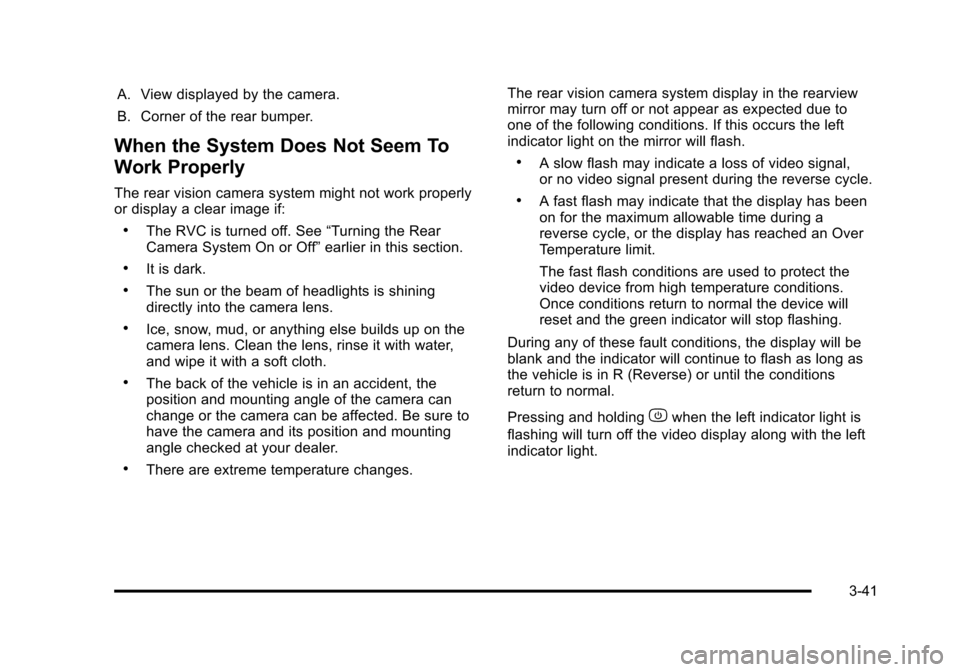
A. View displayed by the camera.
B. Corner of the rear bumper.
When the System Does Not Seem To
Work Properly
The rear vision camera system might not work properly
or display a clear image if:
.The RVC is turned off. See“Turning the Rear
Camera System On or Off” earlier in this section.
.It is dark.
.The sun or the beam of headlights is shining
directly into the camera lens.
.Ice, snow, mud, or anything else builds up on the
camera lens. Clean the lens, rinse it with water,
and wipe it with a soft cloth.
.The back of the vehicle is in an accident, the
position and mounting angle of the camera can
change or the camera can be affected. Be sure to
have the camera and its position and mounting
angle checked at your dealer.
.There are extreme temperature changes. The rear vision camera system display in the rearview
mirror may turn off or not appear as expected due to
one of the following conditions. If this occurs the left
indicator light on the mirror will flash.
.A slow flash may indicate a loss of video signal,
or no video signal present during the reverse cycle.
.A fast flash may indicate that the display has been
on for the maximum allowable time during a
reverse cycle, or the display has reached an Over
Temperature limit.
The fast flash conditions are used to protect the
video device from high temperature conditions.
Once conditions return to normal the device will
reset and the green indicator will stop flashing.
During any of these fault conditions, the display will be
blank and the indicator will continue to flash as long as
the vehicle is in R (Reverse) or until the conditions
return to normal.
Pressing and holding
zwhen the left indicator light is
flashing will turn off the video display along with the left
indicator light.
3-41
Page 157 of 430
Black plate (1,1)Chevrolet HHR Owner Manual - 2011
Section 4 Instrument Panel
Instrument Panel Overview. . . . . . . . . . . . . . . . . . . . . . . .4-3
Hazard Warning Flashers . . . . . . . . . . . . . . . . . . . . . . . 4-3
Horn . . . . . . . . . . . . . . . . . . . . . . . . . . . . . . . . . . . . . . . . . . . . 4-3
Tilt Wheel . . . . . . . . . . . . . . . . . . . . . . . . . . . . . . . . . . . . . . . 4-3
Turn Signal/Multifunction Lever . . . . . . . . . . . . . . . . . . 4-4
Turn and Lane-Change Signals . . . . . . . . . . . . . . . . . 4-4
Headlamp High/Low-Beam Changer . . . . . . . . . . . . 4-5
Flash-to-Pass . . . . . . . . . . . . . . . . . . . . . . . . . . . . . . . . . . . 4-5
Windshield Wipers . . . . . . . . . . . . . . . . . . . . . . . . . . . . . . 4-5
Windshield Washer . . . . . . . . . . . . . . . . . . . . . . . . . . . . . 4-6
Rear Window Wiper/Washer . . . . . . . . . . . . . . . . . . . . 4-7
Cruise Control . . . . . . . . . . . . . . . . . . . . . . . . . . . . . . . . . . 4-8
Headlamps . . . . . . . . . . . . . . . . . . . . . . . . . . . . . . . . . . . . 4-11
Wiper Activated Headlamps . . . . . . . . . . . . . . . . . . . 4-12
Headlamps on Reminder . . . . . . . . . . . . . . . . . . . . . . 4-12
Daytime Running Lamps (DRL) . . . . . . . . . . . . . . . . 4-12
Automatic Headlamp System . . . . . . . . . . . . . . . . . . 4-13
Fog Lamps . . . . . . . . . . . . . . . . . . . . . . . . . . . . . . . . . . . . 4-13
Instrument Panel Brightness . . . . . . . . . . . . . . . . . . . 4-14
Dome Lamp . . . . . . . . . . . . . . . . . . . . . . . . . . . . . . . . . . . 4-14
Entry/Exit Lighting . . . . . . . . . . . . . . . . . . . . . . . . . . . . . 4-14
Reading Lamps . . . . . . . . . . . . . . . . . . . . . . . . . . . . . . . . 4-14
Electric Power Management . . . . . . . . . . . . . . . . . . . 4-15
Battery Run-Down Protection . . . . . . . . . . . . . . . . . . 4-15
Accessory Power Outlet(s) . . . . . . . . . . . . . . . . . . . . . 4-15
Ashtray(s) and Cigarette Lighter . . . . . . . . . . . . . . . 4-17 Climate Controls
. . . . . . . . . . . . . . . . . . . . . . . . . . . . . . . . . . 4-18
Climate Control System . . . . . . . . . . . . . . . . . . . . . . . . 4-18
Outlet Adjustment . . . . . . . . . . . . . . . . . . . . . . . . . . . . . . 4-20
Passenger Compartment Air Filter . . . . . . . . . . . . . 4-21
Warning Lights, Gauges, and Indicators . . . . . . . .4-22
Instrument Panel Cluster . . . . . . . . . . . . . . . . . . . . . . . 4-23
Speedometer and Odometer . . . . . . . . . . . . . . . . . . . 4-24
Tachometer . . . . . . . . . . . . . . . . . . . . . . . . . . . . . . . . . . . . 4-24
Safety Belt Reminders . . . . . . . . . . . . . . . . . . . . . . . . . 4-25
Airbag Readiness Light . . . . . . . . . . . . . . . . . . . . . . . . 4-26
Passenger Airbag Status Indicator . . . . . . . . . . . . . 4-27
Charging System Light . . . . . . . . . . . . . . . . . . . . . . . . 4-28
Up-Shift Light . . . . . . . . . . . . . . . . . . . . . . . . . . . . . . . . . . 4-28
Brake System Warning Light . . . . . . . . . . . . . . . . . . . 4-29
Antilock Brake System (ABS) Warning Light . . . 4-30
Enhanced Traction System (ETS) Indicator/ Warning Light . . . . . . . . . . . . . . . . . . . . . . . . . . . . . . . . 4-30
Electronic Stability Control (ESC)/Traction Control System (TCS) Indicator/Warning
Light . . . . . . . . . . . . . . . . . . . . . . . . . . . . . . . . . . . . . . . . . 4-31
Engine Coolant Temperature Warning Light . . . . 4-32
Engine Coolant Temperature Gauge . . . . . . . . . . . 4-32
Tire Pressure Light . . . . . . . . . . . . . . . . . . . . . . . . . . . . 4-33
Malfunction Indicator Lamp . . . . . . . . . . . . . . . . . . . . 4-33
Oil Pressure Light . . . . . . . . . . . . . . . . . . . . . . . . . . . . . 4-36
Security Light . . . . . . . . . . . . . . . . . . . . . . . . . . . . . . . . . . 4-36
4-1
Page 159 of 430
Black plate (3,1)Chevrolet HHR Owner Manual - 2011
Instrument Panel Overview
Hazard Warning Flashers
|(Hazard Warning Flasher):Press this button
located on the instrument panel, to make the front and
rear turn signal lamps flash on and off. This warns
others that you are having trouble.
Press
|again to turn the flashers off.
Horn
To sound the horn, press the horn symbols located on
the steering wheel.
Tilt Wheel
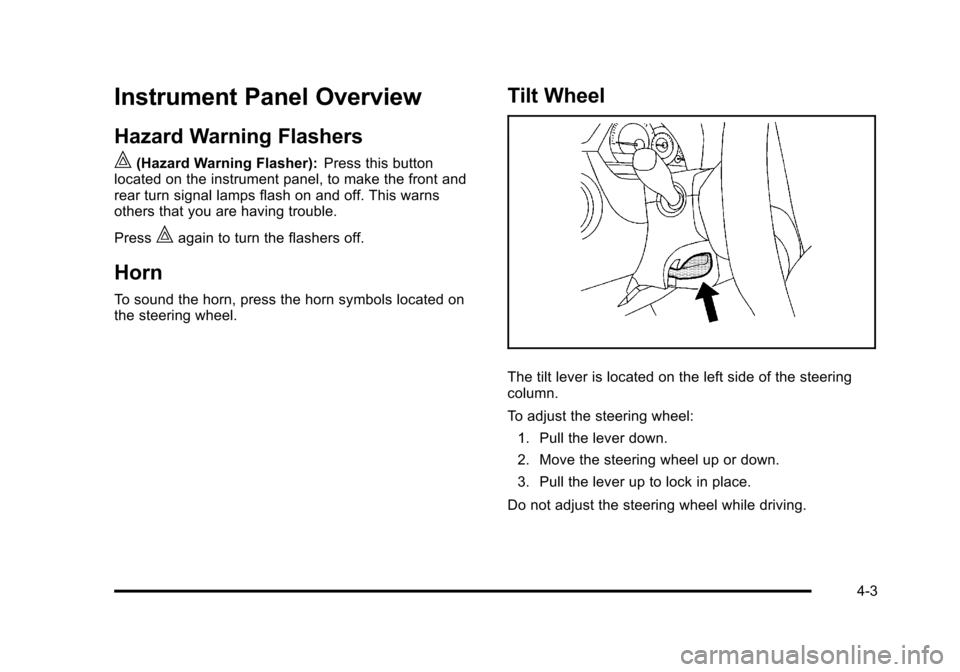
The tilt lever is located on the left side of the steering
column.
To adjust the steering wheel:
1. Pull the lever down.
2. Move the steering wheel up or down.
3. Pull the lever up to lock in place.
Do not adjust the steering wheel while driving.
4-3