2011 CHEVROLET HHR oil temperature
[x] Cancel search: oil temperaturePage 5 of 430
Black plate (5,1)Chevrolet HHR Owner Manual - 2011
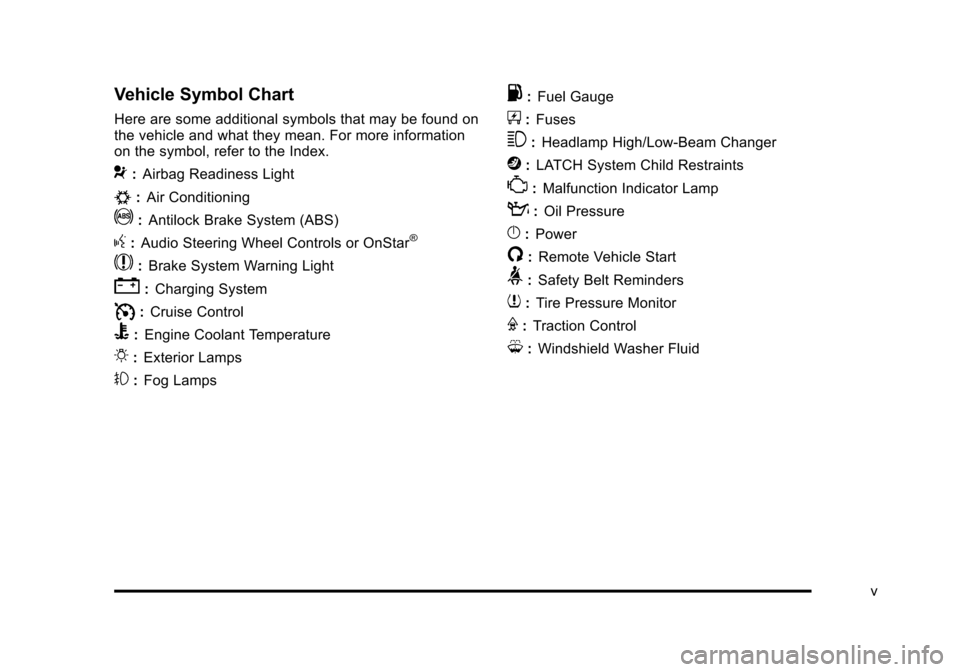
Vehicle Symbol Chart
Here are some additional symbols that may be found on
the vehicle and what they mean. For more information
on the symbol, refer to the Index.
9:Airbag Readiness Light
#:Air Conditioning
!:Antilock Brake System (ABS)
g:Audio Steering Wheel Controls or OnStar®
$: Brake System Warning Light
":Charging System
I:Cruise Control
B: Engine Coolant Temperature
O:Exterior Lamps
#:Fog Lamps
.: Fuel Gauge
+:Fuses
3: Headlamp High/Low-Beam Changer
j:LATCH System Child Restraints
*: Malfunction Indicator Lamp
::Oil Pressure
}:Power
/:Remote Vehicle Start
>:Safety Belt Reminders
7:Tire Pressure Monitor
F:Traction Control
M:Windshield Washer Fluid
v
Page 113 of 430
Black plate (7,1)Chevrolet HHR Owner Manual - 2011
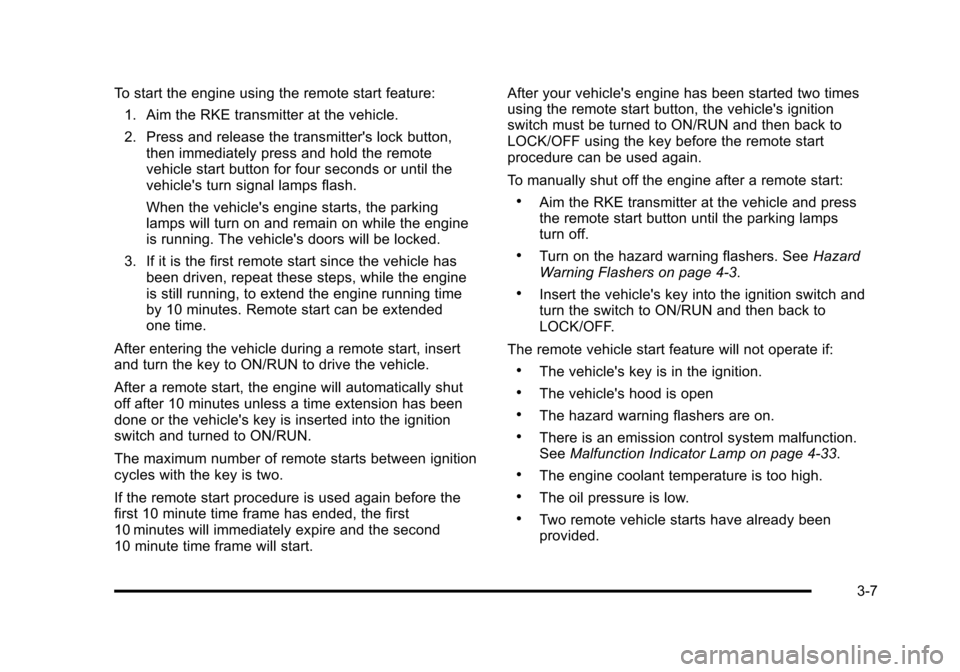
To start the engine using the remote start feature:1. Aim the RKE transmitter at the vehicle.
2. Press and release the transmitter's lock button, then immediately press and hold the remote
vehicle start button for four seconds or until the
vehicle's turn signal lamps flash.
When the vehicle's engine starts, the parking
lamps will turn on and remain on while the engine
is running. The vehicle's doors will be locked.
3. If it is the first remote start since the vehicle has been driven, repeat these steps, while the engine
is still running, to extend the engine running time
by 10 minutes. Remote start can be extended
one time.
After entering the vehicle during a remote start, insert
and turn the key to ON/RUN to drive the vehicle.
After a remote start, the engine will automatically shut
off after 10 minutes unless a time extension has been
done or the vehicle's key is inserted into the ignition
switch and turned to ON/RUN.
The maximum number of remote starts between ignition
cycles with the key is two.
If the remote start procedure is used again before the
first 10 minute time frame has ended, the first
10 minutes will immediately expire and the second
10 minute time frame will start. After your vehicle's engine has been started two times
using the remote start button, the vehicle's ignition
switch must be turned to ON/RUN and then back to
LOCK/OFF using the key before the remote start
procedure can be used again.
To manually shut off the engine after a remote start:
.Aim the RKE transmitter at the vehicle and press
the remote start button until the parking lamps
turn off.
.Turn on the hazard warning flashers. See
Hazard
Warning Flashers on page 4‑3.
.Insert the vehicle's key into the ignition switch and
turn the switch to ON/RUN and then back to
LOCK/OFF.
The remote vehicle start feature will not operate if:
.The vehicle's key is in the ignition.
.The vehicle's hood is open
.The hazard warning flashers are on.
.There is an emission control system malfunction.
See Malfunction Indicator Lamp on page 4‑33.
.The engine coolant temperature is too high.
.The oil pressure is low.
.Two remote vehicle starts have already been
provided.
3-7
Page 131 of 430
Black plate (25,1)Chevrolet HHR Owner Manual - 2011
Notice:Cranking the engine for long periods of
time, by returning the key to the START position
immediately after cranking has ended, can overheat
and damage the cranking motor, and drain the
battery. Wait at least 15 seconds between each try,
to let the cranking motor cool down.
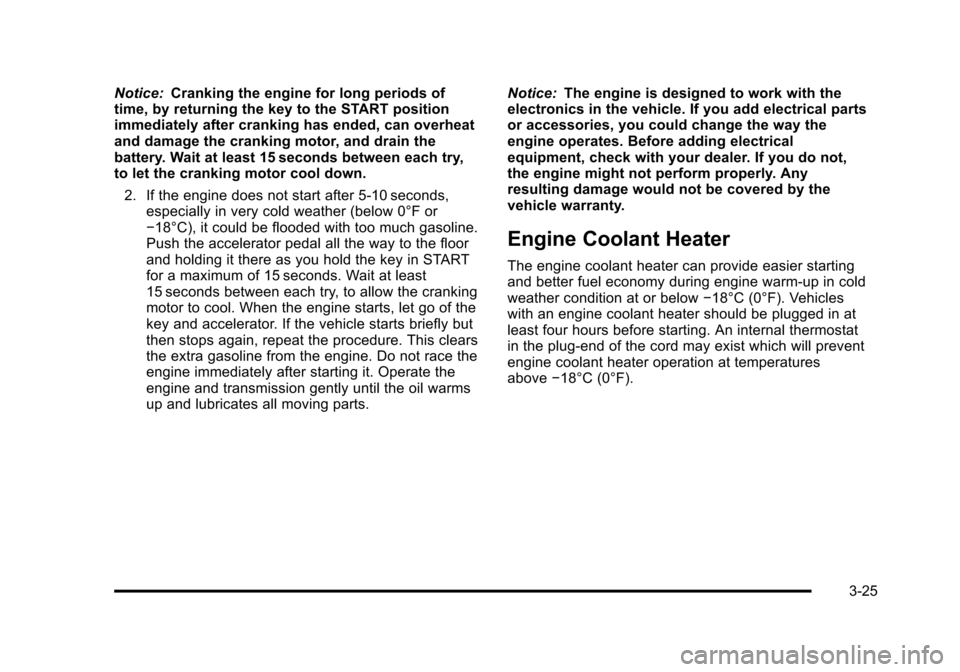
2. If the engine does not start after 5‐10 seconds, especially in very cold weather (below 0°F or
−18°C), it could be flooded with too much gasoline.
Push the accelerator pedal all the way to the floor
and holding it there as you hold the key in START
for a maximum of 15 seconds. Wait at least
15 seconds between each try, to allow the cranking
motor to cool. When the engine starts, let go of the
key and accelerator. If the vehicle starts briefly but
then stops again, repeat the procedure. This clears
the extra gasoline from the engine. Do not race the
engine immediately after starting it. Operate the
engine and transmission gently until the oil warms
up and lubricates all moving parts. Notice:
The engine is designed to work with the
electronics in the vehicle. If you add electrical parts
or accessories, you could change the way the
engine operates. Before adding electrical
equipment, check with your dealer. If you do not,
the engine might not perform properly. Any
resulting damage would not be covered by the
vehicle warranty.
Engine Coolant Heater
The engine coolant heater can provide easier starting
and better fuel economy during engine warm‐up in cold
weather condition at or below −18°C (0°F). Vehicles
with an engine coolant heater should be plugged in at
least four hours before starting. An internal thermostat
in the plug-end of the cord may exist which will prevent
engine coolant heater operation at temperatures
above −18°C (0°F).
3-25
Page 157 of 430
Black plate (1,1)Chevrolet HHR Owner Manual - 2011
Section 4 Instrument Panel
Instrument Panel Overview. . . . . . . . . . . . . . . . . . . . . . . .4-3
Hazard Warning Flashers . . . . . . . . . . . . . . . . . . . . . . . 4-3
Horn . . . . . . . . . . . . . . . . . . . . . . . . . . . . . . . . . . . . . . . . . . . . 4-3
Tilt Wheel . . . . . . . . . . . . . . . . . . . . . . . . . . . . . . . . . . . . . . . 4-3
Turn Signal/Multifunction Lever . . . . . . . . . . . . . . . . . . 4-4
Turn and Lane-Change Signals . . . . . . . . . . . . . . . . . 4-4
Headlamp High/Low-Beam Changer . . . . . . . . . . . . 4-5
Flash-to-Pass . . . . . . . . . . . . . . . . . . . . . . . . . . . . . . . . . . . 4-5
Windshield Wipers . . . . . . . . . . . . . . . . . . . . . . . . . . . . . . 4-5
Windshield Washer . . . . . . . . . . . . . . . . . . . . . . . . . . . . . 4-6
Rear Window Wiper/Washer . . . . . . . . . . . . . . . . . . . . 4-7
Cruise Control . . . . . . . . . . . . . . . . . . . . . . . . . . . . . . . . . . 4-8
Headlamps . . . . . . . . . . . . . . . . . . . . . . . . . . . . . . . . . . . . 4-11
Wiper Activated Headlamps . . . . . . . . . . . . . . . . . . . 4-12
Headlamps on Reminder . . . . . . . . . . . . . . . . . . . . . . 4-12
Daytime Running Lamps (DRL) . . . . . . . . . . . . . . . . 4-12
Automatic Headlamp System . . . . . . . . . . . . . . . . . . 4-13
Fog Lamps . . . . . . . . . . . . . . . . . . . . . . . . . . . . . . . . . . . . 4-13
Instrument Panel Brightness . . . . . . . . . . . . . . . . . . . 4-14
Dome Lamp . . . . . . . . . . . . . . . . . . . . . . . . . . . . . . . . . . . 4-14
Entry/Exit Lighting . . . . . . . . . . . . . . . . . . . . . . . . . . . . . 4-14
Reading Lamps . . . . . . . . . . . . . . . . . . . . . . . . . . . . . . . . 4-14
Electric Power Management . . . . . . . . . . . . . . . . . . . 4-15
Battery Run-Down Protection . . . . . . . . . . . . . . . . . . 4-15
Accessory Power Outlet(s) . . . . . . . . . . . . . . . . . . . . . 4-15
Ashtray(s) and Cigarette Lighter . . . . . . . . . . . . . . . 4-17 Climate Controls
. . . . . . . . . . . . . . . . . . . . . . . . . . . . . . . . . . 4-18
Climate Control System . . . . . . . . . . . . . . . . . . . . . . . . 4-18
Outlet Adjustment . . . . . . . . . . . . . . . . . . . . . . . . . . . . . . 4-20
Passenger Compartment Air Filter . . . . . . . . . . . . . 4-21
Warning Lights, Gauges, and Indicators . . . . . . . .4-22
Instrument Panel Cluster . . . . . . . . . . . . . . . . . . . . . . . 4-23
Speedometer and Odometer . . . . . . . . . . . . . . . . . . . 4-24
Tachometer . . . . . . . . . . . . . . . . . . . . . . . . . . . . . . . . . . . . 4-24
Safety Belt Reminders . . . . . . . . . . . . . . . . . . . . . . . . . 4-25
Airbag Readiness Light . . . . . . . . . . . . . . . . . . . . . . . . 4-26
Passenger Airbag Status Indicator . . . . . . . . . . . . . 4-27
Charging System Light . . . . . . . . . . . . . . . . . . . . . . . . 4-28
Up-Shift Light . . . . . . . . . . . . . . . . . . . . . . . . . . . . . . . . . . 4-28
Brake System Warning Light . . . . . . . . . . . . . . . . . . . 4-29
Antilock Brake System (ABS) Warning Light . . . 4-30
Enhanced Traction System (ETS) Indicator/ Warning Light . . . . . . . . . . . . . . . . . . . . . . . . . . . . . . . . 4-30
Electronic Stability Control (ESC)/Traction Control System (TCS) Indicator/Warning
Light . . . . . . . . . . . . . . . . . . . . . . . . . . . . . . . . . . . . . . . . . 4-31
Engine Coolant Temperature Warning Light . . . . 4-32
Engine Coolant Temperature Gauge . . . . . . . . . . . 4-32
Tire Pressure Light . . . . . . . . . . . . . . . . . . . . . . . . . . . . 4-33
Malfunction Indicator Lamp . . . . . . . . . . . . . . . . . . . . 4-33
Oil Pressure Light . . . . . . . . . . . . . . . . . . . . . . . . . . . . . 4-36
Security Light . . . . . . . . . . . . . . . . . . . . . . . . . . . . . . . . . . 4-36
4-1
Page 196 of 430
Black plate (40,1)Chevrolet HHR Owner Manual - 2011
AV (Average) SPEED
Press the information button until AV SPEED displays.
This mode shows the vehicle's average speed in miles
per hour (mph) or kilometers per hour (km/h).
To reset the average vehicle speed, press and hold the
reset button while AV SPEED is displayed.
OIL LIFE
Press the information button until OIL LIFE displays.
The engine oil life system shows an estimate of the oil's
remaining useful life. It shows 100% when the system is
reset after an oil change. It alerts you to change the oil
on a schedule consistent with your driving conditions.
In addition to the engine oil life system monitoring the
oil life, additional maintenance is recommended in the
Maintenance Schedule in this manual. SeeEngine Oil
on page 6‑16andScheduled Maintenanceon
page 7‑3.
Always reset the engine oil life system after an oil
change. See “How to Reset the Engine Oil Life System”
under Engine Oil Life System on page 6‑19.
COOLANT
Press the information button until COOLANT displays.
This mode shows the temperature of the engine coolant
in either degrees Fahrenheit (°F) or degrees
Celsius (°C).
Tire Pressure
If your vehicle has a Tire Pressure Monitor System
(TPMS), the pressure for each tire can be viewed in the
DIC. The tire pressure is shown in either pounds per
square inch (psi) or kilopascals (kPa). Press the
information button until LF ## PSI (kPa) ## RF displays
for the front tires. Press the information button again
until LR ## PSI (kPa) ## RR displays for the rear tires.
If a low tire pressure condition is detected by the
system while driving, a message advising you to check
the tire pressure appears in the display. See Inflation -
Tire Pressure
on page 6‑54and DIC Warnings and
Messageson page 4‑40for more information.
DIC Warnings and Messages
These messages appear if there is a problem detected
in one of your vehicle's systems.
A message clears when the vehicle's condition is no
longer present. To acknowledge a message and clear it
from the display, press and hold any of the DIC buttons.
If the condition is still present, the warning message
comes back on the next time the vehicle is turned off
and back on. With most messages, a warning chime
sounds when the message displays. Your vehicle may
have other warning messages.
4-40
Page 197 of 430
Black plate (41,1)Chevrolet HHR Owner Manual - 2011
AUTO (Automatic) LIGHTS OFF
This message displays if the automatic headlamp
system is disabled with the headlamp switch. See
Automatic Headlamp System
on page 4‑13for more
information.
AUTO (Automatic) LIGHTS ON
This message displays if the automatic headlamp
system is enabled with the headlamp switch. See
Automatic Headlamp System
on page 4‑13for more
information.
BRAKE FLUID
This message displays, while the ignition is on, when
the brake fluid level is low. The brake system warning
light on the instrument panel cluster also comes on.
See Brake System Warning Light
on page 4‑29for
more information. Have the brake system serviced by
your dealer as soon as possible.
CHANGE OIL SOON
This message displays when the life of the engine oil
has expired and it should be changed.
When this message is acknowledged and cleared from
the display, the engine oil life system must still be reset
separately. See Engine Oil Life System
on page 6‑19andScheduled Maintenanceon page 7‑3for more
information.
CHECK GAS CAP
This message displays if the fuel cap has not been fully
tightened. Recheck the fuel cap to make sure that it is
on properly. A few driving trips with the cap properly
installed should turn the message off.
COOLING MODE ON
This message may display on some vehicles. Under
severe conditions, hot ambient temperatures, steep
grades, and towing, your vehicle may experience more
transmission shifting. This is temporary and normal
under these conditions. This does not require engine or
transmission service.
CRUISE ENGAGED
This message displays when the cruise control system
is active. See Cruise Controlon page 4‑8for more
information.
DOOR AJAR
This message displays if one or more of the vehicle's
doors are open. Make sure that the door(s) are closed
completely.
ENGINE DISABLED
This message displays if the starting of the engine is
disabled. Have your vehicle serviced by your dealer
immediately.
4-41
Page 294 of 430
Black plate (18,1)Chevrolet HHR Owner Manual - 2011
Viscosity Grade
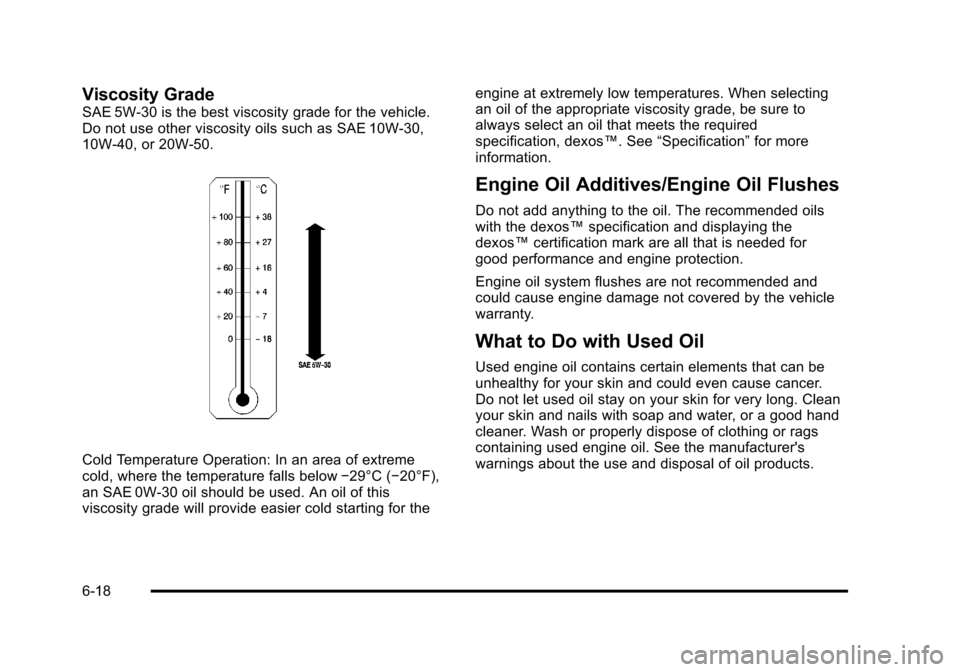
SAE 5W-30 is the best viscosity grade for the vehicle.
Do not use other viscosity oils such as SAE 10W‐30,
10W‐40, or 20W-50.
Cold Temperature Operation: In an area of extreme
cold, where the temperature falls below−29°C (−20°F),
an SAE 0W-30 oil should be used. An oil of this
viscosity grade will provide easier cold starting for the engine at extremely low temperatures. When selecting
an oil of the appropriate viscosity grade, be sure to
always select an oil that meets the required
specification, dexos™. See
“Specification”for more
information.
Engine Oil Additives/Engine Oil Flushes
Do not add anything to the oil. The recommended oils
with the dexos™ specification and displaying the
dexos™ certification mark are all that is needed for
good performance and engine protection.
Engine oil system flushes are not recommended and
could cause engine damage not covered by the vehicle
warranty.
What to Do with Used Oil
Used engine oil contains certain elements that can be
unhealthy for your skin and could even cause cancer.
Do not let used oil stay on your skin for very long. Clean
your skin and nails with soap and water, or a good hand
cleaner. Wash or properly dispose of clothing or rags
containing used engine oil. See the manufacturer's
warnings about the use and disposal of oil products.
6-18
Page 295 of 430
Black plate (19,1)Chevrolet HHR Owner Manual - 2011
Used oil can be a threat to the environment. If you
change your own oil, be sure to drain all the oil from the
filter before disposal. Never dispose of oil by putting it in
the trash or pouring it on the ground, into sewers,
or into streams or bodies of water. Recycle it by taking it
to a place that collects used oil.
Engine Oil Life System
When to Change Engine Oil
This vehicle has the Engine Oil Life System, a computer
system that indicates when to change the engine oil
and filter. This is based on engine revolutions and
engine temperature, and not on mileage. Based on
driving conditions, the mileage at which an oil change is
indicated can vary considerably. For the oil life system
to work properly, the system must be reset every time
the oil is changed.
When the system has calculated that oil life has been
diminished, it indicates that an oil change is necessary.
A CHANGE OIL SOON message comes on. SeeDIC
Warnings and Messages
on page 4‑40. Change the
oil as soon as possible within the next 600 miles
(1 000 km). It is possible that, if driving under the best
conditions, the oil life system might indicate that an oil
change is not necessary for up to a year. The engine oil
and filter must be changed at least once a year and, at
this time, the system must be reset. Your dealer has
trained service people who will perform this work and reset the system. It is also important to check the oil
regularly over the course of an oil drain interval and
keep it at the proper level.
If the system is ever reset accidentally, the oil must be
changed at 3,000 miles (5 000 km) since the last oil
change. Remember to reset the oil life system
whenever the oil is changed.
How to Reset the Engine Oil Life
System
Reset the system whenever the engine oil is changed
so that the system can calculate the next engine oil
change. To reset the system:
1. Turn the ignition to ON/RUN, with the engine off.
2. Press the information and reset buttons on the Driver Information Center (DIC) at the same time to
enter the personalization menu. See DIC Vehicle
Personalization on page 4‑45.
3. Press the information button to scroll through the available personalization menu modes until the
DIC display shows OIL‐LIFE RESET.
4. Press and hold the reset button until the DIC display shows ACKNOWLEDGED. This will tell you
the system has been reset.
5. Turn the key to LOCK/OFF.
6-19