2011 CHEVROLET HHR turn signal
[x] Cancel search: turn signalPage 259 of 430
Black plate (21,1)Chevrolet HHR Owner Manual - 2011
To save fuel, run the engine for only short periods as
needed to warm the vehicle and then shut the engine
off and close the window most of the way to save heat.
Repeat this until help arrives but only when you feel
really uncomfortable from the cold. Moving about to
keep warm also helps.
If it takes some time for help to arrive, now and then
when you run the engine, push the accelerator pedal
slightly so the engine runs faster than the idle speed.
This keeps the battery charged to restart the vehicle
and to signal for help with the headlamps. Do this as
little as possible to save fuel.
If Your Vehicle is Stuck in Sand,
Mud, Ice, or Snow
Slowly and cautiously spin the wheels to free the
vehicle when stuck in sand, mud, ice, or snow. See
Rocking Your Vehicle to Get It Out on page 5‑21.
If the vehicle has a traction system, it can often help to
free a stuck vehicle. Refer to the vehicle's traction
system in the Index. If stuck too severely for the traction
system to free the vehicle, turn the traction system off
and use the rocking method.
{WARNING:
If the vehicle's tires spin at high speed, they can
explode, and you or others could be injured. The
vehicle can overheat, causing an engine
compartment fire or other damage. Spin the
wheels as little as possible and avoid going above
55 km/h (35 mph) as shown on the speedometer.
For information about using tire chains on the vehicle,
see Tire Chains on page 6‑68.
Rocking Your Vehicle to Get It Out
Turn the steering wheel left and right to clear the area
around the front wheels. Turn off any traction system.
Shift back and forth between R (Reverse) and a forward
gear, or with a manual transmission, between 1 (First) or
2 (Second) and R (Reverse), spinning the wheels as
little as possible. To prevent transmission wear, wait
until the wheels stop spinning before shifting gears.
Release the accelerator pedal while shifting, and press
lightly on the accelerator pedal when the transmission is
in gear. Slowly spinning the wheels in the forward and
5-21
Page 273 of 430
Black plate (35,1)Chevrolet HHR Owner Manual - 2011
Before starting, check all trailer hitch parts and
attachments, safety chains, electrical connectors,
lamps, tires and mirror adjustments. If the trailer has
electric brakes, start the vehicle and trailer moving and
then apply the trailer brake controller by hand to be sure
the brakes are working. This checks the electrical
connection at the same time.
During the trip, check occasionally to be sure that the
load is secure, and that the lamps and any trailer
brakes are still working.
Following Distance
Stay at least twice as far behind the vehicle ahead as
you would when driving the vehicle without a trailer.
This can help to avoid situations that require heavy
braking and sudden turns.
Passing
More passing distance is needed when towing a trailer.
Because the rig is longer, it is necessary to go much
farther beyond the passed vehicle before returning to
the lane.
Backing Up
Hold the bottom of the steering wheel with one hand.
Then, to move the trailer to the left, move that hand to
the left. To move the trailer to the right, move your hand
to the right. Always back up slowly and, if possible,
have someone guide you.
Making Turns
When turning with a trailer, make wider turns than
normal. Do this so the trailer will not strike soft
shoulders, curbs, road signs, trees or other objects.
Avoid jerky or sudden maneuvers. Signal well in
advance.
Turn Signals When Towing a Trailer
The arrows on the instrument panel flash whenever
signaling a turn or lane change. Properly hooked up,
the trailer lamps also flash, telling other drivers the
vehicle is turning, changing lanes or stopping.
When towing a trailer, the arrows on the instrument
panel flash for turns even if the bulbs on the trailer are
burned out. For this reason you may think other drivers
are seeing the signal when they are not. It is important
to check occasionally to be sure the trailer bulbs are still
working.
5-35
Page 277 of 430
Black plate (1,1)Chevrolet HHR Owner Manual - 2011
Section 6 Service and Appearance Care
Service. . . . . . . . . . . . . . . . . . . . . . . . . . . . . . . . . . . . . . . . . . . . . 6-3
Accessories and Modifications . . . . . . . . . . . . . . . . . . 6-3
California Proposition 65 Warning . . . . . . . . . . . . . . . 6-4
California Perchlorate Materials Requirements . . . . . . . . . . . . . . . . . . . . . . . . . . . . . . . . . 6-4
Doing Your Own Service Work . . . . . . . . . . . . . . . . . . 6-4
Adding Equipment to the Outside of the Vehicle . . . . . . . . . . . . . . . . . . . . . . . . . . . . . . . . . . . . . . . . 6-5
Fuel . . . . . . . . . . . . . . . . . . . . . . . . . . . . . . . . . . . . . . . . . . . . . . . . . 6-5
Gasoline Octane . . . . . . . . . . . . . . . . . . . . . . . . . . . . . . . . 6-6
Gasoline Specifications . . . . . . . . . . . . . . . . . . . . . . . . . 6-6
California Fuel . . . . . . . . . . . . . . . . . . . . . . . . . . . . . . . . . . 6-6
Additives . . . . . . . . . . . . . . . . . . . . . . . . . . . . . . . . . . . . . . . . 6-7
Fuel E85 (85% Ethanol) . . . . . . . . . . . . . . . . . . . . . . . . . 6-8
Fuels in Foreign Countries . . . . . . . . . . . . . . . . . . . . . . 6-9
Filling the Tank . . . . . . . . . . . . . . . . . . . . . . . . . . . . . . . . . . 6-9
Filling a Portable Fuel Container . . . . . . . . . . . . . . . 6-12
Checking Things Under the Hood . . . . . . . . . . . . . . .6-12
Hood Release . . . . . . . . . . . . . . . . . . . . . . . . . . . . . . . . . 6-13
Engine Compartment Overview . . . . . . . . . . . . . . . . 6-14
Engine Oil . . . . . . . . . . . . . . . . . . . . . . . . . . . . . . . . . . . . . 6-16
Engine Oil Life System . . . . . . . . . . . . . . . . . . . . . . . . 6-19
Engine Air Cleaner/Filter . . . . . . . . . . . . . . . . . . . . . . . 6-20
Automatic Transmission Fluid . . . . . . . . . . . . . . . . . . 6-21
Manual Transmission Fluid . . . . . . . . . . . . . . . . . . . . 6-22
Hydraulic Clutch . . . . . . . . . . . . . . . . . . . . . . . . . . . . . . . 6-22 Cooling System . . . . . . . . . . . . . . . . . . . . . . . . . . . . . . . . 6-22
Engine Coolant . . . . . . . . . . . . . . . . . . . . . . . . . . . . . . . . 6-24
Engine Overheating . . . . . . . . . . . . . . . . . . . . . . . . . . . 6-28
Windshield Washer Fluid . . . . . . . . . . . . . . . . . . . . . . 6-30
Brakes . . . . . . . . . . . . . . . . . . . . . . . . . . . . . . . . . . . . . . . . . 6-30
Battery . . . . . . . . . . . . . . . . . . . . . . . . . . . . . . . . . . . . . . . . . 6-33
Jump Starting . . . . . . . . . . . . . . . . . . . . . . . . . . . . . . . . . . 6-34
Headlamp Aiming . . . . . . . . . . . . . . . . . . . . . . . . . . . . . . . . 6-38
Bulb Replacement . . . . . . . . . . . . . . . . . . . . . . . . . . . . . . . . 6-41
Halogen Bulbs . . . . . . . . . . . . . . . . . . . . . . . . . . . . . . . . . 6-41
Headlamps, Front Turn Signal, and Parking Lamps . . . . . . . . . . . . . . . . . . . . . . . . . . . . . . . . . . . . . . . 6-41
Center High-Mounted Stoplamp (CHMSL) . . . . . 6-43
Taillamps, Turn Signal, Stoplamps and Back-up Lamps . . . . . . . . . . . . . . . . . . . . . . . . . . . . . . . . . . . . . . . 6-44
License Plate Lamp . . . . . . . . . . . . . . . . . . . . . . . . . . . . 6-45
Replacement Bulbs . . . . . . . . . . . . . . . . . . . . . . . . . . . . 6-45
Windshield Wiper Blade Replacement . . . . . . . . . . .6-46
Tires . . . . . . . . . . . . . . . . . . . . . . . . . . . . . . . . . . . . . . . . . . . . . . . 6-47
Tire Sidewall Labeling . . . . . . . . . . . . . . . . . . . . . . . . . 6-48
Tire Terminology and Definitions . . . . . . . . . . . . . . . 6-51
Inflation - Tire Pressure . . . . . . . . . . . . . . . . . . . . . . . . 6-54
Tire Pressure Monitor System . . . . . . . . . . . . . . . . . 6-55
Tire Pressure Monitor Operation . . . . . . . . . . . . . . . 6-57
Tire Inspection and Rotation . . . . . . . . . . . . . . . . . . . 6-60
6-1
Page 317 of 430
Black plate (41,1)Chevrolet HHR Owner Manual - 2011
Bulb Replacement
For the proper type of replacement bulbs, see
Replacement Bulbs on page 6‑45.
For any bulb changing procedure not listed in this
section, contact your dealer.
Halogen Bulbs
{WARNING:
Halogen bulbs have pressurized gas inside and
can burst if you drop or scratch the bulb. You or
others could be injured. Be sure to read and
follow the instructions on the bulb package.
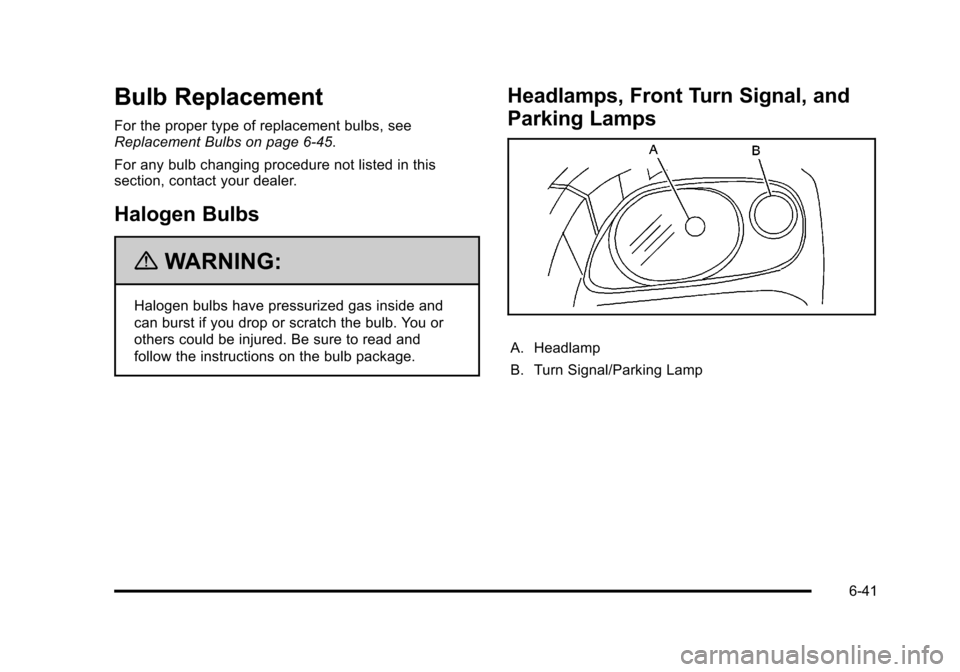
Headlamps, Front Turn Signal, and
Parking Lamps
A. Headlamp
B. Turn Signal/Parking Lamp
6-41
Page 318 of 430
Black plate (42,1)Chevrolet HHR Owner Manual - 2011
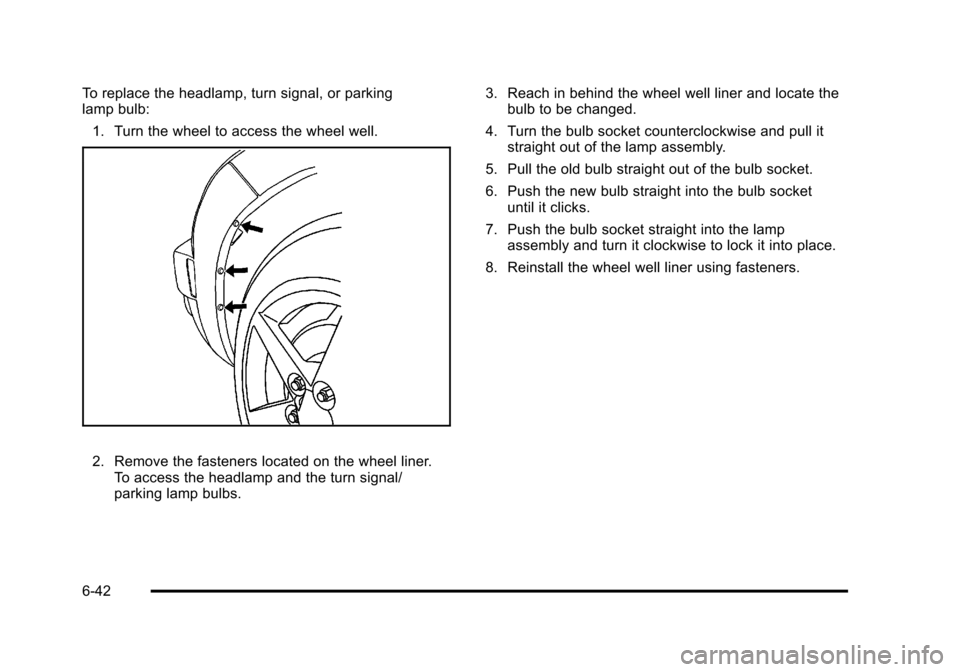
To replace the headlamp, turn signal, or parking
lamp bulb:1. Turn the wheel to access the wheel well.
2. Remove the fasteners located on the wheel liner. To access the headlamp and the turn signal/
parking lamp bulbs. 3. Reach in behind the wheel well liner and locate the
bulb to be changed.
4. Turn the bulb socket counterclockwise and pull it straight out of the lamp assembly.
5. Pull the old bulb straight out of the bulb socket.
6. Push the new bulb straight into the bulb socket until it clicks.
7. Push the bulb socket straight into the lamp assembly and turn it clockwise to lock it into place.
8. Reinstall the wheel well liner using fasteners.
6-42
Page 320 of 430
Black plate (44,1)Chevrolet HHR Owner Manual - 2011
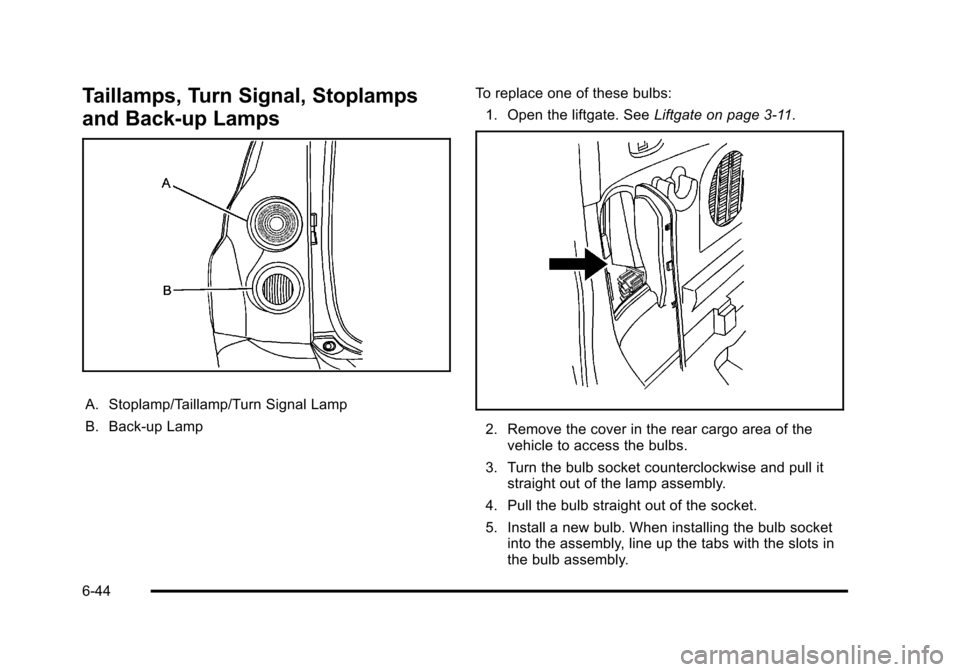
Taillamps, Turn Signal, Stoplamps
and Back-up Lamps
A. Stoplamp/Taillamp/Turn Signal Lamp
B. Back-up LampTo replace one of these bulbs:
1. Open the liftgate. See Liftgate on page 3‑11.
2. Remove the cover in the rear cargo area of the
vehicle to access the bulbs.
3. Turn the bulb socket counterclockwise and pull it straight out of the lamp assembly.
4. Pull the bulb straight out of the socket.
5. Install a new bulb. When installing the bulb socket into the assembly, line up the tabs with the slots in
the bulb assembly.
6-44
Page 321 of 430
Black plate (45,1)Chevrolet HHR Owner Manual - 2011
6. Push the bulb socket straight into the lampassembly and turn it clockwise to lock it into place.
7. Reinstall the cover.
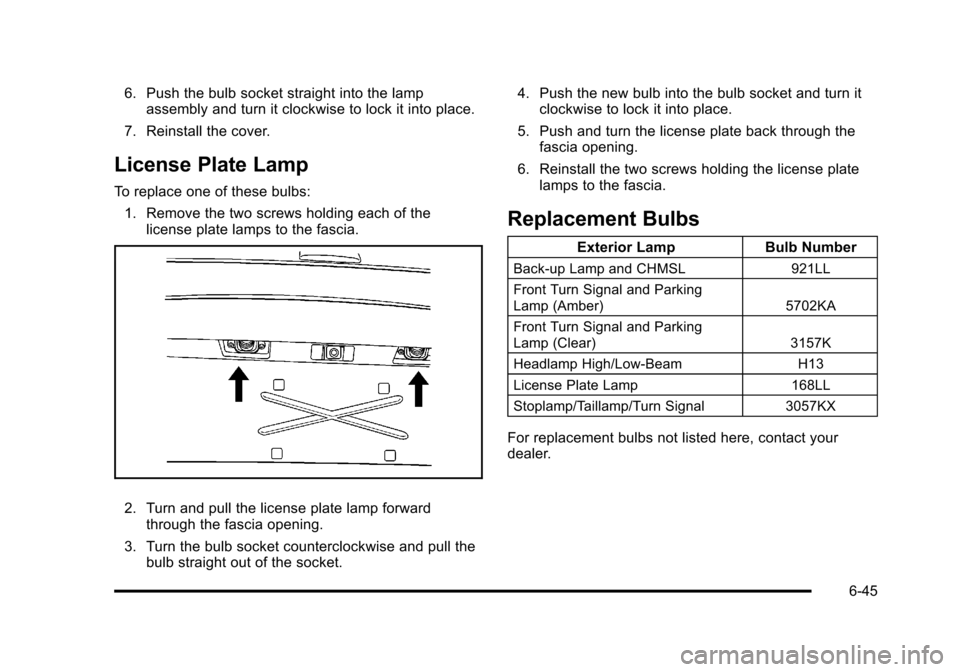
License Plate Lamp
To replace one of these bulbs: 1. Remove the two screws holding each of the license plate lamps to the fascia.
2. Turn and pull the license plate lamp forwardthrough the fascia opening.
3. Turn the bulb socket counterclockwise and pull the bulb straight out of the socket. 4. Push the new bulb into the bulb socket and turn it
clockwise to lock it into place.
5. Push and turn the license plate back through the fascia opening.
6. Reinstall the two screws holding the license plate lamps to the fascia.
Replacement Bulbs
Exterior Lamp Bulb Number
Back-up Lamp and CHMSL 921LL
Front Turn Signal and Parking
Lamp (Amber) 5702KA
Front Turn Signal and Parking
Lamp (Clear) 3157K
Headlamp High/Low-Beam H13
License Plate Lamp 168LL
Stoplamp/Taillamp/Turn Signal 3057KX
For replacement bulbs not listed here, contact your
dealer.
6-45
Page 335 of 430
Black plate (59,1)Chevrolet HHR Owner Manual - 2011
TPMS Sensor Matching Process
Each TPMS sensor has a unique identification code.
Any time you replace one or more of the TPMS sensors
or rotate the vehicle's tires, the identification codes
need to be matched to the new tire/wheel location. The
sensors are matched, to the tire/wheel locations, in the
following order: driver side front tire, passenger side
front tire, passenger side rear tire, and driver side rear
tire using a TPMS diagnostic tool. See your dealer for
service.
The TPMS sensors can also be matched to each tire/
wheel position by increasing or decreasing the tire's air
pressure. When increasing the tire's pressure, do not
exceed the maximum inflation pressure indicated on the
tire's sidewall. To decrease the tire's air-pressure use
the pointed end of the valve cap, a pencil-style air
pressure gauge, or a key.
You have two minutes to match each tire and wheel
position. If it takes longer than two minutes to match
any tire and wheel position, the matching process stops
and you need to start over.
The TPMS matching process is outlined below:1. Set the parking brake.
2. Turn the ignition switch to ON/RUN with the engine off. 3. Press and hold the Remote Keyless Entry (RKE)
transmitter's LOCK and UNLOCK buttons, at the
same time, for about five seconds to start the
TPMS learn mode. The horn sounds twice
indicating the TPMS receiver is ready and in
learn mode.
4. Start with the driver side front tire. The driver side front turn signal also comes on to indicate that
corner's sensor is ready to be learned.
5. Remove the valve cap from the tire's valve stem. Activate the TPMS sensor by increasing or
decreasing the tire's air pressure for about
eight seconds. The horn chirp, can take up to
30 seconds to sound. It chirps one time and then
all the turn signals flash one time to confirm the
sensor identification code has been matched to the
tire/wheel position.
6. The passenger side front turn signal comes on to indicate that corner sensor is ready to be learned.
Proceed to the passenger side front tire and repeat
the procedure in Step 5.
7. The passenger side rear turn signal comes on to indicate that corner sensor is ready to be learned.
Proceed to the passenger side rear tire and repeat
the procedure in Step 5.
6-59