2011 CHEVROLET CORVETTE ECO mode
[x] Cancel search: ECO modePage 182 of 428

Black plate (62,1)Chevrolet Corvette Owner Manual - 2011
5-62 Instruments and Controls
If you choose DRIVER, on
automatic transmission vehicles,
the driver's door will automatically
unlock when the shift lever is
moved into P (Park). On manual
transmission vehicles, the driver's
door will automatically unlock when
the ignition is turned off or is in RAP.
If you choose BOTH, on automatic
transmission vehicles, both doors
will automatically unlock when the
shift lever is moved into P (Park).
On manual transmission vehicles,
both doors will automatically unlock
when the ignition is turned off or is
in RAP.
When the mode you want is
selected, press the OPTION button
to set your choice and advance to
the next personal option.
Language:This option allows you
to select the language the DIC, the
Head-Up Display (HUD), if your
vehicle has this feature, and the
radio uses to display messages.
Each language mode will be
displayed in its own language. For example, English will be
displayed as ENGLISH, Spanish as
ESPANOL, etc. If your vehicle has
the navigation system, you will not
have the Japanese language mode.
Press the OPTION button until
LANGUAGE appears on the display,
then press the RESET button to
scroll through the following modes:
.ENGLISH (default)
.DEUTSCH (German)
.FRANCAIS (French)
.ITALIANO (Italian)
.ESPANOL (Spanish)
If you choose a language that you
do not understand, press the
OPTION and RESET buttons
for five seconds. The DIC will
begin displaying all of the various
languages one by one for as long
as the buttons are pressed. When
the desired language is displayed,
release the buttons and the DIC
will set to this language. When the mode you want is
selected, press the OPTION button
to set your choice and advance to
the next personal option.
Personalize Name:
This option
allows you to type in a name or
greeting that will appear on the DIC
display whenever the corresponding
keyless access transmitter (1 or 2)
is used or one of the memory
buttons (1 or 2) located on the
driver's door is pressed.
Press the OPTION button until
PERSONALIZE NAME appears on
the display, then press the RESET
button to scroll through the following
modes:
.YES
.NO (default)
If you choose YES, you can type in
a name that will appear on the DIC
display.
Page 185 of 428
Black plate (65,1)Chevrolet Corvette Owner Manual - 2011
Instruments and Controls 5-65
Park the vehicle outside of the
garage when programming a garage
door. Be sure that people and
objects are clear of the garage door
or gate that is being programmed.
Programming Universal Home
Remote—Rolling Code
For questions or help programming
the Universal Home Remote
System, call 1-866-572-2728
or go to learcar2u.com.
Most garage door openers sold
after 1996 are Rolling Code units.
Programming a garage door opener
involves time-sensitive actions, so
read the entire procedure before
starting. Otherwise, the device will
time out and the procedure will have
to be repeated. To program up to three devices:
1. Press START or put the vehicle
in accessory mode. See Ignition
Positions on page 9‑20 for
additional information.
Programming can only occur
when the vehicle is running or
in accessory mode.
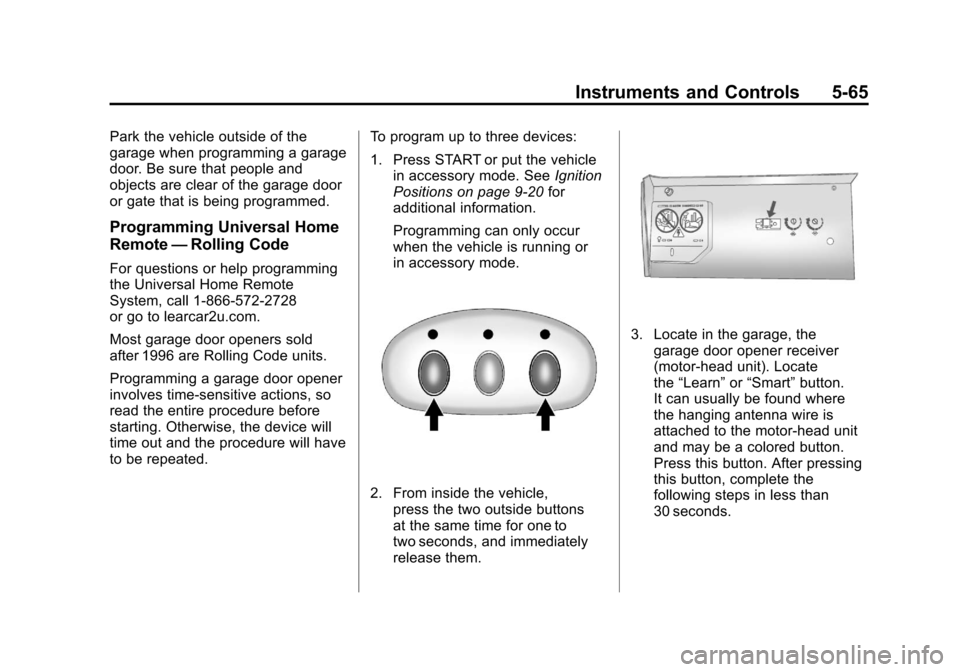
2. From inside the vehicle, press the two outside buttons
at the same time for one to
two seconds, and immediately
release them.
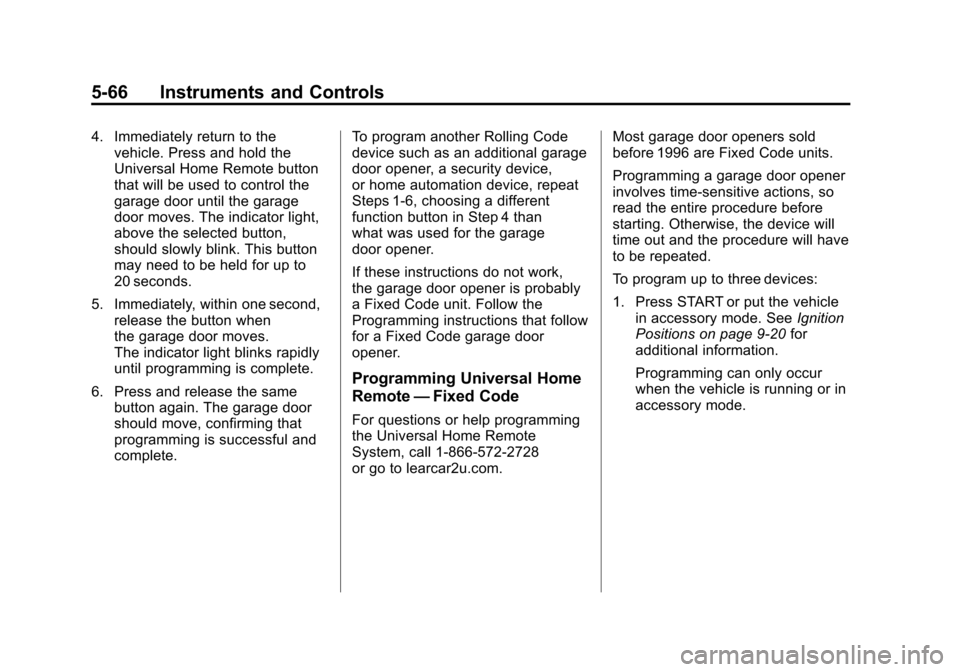
3. Locate in the garage, thegarage door opener receiver
(motor-head unit). Locate
the “Learn” or“Smart” button.
It can usually be found where
the hanging antenna wire is
attached to the motor-head unit
and may be a colored button.
Press this button. After pressing
this button, complete the
following steps in less than
30 seconds.
Page 186 of 428
Black plate (66,1)Chevrolet Corvette Owner Manual - 2011
5-66 Instruments and Controls
4. Immediately return to thevehicle. Press and hold the
Universal Home Remote button
that will be used to control the
garage door until the garage
door moves. The indicator light,
above the selected button,
should slowly blink. This button
may need to be held for up to
20 seconds.
5. Immediately, within one second, release the button when
the garage door moves.
The indicator light blinks rapidly
until programming is complete.
6. Press and release the same button again. The garage door
should move, confirming that
programming is successful and
complete. To program another Rolling Code
device such as an additional garage
door opener, a security device,
or home automation device, repeat
Steps 1-6, choosing a different
function button in Step 4 than
what was used for the garage
door opener.
If these instructions do not work,
the garage door opener is probably
a Fixed Code unit. Follow the
Programming instructions that follow
for a Fixed Code garage door
opener.
Programming Universal Home
Remote
—Fixed Code
For questions or help programming
the Universal Home Remote
System, call 1-866-572-2728
or go to learcar2u.com. Most garage door openers sold
before 1996 are Fixed Code units.
Programming a garage door opener
involves time-sensitive actions, so
read the entire procedure before
starting. Otherwise, the device will
time out and the procedure will have
to be repeated.
To program up to three devices:
1. Press START or put the vehicle
in accessory mode. See Ignition
Positions on page 9‑20 for
additional information.
Programming can only occur
when the vehicle is running or in
accessory mode.
Page 188 of 428
Black plate (68,1)Chevrolet Corvette Owner Manual - 2011
5-68 Instruments and Controls
The switch positions on the
hand-held transmitter could be
labeled, as follows:
.A switch in the up position
could be labeled as“Up,”
“+,” or“On.”
.A switch in the down
position could be labeled
as “Down,” “−,” or“Off.”
.A switch in the middle
position could be labeled as
“Middle,” “0,” or“Neutral.”
3. Write down the eight to 12 switch settings from left to right as
follows:
.When a switch is in the up
position, write “Left.”
.When a switch is in the
down position, write “Right.”
.If a switch is set between
the up and down position,
write“Middle.”
The switch settings written
down in Step 3 now
become the button strokes
to be entered into the
Universal Home Remote
in Step 5. Be sure to enter
the switch settings written
down in Step 3, in order
from left to right, into the
Universal Home Remote,
when completing Step 5.
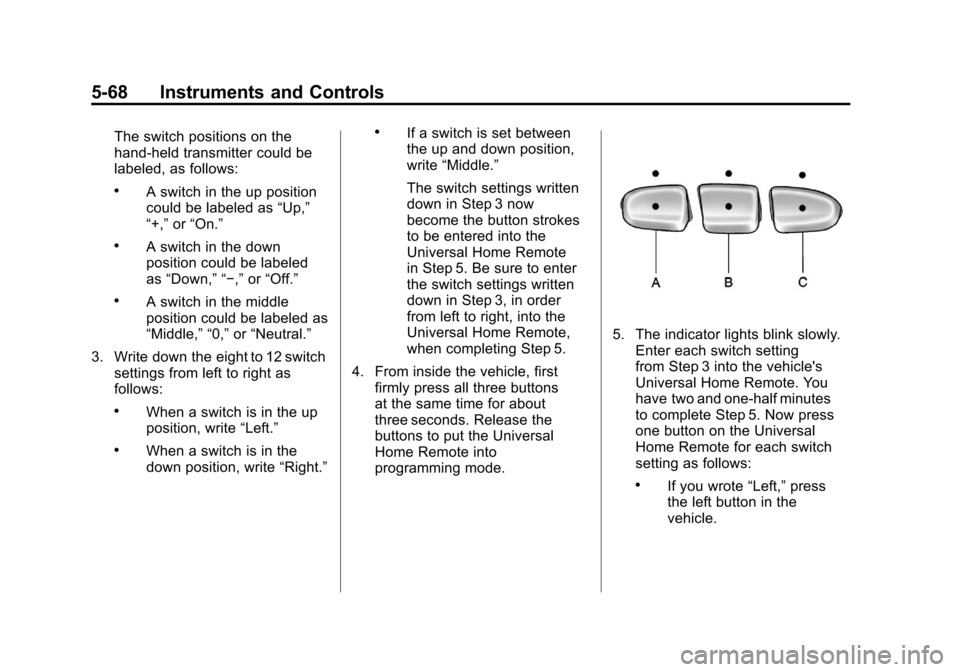
4. From inside the vehicle, first firmly press all three buttons
at the same time for about
three seconds. Release the
buttons to put the Universal
Home Remote into
programming mode.
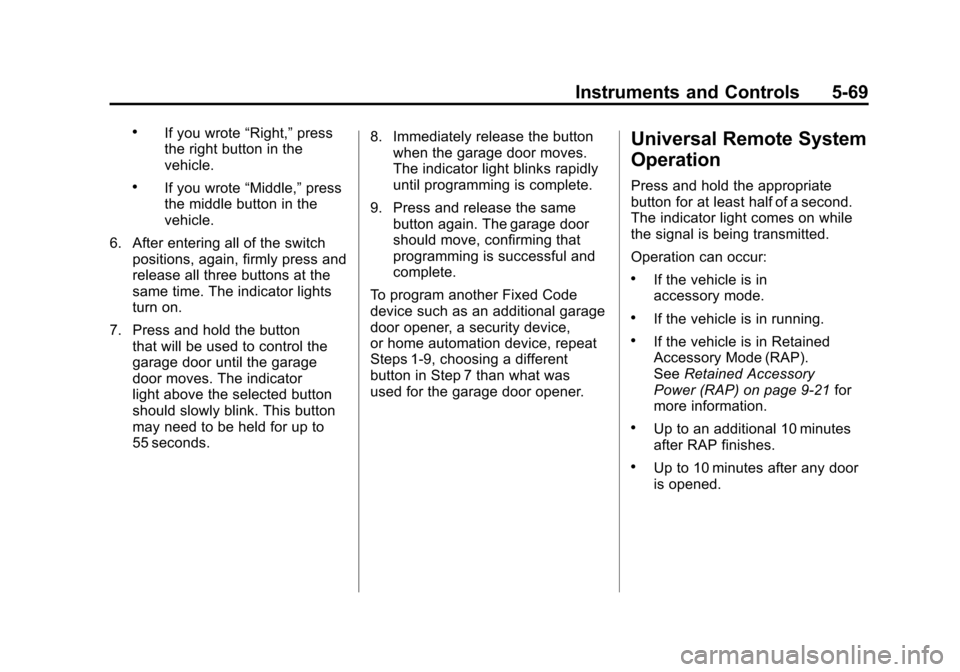
5. The indicator lights blink slowly.Enter each switch setting
from Step 3 into the vehicle's
Universal Home Remote. You
have two and one-half minutes
to complete Step 5. Now press
one button on the Universal
Home Remote for each switch
setting as follows:
.If you wrote “Left,”press
the left button in the
vehicle.
Page 189 of 428
Black plate (69,1)Chevrolet Corvette Owner Manual - 2011
Instruments and Controls 5-69
.If you wrote“Right,”press
the right button in the
vehicle.
.If you wrote “Middle,”press
the middle button in the
vehicle.
6. After entering all of the switch positions, again, firmly press and
release all three buttons at the
same time. The indicator lights
turn on.
7. Press and hold the button that will be used to control the
garage door until the garage
door moves. The indicator
light above the selected button
should slowly blink. This button
may need to be held for up to
55 seconds. 8. Immediately release the button
when the garage door moves.
The indicator light blinks rapidly
until programming is complete.
9. Press and release the same button again. The garage door
should move, confirming that
programming is successful and
complete.
To program another Fixed Code
device such as an additional garage
door opener, a security device,
or home automation device, repeat
Steps 1-9, choosing a different
button in Step 7 than what was
used for the garage door opener.
Universal Remote System
Operation
Press and hold the appropriate
button for at least half of a second.
The indicator light comes on while
the signal is being transmitted.
Operation can occur:
.If the vehicle is in
accessory mode.
.If the vehicle is in running.
.If the vehicle is in Retained
Accessory Mode (RAP).
See Retained Accessory
Power (RAP) on page 9‑21 for
more information.
.Up to an additional 10 minutes
after RAP finishes.
.Up to 10 minutes after any door
is opened.
Page 213 of 428
Black plate (15,1)Chevrolet Corvette Owner Manual - 2011
Infotainment System 7-15
SONGLIST FULL displays if more
than 20 selections are stored.
To play tracks:
1. Press
R. One beep sounds and
S-LIST displays. The recorded
tracks begin to play in the order
they were saved
2. Press
toruto go back or
forward within the saved tracks.
To delete tracks:
1. Press
Rto turn song list on.
S-LIST displays.
2. Press
toru, use theO e
knob to select the desired track
to be deleted.
3. Press and hold
Runtil SONG
REMOVED displays.
After a track has been deleted, the
remaining tracks are moved up the
list. When another track is added to
the song list, the track is added to
the end of the list. To delete the entire song list:
1. Press
Rto turn song list on.
S-LIST displays.
2. Press and hold
Rfor more than
4 seconds. One beep sounds
and SONGLIST EMPTY displays
to confirm that the song list has
been deleted.
If a CD is ejected, and the song
list contains saved tracks from that
CD, those tracks are automatically
deleted from the song list. Any
tracks saved to the song list again
are added to the bottom of the list.
To end song list mode, press
R.
One beep sounds and S-LIST is
removed from the display.
MP3 Format
Radios with the MP3 feature can
only play CD-R discs. Do not mix
standard audio and MP3 files on the
same disc. Supported File Structure
Radios with the MP3 feature support
up to:
.50 folders.
.11 folders in depth.
.50 playlists.
.255 files.
.10 sessions.
Root Directory:
The root directory is treated as a
folder. Files are stored in the root
directory when the disc or storage
device does not contain folders.
Files accessed from the root
directory display as F1 ROOT.
Empty Folder:
Folders that do not contain files are
skipped, and the player advances to
the next folder that contains files.
Page 224 of 428

Black plate (2,1)Chevrolet Corvette Owner Manual - 2011
8-2 Climate Controls
When the vehicle is first started,
the display shows the driver's
temperature setting, the outside
temperature, the fan speed and the
air delivery, for about 10 seconds.
The outside temperature is shown
in the center of the display.
The digital display will show the
readings in Fahrenheit or Celsius.
See“Personal Options” under
Vehicle Personalization on
page 5‑55 for information
on changing your display.
Automatic Operation
AUTO (Automatic): Press the
AUTO button to place the entire
system in the automatic mode.
When automatic operation is active,
the system automatically controls
the inside temperature, the air
delivery mode, and the fan speed. After a ten second display of the
current settings, the word AUTO,
the driver's temperature setting
and the outside temperature will
be shown. The system operates
to reach the set temperature as
quickly as possible. The AUTO
control system works best with the
windows up and the removable roof
installed or the convertible top up.
1. Press the AUTO button.
2. Adjust the temperature to a
comfortable setting between
16°C (60°F) and 32°C (90°F).
Choosing the coldest or warmest
temperature setting will not
cause the system to heat or
cool any faster. A setting of
23°C (73°F) is suggested.
In cold weather, the system will
start at reduced fan speeds to
avoid blowing cold air into your
vehicle until warmer air is available. The system starts out
blowing air at the floor but may
change modes automatically as
the vehicle warms up to maintain
the chosen temperature setting.
The length of time needed for
warm up depends on the outside
temperature and the length of
time that has elapsed since the
vehicle was last driven.
3. Wait for the system to regulate. This may take from 10 to
30 minutes. Then adjust the
temperature, if necessary.
Do not cover the solar sensor
located in the center of the
instrument panel, near the
windshield. For more information
on the solar sensor, see “Sensor”
later in this section.
Page 226 of 428
Black plate (4,1)Chevrolet Corvette Owner Manual - 2011
8-4 Climate Controls
1(Defrost):This mode clears the
windows of fog or frost more quickly.
Air is directed to the windshield,
with a small amount directed to the
side window outlets. The indicator
light comes on and the digital
display will show the defrost mode
symbol and fan speed when the
front defrost mode is being used. In
this mode, the system automatically
turns off the recirculation and runs
the air-conditioning compressor,
unless the outside temperature is
at or below freezing. Recirculation
cannot be selected while in the
defrost mode. Pressing
1again
will return the system to the last
operating mode.
For severe ice conditions, turn
the driver's temperature knob to
32°C (90°F) while in defrost mode.
Do not drive the vehicle until all the
windows are clear.
^(Air Conditioning Off): Press
to turn the air conditioning
compressor off. Press AUTO to
return to automatic operation.
When in AUTO, the air conditioning
compressor comes on automatically,
as needed.
Air conditioning does not
operate at temperatures below
about 2°C to 4°C (35°F to 40°F).
In temperatures above 4°C (40°F),
the air conditioning cannot be
turned off in defrost and defog,
as it helps to remove moisture
from the vehicle. It also helps to
keep the windows clear.
You may notice a slight change
in engine performance when the
air-conditioning compressor shuts
off and turns on again. This is
normal. The system is designed to
make adjustments to help with fuel
economy while still maintaining the
selected temperature. On hot days, open the windows to
let hot inside air escape; then close
them. This helps to reduce the time
it takes for the vehicle to cool down.
It also helps the system to operate
more efficiently.
For quick cool down on hot
days press the AUTO button and
adjust the temperature to a cool,
comfortable setting. To achieve
maximum cool down, do the
following:
1. Select
Hmode.
2. Press
?.
3. Select the a/c on.
4. Select the coolest temperature.
5. Select the highest fan speed.