Page 153 of 470

Black plate (49,1)Cadillac DTS Owner Manual - 2011
2. Locate in the garage, the garage door openerreceiver (motor-head unit). Locate the “Learn”
or “Smart” button. It can usually be found where
the hanging antenna wire is attached to the
motor-head unit and may be a colored button.
Press this button. After pressing this button,
complete the following steps in less than
30 seconds.
3. Immediately return to the vehicle. Press and hold the Universal Home Remote button that will be
used to control the garage door until the garage door moves. The indicator light, above the selected
button, should slowly blink. This button may need
to be held for up to 20 seconds.
4. Immediately, within one second, release the button when the garage door moves. The indicator light
will blink rapidly until programming is complete.
5. Press and release the same button again. The garage door should move, confirming that
programming is successful and complete.
To program another Rolling Code device such as an
additional garage door opener, a security device,
or home automation device, repeat Steps 1 through 5,
choosing a different function button in Step 3 than what
was used for the garage door opener.
If these instructions do not work, the garage door
opener is probably a Fixed Code unit. Follow the
Programming instructions that follow for a Fixed Code
garage door opener.
Programming Universal Home
Remote —Fixed Code
For questions or help programming the Universal
Home Remote System, call 1-866-572-2728 or go to
learcar2u.com.
Most garage door openers sold before 1996 are Fixed
Code units.
3-49
Page 154 of 470

Black plate (50,1)Cadillac DTS Owner Manual - 2011
Programming a garage door opener involves
time-sensitive actions, so read the entire procedure
before starting. Otherwise, the device will time out and
the procedure will have to be repeated.
To program up to three devices:
1. To verify that the garage door opener is a FixedCode unit, remove the battery cover on the hand
held transmitter supplied by the manufacturer of
the garage door opener motor. If there are a row
of dip switches similar to the graphic above, the
garage door opener is a Fixed Code unit. If you do not see a row of dip switches, return to the
previous section for Programming Universal Home
Remote
–Rolling Code.
Your hand held transmitter can have between
eight to 12 dip switches depending on the brand
of transmitter.
The garage door opener receiver (motor head unit)
could also have a row of dip switches that can be
used when programming the Universal Home
Remote. If the total number of switches on the
motor head and hand held transmitter are different,
or if the dip switch settings are different, use the
dip switch settings on the motor head unit to
program the Universal Home Remote. The motor
head dip switch settings can also be used when
the original hand held transmitter is not available.
3-50
Page 155 of 470
Black plate (51,1)Cadillac DTS Owner Manual - 2011
Example of Eight Dip Switches with Two PositionsExample of Eight Dip Switches with Three PositionsThe panel of switches might not appear exactly as
they do in the examples above, but they should be
similar.
The switch positions on the hand-held transmitter
could be labeled, as follows:
.A switch in the up position could be labeled as
“Up,” “+,” or“On.”
.A switch in the down position could be labeled
as “Down,” “−,” or“Off.”
.A switch in the middle position could be labeled
as “Middle,” “0,” or“Neutral.”
3-51
Page 156 of 470

Black plate (52,1)Cadillac DTS Owner Manual - 2011
2. Write down the eight to 12 switch settings from leftto right as follows:
.When a switch is in the up position, write “Left.”
.When a switch is in the down position, write
“Right.”
.If a switch is set between the up and down
position, write“Middle.”
The switch settings written down in Step 2 now
become the button strokes to be entered into
the Universal Home Remote in Step 4. Be sure
to enter the switch settings written down in
Step 2, in order from left to right, into the
Universal Home Remote, when completing
Step 4.
3. From inside your vehicle, first firmly press all three buttons at the same time for about
three seconds. Release the buttons to put the
Universal Home Remote into programming mode.
4. The indicator lights will blink slowly. Enter eachswitch setting from Step 2 into your vehicle's
Universal Home Remote. You will have two and
one-half minutes to complete Step 4. Now press
one button on the Universal Home Remote for
each switch setting as follows:
.If you wrote “Left,”press the left button in the
vehicle.
.If you wrote “Right,”press the right button in
the vehicle.
.If you wrote “Middle,”press the middle button in
the vehicle.
3-52
Page 157 of 470

Black plate (53,1)Cadillac DTS Owner Manual - 2011
5. After entering all of the switch positions, again,firmly press and release all three buttons at the
same time. The indicator lights will turn on.
6. Press and hold the button that will be used to control the garage door until the garage door
moves. The indicator light above the selected
button should slowly blink. This button may need to
be held for up to 55 seconds.
7. Immediately release the button when the garage door moves. The indicator light will blink rapidly
until programming is complete.
8. Press and release the same button again. The garage door should move, confirming that
programming is successful and complete.
To program another Fixed Code device such as an
additional garage door opener, a security device,
or home automation device, repeat Steps 1-8, choosing
a different button in Step 6 than what was used for the
garage door opener.
Using Universal Home Remote
Press and hold the appropriate button for at least half
of a second. The indicator light will come on while the
signal is being transmitted.
Reprogramming Universal Home
Remote Buttons
Any of the three buttons can be reprogrammed by
repeating the instructions.
Erasing Universal Home Remote
Buttons
The programmed buttons should be erased when the
vehicle is sold or the lease ends.
To erase either Rolling Code or Fixed Code on the
Universal Home Remote device: 1. Press and hold the two outside buttons at the same time for approximately 20 seconds, until the
indicator lights, located directly above the buttons,
begin to blink rapidly.
2. Once the indicator lights begin to blink, release both buttons. The codes from all buttons will be
erased.
For help or information on the Universal Home Remote
System, call the customer assistance phone number
under Customer Assistance Offices on page 8‑6.
3-53
Page 158 of 470

Black plate (54,1)Cadillac DTS Owner Manual - 2011
Storage Areas
Glove Box
Lift up the glove box handle to open it. Use the key to
lock and unlock the glove box.
Cupholders
There are cupholders located in the full floor console,
or in the front of the center seat console. Cupholders
are also located in the rear armrest. Slide the cover
back to access the full floor console cupholder. Fold
open the front of the console to access the center seat
console cupholder.
Front Storage Area
To access the front storage area, push down and then
release. Push up and forward to remove.
Center Console Storage
If the vehicle has a full floor console it has two storage
areas. Lift the left lever located in the front of the
armrest lid to access the upper storage tray . Lift
the right lever to access the lower storage area.
If the vehicle has a center seat console it will have
two storage areas. Press the button located on thefront of the armrest and lift the armrest cover to access
the upper storage area. Pull the strap located behind
the cup holder to access the lower storage area.
Center Flex Storage Unit
This vehicle may have a center flex storage unit that
includes a front center seat with a lap belt and an
underseat storage compartment. The center seatback
can also be used as an armrest. Cupholders are also
located at the front edge of the storage unit and can be
accessed by folding the compartment forward.
Pull the handle rearward to open a storage
compartment and access the accessory power outlet.
Pull out to remove.
When not being used, the center seat lap belt can be
stored in the underseat storage compartment.
Floor Mats
{WARNING:
If a floor mat is the wrong size or is not properly
installed, it can interfere with the accelerator pedal
and/or brake pedal. Interference with the pedals
can cause unintended acceleration and/or
(Continued)
3-54
Page 159 of 470

Black plate (55,1)Cadillac DTS Owner Manual - 2011
WARNING: (Continued)
increased stopping distance which can cause a
crash and injury. Make sure the floor mat does not
interfere with the accelerator or brake pedal.
Use the following guidelines for proper floor mat usage.
.The original equipment floor mats were designed
for your vehicle. If the floor mats need replacing, it
is recommended that GM certified floor mats be
purchased. Non-GM floor mats may not fit properly
and may interfere with the accelerator or brake
pedal. Always check that the floor mats do not
interfere with the pedals.
.Use the floor mat with the correct side up. Do not
turn it over.
.Do not place anything on top of the driver side
floor mat.
.Use only a single floor mat on the driver side.
.Do not place one floor mat on top of another.
The driver side floor mat is held in place by two hooks.
Removing and Replacing the Floor Mats
1. Pull up on the rear of the mat to remove it from the hooks.
2. Reinstall the floor mat by lining up the openings in the floor mat over the hooks and push it down into
position.
3. Make sure the floor mat is properly secured and verify that it does not interfere with the accelerator
or brake pedals.
3-55
Page 160 of 470

Black plate (56,1)Cadillac DTS Owner Manual - 2011
Rear Seat Armrest
This vehicle has a rear seat armrest with cupholders.
Pull the tab on the armrest forward, to access it.
Convenience Net
Use the convenience net, located in the rear, to store
small loads as far forward as possible. The net should
not be used to store heavy loads.
Sunroof
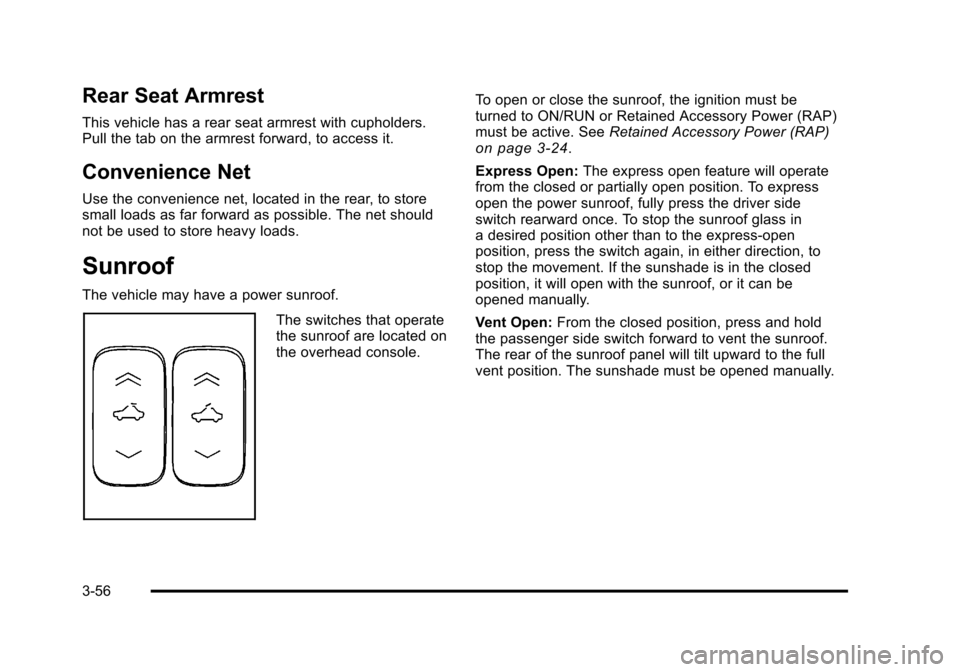
The vehicle may have a power sunroof.
The switches that operate
the sunroof are located on
the overhead console.To open or close the sunroof, the ignition must be
turned to ON/RUN or Retained Accessory Power (RAP)
must be active. See
Retained Accessory Power (RAP)
on page 3‑24.
Express Open: The express open feature will operate
from the closed or partially open position. To express
open the power sunroof, fully press the driver side
switch rearward once. To stop the sunroof glass in
a desired position other than to the express-open
position, press the switch again, in either direction, to
stop the movement. If the sunshade is in the closed
position, it will open with the sunroof, or it can be
opened manually.
Vent Open: From the closed position, press and hold
the passenger side switch forward to vent the sunroof.
The rear of the sunroof panel will tilt upward to the full
vent position. The sunshade must be opened manually.
3-56