Page 224 of 315

ADVANCED PARKING GUIDANCE SYSTEM
227
MessageCauseWhat to do
Steering position is not
straight. Turn the steering
wheel to LEFT (or RIGHT).The steering wheel is not
straight.Straighten the steering
wheel.
Steer to left (or right) until
the frame becomes green.It is possible to begin to
park if you turn the steering
wheel in the direction indi-
cated.Turn the steering wheel in
the direction indicated until
the frame turns green (the
message “Too much force
applied to the steering
wheel” is displayed). Turn
the wheel slightly more
than necessary to over-
come tire resistance. Once
you have turned the steer-
ing wheel, you can no lon-
ger change the target park-
ing position. Be sure to
align the frame before turn-
ing the steering wheel.
! Parking position has not
been set.You have begun to back up
without touching “OK”.Stop the vehicle and touch
“OK”.
! Speed is too fast.The speed at which you are
backing up is too fast.Back up at a speed that
does not cause the warning
chime to sound, using the
brake pedal. The system
will be disabled if you back
up too quickly.
! Guidance canceled by
user operation.You have turned the steer-
ing wheel or depressed the
accelerator pedal during
the assist mode.The system has been dis-
abled, so restart from the
beginning.
! Accelerator pedal has
been depressed.You have depressed the
accelerator pedal when
setting the target parking
position.Do not depress the acceler-
ator pedal.
! Guidance unavailable.Some sort of malfunction
has occurred within the
system.Have the vehicle checked
by your Toyota dealer.
! System not ready.−Take your vehicle to your
Toyota dealer.
! Clean Park Sonar.In extreme cold weather or
foreign matter gets on the
sensors.Have the vehicle checked
by your Toyota dealer.
Page 225 of 315

ADVANCED PARKING GUIDANCE SYSTEM
228
Message and voice guidance
In the parallel parking assist mode and parking assist mode, voice guida\
nce accompa-
nies the following messages displayed during parking position setting an\
d steering
wheel control. (Voice guidance may not be given depending on the reason the message
was displayed.)
Message
Voice Guidance (Warning tone)
During settingDuring steering wheelcontrol
! Check APGS system. Have your
vehicle checked by a dealer.(One chime)
(Two beeps) The guid-
ance has been can-
celed.
! System cannot guide under cur-
rent conditions.−
(Two beeps) The guid-
ance has been can-
celed.
! APGS not available now.(One chime)
(Two beeps) The guid-
ance has been can-
celed.
! Release parking brake.(One chime)
(Two beeps) The guid-
ance has been can-
celed.
! Parking position has not been set.(One chime)−
! Speed is too fast.−
(Several beeps and
then two beeps) The
guidance has been
canceled.
! Guidance canceled by user op-
eration.−
(Two beeps) The guid-
ance has been can-
celed.
For the adjustment of the volume, ask your Toyota dealer.
Page 253 of 315
SETUP
256
“Manage phone” is accessed from the
“Connect Phone” screen.
1. Push the “SETUP” button.
2. Touch “Phone”.
3. Touch “Manage Phone”.
Please refer to the following pages for
each setting.
�Registering a Bluetooth� phone
1. Touch “(add new)” to register your
cellular phone to the system.
2. When this screen is displayed, input
the passcode displayed on the screen
into the phone.
For the operation of the phone, see the
manual that comes with your cellular
phone.
If you want to cancel it, touch “Cancel” .
— Manage phone
Page 263 of 315

SETUP
266
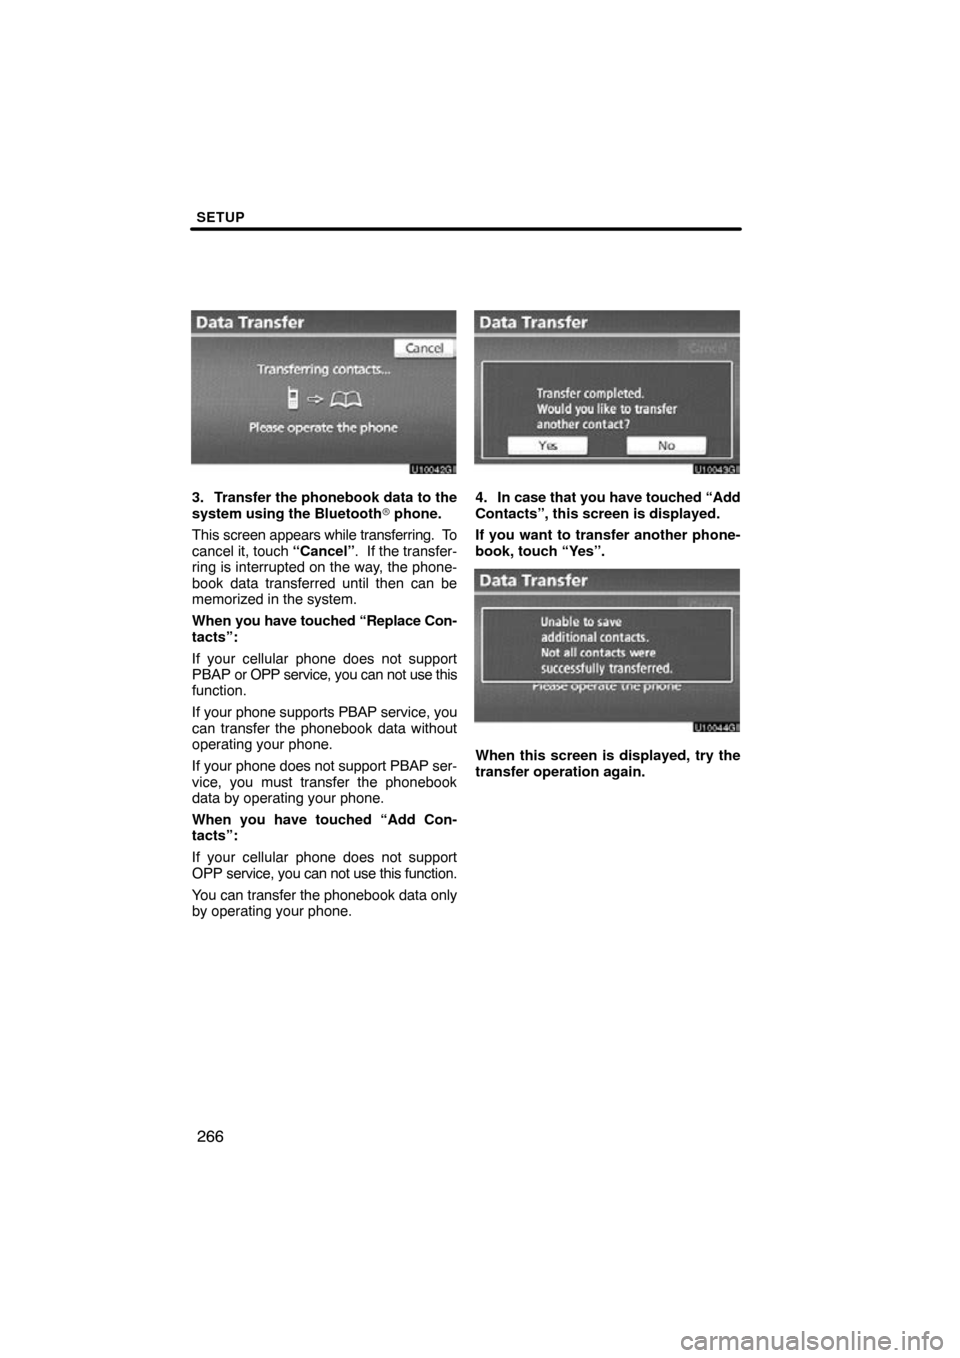
3. Transfer the phonebook data to the
system using the Bluetooth� phone.
This screen appears while transferring. To
cancel it, touch “Cancel”. If the transfer-
ring is interrupted on the way, the phone-
book data transferred until then can be
memorized in the system.
When you have touched “Replace Con-
tacts”:
If your cellular phone does not support
PBAP or OPP service, you can not use this
function.
If your phone supports PBAP service, you
can transfer the phonebook data without
operating your phone.
If your phone does not support PBAP ser-
vice, you must transfer the phonebook
data by operating your phone.
When you have touched “Add Con-
tacts”:
If your cellular phone does not support
OPP service, you can not use this function.
You can transfer the phonebook data only
by operating your phone.4. In case that you have touched “Add
Contacts”, this screen is displayed.
If you want to transfer another phone-
book, touch “Yes”.
u10044gi
When this screen is displayed, try the
transfer operation again.
Page 292 of 315
SETUP
295
The Bluetooth� audio settings can be
set.
�Registering your portable player
U10008GS
1. Touch “Bluetooth∗ Audio Setting”
on “Audio Settings” screen.
U10009GS
2. Touch “Register” of “Bluetooth∗
Audio” on “BT Audio Settings” screen.∗: Bluetooth is a registered trademark of
Bluetooth SIG.Inc.
U10010GS
3. When this screen is displayed, enter
the passcode displayed on the screen
into the portable player.
For the operation of the portable player,
see the manual that comes with it.
If you want to cancel the entry, touch “Can-
cel”.
U10011GS
4. When the connection is complete,
this screen is displayed.
You do not need to enter the portable play-
er in case of using the same one.
U10012GS
When this screen is displayed, follow the
guidance on the screen to try connection
again.
—Setting Bluetooth � audio
Page 298 of 315

SETUP
301
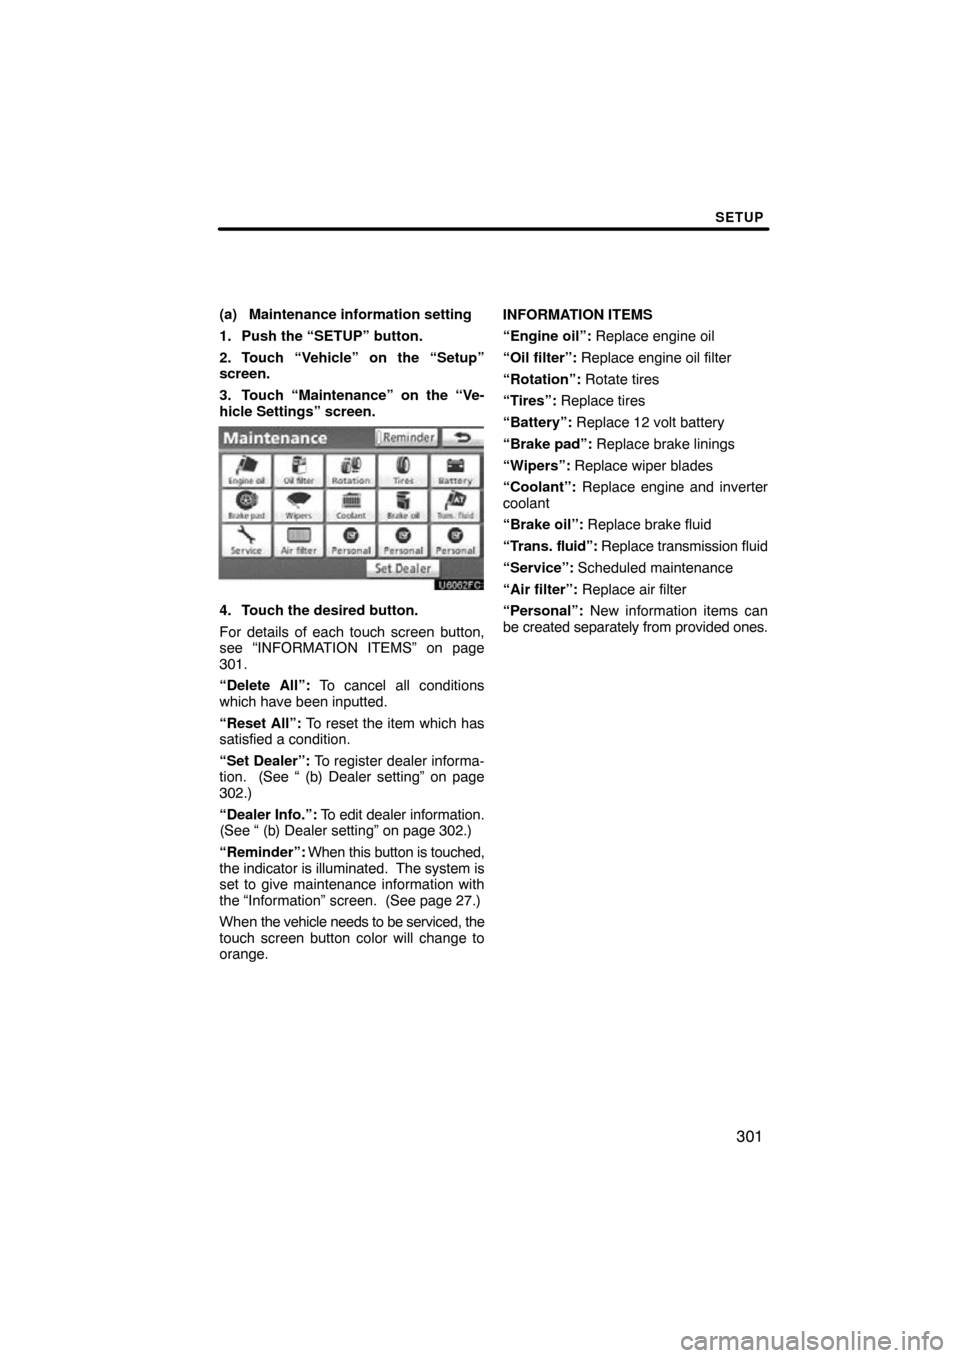
(a) Maintenance information setting
1. Push the “SETUP” button.
2. Touch “Vehicle” on the “Setup”
screen.
3. Touch “Maintenance” on the “Ve-
hicle Settings” screen.
4. Touch the desired button.
For details of each touch screen button,
see “INFORMATION ITEMS” on page
301.
“Delete All”: To cancel all conditions
which have been inputted.
“Reset All”: To reset the item which has
satisfied a condition.
“Set Dealer”: To register dealer informa-
tion. (See “ (b) Dealer setting” on page
302.)
“Dealer Info.”: To edit dealer information.
(See “ (b) Dealer setting” on page 302.)
“Reminder”: When this button is touched,
the indicator is illuminated. The system is
set to give maintenance information with
the “Information” screen. (See page 27.)
When the vehicle needs to be serviced, the
touch screen button color will change to
orange. INFORMATION ITEMS
“Engine oil”: Replace engine oil
“Oil filter”: Replace engine oil filter
“Rotation”:
Rotate tires
“Tires”: Replace tires
“Battery”: Replace 12 volt battery
“Brake pad”: Replace brake linings
“Wipers”: Replace wiper blades
“Coolant”: Replace engine and inverter
coolant
“Brake oil”: Replace brake fluid
“Trans. fluid”: Replace transmission fluid
“Service”: Scheduled maintenance
“Air filter”: Replace air filter
“Personal”: New information items can
be created separately from provided ones.
Page 299 of 315

SETUP
302
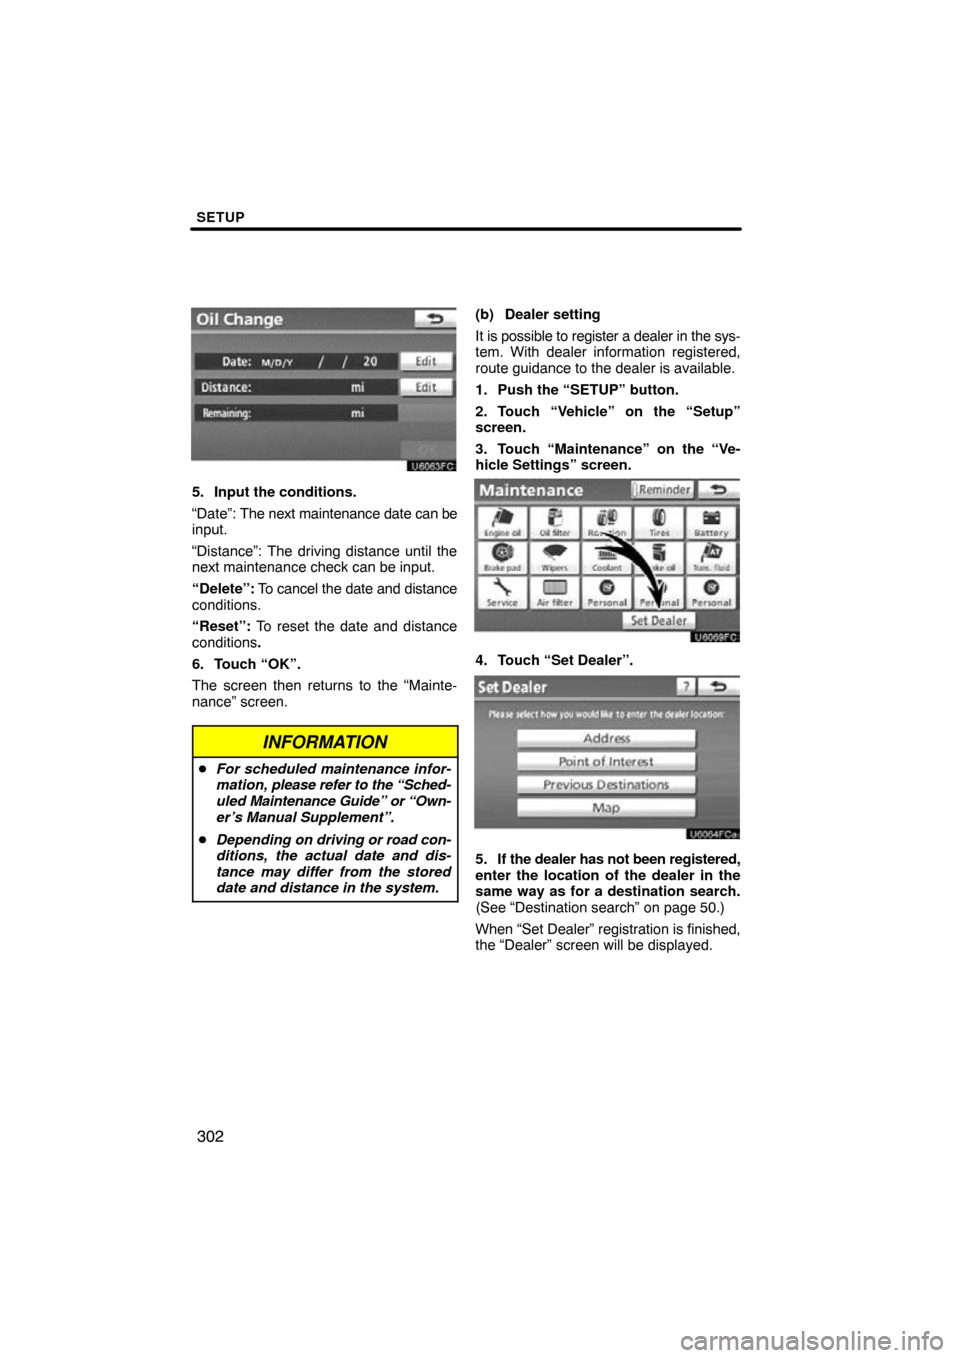
5. Input the conditions.
“Date”: The next maintenance date can be
input.
“Distance”: The driving distance until the
next maintenance check can be input.
“Delete”: To cancel the date and distance
conditions.
“Reset”: To reset the date and distance
conditions .
6. Touch “OK”.
The screen then returns to the “Mainte-
nance” screen.
INFORMATION
� For scheduled maintenance infor-
mation, please refer to the “Sched-
uled Maintenance Guide” or “Own-
er’s Manual Supplement”.
� Depending on driving or road con-
ditions, the actual date and dis-
tance may differ from the stored
date and distance in the system.
(b) Dealer setting
It is possible to register a dealer in the sys-
tem. With dealer information registered,
route guidance to the dealer is available.
1. Push the “SETUP” button.
2. Touch “Vehicle” on the “Setup”
screen.
3. Touch “Maintenance” on the “Ve-
hicle Settings” screen.
4. Touch “Set Dealer”.
5. If the dealer has not been registered,
enter the location of the dealer in the
same way as for a destination search.
(See “Destination search” on page 50.)
When “Set Dealer” registration is finished,
the “Dealer” screen will be displayed.