Page 223 of 264

AUDIO/VIDEO SYSTEM
227
DESCRIPTION OF DVD CONTROLS
�Top page of DVD video controls
“Menu” and “Top Menu”: If you touch
any of the above controls, the menu
screen for DVD video appears. (For the
operation, see the manual that come with
the DVD video disc provided separately.)
: The menu control key appears on
the screen. (See page 228.)
: Touching this will pause the video
screen. When you touch this again, the
video screen advances frame by frame.
�� : Touching this will fast reverse during
playback.
: Touching this will stop the video screen.
� : Touching this will pause during play-
back and resume normal play during
pause or slow forward.
�� : Touching this will fast forward during
playback and forward slowly during pause.
�Second page of DVD video controls
“Setup”: The initial set up screen ap-
pears. (See page 230.)
“Search”: The title search screen ap-
pears. (See page 228.)
“Return”: Touching this will display the
predetermined scene and start playing
from there.
“AUDIO”: The audio changing screen ap-
pears. (See page 229.)
“Subtitle”: The subtitle changing screen
appears. (See page 229.)
“Angle”: The angle selection screen ap-
pears. (See page 230.)
Page 224 of 264
AUDIO/VIDEO SYSTEM
228
SELECTING A MENU ITEM
Enter the menu item using \b, � , and
� and touch “Enter”. The player starts
playing video for that menu item. (For
details, see the manual that comes with
the DVD video disc provided separate-
ly.)
Each time you touch “Move Buttons”,
the controls on the screen move up-
ward and downward.
When you touch “<
will disappear. To display them again,
touch “ON>>” .
When you touch
, the previous
screen returns.
SEARCHING BY TITLE
Enter the title number and touch “En-
ter”. The player starts playing video for
that title number.
When you push either side of the “SEEK/
TRACK” button, you can select a chapter.
If you enter the wrong numbers, touch
“Clear” to delete the numbers.
When you touch
, the previous
screen returns.
Page 231 of 264
AUDIO/VIDEO SYSTEM
235
(g) Operating a video CD
PLAYING A VIDEO CD
Push the “AUDIO” button to display
this screen.
When you touch “WIDE”, the screen
mode can be changed.
It you touch “PICTURE” when the vehicle
is completely stopped and the parking
brake is applied, the video screen returns.
DISPLAYING VIDEO CD CONTROLS
If you touch the part where controls are not
located while you are watching video on
the video CD, video CD controls will ap-
pear.
“Page2”: Touching this will display on the
second page of video CD controls.
“Page1”: Touching this will display on the
top page of video CD controls.
“Hide Buttons”: Touching this will turn off
the controls from the screen.
If “
” appears on the display when you
touch a control, the operation is not per-
mitted.
Page 232 of 264

AUDIO/VIDEO SYSTEM
236
DESCRIPTION OF VIDEO CD CON-
TROLS
�Controls on top page
“Select Number”: The track or number
search screen appears. (See “SEARCH-
ING BY TRACK” on page 237.)
“Prev. Menu”: When you touch this while
the disc menu is displayed, the previous
page appears on the screen. If you touch
this while the player is playing video, the
previous track is searched and played.
“Next Menu”: When you touch this while
the disc menu is displayed, the next page
appears on the display. If you touch this
while the player is playing video, the next
track is searched and played.
“Main/Sub”: A multiplex transmission
changing control. The mode changes from
Main/Sub to Main, to Sub and back to
Main/Sub by touching this control.
“Return”: Touching this will display the
predetermined scene and start playing
from there.
�Controls on second page
: Use this to pause the video
screen. When you touch this again, the
video screen advance frame by frame.
�� : Touch this to fast reverse during
playback.
� : Touch this to pause during playback
and resume playing during pause.
�� : Touch this to fast forward during the
playback and start playing slowly during
pause.
Page 233 of 264

AUDIO/VIDEO SYSTEM
237
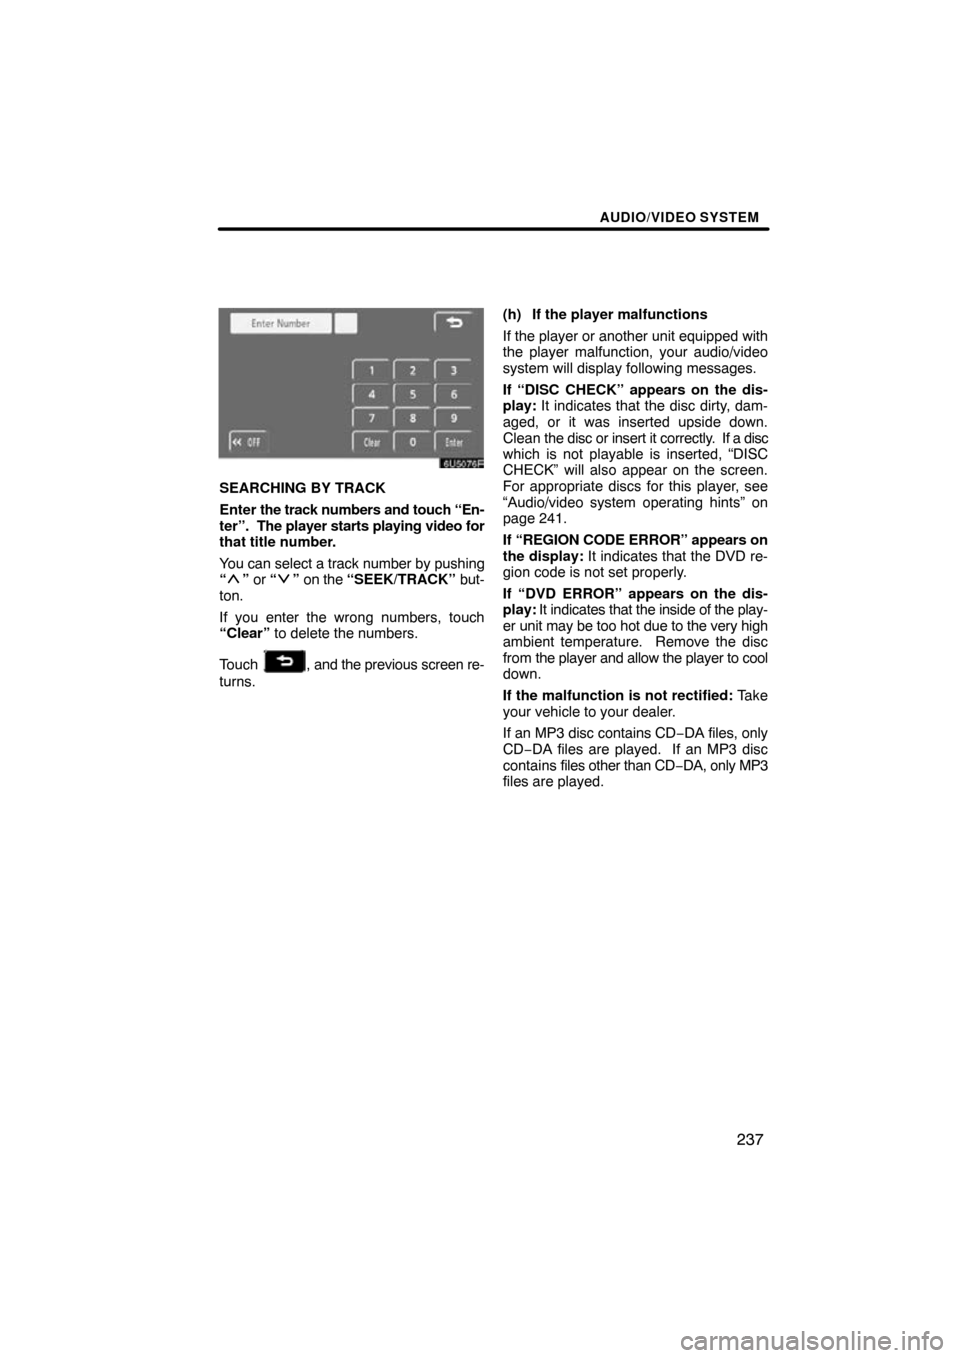
SEARCHING BY TRACK
Enter the track numbers and touch “En-
ter”. The player starts playing video for
that title number.
You can select a track number by pushing
“
” or “” on the “SEEK/TRACK” but-
ton.
If you enter the wrong numbers, touch
“Clear” to delete the numbers.
Touch
, and the previous screen re-
turns. (h) If the player malfunctions
If the player or another unit equipped with
the player malfunction, your audio/video
system will display following messages.
If “DISC CHECK” appears on the dis-
play:
It indicates that the disc dirty, dam-
aged, or it was inserted upside down.
Clean the disc or insert it correctly. If a disc
which is not playable is inserted, “DISC
CHECK” will also appear on the screen.
For appropriate discs for this player, see
“Audio/video system operating hints” on
page 241.
If “REGION CODE ERROR” appears on
the display: It indicates that the DVD re-
gion code is not set properly.
If “DVD ERROR” appears on the dis-
play: It indicates that the inside of the play-
er unit may be too hot due to the very high
ambient temperature. Remove the disc
from the player and allow the player to cool
down.
If the malfunction is not rectified: Take
your vehicle to your dealer.
If an MP3 disc contains CD −DA files, only
CD−DA files are played. If an MP3 disc
contains files other than CD −DA, only MP3
files are played.
Page 242 of 264

AUDIO/VIDEO SYSTEM
246
MP3/WMA FILES
�MP3 (MPEG Audio Layer 3) and WMA
(Windows Media Audio) are audio
compression standards.
�The MP3/WMA player can play MP3
and WMA files on CD−ROM, CD−R
and CD −RW discs.
The unit can play disc recordings com-
patible with ISO 9660 level 1 and level
2 and with the Romeo and Joliet file
system.
�When naming an MP3 or WMA file, add
the appropriate file extension (.mp3 or
.wma).
�The MP3/WMA player plays back files
with .mp3 or .wma file extensions as
MP3 or WMA files. To prevent noise
and playback errors, use the appropri-
ate file extensions.
�The player can play only the first ses-
sion using multi −session compatible
CDs.
�MP3 files are compatible with the ID3
Tag Ver. 1.0, Ver. 1.1, Ver. 2.2, and Ver.
2.3 formats. The unit cannot display
disc title, track title and artist name in
other formats.
�WMA files can contain a WMA tag that
is used in the same way as an ID3 tag.
WMA tags carry information such as
track title, artist name.
�The emphasis function is available
only when playing MP3/WMA files re-
corded at 32, 44.1 and 48 kHz. (The
system can play MP3 files with sam-
pling frequencies of 16, 22.05, and 24
kHz. However, the emphasis function
is not available for files recorded at
these frequencies.)
�The sound quality of MP3/WMA files
generally improves with higher bit rate-
s. In order to achieve a reasonable lev-
el of sound quality, discs recorded with
a bit rate of at least 128 kbps are rec-
ommended.
Playable bit rates
MP3 files:
MPEG1 LAYER3—64 to 320 kbps
MPEG2 LSF LAYER3—64 to 160 kbps
WMA files:
Ver. 7, 8 CBR—48 to 192 kbps
Ver. 9 CBR—48 to 320 kbps
�The MP3/WMA player does not play
back MP3/WMA files from discs re-
corder using packet write data transfer
(UDF format). Discs should be re-
corded using “pre −mastering” software
rather than packet− write software.
�M3u playlists are not compatible with
the audio player.
�MP3i (MP3 interactive) and MP3PRO
formats are not compatible with the au-
dio player.
�The MP3 player is compatible with
VBR (Variable Bit Rate).
�When playing back files recorded as
VBR (Variable Bit Rate) files, the play
time will not be correctly displayed if
fast−forward or reverse operations are
used.
�It is not possible to check folders that
do not include MP3/WMA files.
�MP3/WMA files in folders up to 8 levels
deep can be played. However, the
start of playback may be delayed when
using discs containing numerous lev-
els of folders. For this reason, we rec-
ommend creating discs with no more
than two levels of folders.
�It is possible to play up to 192 folders or
255 files on one disc.
Page 246 of 264

REAR VIEW MONITOR SYSTEM
250
The rear view monitor system assists
the driver by displaying an image of the
view behind the vehicle while backing
up. The image is displayed in reverse
on the screen. This allows the image to
appear in the same manner as that of
the rear view mirror.
Vehicles with smart key system —
To display the rear view image on the
screen, place the shift lever in the “R”
position when the “ENGINE START
STOP” switch is in IGNITION ON mode.
Vehicles without smart key system —
To display the rear view image on the
screen, place the shift lever in the “R”
position when the engine switch is in
“ON” position.
If you move the shift lever out of the “R”
position, the screen returns to the previous
screen. Operating another function of the
navigation system will display another
screen.
The rear view monitor system is a supple-
ment device intended to assist back up.
When backing up, be sure to check behind
and all around the vehicle visually.
CAUTION
�Never depend on the rear view
monitor system entirely when
backing up. Always make sure
your intended path is clear.
Use caution, just as you would
when backing up any vehicle.
�Never back up while looking only at
the screen. The image on the
screen is different from actual
conditions. Depicted distances
between objects and flat surfaces
will differ from actual distance. If
you back up while looking only at
the screen, you may hit a vehicle, a
person or an object. When backing
up, be sure to check behind and all
around the vehicle visually and
with mirrors before proceeding.
�Do not use the system when the
back door is not completely
closed.
�If the back of the vehicle is hit, the
position and mounting angle of the
camera may change. Be sure to
have the camera’s position and
mounting angle checked at your
Toyota dealer.
�As the camera has a water proof
construction, do not detach, disas-
semble or modify it. This may
cause incorrect operation.
�If the temperature changes rapidly,
such as when hot water is poured
on the vehicle in cold weather, the
system may not operate normally.
Rear view monitor system
Page 247 of 264

REAR VIEW MONITOR SYSTEM
251
�If the camera lens becomes dirty, it
cannot transmit a clear image. If
water droplets, snow, or mud ad-
here to the lens, rinse with water
and wipe with a soft cloth. If the
lens is extremely dirty, wash it with
a mild cleanser and rinse.
�Do not allow organic solvent, car
wax, window cleaner or glass coat
to adhere to the camera. If this hap-
pens, wipe it off as soon as pos-
sible.
�Use your own eyes to confirm the
vehicle’s surroundings, as the dis-
played image may become faint or
dark, and moving images will be
distorted, or not entirely visible
when the outside temperature is
low. When backing up, be sure to
check behind and all around the ve-
hicle visually and with mirror be-
fore proceeding.
NOTICE
When replacing the tires, please con-
sult your Toyota dealer. If you re-
place the tires, the area displayed on
the screen may change.
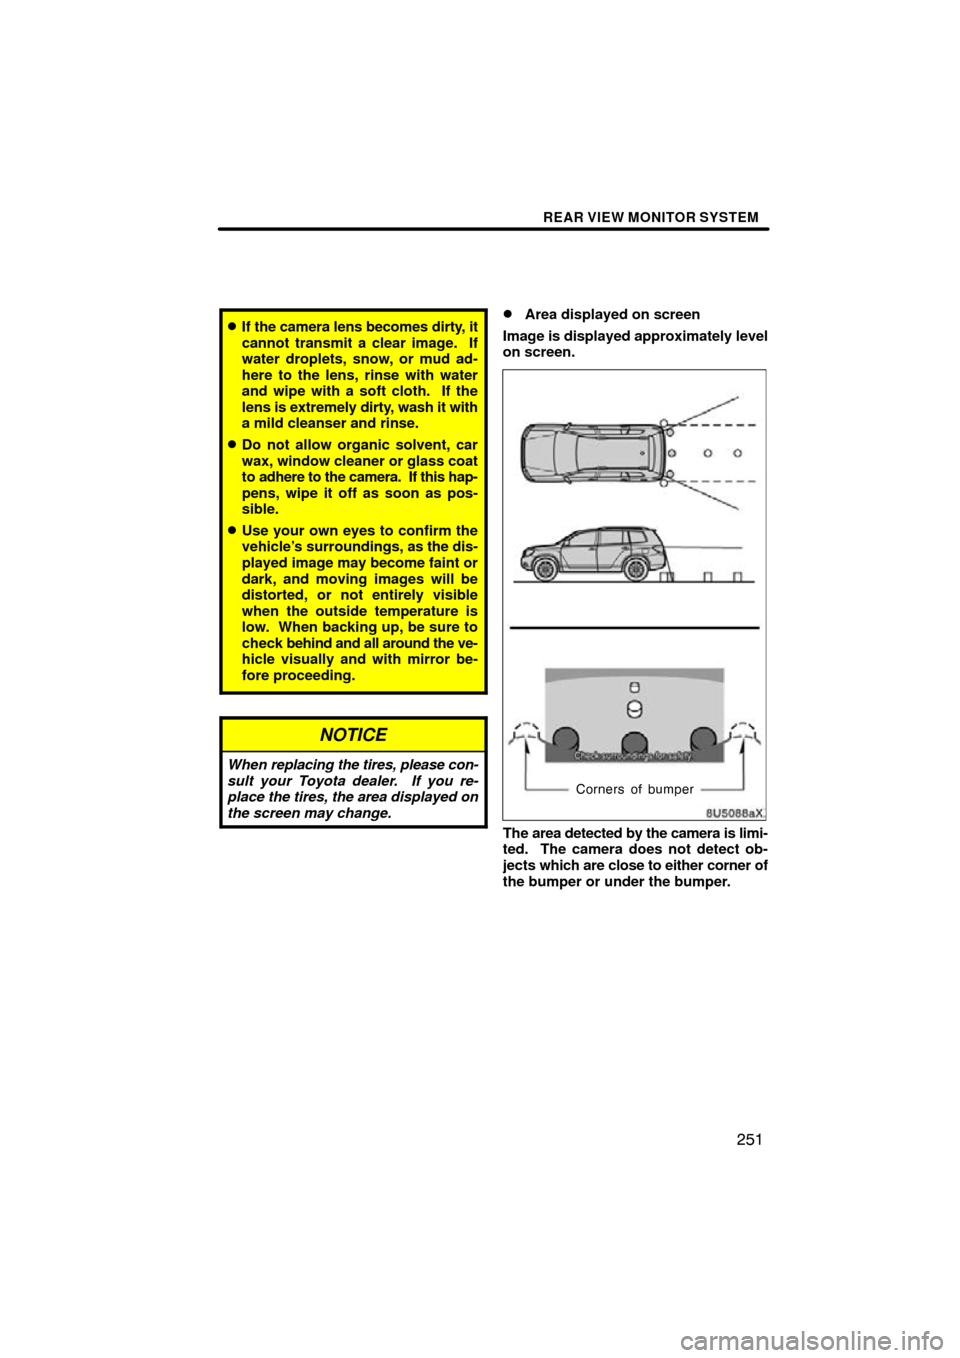
�Area displayed on screen
Image is displayed approximately level
on screen.
Corners of bumper
The area detected by the camera is limi-
ted. The camera does not detect ob-
jects which are close to either corner of
the bumper or under the bumper.