2010 SUZUKI SX4 key
[x] Cancel search: keyPage 105 of 297
3-4
OPERATING YOUR VEHICLE
80J23-03E
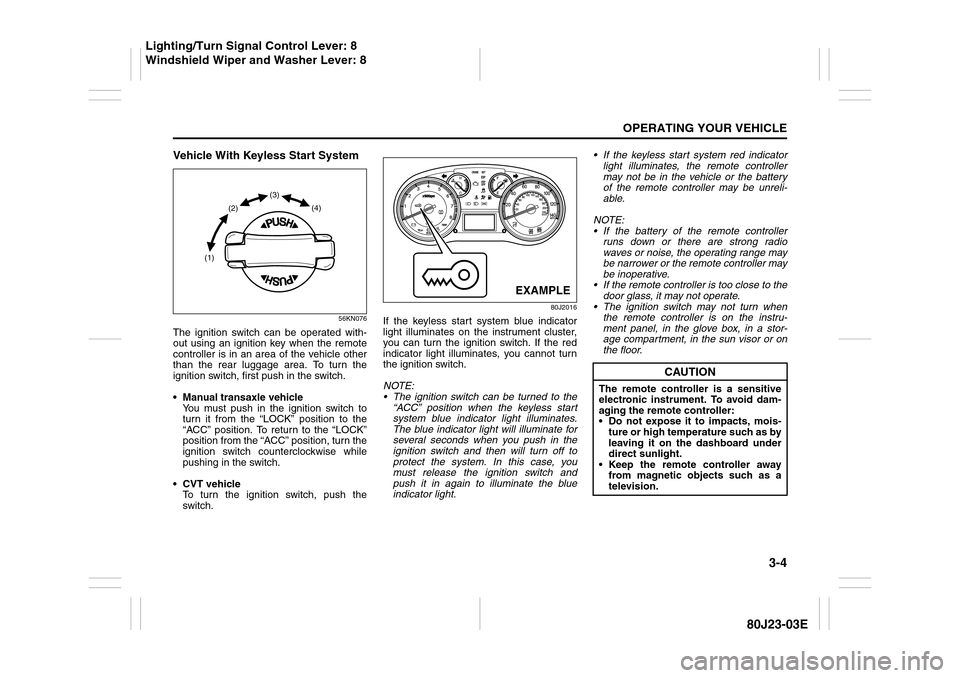
Vehicle With Keyless Start System
56KN076
The ignition switch can be operated with-
out using an ignition key when the remote
controller is in an area of the vehicle other
than the rear luggage area. To turn the
ignition switch, first push in the switch.
Manual transaxle vehicle
You must push in the ignition switch to
turn it from the “LOCK” position to the
“ACC” position. To return to the “LOCK”
position from the “ACC” position, turn the
ignition switch counterclockwise while
pushing in the switch.
CVT vehicle
To turn the ignition switch, push the
switch.
80J2016
If the keyless start system blue indicator
light illuminates on the instrument cluster,
you can turn the ignition switch. If the red
indicator light illuminates, you cannot turn
the ignition switch.
NOTE:
The ignition switch can be turned to the
“ACC” position when the keyless start
system blue indicator light illuminates.
The blue indicator light will illuminate for
several seconds when you push in the
ignition switch and then will turn off to
protect the system. In this case, you
must release the ignition switch and
push it in again to illuminate the blue
indicator light. If the keyless start system red indicator
light illuminates, the remote controller
may not be in the vehicle or the battery
of the remote controller may be unreli-
able.
NOTE:
If the battery of the remote controller
runs down or there are strong radio
waves or noise, the operating range may
be narrower or the remote controller may
be inoperative.
If the remote controller is too close to the
door glass, it may not operate.
The ignition switch may not turn when
the remote controller is on the instru-
ment panel, in the glove box, in a stor-
age compartment, in the sun visor or on
the floor.
(1)(2)(3)
(4)
EXAMPLE
CAUTION
The remote controller is a sensitive
electronic instrument. To avoid dam-
aging the remote controller:
Do not expose it to impacts, mois-
ture or high temperature such as by
leaving it on the dashboard under
direct sunlight.
Keep the remote controller away
from magnetic objects such as a
television.
Lighting/Turn Signal Control Lever: 8
Windshield Wiper and Washer Lever: 8
Page 106 of 297
3-5OPERATING YOUR VEHICLE
80J23-03E
If you leave any of the doors open with the
ignition switch in the “ACC” position for a
while (and no key inserted), the engine
may not start when you turn the ignition
switch to “START”. If the engine does not
start, close all doors completely or turn the
ignition switch back to the “LOCK” position,
then start the engine.
The ignition switch has the following four
positions:
LOCK (1)
This is the normal parking position. It is the
only position in which the key can be
removed. It locks the ignition, and prevents
normal use of the steering wheel.
For vehicles with a CVT, the gearshift lever
must be in the “P” (Park) position to turn
the key to the “LOCK” position.
To release the steering lock, turn the igni-
tion switch clockwise to one of the other
positions. If you have trouble turning the
ignition switch to unlock the steering, try
turning the steering wheel slightly to the
right or left while turning the switch.
Manual transaxle vehicle
You must push in the ignition switch to
turn it from the “LOCK” position to the
“ACC” position. To return to the “LOCK”
position from the “ACC” position, turn the
ignition switch counterclockwise while
pushing in the switch.CVT vehicle
To turn the ignition switch, push the
switch.
ACC (2)
Accessories such as the radio can oper-
ate, but the engine is off.
ON (3)
This is the normal operating position. All
electrical systems are on.
START (4)
This is the position for starting the engine
using the starter motor. The switch should
be released from this position as soon as
the engine starts.
Ignition switch reminder
(When using the keyless start system)
A buzzer sounds intermittently to remind
you to return the ignition switch to the
“LOCK” position if it is in the “ACC” position
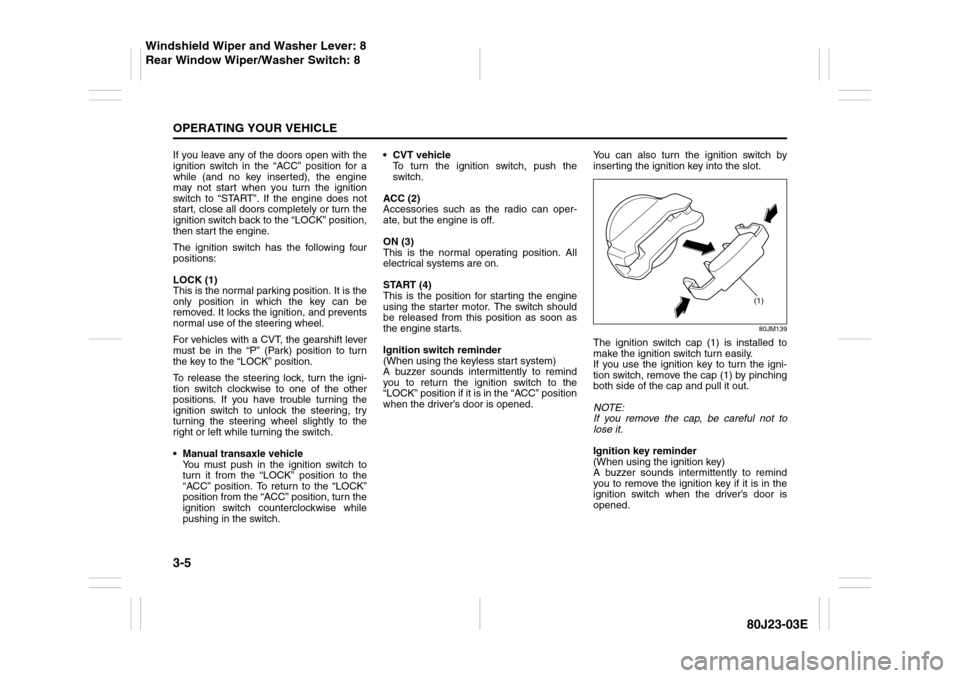
when the driver’s door is opened.You can also turn the ignition switch by
inserting the ignition key into the slot.
80JM139
The ignition switch cap (1) is installed to
make the ignition switch turn easily.
If you use the ignition key to turn the igni-
tion switch, remove the cap (1) by pinching
both side of the cap and pull it out.
NOTE:
If you remove the cap, be careful not to
lose it.
Ignition key reminder
(When using the ignition key)
A buzzer sounds intermittently to remind
you to remove the ignition key if it is in the
ignition switch when the driver’s door is
opened.
(1)
Windshield Wiper and Washer Lever: 8
Rear Window Wiper/Washer Switch: 8
Page 107 of 297
3-6
OPERATING YOUR VEHICLE
80J23-03E
81A297S
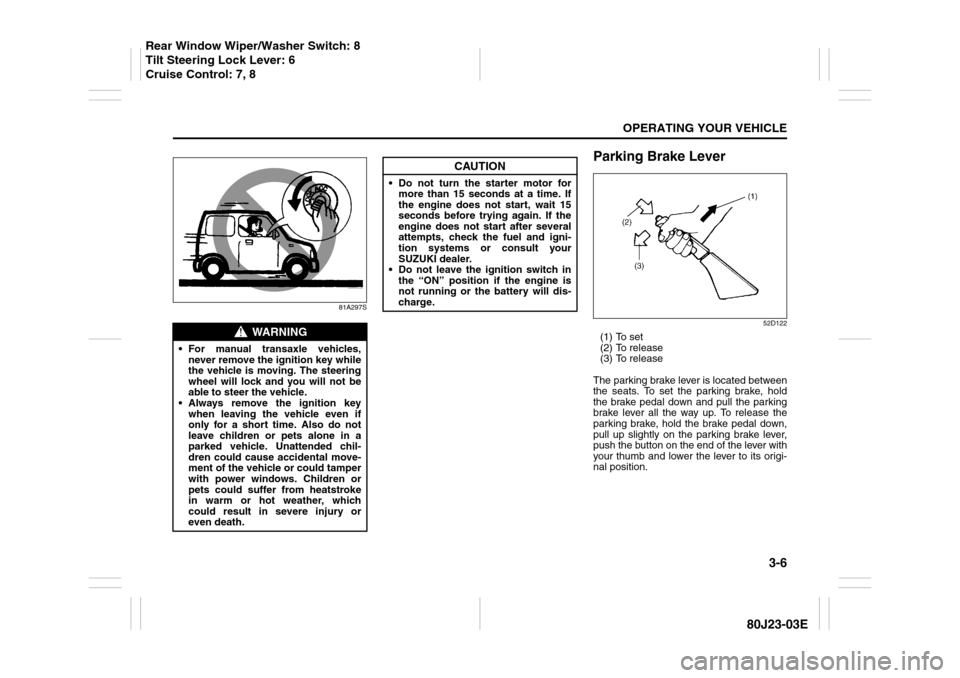
Parking Brake Lever
52D122
(1) To set
(2) To release
(3) To release
The parking brake lever is located between
the seats. To set the parking brake, hold
the brake pedal down and pull the parking
brake lever all the way up. To release the
parking brake, hold the brake pedal down,
pull up slightly on the parking brake lever,
push the button on the end of the lever with
your thumb and lower the lever to its origi-
nal position.
WARNING
For manual transaxle vehicles,
never remove the ignition key while
the vehicle is moving. The steering
wheel will lock and you will not be
able to steer the vehicle.
Always remove the ignition key
when leaving the vehicle even if
only for a short time. Also do not
leave children or pets alone in a
parked vehicle. Unattended chil-
dren could cause accidental move-
ment of the vehicle or could tamper
with power windows. Children or
pets could suffer from heatstroke
in warm or hot weather, which
could result in severe injury or
even death.
CAUTION
Do not turn the starter motor for
more than 15 seconds at a time. If
the engine does not start, wait 15
seconds before trying again. If the
engine does not start after several
attempts, check the fuel and igni-
tion systems or consult your
SUZUKI dealer.
Do not leave the ignition switch in
the “ON” position if the engine is
not running or the battery will dis-
charge.
Rear Window Wiper/Washer Switch: 8
Tilt Steering Lock Lever: 6
Cruise Control: 7, 8
Page 110 of 297
3-9OPERATING YOUR VEHICLE
80J23-03E
Starting a Cold EngineWith your foot off the accelerator pedal,
crank the engine by turning the ignition key
to “START”. Release the key when the
engine starts.
If the engine does not start after 15 sec-
onds of cranking, wait about 15 seconds,
then press down the accelerator pedal to
1/3 of its travel and try cranking the engine
again. Release the key and accelerator
pedal when the engine starts.
If the engine still does not start, try holding
the accelerator pedal all the way to the
floor while cranking. This should clear the
engine if it is flooded.
If you are unable to start the engine using
this procedure, consult your SUZUKI
dealer.Starting a Warm EngineUse the same procedure as for “Starting a
Cold Engine”.
Engine Block Heater
(if equipped)
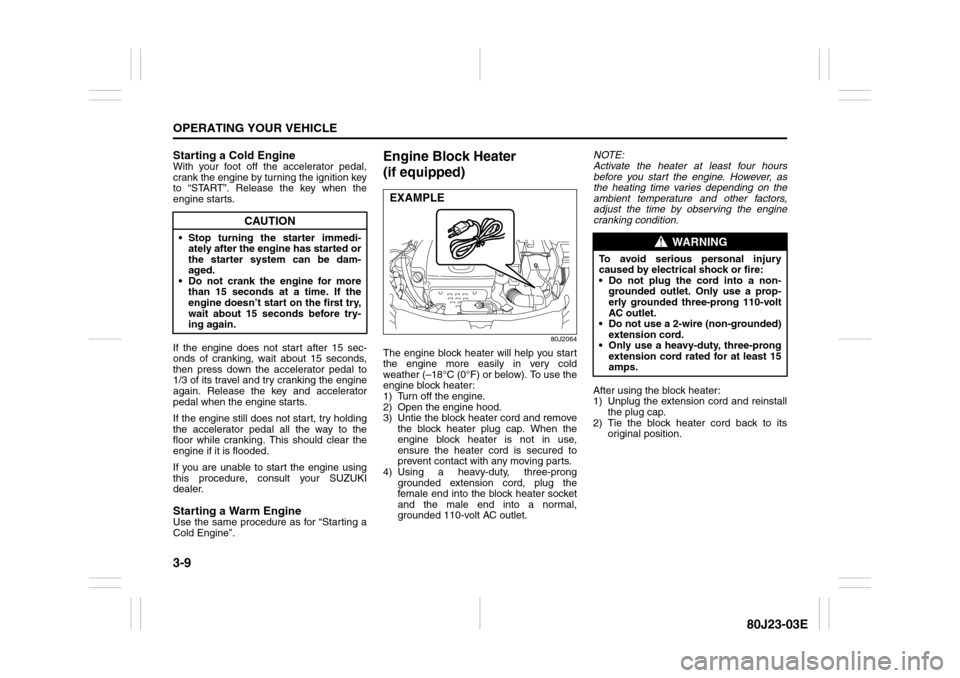
80J2064
The engine block heater will help you start
the engine more easily in very cold
weather (–18°C (0°F) or below). To use the
engine block heater:
1) Turn off the engine.
2) Open the engine hood.
3) Untie the block heater cord and remove
the block heater plug cap. When the
engine block heater is not in use,
ensure the heater cord is secured to
prevent contact with any moving parts.
4) Using a heavy-duty, three-prong
grounded extension cord, plug the
female end into the block heater socket
and the male end into a normal,
grounded 110-volt AC outlet.NOTE:
Activate the heater at least four hours
before you start the engine. However, as
the heating time varies depending on the
ambient temperature and other factors,
adjust the time by observing the engine
cranking condition.
After using the block heater:
1) Unplug the extension cord and reinstall
the plug cap.
2) Tie the block heater cord back to its
original position.
CAUTION
Stop turning the starter immedi-
ately after the engine has started or
the starter system can be dam-
aged.
Do not crank the engine for more
than 15 seconds at a time. If the
engine doesn’t start on the first try,
wait about 15 seconds before try-
ing again.
EXAMPLE
WARNING
To avoid serious personal injury
caused by electrical shock or fire:
Do not plug the cord into a non-
grounded outlet. Only use a prop-
erly grounded three-prong 110-volt
AC outlet.
Do not use a 2-wire (non-grounded)
extension cord.
Only use a heavy-duty, three-prong
extension cord rated for at least 15
amps.
Page 116 of 297
3-15OPERATING YOUR VEHICLE
80J23-03E
Canceling the manual mode
To cancel the manual mode, shift the gear-
shift lever from “M” to “D”.
Temporary manual mode
Pull the shift paddle (if equipped) toward
you when driving with the gearshift lever in
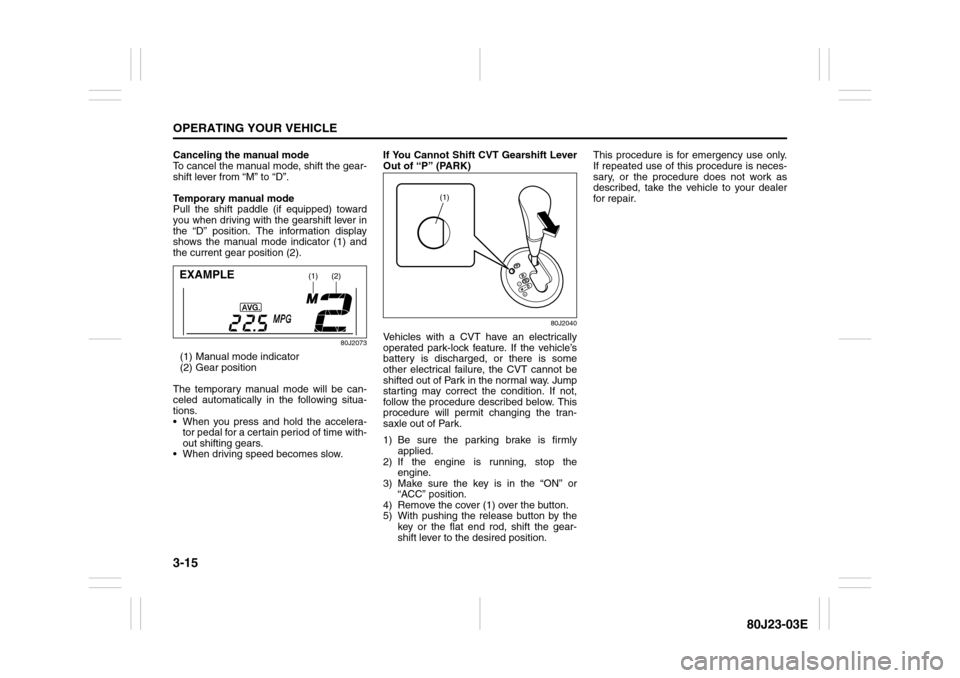
the “D” position. The information display
shows the manual mode indicator (1) and
the current gear position (2).
80J2073
(1) Manual mode indicator
(2) Gear position
The temporary manual mode will be can-
celed automatically in the following situa-
tions.
When you press and hold the accelera-
tor pedal for a certain period of time with-
out shifting gears.
When driving speed becomes slow.If You Cannot Shift CVT Gearshift Lever
Out of “P” (PARK)
80J2040
Vehicles with a CVT have an electrically
operated park-lock feature. If the vehicle’s
battery is discharged, or there is some
other electrical failure, the CVT cannot be
shifted out of Park in the normal way. Jump
starting may correct the condition. If not,
follow the procedure described below. This
procedure will permit changing the tran-
saxle out of Park.
1) Be sure the parking brake is firmly
applied.
2) If the engine is running, stop the
engine.
3) Make sure the key is in the “ON” or
“ACC” position.
4) Remove the cover (1) over the button.
5) With pushing the release button by the
key or the flat end rod, shift the gear-
shift lever to the desired position.This procedure is for emergency use only.
If repeated use of this procedure is neces-
sary, or the procedure does not work as
described, take the vehicle to your dealer
for repair.
(1)
(2)
EXAMPLE
(1)
Page 118 of 297
3-17OPERATING YOUR VEHICLE
80J23-03E
From i-AWD AUTO to i-AWD LOCK
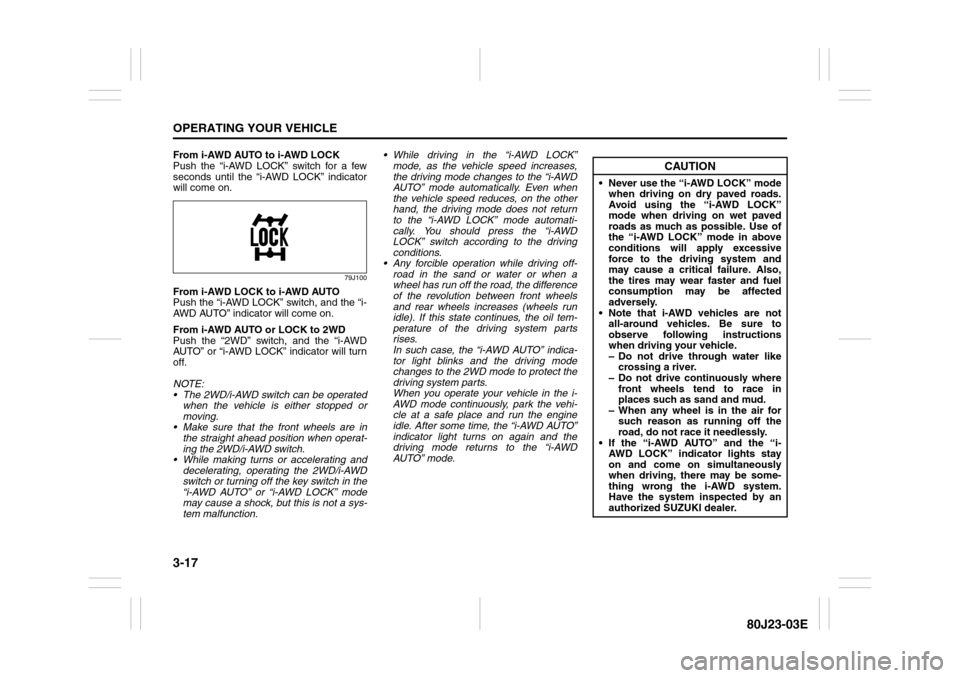
Push the “i-AWD LOCK” switch for a few
seconds until the “i-AWD LOCK” indicator
will come on.
79J100
From i-AWD LOCK to i-AWD AUTO
Push the “i-AWD LOCK” switch, and the “i-
AWD AUTO” indicator will come on.
From i-AWD AUTO or LOCK to 2WD
Push the “2WD” switch, and the “i-AWD
AUTO” or “i-AWD LOCK” indicator will turn
off.
NOTE:
The 2WD/i-AWD switch can be operated
when the vehicle is either stopped or
moving.
Make sure that the front wheels are in
the straight ahead position when operat-
ing the 2WD/i-AWD switch.
While making turns or accelerating and
decelerating, operating the 2WD/i-AWD
switch or turning off the key switch in the
“i-AWD AUTO” or “i-AWD LOCK” mode
may cause a shock, but this is not a sys-
tem malfunction. While driving in the “i-AWD LOCK”
mode, as the vehicle speed increases,
the driving mode changes to the “i-AWD
AUTO” mode automatically. Even when
the vehicle speed reduces, on the other
hand, the driving mode does not return
to the “i-AWD LOCK” mode automati-
cally. You should press the “i-AWD
LOCK” switch according to the driving
conditions.
Any forcible operation while driving off-
road in the sand or water or when a
wheel has run off the road, the difference
of the revolution between front wheels
and rear wheels increases (wheels run
idle). If this state continues, the oil tem-
perature of the driving system parts
rises.
In such case, the “i-AWD AUTO” indica-
tor light blinks and the driving mode
changes to the 2WD mode to protect the
driving system parts.
When you operate your vehicle in the i-
AWD mode continuously, park the vehi-
cle at a safe place and run the engine
idle. After some time, the “i-AWD AUTO”
indicator light turns on again and the
driving mode returns to the “i-AWD
AUTO” mode.
CAUTION
Never use the “i-AWD LOCK” mode
when driving on dry paved roads.
Avoid using the “i-AWD LOCK”
mode when driving on wet paved
roads as much as possible. Use of
the “i-AWD LOCK” mode in above
conditions will apply excessive
force to the driving system and
may cause a critical failure. Also,
the tires may wear faster and fuel
consumption may be affected
adversely.
Note that i-AWD vehicles are not
all-around vehicles. Be sure to
observe following instructions
when driving your vehicle.
– Do not drive through water like
crossing a river.
– Do not drive continuously where
front wheels tend to race in
places such as sand and mud.
– When any wheel is in the air for
such reason as running off the
road, do not race it needlessly.
If the “i-AWD AUTO” and the “i-
AWD LOCK” indicator lights stay
on and come on simultaneously
when driving, there may be some-
thing wrong the i-AWD system.
Have the system inspected by an
authorized SUZUKI dealer.
Page 137 of 297
4-4
DRIVING TIPS
80J23-03E
Driving on Slippery Roads
60G089S
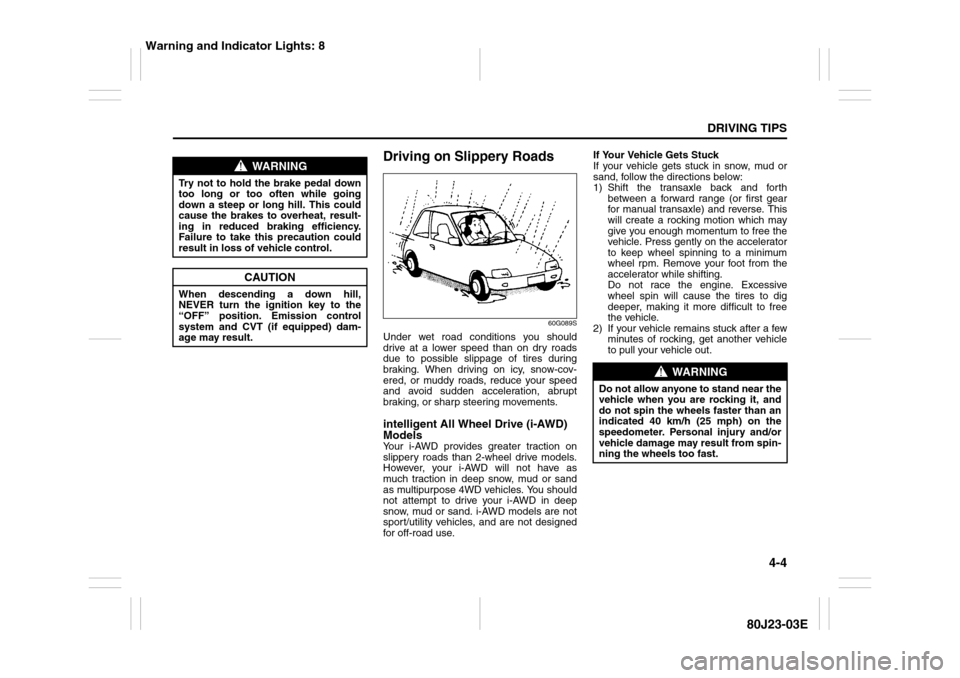
Under wet road conditions you should
drive at a lower speed than on dry roads
due to possible slippage of tires during
braking. When driving on icy, snow-cov-
ered, or muddy roads, reduce your speed
and avoid sudden acceleration, abrupt
braking, or sharp steering movements.intelligent All Wheel Drive (i-AWD)
ModelsYour i-AWD provides greater traction on
slippery roads than 2-wheel drive models.
However, your i-AWD will not have as
much traction in deep snow, mud or sand
as multipurpose 4WD vehicles. You should
not attempt to drive your i-AWD in deep
snow, mud or sand. i-AWD models are not
sport/utility vehicles, and are not designed
for off-road use.If Your Vehicle Gets Stuck
If your vehicle gets stuck in snow, mud or
sand, follow the directions below:
1) Shift the transaxle back and forth
between a forward range (or first gear
for manual transaxle) and reverse. This
will create a rocking motion which may
give you enough momentum to free the
vehicle. Press gently on the accelerator
to keep wheel spinning to a minimum
wheel rpm. Remove your foot from the
accelerator while shifting.
Do not race the engine. Excessive
wheel spin will cause the tires to dig
deeper, making it more difficult to free
the vehicle.
2) If your vehicle remains stuck after a few
minutes of rocking, get another vehicle
to pull your vehicle out.
WARNING
Try not to hold the brake pedal down
too long or too often while going
down a steep or long hill. This could
cause the brakes to overheat, result-
ing in reduced braking efficiency.
Failure to take this precaution could
result in loss of vehicle control.
CAUTION
When descending a down hill,
NEVER turn the ignition key to the
“OFF” position. Emission control
system and CVT (if equipped) dam-
age may result.
WARNING
Do not allow anyone to stand near the
vehicle when you are rocking it, and
do not spin the wheels faster than an
indicated 40 km/h (25 mph) on the
speedometer. Personal injury and/or
vehicle damage may result from spin-
ning the wheels too fast.
Warning and Indicator Lights: 8
Page 186 of 297
5-45OTHER CONTROLS AND EQUIPMENT
80J23-03E
80JS024
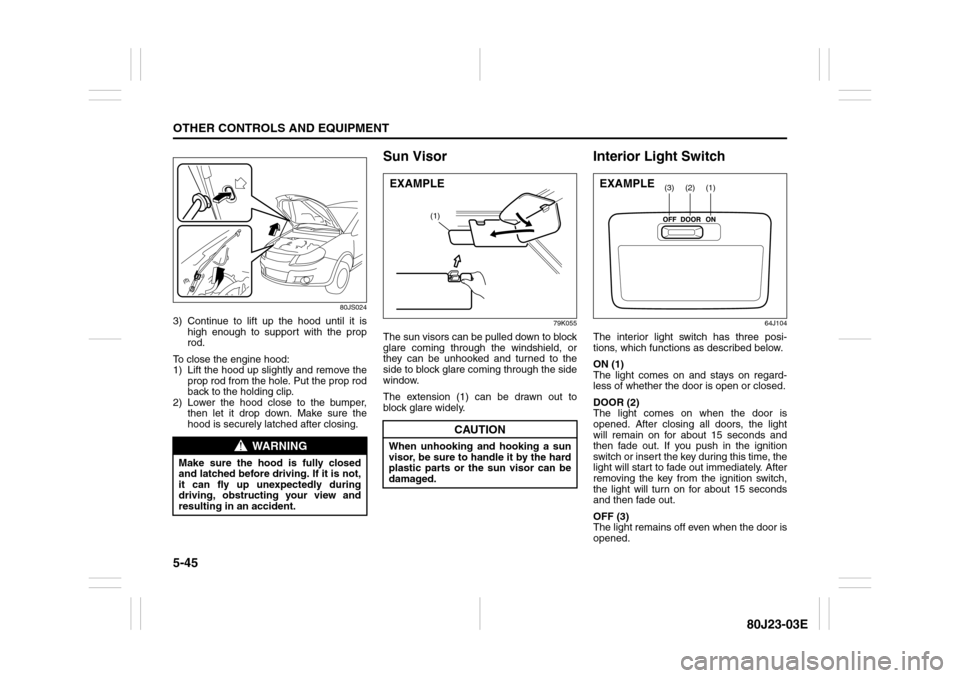
3) Continue to lift up the hood until it is
high enough to support with the prop
rod.
To close the engine hood:
1) Lift the hood up slightly and remove the
prop rod from the hole. Put the prop rod
back to the holding clip.
2) Lower the hood close to the bumper,
then let it drop down. Make sure the
hood is securely latched after closing.
Sun Visor
79K055
The sun visors can be pulled down to block
glare coming through the windshield, or
they can be unhooked and turned to the
side to block glare coming through the side
window.
The extension (1) can be drawn out to
block glare widely.
Interior Light Switch
64J104
The interior light switch has three posi-
tions, which functions as described below.
ON (1)
The light comes on and stays on regard-
less of whether the door is open or closed.
DOOR (2)
The light comes on when the door is
opened. After closing all doors, the light
will remain on for about 15 seconds and
then fade out. If you push in the ignition
switch or insert the key during this time, the
light will start to fade out immediately. After
removing the key from the ignition switch,
the light will turn on for about 15 seconds
and then fade out.
OFF (3)
The light remains off even when the door is
opened.
WARNING
Make sure the hood is fully closed
and latched before driving. If it is not,
it can fly up unexpectedly during
driving, obstructing your view and
resulting in an accident.
CAUTION
When unhooking and hooking a sun
visor, be sure to handle it by the hard
plastic parts or the sun visor can be
damaged.
(1)
EXAMPLE
(1)
(2)
(3)
EXAMPLE