2010 SUZUKI SX4 seat adjustment
[x] Cancel search: seat adjustmentPage 28 of 297
2-11BEFORE DRIVING
80J23-03E
80J2076
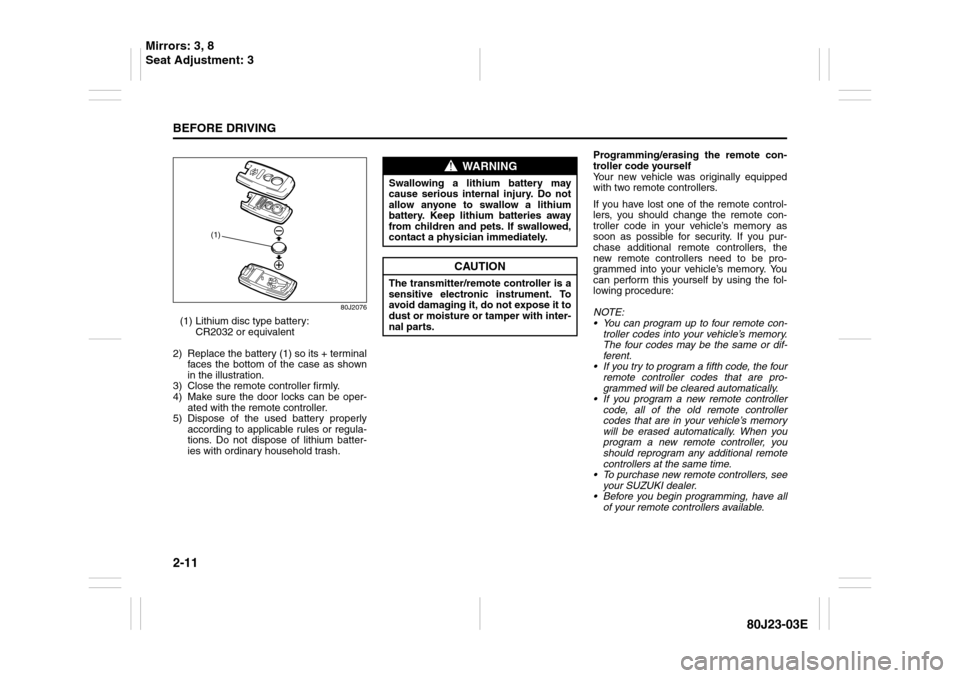
(1) Lithium disc type battery:
CR2032 or equivalent
2) Replace the battery (1) so its + terminal
faces the bottom of the case as shown
in the illustration.
3) Close the remote controller firmly.
4) Make sure the door locks can be oper-
ated with the remote controller.
5) Dispose of the used battery properly
according to applicable rules or regula-
tions. Do not dispose of lithium batter-
ies with ordinary household trash.Programming/erasing the remote con-
troller code yourself
Your new vehicle was originally equipped
with two remote controllers.
If you have lost one of the remote control-
lers, you should change the remote con-
troller code in your vehicle’s memory as
soon as possible for security. If you pur-
chase additional remote controllers, the
new remote controllers need to be pro-
grammed into your vehicle’s memory. You
can perform this yourself by using the fol-
lowing procedure:
NOTE:
You can program up to four remote con-
troller codes into your vehicle’s memory.
The four codes may be the same or dif-
ferent.
If you try to program a fifth code, the four
remote controller codes that are pro-
grammed will be cleared automatically.
If you program a new remote controller
code, all of the old remote controller
codes that are in your vehicle’s memory
will be erased automatically. When you
program a new remote controller, you
should reprogram any additional remote
controllers at the same time.
To purchase new remote controllers, see
your SUZUKI dealer.
Before you begin programming, have all
of your remote controllers available.
(1)
WARNING
Swallowing a lithium battery may
cause serious internal injury. Do not
allow anyone to swallow a lithium
battery. Keep lithium batteries away
from children and pets. If swallowed,
contact a physician immediately.
CAUTION
The transmitter/remote controller is a
sensitive electronic instrument. To
avoid damaging it, do not expose it to
dust or moisture or tamper with inter-
nal parts.
Mirrors: 3, 8
Seat Adjustment: 3
Page 29 of 297
2-12
BEFORE DRIVING
80J23-03E
To program a new remote controller
1) Close all the doors of the vehicle.
2) Sit in the driver’s seat and confirm that
the driver’s door is unlocked.
3) Insert the key into the ignition switch.
4) Complete steps 1 through 6 described
below within 25 seconds after step 3).
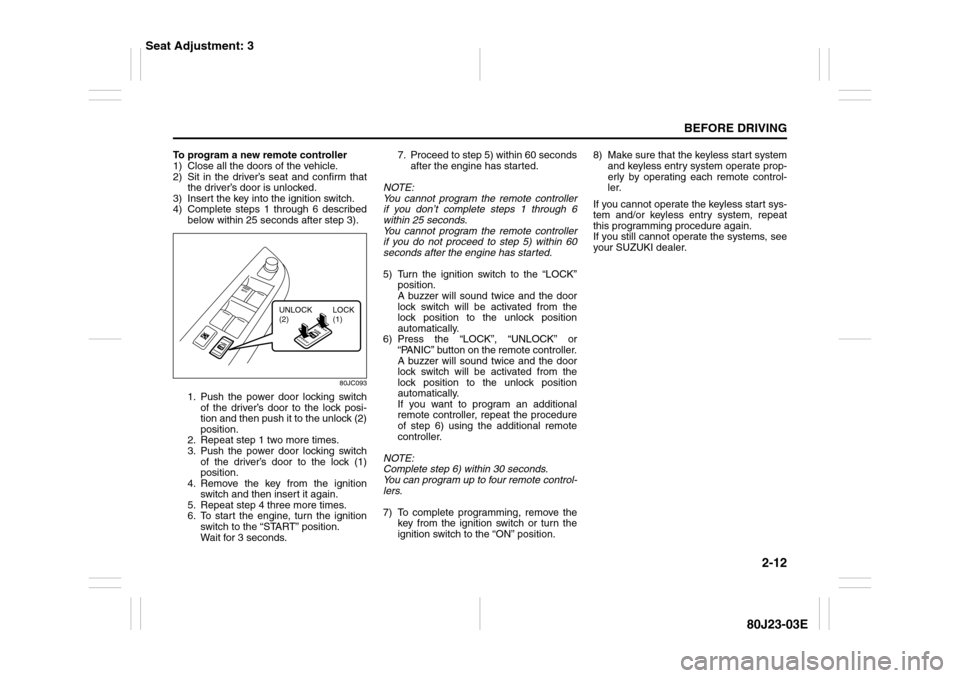
80JC093
1. Push the power door locking switch
of the driver’s door to the lock posi-
tion and then push it to the unlock (2)
position.
2. Repeat step 1 two more times.
3. Push the power door locking switch
of the driver’s door to the lock (1)
position.
4. Remove the key from the ignition
switch and then insert it again.
5. Repeat step 4 three more times.
6. To start the engine, turn the ignition
switch to the “START” position.
Wait for 3 seconds.7. Proceed to step 5) within 60 seconds
after the engine has started.
NOTE:
You cannot program the remote controller
if you don’t complete steps 1 through 6
within 25 seconds.
You cannot program the remote controller
if you do not proceed to step 5) within 60
seconds after the engine has started.
5) Turn the ignition switch to the “LOCK”
position.
A buzzer will sound twice and the door
lock switch will be activated from the
lock position to the unlock position
automatically.
6) Press the “LOCK”, “UNLOCK” or
“PANIC” button on the remote controller.
A buzzer will sound twice and the door
lock switch will be activated from the
lock position to the unlock position
automatically.
If you want to program an additional
remote controller, repeat the procedure
of step 6) using the additional remote
controller.
NOTE:
Complete step 6) within 30 seconds.
You can program up to four remote control-
lers.
7) To complete programming, remove the
key from the ignition switch or turn the
ignition switch to the “ON” position.8) Make sure that the keyless start system
and keyless entry system operate prop-
erly by operating each remote control-
ler.
If you cannot operate the keyless start sys-
tem and/or keyless entry system, repeat
this programming procedure again.
If you still cannot operate the systems, see
your SUZUKI dealer.
UNLOCK
(2)LOCK
(1)
Seat Adjustment: 3
Page 30 of 297

2-13BEFORE DRIVING
80J23-03E
To change the old remote controller
codes in your vehicle’s memory
If you have lost one of the remote control-
lers, you should change the remote con-
troller codes in your vehicle’s memory as
soon as possible for security.
To erase the remote controller code(s) in
your vehicle’s memory, you should pro-
gram the new remote controller code. The
old codes in your vehicle’s memory will be
erased automatically. If you have more
remote controller(s), you must program all
of the remote controller codes at the same
time. You cannot operate the keyless start
system and keyless entry system using
any remote controller that is not pro-
grammed at the same time.
For details on how to program, refer to the
programming procedure in this section.
When you complete programming, make
sure that the keyless start system and key-
less entry system operate properly by
operating each remote controller.1. For USA
This device complies with Part 15 of the
FCC Rules. Operation is subject to the fol-
lowing two conditions:
1) This device may not cause harmful
interference, and
2) This device must accept any interfer-
ence received, including interference
that may cause undesired operation.
NOTE:
Changes or modifications not expressly
approved by the party responsible for com-
pliance could void the user’s authority to
operate the equipment.
2. For Canada
This device complies with Industry Canada
Standard RSS-210. Operation is subject to
the following two conditions:
1) This device may not cause interference,
and
2) This device must accept any interfer-
ence, including interference that may
cause undesired operation of the
device.
The term “IC:” before the certification/reg-
istration number only signifies that the
Industry Canada technical specifications
were met.Keyless Entry System Transmitter
(Type B)
52D209
(1) “LOCK” button
(2) “UNLOCK” button
(3) “PANIC” button
“LOCK” button (1) / “UNLOCK” button
(2) function
You can lock or unlock all doors (including
the tailgate of SX4) simultaneously by
operating the transmitter near the vehicle.
To lock the doors, push the “LOCK” but-
ton (1).
To unlock the driver’s door, push the
“UNLOCK” button (2) once.
To unlock other doors, wait a second or
two, then push the “UNLOCK” button (2)
a second time. If you “double-click” too
fast, the doors will not unlock.
(1)
(2)
(3)
Seat Adjustment: 3
Head Restraints: 3
Page 37 of 297
2-20
BEFORE DRIVING
80J23-03E
Outside Rearview Mirrors
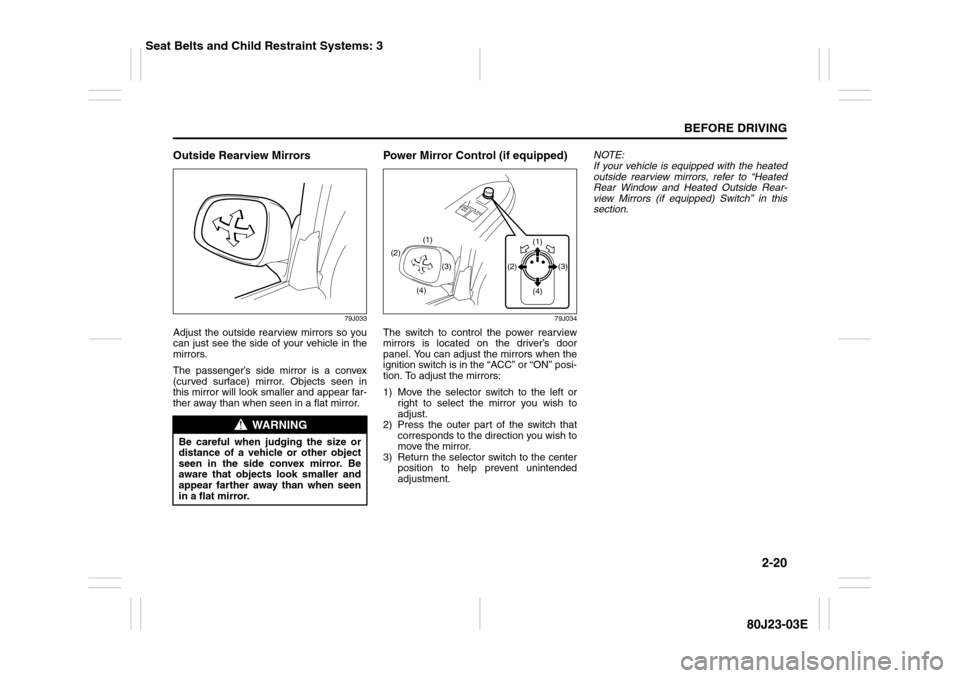
79J033
Adjust the outside rearview mirrors so you
can just see the side of your vehicle in the
mirrors.
The passenger’s side mirror is a convex
(curved surface) mirror. Objects seen in
this mirror will look smaller and appear far-
ther away than when seen in a flat mirror.
Power Mirror Control (if equipped)
79J034
The switch to control the power rearview
mirrors is located on the driver’s door
panel. You can adjust the mirrors when the
ignition switch is in the “ACC” or “ON” posi-
tion. To adjust the mirrors:
1) Move the selector switch to the left or
right to select the mirror you wish to
adjust.
2) Press the outer part of the switch that
corresponds to the direction you wish to
move the mirror.
3) Return the selector switch to the center
position to help prevent unintended
adjustment.NOTE:
If your vehicle is equipped with the heated
outside rearview mirrors, refer to “Heated
Rear Window and Heated Outside Rear-
view Mirrors (if equipped) Switch” in this
section.
WARNING
Be careful when judging the size or
distance of a vehicle or other object
seen in the side convex mirror. Be
aware that objects look smaller and
appear farther away than when seen
in a flat mirror.
(2)
(4)(3) (1)
(1)
(3) (2)
(4)
Seat Belts and Child Restraint Systems: 3
Page 38 of 297
2-21BEFORE DRIVING
80J23-03E
Front SeatsSeat AdjustmentAdjusting Seat Position
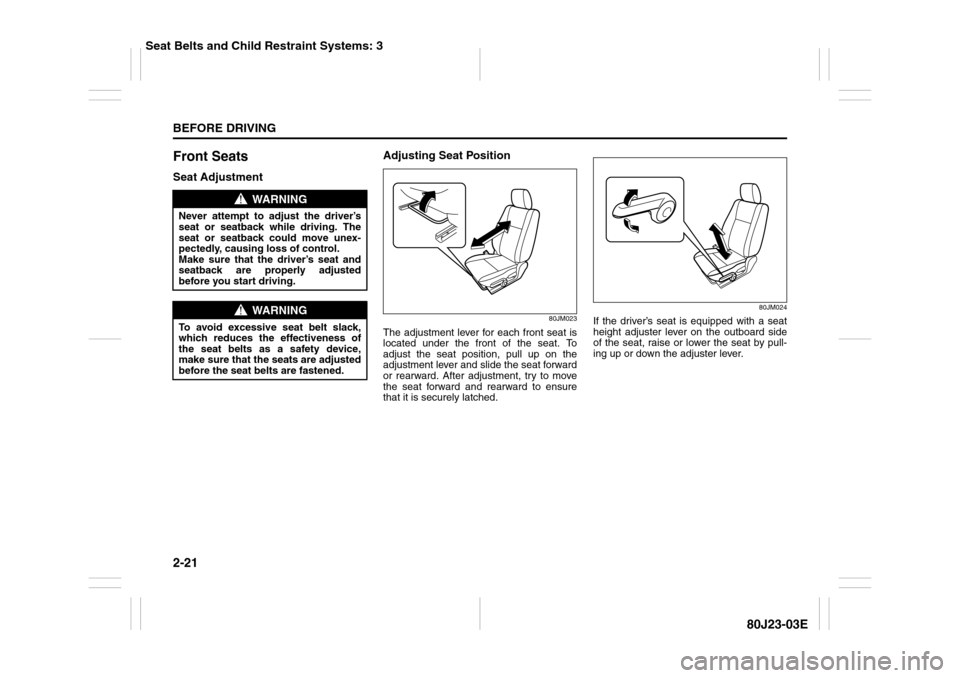
80JM023
The adjustment lever for each front seat is
located under the front of the seat. To
adjust the seat position, pull up on the
adjustment lever and slide the seat forward
or rearward. After adjustment, try to move
the seat forward and rearward to ensure
that it is securely latched.
80JM024
If the driver’s seat is equipped with a seat
height adjuster lever on the outboard side
of the seat, raise or lower the seat by pull-
ing up or down the adjuster lever.
WARNING
Never attempt to adjust the driver’s
seat or seatback while driving. The
seat or seatback could move unex-
pectedly, causing loss of control.
Make sure that the driver’s seat and
seatback are properly adjusted
before you start driving.
WARNING
To avoid excessive seat belt slack,
which reduces the effectiveness of
the seat belts as a safety device,
make sure that the seats are adjusted
before the seat belts are fastened.
Seat Belts and Child Restraint Systems: 3
Page 39 of 297
2-22
BEFORE DRIVING
80J23-03E
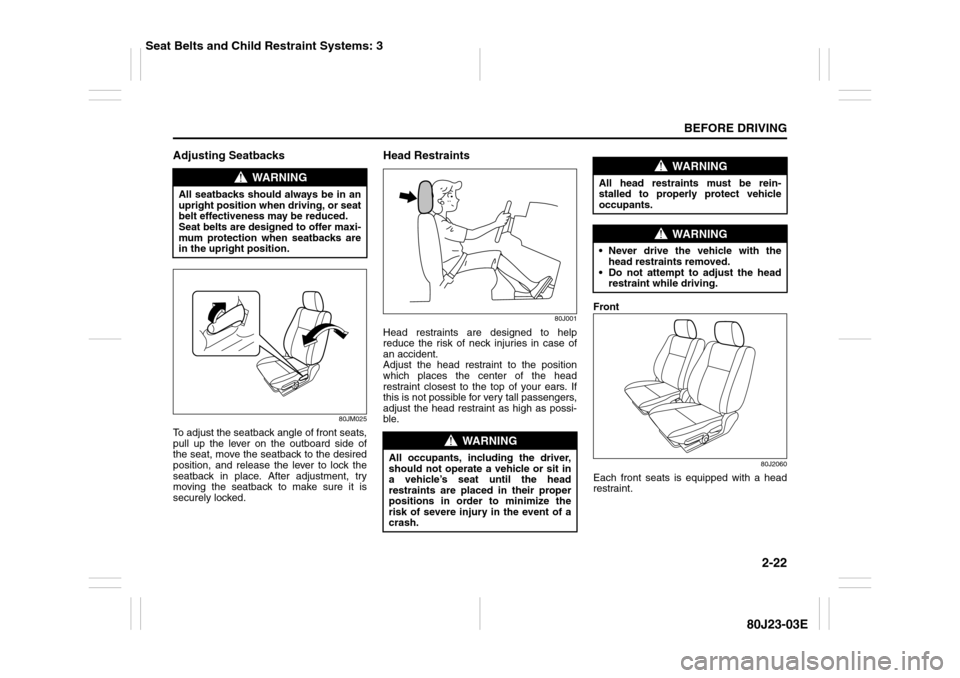
Adjusting Seatbacks
80JM025
To adjust the seatback angle of front seats,
pull up the lever on the outboard side of
the seat, move the seatback to the desired
position, and release the lever to lock the
seatback in place. After adjustment, try
moving the seatback to make sure it is
securely locked.
Head Restraints
80J001
Head restraints are designed to help
reduce the risk of neck injuries in case of
an accident.
Adjust the head restraint to the position
which places the center of the head
restraint closest to the top of your ears. If
this is not possible for very tall passengers,
adjust the head restraint as high as possi-
ble.Front
80J2060
Each front seats is equipped with a head
restraint.
WARNING
All seatbacks should always be in an
upright position when driving, or seat
belt effectiveness may be reduced.
Seat belts are designed to offer maxi-
mum protection when seatbacks are
in the upright position.
WARNING
All occupants, including the driver,
should not operate a vehicle or sit in
a vehicle’s seat until the head
restraints are placed in their proper
positions in order to minimize the
risk of severe injury in the event of a
crash.
WARNING
All head restraints must be rein-
stalled to properly protect vehicle
occupants.
WARNING
Never drive the vehicle with the
head restraints removed.
Do not attempt to adjust the head
restraint while driving.
Seat Belts and Child Restraint Systems: 3
Page 51 of 297
2-34
BEFORE DRIVING
80J23-03E
Front passenger’s seat belt reminder
The front passenger’s seat belt reminder
will activate only when there is a passen-
ger sitting in the front seat. In some situa-
tions, however, such as when you place
heavy objects in the front seat, the seat
belt reminder can be activated as if there
were a passenger present. The front pas-
senger’s seat belt reminder works in the
same manner as the driver’s seat belt
reminder, except that it is not activated
until 10 seconds after the ignition switch is
turned to the “ON” position.
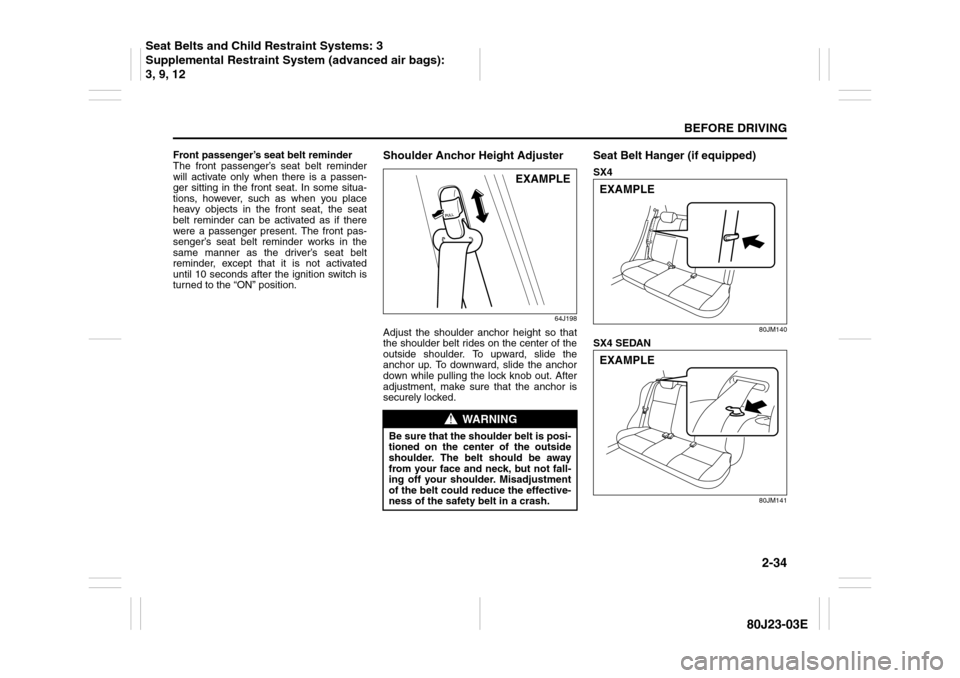
Shoulder Anchor Height Adjuster
64J198
Adjust the shoulder anchor height so that
the shoulder belt rides on the center of the
outside shoulder. To upward, slide the
anchor up. To downward, slide the anchor
down while pulling the lock knob out. After
adjustment, make sure that the anchor is
securely locked.
Seat Belt Hanger (if equipped)SX4
80JM140
SX4 SEDAN
80JM141
WARNING
Be sure that the shoulder belt is posi-
tioned on the center of the outside
shoulder. The belt should be away
from your face and neck, but not fall-
ing off your shoulder. Misadjustment
of the belt could reduce the effective-
ness of the safety belt in a crash.
EXAMPLE
EXAMPLEEXAMPLE
Seat Belts and Child Restraint Systems: 3
Supplemental Restraint System (advanced air bags):
3, 9, 12
Page 62 of 297
2-45BEFORE DRIVING
80J23-03E
5) When routing the top strap, be sure to
pass the top strap as shown in the illus-
tration. For SX4 SEDAN, if the top strap
cannot be properly tightened when
passed under the head restraint as
shown in the Type 1 and Type 2 illustra-
tions, pass the top strap over the top of
the head restraint as shown in the Type
3 illustration. (Refer to “Head
Restraints” section for details on how to
raise or lower the head restraint.)
6) Make sure that cargo does not interfere
with routing of the top strap.
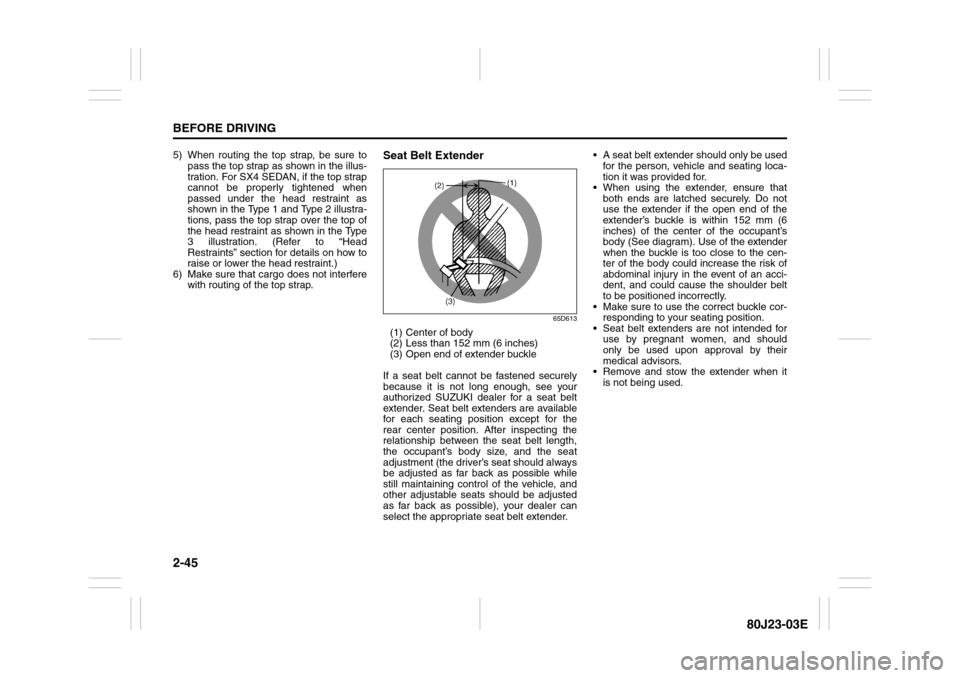
Seat Belt Extender
65D613
(1) Center of body
(2) Less than 152 mm (6 inches)
(3) Open end of extender buckle
If a seat belt cannot be fastened securely
because it is not long enough, see your
authorized SUZUKI dealer for a seat belt
extender. Seat belt extenders are available
for each seating position except for the
rear center position. After inspecting the
relationship between the seat belt length,
the occupant’s body size, and the seat
adjustment (the driver’s seat should always
be adjusted as far back as possible while
still maintaining control of the vehicle, and
other adjustable seats should be adjusted
as far back as possible), your dealer can
select the appropriate seat belt extender. A seat belt extender should only be used
for the person, vehicle and seating loca-
tion it was provided for.
When using the extender, ensure that
both ends are latched securely. Do not
use the extender if the open end of the
extender’s buckle is within 152 mm (6
inches) of the center of the occupant’s
body (See diagram). Use of the extender
when the buckle is too close to the cen-
ter of the body could increase the risk of
abdominal injury in the event of an acci-
dent, and could cause the shoulder belt
to be positioned incorrectly.
Make sure to use the correct buckle cor-
responding to your seating position.
Seat belt extenders are not intended for
use by pregnant women, and should
only be used upon approval by their
medical advisors.
Remove and stow the extender when it
is not being used.