2010 SUZUKI SX4 Fan belt
[x] Cancel search: Fan beltPage 46 of 297
2-29BEFORE DRIVING
80J23-03E
65D201 65D199
WARNING
(Continued)
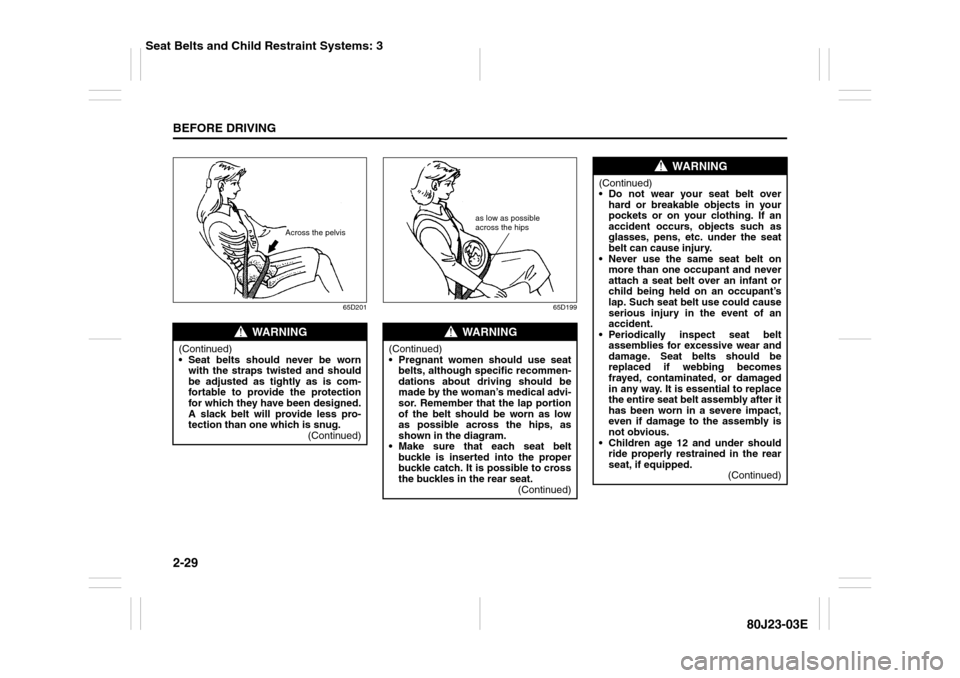
Seat belts should never be worn
with the straps twisted and should
be adjusted as tightly as is com-
fortable to provide the protection
for which they have been designed.
A slack belt will provide less pro-
tection than one which is snug.
(Continued)
Across the pelvis
WARNING
(Continued)
Pregnant women should use seat
belts, although specific recommen-
dations about driving should be
made by the woman’s medical advi-
sor. Remember that the lap portion
of the belt should be worn as low
as possible across the hips, as
shown in the diagram.
Make sure that each seat belt
buckle is inserted into the proper
buckle catch. It is possible to cross
the buckles in the rear seat.
(Continued)
as low as possible
across the hips
WARNING
(Continued)
Do not wear your seat belt over
hard or breakable objects in your
pockets or on your clothing. If an
accident occurs, objects such as
glasses, pens, etc. under the seat
belt can cause injury.
Never use the same seat belt on
more than one occupant and never
attach a seat belt over an infant or
child being held on an occupant’s
lap. Such seat belt use could cause
serious injury in the event of an
accident.
Periodically inspect seat belt
assemblies for excessive wear and
damage. Seat belts should be
replaced if webbing becomes
frayed, contaminated, or damaged
in any way. It is essential to replace
the entire seat belt assembly after it
has been worn in a severe impact,
even if damage to the assembly is
not obvious.
Children age 12 and under should
ride properly restrained in the rear
seat, if equipped.
(Continued)
Seat Belts and Child Restraint Systems: 3
Page 47 of 297
2-30
BEFORE DRIVING
80J23-03E
Lap-Shoulder BeltEmergency Locking Retractor (ELR)
The seat belt has an emergency locking
retractor (ELR), which is designed to lock
the seat belt only during a sudden stop or
impact. It also may lock if you pull the belt
across your body very quickly. If this hap-
pens, let the belt go back to unlock it, then
pull the belt across your body more slowly.
Automatic Locking Retractor (ALR)
The front passenger’s seat belt and the
rear seat belts have emergency locking
retractors (ELRs) that can be temporarily
converted to function as automatic locking
retractors (ALRs). The ALR mode should
be used if you need to secure a child
restraint system in the seat. Refer to the
“Child Restraint Systems” section for
details.Safety reminder
60A038
60A040
WARNING
(Continued)
Infants and small children should
never be transported unless they
are properly restrained. Restraint
systems for infants and small chil-
dren can be purchased commer-
cially and should be used. Make
sure that the system you purchase
meets Federal Motor Vehicle Safety
Standards. Read and follow all the
directions provided by the manu-
facturer.
Avoid contamination of seat belt
webbing by polishes, oils, chemi-
cals and particularly battery acid.
Cleaning may safely be carried out
using mild soap and water.
For children, if the shoulder belt
irritates the neck or face, move the
child closer to the center of the
vehicle.
All seatbacks should always be in
an upright position when driving,
or seat belt effectiveness may be
reduced. Seat belts are designed to
offer maximum protection when
seatbacks are in the upright posi-
tion.
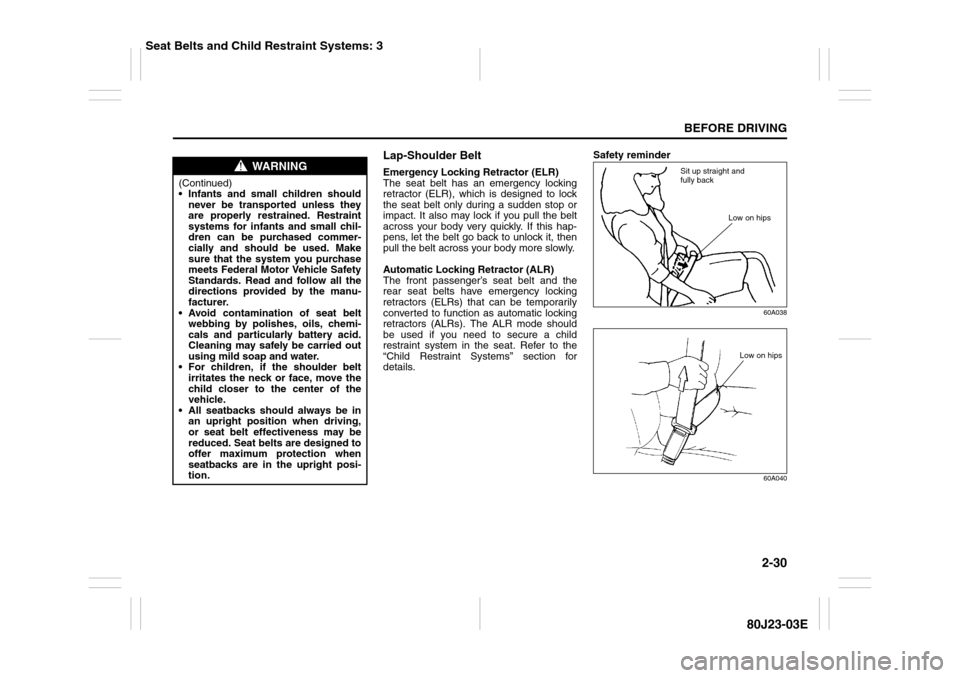
Sit up straight and
fully back
Low on hips
Low on hips
Seat Belts and Child Restraint Systems: 3
Page 53 of 297
2-36
BEFORE DRIVING
80J23-03E
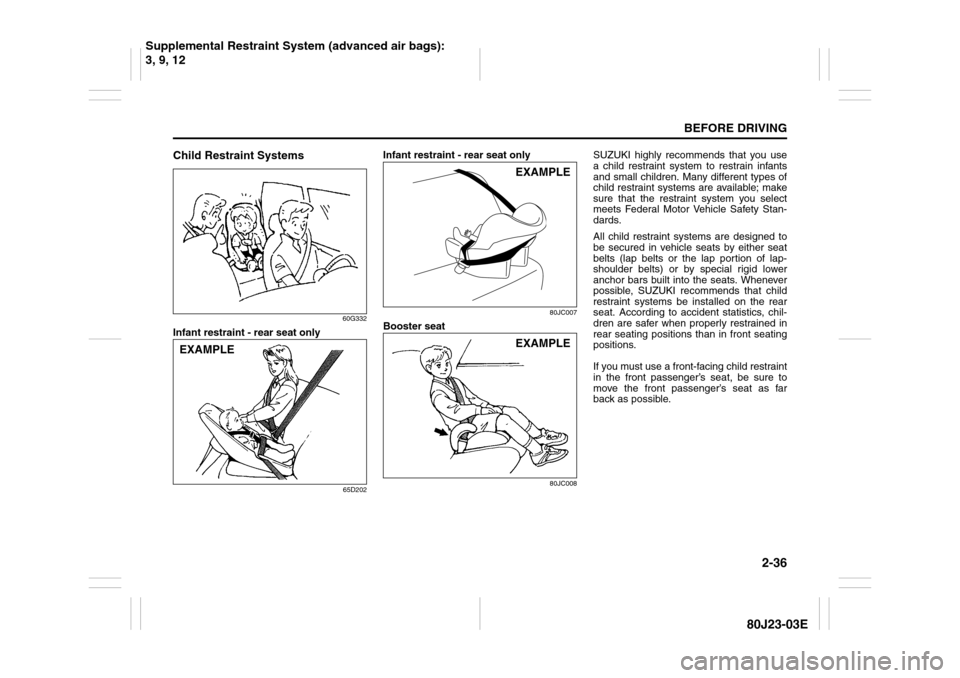
Child Restraint Systems
60G332
Infant restraint - rear seat only
65D202
Infant restraint - rear seat only
80JC007
Booster seat
80JC008
SUZUKI highly recommends that you use
a child restraint system to restrain infants
and small children. Many different types of
child restraint systems are available; make
sure that the restraint system you select
meets Federal Motor Vehicle Safety Stan-
dards.
All child restraint systems are designed to
be secured in vehicle seats by either seat
belts (lap belts or the lap portion of lap-
shoulder belts) or by special rigid lower
anchor bars built into the seats. Whenever
possible, SUZUKI recommends that child
restraint systems be installed on the rear
seat. According to accident statistics, chil-
dren are safer when properly restrained in
rear seating positions than in front seating
positions.
If you must use a front-facing child restraint
in the front passenger’s seat, be sure to
move the front passenger’s seat as far
back as possible.
EXAMPLE
EXAMPLEEXAMPLE
Supplemental Restraint System (advanced air bags):
3, 9, 12
Page 71 of 297
2-54
BEFORE DRIVING
80J23-03E
When the ignition switch is turned to the
“ON” position, the “PASS AIR BAG OFF”
indicator comes on for several seconds to
let you know the system is working. When
the front passenger sensing system has
turned off the front passenger’s front air
bag including the seat belt pretensioner,
the “PASS AIR BAG OFF” indicator will
come on and stay on to remind you that
the front passenger’s front air bag is off.
The front passenger sensing system uses
front seat pressure measurements and
pressure locations to determine whether to
activate or deactivate the front passenger’s
front air bag. The front passenger sensing
system may or may not turn off the front air
bag, depending on the front passenger’s
seating posture and body build. The air
bag should be turned off in the following
situations:
There is no occupant in the front pas-
senger seat.
The occupant of the front passenger
seat lifts his or her weight off of the seat
for a period of time.
The occupant of the front passenger
seat is an infant or small child in a child
restraint system or a small child in a
booster seat.
A smaller person, such as a child who
has outgrown child restraints or a very
small adolescent is seated in the front
passenger seat.NOTE:
If the front passenger seat is unoccupied,
the “PASS AIR BAG OFF” indicator will not
come on but the front passenger’s front air
bag will not deploy and the seat belt pre-
tensioner will not operate.
If you have secured a child in the front pas-
senger seat in a forward-facing child
restraint system or booster seat and the
“PASS AIR BAG OFF” indicator light is not
on, turn the vehicle off, remove the child
restraint or booster seat from the vehicle
and reinstall it following the child restraint
or booster seat manufacturer’s directions.
Also refer to “Seat Belts and Child
Restraint Systems” in this section. If, after
reinstalling the child restraint and restart-
ing the vehicle, the “PASS AIR BAG OFF”
indicator is still not lit, check to make sure
that the vehicle’s seatback is not pressing
the child restraint into the seat cushion. If
this happens, slightly recline the vehicle’s
seatback and adjust the seat cushion if
possible. Also make sure the child restraint
is not trapped under the vehicle head
restraint. If this happens, adjust the head
restraint. If the “PASS AIR BAG OFF” indi-
cator is still not on, secure the child in the
child restraint or booster seat in a rear seat
position in the vehicle and check with your
dealer.
65D607
According to accident statistics, children
are safer when properly restrained in rear
seating positions than in front seating posi-
tions. Whenever possible, SUZUKI recom-
mends you install child restraints in the
rear seat.
WARNING
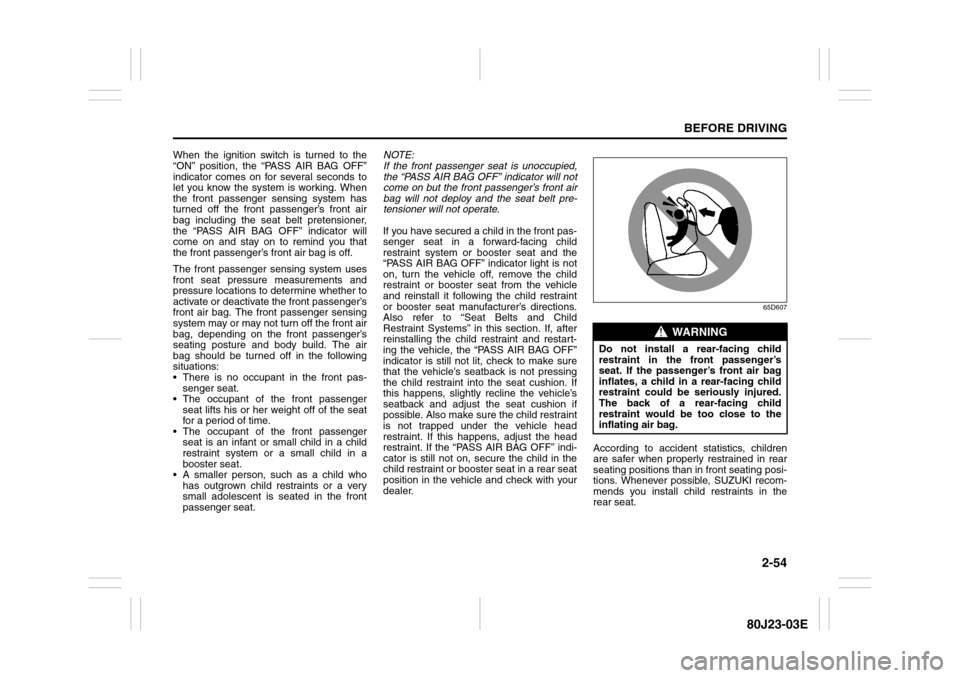
Do not install a rear-facing child
restraint in the front passenger’s
seat. If the passenger’s front air bag
inflates, a child in a rear-facing child
restraint could be seriously injured.
The back of a rear-facing child
restraint would be too close to the
inflating air bag.
Page 206 of 297
7-1INSPECTION AND MAINTENANCE
80J23-03E
60A187S
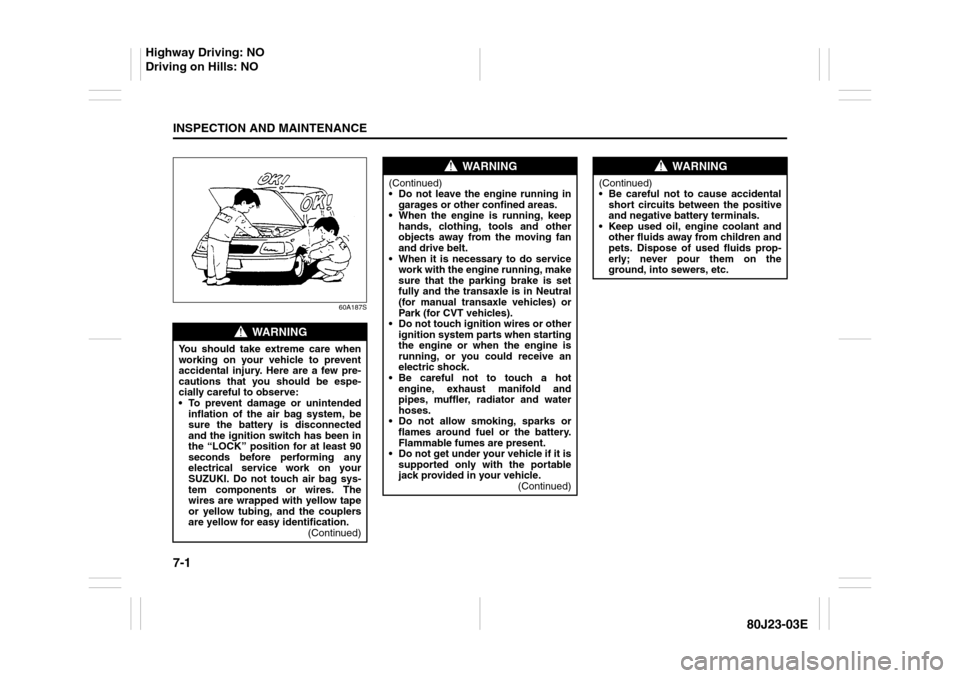
WARNING
You should take extreme care when
working on your vehicle to prevent
accidental injury. Here are a few pre-
cautions that you should be espe-
cially careful to observe:
To prevent damage or unintended
inflation of the air bag system, be
sure the battery is disconnected
and the ignition switch has been in
the “LOCK” position for at least 90
seconds before performing any
electrical service work on your
SUZUKI. Do not touch air bag sys-
tem components or wires. The
wires are wrapped with yellow tape
or yellow tubing, and the couplers
are yellow for easy identification.
(Continued)
WARNING
(Continued)
Do not leave the engine running in
garages or other confined areas.
When the engine is running, keep
hands, clothing, tools and other
objects away from the moving fan
and drive belt.
When it is necessary to do service
work with the engine running, make
sure that the parking brake is set
fully and the transaxle is in Neutral
(for manual transaxle vehicles) or
Park (for CVT vehicles).
Do not touch ignition wires or other
ignition system parts when starting
the engine or when the engine is
running, or you could receive an
electric shock.
Be careful not to touch a hot
engine, exhaust manifold and
pipes, muffler, radiator and water
hoses.
Do not allow smoking, sparks or
flames around fuel or the battery.
Flammable fumes are present.
Do not get under your vehicle if it is
supported only with the portable
jack provided in your vehicle.
(Continued)
WARNING
(Continued)
Be careful not to cause accidental
short circuits between the positive
and negative battery terminals.
Keep used oil, engine coolant and
other fluids away from children and
pets. Dispose of used fluids prop-
erly; never pour them on the
ground, into sewers, etc.
Highway Driving: NO
Driving on Hills: NO
Page 216 of 297
7-11INSPECTION AND MAINTENANCE
80J23-03E
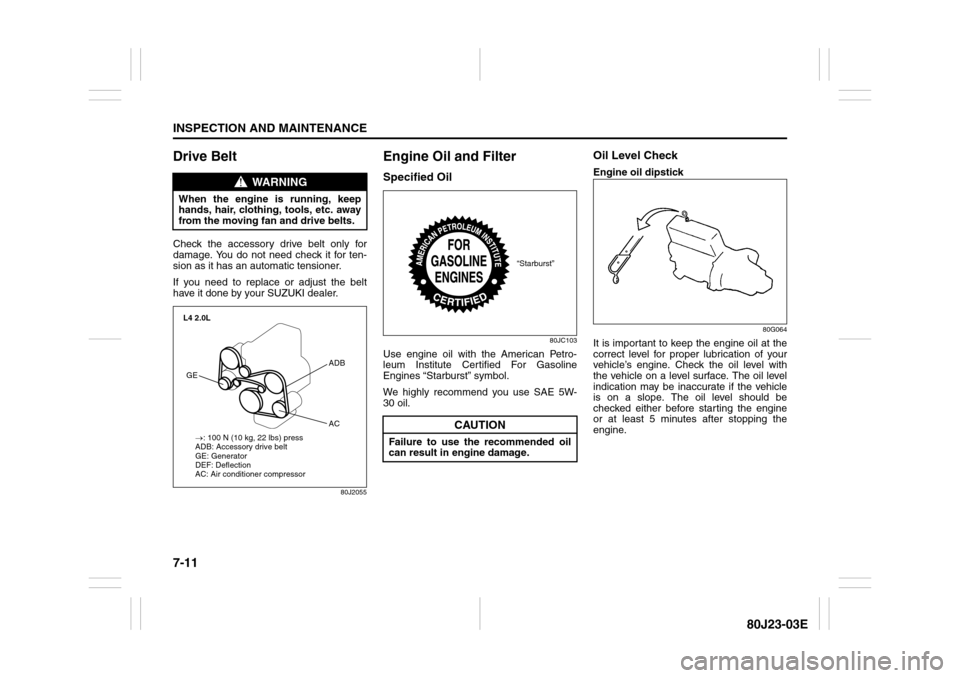
Drive Belt Check the accessory drive belt only for
damage. You do not need check it for ten-
sion as it has an automatic tensioner.
If you need to replace or adjust the belt
have it done by your SUZUKI dealer.
80J2055
Engine Oil and FilterSpecified Oil
80JC103
Use engine oil with the American Petro-
leum Institute Certified For Gasoline
Engines “Starburst” symbol.
We highly recommend you use SAE 5W-
30 oil.
Oil Level CheckEngine oil dipstick
80G064
It is important to keep the engine oil at the
correct level for proper lubrication of your
vehicle’s engine. Check the oil level with
the vehicle on a level surface. The oil level
indication may be inaccurate if the vehicle
is on a slope. The oil level should be
checked either before starting the engine
or at least 5 minutes after stopping the
engine.
WARNING
When the engine is running, keep
hands, hair, clothing, tools, etc. away
from the moving fan and drive belts.
→: 100 N (10 kg, 22 lbs) press
ADB: Accessory drive belt
GE: Generator
DEF: Deflection
AC: Air conditioner compressor L4 2.0LGEADB
AC
CAUTION
Failure to use the recommended oil
can result in engine damage.
“Starburst”
Page 262 of 297
8-5EMERGENCY SERVICE
80J23-03E
Jump Starting Instructions
When jump starting your vehicle, use
the following procedure:
60A269
1) Use only a 12-volt battery to jump start
your vehicle. Position the good 12-volt
battery close to your vehicle so that the
jumper cables will reach both batteries.
When using a battery installed on
another vehicle, DO NOT LET THE
VEHICLES TOUCH. Set the parking
brakes fully on both vehicles.2) Turn off all vehicle accessories, except
those necessary for safety reasons (for
example, headlights or hazard lights).
54G079
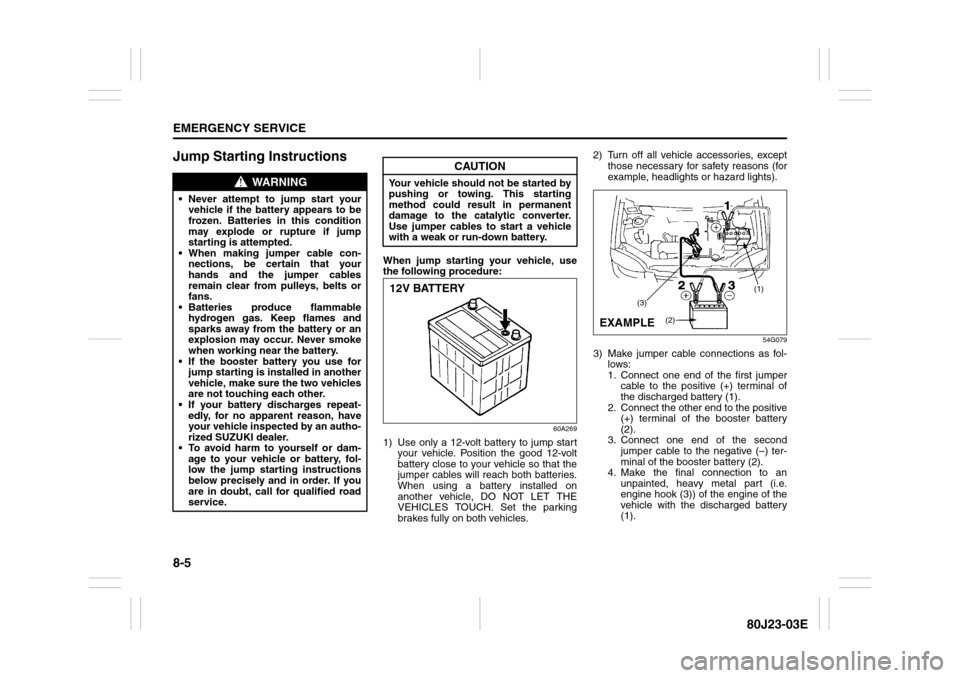
3) Make jumper cable connections as fol-
lows:
1. Connect one end of the first jumper
cable to the positive (+) terminal of
the discharged battery (1).
2. Connect the other end to the positive
(+) terminal of the booster battery
(2).
3. Connect one end of the second
jumper cable to the negative (–) ter-
minal of the booster battery (2).
4. Make the final connection to an
unpainted, heavy metal part (i.e.
engine hook (3)) of the engine of the
vehicle with the discharged battery
(1).
WARNING
Never attempt to jump start your
vehicle if the battery appears to be
frozen. Batteries in this condition
may explode or rupture if jump
starting is attempted.
When making jumper cable con-
nections, be certain that your
hands and the jumper cables
remain clear from pulleys, belts or
fans.
Batteries produce flammable
hydrogen gas. Keep flames and
sparks away from the battery or an
explosion may occur. Never smoke
when working near the battery.
If the booster battery you use for
jump starting is installed in another
vehicle, make sure the two vehicles
are not touching each other.
If your battery discharges repeat-
edly, for no apparent reason, have
your vehicle inspected by an autho-
rized SUZUKI dealer.
To avoid harm to yourself or dam-
age to your vehicle or battery, fol-
low the jump starting instructions
below precisely and in order. If you
are in doubt, call for qualified road
service.
CAUTION
Your vehicle should not be started by
pushing or towing. This starting
method could result in permanent
damage to the catalytic converter.
Use jumper cables to start a vehicle
with a weak or run-down battery.12V BATTERY
(1)
(3)
(2)
EXAMPLE