2010 SUBARU FORESTER hi - lo range
[x] Cancel search: hi - lo rangePage 95 of 402

2-10Keys and doors
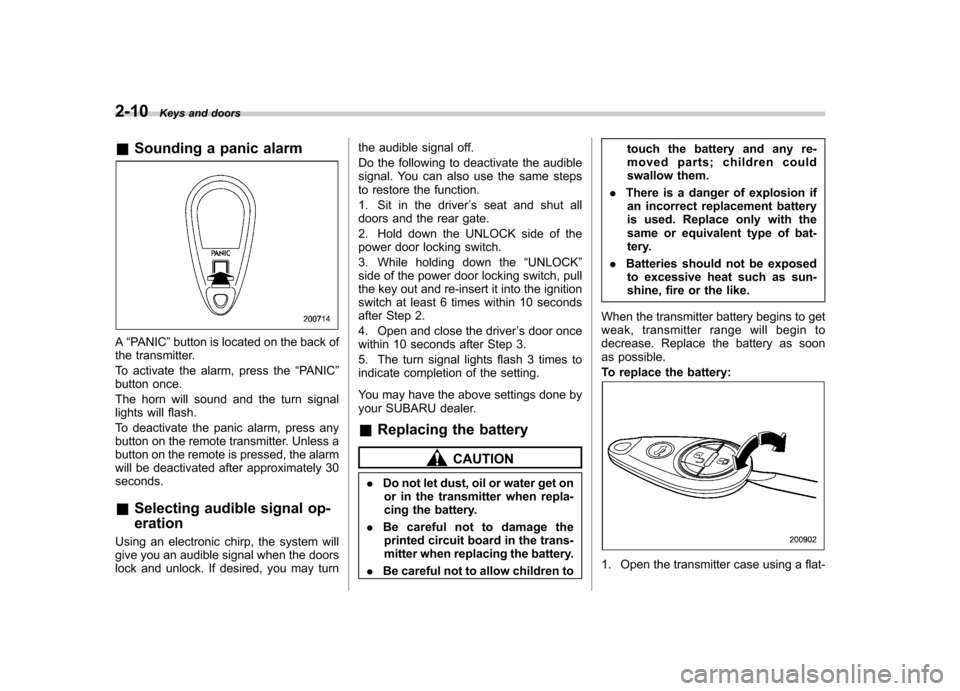
&Sounding a panic alarm
A“PANIC ”button is located on the back of
the transmitter.
To activate the alarm, press the “PANIC ”
button once.
The horn will sound and the turn signal
lights will flash.
To deactivate the panic alarm, press any
button on the remote transmitter. Unless a
button on the remote is pressed, the alarm
will be deactivated after approximately 30seconds. & Selecting audible signal op- eration
Using an electronic chirp, the system will
give you an audible signal when the doors
lock and unlock. If desired, you may turn the audible signal off.
Do the following to deactivate the audible
signal. You can also use the same steps
to restore the function.
1. Sit in the driver
’s seat and shut all
doors and the rear gate.
2. Hold down the UNLOCK side of the
power door locking switch.
3. While holding down the “UNLOCK ”
side of the power door locking switch, pull
the key out and re-insert it into the ignition
switch at least 6 times within 10 seconds
after Step 2.
4. Open and close the driver ’s door once
within 10 seconds after Step 3.
5. The turn signal lights flash 3 times to
indicate completion of the setting.
You may have the above settings done by
your SUBARU dealer.
& Replacing the battery
CAUTION
. Do not let dust, oil or water get on
or in the transmitter when repla-
cing the battery.
. Be careful not to damage the
printed circuit board in the trans-
mitter when replacing the battery.
. Be careful not to allow children to touch the battery and any re-
moved parts; children could
swallow them.
. There is a danger of explosion if
an incorrect replacement battery
is used. Replace only with the
same or equivalent type of bat-
tery.
. Batteries should not be exposed
to excessive heat such as sun-
shine, fire or the like.
When the transmitter battery begins to get
weak, transmitter range will begin to
decrease. Replace the battery as soon
as possible.
To replace the battery:
1. Open the transmitter case using a flat-
Page 99 of 402

2-14Keys and doors
11. Test every registered transmitter to
confirm correct operation. !Deleting old transmitter codes
The control unit of the keyless entry
system has four memory locations to store
transmitter codes, giving it the ability to
operate with up to four transmitters. When
you lose a transmitter, the lost transmit-ter ’s code remains in the memory. For
security reasons, lost transmitter codes
should be deleted from the memory.
To delete old transmitter codes, program
four transmitter codes into the system. If
you have only one current transmitter,
program it four times. If you have two
current transmitters, program each one
twice. If you have three current transmit-
ters, program two of them once and the
third one twice. This process will leave
only current transmitter codes in thesystem ’s memory.
NOTE
Make sure no one else is operating
their keyless entry system within range
of your vehicle when programming
transmitters. If someone else were to
operate their remote transmitter while
you are programming your transmit-
ters, it is possible that their transmitter
code will be programmed into your system, allowing them unauthorized
access to your vehicle.
Alarm system
The alarm system helps to protect your
vehicle and valuables from theft. The horn
sounds and the turn signal lights flash if
someone attempts to break into your
vehicle. The starter motor is also inter-
rupted to prevent starting the vehicle
without a key.
The system can be armed and disarmed
with the remote transmitter.
The system does not operate when the
key is inserted into the ignition switch.
Your vehicle
’s alarm system has been set
for activation at the time of shipment from
the factory. You can set the system for
deactivation yourself or have it done by
your SUBARU dealer.
& System operation
The alarm system will give the following
alarms when triggered. . The vehicle ’s horn will sound for 30
seconds.. The turn signal lights will flash for 30
seconds.
If any of the doors or the rear gate remains
open after the 30-second period, the horn
will continue to sound for a maximum of 3
minutes. If the door or the rear gate is
Page 125 of 402

3-14Instruments and controls
creases over the specified range, the
indicator light/warning light blinks inRED. At this time, the engine is close to
overheating.
If the engine coolant temperature in-
creases further, the indicator light/warning
light illuminates in REDcontinuously. At
this time, the engine may be overheating.
When the indicator light/warning light
blinks in REDor illuminates in RED, safely
stop the vehicle as soon as possible, and
refer to the emergency steps for the
engine overheating. Refer to “Engine
overheating ”F 9-12. Afterward, have the
system checked by your nearest
SUBARU dealer.
Also, if the indicator light/warning light
often blinks in RED, the electrical system
may be malfunctioning. Contact your
SUBARU dealer for an inspection.
NOTE
If the engine is restarted after a certain
driving condition, this indicator light/
warning light may illuminate in RED.
However, this is not a malfunction if the
indicator light/warning light turns off
after a short time. &
Charge warning light
If this light illuminates when the engine is
running, it may indicate that the charging
system is not working properly.
If the light illuminates while driving or does
not turn off after the engine starts, stop the
engine at the first safe opportunity and
check the alternator belt. If the belt is
loose, broken or if the belt is in good
condition but the light remains on, contact
your nearest SUBARU dealer immedi-
ately. &Oil pressure warning light
If this light illuminates when the engine is
running, it may indicate that the engine oil
pressure is low and the lubricating system
is not working properly.
If the light illuminates while driving or does
not turn off after the engine starts, stop the
engine at the first safe opportunity and
check the engine oil level. If the oil level is
low, add oil immediately. If the engine oil is
at the proper level but the light remains on,
contact your nearest SUBARU dealer
immediately.
CAUTION
Do not operate the engine with the
oil pressure warning light on. This
may cause serious engine damage.
& AT OIL TEMP warning
light (AT models)
The AT oil temperature warning light “AT
OIL TEMP ”illuminates when the ignition
switch is turned to the “ON ”position and
turns off after the engine has started.
If this light illuminates when the engine is
running, it may indicate that the automatic
transmission fluid temperature is too hot.
If the light illuminates while driving, im-
mediately stop the vehicle in a safe place
and let the engine idle until the warning
light turns off. ! Automatic transmission control
system warning
If the light flashes after the engine starts, it
may indicate that the automatic transmis-
sion control system is not working prop-
erly. Contact your nearest SUBARU deal-
er for service immediately.
Page 134 of 402

The fuel consumption indicator is linked
with the odometer/trip meter display on the
combination meter, according to the fol-
lowing chart.Odometer/
Trip meter Fuel consumption indicator
A trip meter Average fuel consumption corresponding to the A trip meter
B trip meter Average fuel consumption
corresponding to the B trip meter
Odometer Not indicated &
Outside temperature indica- tor
1) U.S.-spec. models
2) Except U.S.-spec. models
The outside temperature indicator shows
the outside temperature in a range from� 22 to 122 8F( �30 to 50 8C).
The indicator can give a false reading
under any of the following conditions: . When there is too much sun.
. During idling; while running at low
speeds in a traffic jam; when the engine
is restarted immediately following a shut- down. . When the actual outside temperature
falls outside the specified indicator range. !
Road surface freeze warning indi- cation1) U.S.-spec. models
2) Except U.S.-spec. models
When the outside temperature drops to 37 8F(3 8C) or lower, the temperature
indication flashes to show that the road
surface may be frozen.
If the outside temperature drops to 37 8F
(3 8C) or lower while the display is giving
an indication other than the outside
temperature, the display switches to the
outside temperature indication and flashes
for 5 seconds before returning to its
original indication.
If the display is already indicating an
outside temperature of 37 8F(3 8C) or lower
when the ignition switch is turned to the Instruments and controls
3-23
– CONTINUED –
Page 158 of 402

&Center and side ventilators
! Center ventilators
Move the tab up and down or right and left
to adjust the flow direction. !
Side ventilators
1) Open
2) Close
3) Thumb-wheel
Move the tab up and down or right and left
to adjust the flow direction.
To open or close the ventilator, turn the
thumb-wheel up or down. Manual climate control sys-
tem (if equipped) &
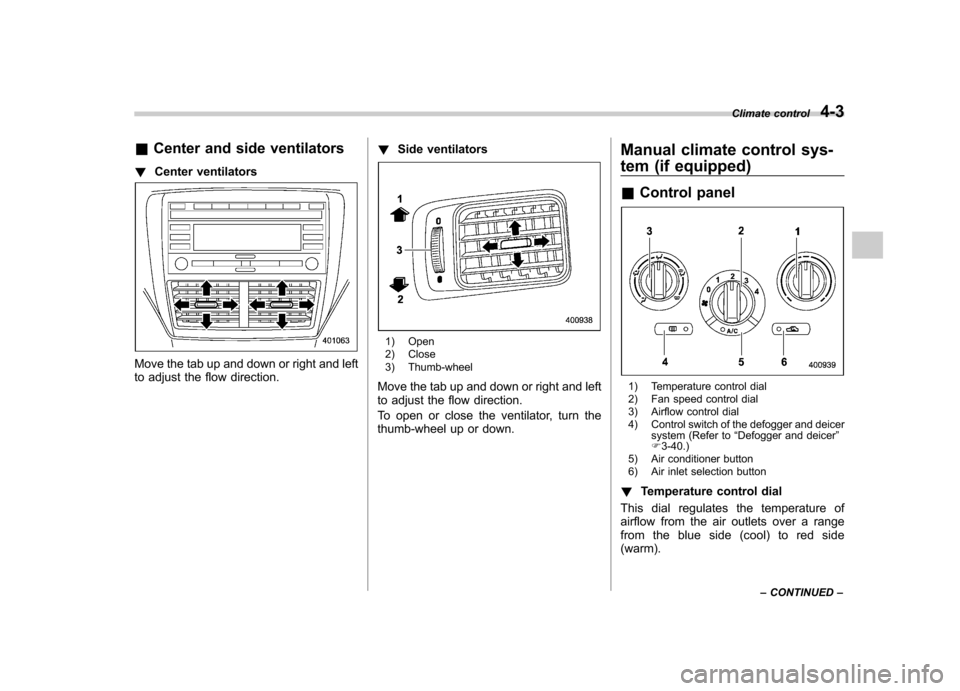
Control panel
1) Temperature control dial
2) Fan speed control dial
3) Airflow control dial
4) Control switch of the defogger and deicer
system (Refer to “Defogger and deicer ”
F 3-40.)
5) Air conditioner button
6) Air inlet selection button
! Temperature control dial
This dial regulates the temperature of
airflow from the air outlets over a range
fromtheblueside(cool)toredside(warm). Climate control
4-3
– CONTINUED –
Page 163 of 402

4-8Climate control
Automatic climate control
system (if equipped)
Although this climate control system can
be used as a full-automatic climate control
system, it can also, if desired, be used as
a semi-automatic climate control system.
When it is used as a full-automatic climate
control system, the outlet air temperature,
fan speed, airflow distribution, air inlet
control, and air conditioner compressor
operation are all automatically controlled
to maintain a constant, comfortable tem-
perature inside the vehicle. NOTE .Operate the automatic climate con-
trol system when the engine is running. . When the engine coolant is cold, the
blower does not run.. In the “AUTO ”mode, when the air
temperature in the passenger compart-
ment is sufficiently cool, the air condi-
tioner compressor does not operate.
For efficient defogging or dehumidify-
ing in cold weather, press the “A/C ”
button to operate the air conditioner
compressor.. Even when cooling is not necessary,
setting the temperature much lower
than the current outlet air temperature
turns on the air conditioner compres- sor automatically and the
“A/C ”indi-
cator light on the control panel illumi-nates. & Control panel
1) Temperature control dial
2) Fan speed control dial
3) Airflow control dial
4) Control switch of the defogger and deicer
system (Refer to “Defogger and deicer ”
F 3-40.)
5) Air inlet selection button
6) Air conditioner button
& To use as full-automatic cli-
mate control system
Place the temperature control dial in the
position for your desired temperature, then set the other dials and buttons as de-
scribed in the following. The system
’s
functions will then switch to AUTO mode
and be controlled automatically. . Airflow control dial: AUTO position
. Fan speed control dial: AUTO position
& To use as semi-automatic
climate control system
Each function can be individually set to
AUTO mode independently of the others.
Any function set to AUTO mode is con-
trolled automatically. Any function not set
to AUTO mode can be manually adjusted
as desired.
The temperature can be set within a range
of 65 to 85 8F (20 to 30 8C).
Page 179 of 402

5-8Audio
mately 5 seconds. ! SVC setting
SVC (Speed Volume Control) is a function
that automatically adjusts the volume
according to the vehicle speed. As the
vehicle speed increases, the audio vo-
lume automatically increases to match the
vehicle speed, in order to create a
pleasant listening environment even as
the driving noise increases. The amount of
this automatic volume change can be set
in the range from OFF to 2. The initial
setting is OFF. ! BEEP setting
A beep sound (operation sound) that
occurs when the audio system is operated
can be set ON/OFF. The initial setting is ON. ! SRS CS Auto setting (type B audio)
SRS CS Auto can be set ON/OFF. When
this setting is ON, “
”is displayed on the
screen.
NOTE
SRS CS Auto creates a 5.1ch equiva-
lent surround field using 10 speakers
that are installed in the vehicle.
SRS CS Auto features:
1) Sound originating from door mount
speakers can be heard at ear level (built in SRS FOCUS effect).
2) Ultra rich bass sound can be ob-
tained from standard door mount
speakers (built in SRS TruBass effect).
3) Surround sound can be obtained
from 2-channel stereo sources such as
CD, MP3 and FM (built in SRS Circle
Surround II effect).
4) SRS CS Auto can position the
center channel image in the center of
the vehicle
’s windshield. This elimi-
nates the need for a center speaker
(built in SRS Circle Surround II phan-
tom center and SRS FOCUS effects).
CS Auto, TruBass, FOCUS, Circle Sur-
round-II, SRS and “
”symbol are
trademarks of SRS Labs, Inc.
CS Auto technology is incorporated
under license from SRS Labs, inc.
Page 180 of 402

&Adjustable level of each mode
Mode Range of levels (displayed)Initial setting Turn counterclockwise Turn clockwise
Volume Volume control 0 to 40 15 For less volume For more volume AUX volume control* 0 to 40 15 For less volume For more volume
Tone and balance Bass control �8 to +8 0 For less bass sound For more bass sound
Midrange control �8 to +8 0 For less midrange sound For more midrange sound
Treble control �8 to +8 0 For less treble sound For more treble sound
Balance L9 to R9 0 Right channel attenuated Left channel attenuated
Fader R9 to F9 0 Front attenuated Rear attenuated
Other settings SPEED VOLUME OFF to 2 OFF For less auto volume change For more auto volume change
BEEP OFF to ON ON OFF ON
CS Auto (type B audio) OFF to ON OFF OFF ON
*: Only when an AUX audio product is connected. Audio
5-9