Page 49 of 271

Unlocking and locking
48
during this time. The power windows are sw itched off completely once you open the
driver or front passenger door.
When driving always use the existing he ating, air conditioning and ventilation
system for ventilating the interior of the vehicle. If the windows are opened, dust as
well as other dirt can get into the vehicle and in addition the wind noise is more at
certain speeds.
Button in the front passenger door and in the rear doorsA button for the relevant window is provided in these doors.Opening a window– Lightly press the appropriate button down and hold it until the window has moved
into the desired position.
– Additionally you can open the window auto matically (fully opened) by pressing the
button down up to the stop. Renewed pressing of the button causes the window
to stop immediately.Closing a window– Lightly press the appropriate button up and hold it until the window has moved
into the desired position.
– Additionally you can close the window auto matically (fully closed) by pressing the
button up up to the stop. Renewe d pressing of the button causes the window to
stop immediately.
WARNING
The system is fitted with a force limiter page 48. If there is an obstacle, the
closing process is stopped and the window goes down by several centimeters.
You should then take particular care when closing the windows! You may
otherwise suffer severe injuries as a re sult of getting an arm, for example,
jammed in the window!
Note
After switching the ignition off, it is still possible to open or close the windows for a
further 10 minutes. The automatic closing and opening functions will not operate
during this time. The power windows are switched off completely once you open the
driver or front passenger door.
Force limiter of the power windowsThe electrically operated power windows are fitted with a force limiter. It reduces the
risk of bruises or injuries when closing the windows.
If there is an obstacle, the closing proces s is stopped and the window goes down by
several centimeters.
If the obstacle prevents the window from being closed during the next 10 seconds, the
closing process is interrupted once again and the window goes down by several
centimeters.
You must try to close the window once ag ain within 10 seconds after the window has
gone down twice, even if the obstacle wa s not yet removed, the closing process is
stopped. During this time it is not possible to automatically close the window. The
force limiter is still switched on.
The force limiter is only switched off, if you attempt to close the window within the next
10 seconds - the window closes now with full strength!
If you wait longer than 10 seconds, th e force limiter is switched on again.
Fig. 33 Position of button in front
passenger door
s2ug.6.book Page 48 Friday, April 9, 2010 2:24 PM
Page 50 of 271

Unlocking and locking49
Using the system
Safety
Driving Tips
General Maintenance
Breakdown assistance
Technical Data
WARNING
You should take particular care when closing the windows! You may otherwise
suffer severe injuries as a result of getting an arm, for example, jammed in the
window!Window convenience operationYou can open and close the electrically po wered windows as follows when unlocking
and locking the vehicle (only cl ose the panoramic sliding roof):Opening a window– Hold the key in the locking cylinder of th e driver's door in the unlock position or
press the unlock button of the radio remote control until all the windows are
opened.Closing a window– Hold the key in the locking cylinder of the dr iver's door in the lock position or press
the lock button of the radio remote co ntrol until all the windows are closed.
You can interrupt the opening or closing operation of the windows immediately by
releasing the key or the lock button.
WARNING
The system is fitted with a force limiter page 48. If there is an obstacle, the
closing process is stopped and the window goes down by several centimeters.
You should then take particular care when closing the windows! You may
otherwise suffer severe injuries as a re sult of getting an arm, for example,
jammed in the window!
Note
On vehicles fitted with an ti-theft alarm system the convenience window opening
is possible by means of the key in the lo cking cylinder only 45 seconds after deacti-
vating the warning system or after activating the anti-theft alarm system.
Operational faultsElectrically operated powe r windows do not operate
If the battery has been disconnected and then reconnected while the window was
opened, the electrically operated power windows do not operate. The system must be
activated. Proceed as follows in order to re-establish the function:
Switch on the ignition.
Press the relevant switch top and hold it pressed as lo ng as necessary until the
window is closed.
Release the switch.
Press once again the relevant switch top and hold it pressed for approx. 3 seconds.
Operation in winter
Ice accumulating on the surface of the wi ndows during the winter may result in a
greater resistance when closing the windows and the window may stop and go down
several centimetres
It is necessary to put the force limiter out of operation in order to close the window
page 48, “Force limiter of the power windows”.
WARNING
The system is fitted with a force limiter page 48. If there is an obstacle, the
closing process is stopped and the window goes down by several centimeters.
You should then take particular care when closing the windows! You may
otherwise suffer severe injuries as a re sult of getting an arm, for example,
jammed in the window!Panoramic sliding roof*IntroductionThe panoramic sliding roof with sun screen ca n only be operated with the control dial
when the ignition is switched on page 50, fig. 34 . The control dial has several posi-
tions.
s2ug.6.book Page 49 Friday, April 9, 2010 2:24 PM
Page 51 of 271

Unlocking and locking
50
After switching off the ignition, it is still po ssible to open, close and tilt the panoramic
sliding roof or the sun screen for approx. 10 minutes. However, it is no longer possible
to operate the panoramic sliding roof and the sun screen the moment you open one
of the front doors.Opening and tilting the panoramic sliding roofComfort position– Turn the switch to position fig. 34 .Open partially– Turn the switch to a position in area .Open fully– Turn the switch to position and hold it in this position (spring-tensioned posi-
tion).Tilting and closing– In order to tilt, press the switch on the recess in the direction of the roof.
– In order to close, press down the switch on the recess and then push it forwards.
When the panoramic sliding roof is in the comfort position, the intensity of the wind
noise is reduced.
Caution
It may be necessary du ring winter to remove any ice and snow in the area of the pano-
ramic sliding roof before opening it, in order to prevent damaging the opening
mechanism.Closing the panoramic sliding roofClosing– Turn the switch to position fig. 34 .
Force limiter
The panoramic sliding roof is fitted with a force limiter. The panoramic sliding roof
stops and moves back several centimetres when it cannot be closed because there is
something in the way (e.g. ice). You can close the panoramic sliding roof fully without
force limiter by pressi ng down the switch on the recess and then pushing it forwards
until the panoramic sliding roof is fully closed .
WARNING
Carefully close the panoramic sliding roof - risk of injury!Opening and closing the sun screenYou can open or close the sun screen separately with the aid of the buttons fig. 35 .
Fig. 34 Control dial for the panoramic
sliding roof
AC
AD
AB
AA
Fig. 35 Buttons for sun screen
s2ug.6.book Page 50 Friday, April 9, 2010 2:24 PM
Page 52 of 271

Unlocking and locking51
Using the system
Safety
Driving Tips
General Maintenance
Breakdown assistance
Technical Data
Opening– Briefly press the button page 50, fig. 35 in order to fully open.
– Press the button and hold it pressed in order to open in the desired position.
The opening process stops when one releases the button.Closing– Briefly press the button page 50, fig. 35 in order to fully close.
– Press the button and hold it pressed in order to close in the desired position.
The closing process stops when one releases the button.Convenience operationYou can also operate the panoramic sliding roof and the sun screen from the outside
using the remote control key.Closing the panoramic sliding roof– Hold down the lock button on the remote control key until the panoramic sliding
roof is closed. The panoramic sliding roof and the sun screen are closed together.
The closing process stops when one releases the button.Tilting the panoramic sliding roof– Hold down the unlock button on the remote control key until the panoramic sliding roof is tilted. When tilting the panoramic sliding roof, the sun screen opens at the
same time.
Note
The force limiter also operates for convenience closing.
The panoramic sliding roof can only be tilted but not opened when the conven-
ience operating feature is being used.
Emergency operationFig. 36 Detail of the headliner: Points fo r positioning screwdriver / emergency operationYou can close and/or open the panoramic slid ing roof by hand if the system is defec-
tive.
– Position the flat blade of a screwdriver carefully against the rear edge of the cover
of the electrical drive fig. 36.
–Pull the cover down.
– Insert an Allen key, Group 4, up to the stop into the opening and close or open the panoramic sliding roof.
– Press on the cover again by first of all in serting the plastic lugs and then pushing the
cover up.
– Have the malfunction rectified by a specialist garage.
Note
After each emergency operation, it is necessary to initialise the roof page 51.Initialising the panoramic sliding roofAfter disconnecting and reconnecting the ba ttery, the panoramic sliding roof and the
sun screen must be initialised.
After initialising the panoramic sliding roof, press down the switch on the recess and
push it forwards for approx. 10 seconds.
AE
AE
AF
AF
A1
A2
s2ug.6.book Page 51 Friday, April 9, 2010 2:24 PM
Page 53 of 271
Unlocking and locking
52
Press the switch page 50, fig. 35 for approx. 10 seconds in order to initialise the
sun screen.
If the panoramic sliding roof or the sun scre en is not fully closed while disconnecting
and reconnecting the battery, first of all the panoramic sliding roof or the sun screen
must be closed page 50 page 50. Only then the initialisation can be performed.
AF
s2ug.6.book Page 52 Friday, April 9, 2010 2:24 PM
Page 54 of 271

Lights and Visibility53
Using the system
Safety
Driving Tips
General Maintenance
Breakdown assistance
Technical Data
Lights and VisibilityLightsSwitching lights on and off
Switching on side lights– Turn the light switch into position
.
Switching on the low beam and main beam– Turn the light switch into position
.
– Push the main beam lever slightly forward in the spring-tensioned position in order to switch on the main beam page 59, fig. 43.
Switching off lights (except daylight driving lights)– Turn the light switch into position 0.
Low beam comes on only if the ignition is switched on. After switching off the ignition,
the low beam is switched off automatica lly and only the side lights come on.
On models fitted with right-hand steering the position of certain switches differs
from that shown in fig. 37 . The symbols which mark the switch positions are iden-
tical, however.
WARNING
Never drive with side lights on - risk of accident! The side lights are not bright
enough to light up the road sufficiently in front of you or to be seen by other
oncoming traffic. In this case, always switch on the low beam when it is dark or
if visibility is poor.
Note
An audible warning will sound if you wi thdraw the ignition key and open the
driver's door when the vehicle lights are still on.
The acoustic warning signal is switched off over the door contact when the driver's
door is closed (ignition off). The vehicle can be parked with the side lights on.
If the car is parked for a lengthy period, we recommend switching off all lights, or
leaving only the parking lights switched on.
The switching on of the described lights should only be undertaken in accordance
with the legal requirements.
If a fault occurs in the light switch , the low beam comes on automatically
In the event of cool or humid weather cond itions, the headlights can be misted up
from inside.
The temperature difference between interior and external area of the headlight
lenses is decisive.
When the driving lights are switched on, the light outlet surfaces are free from
mist after a short period. The headlight lenses can possibly mist up at the border
areas.
It also concerns reverse light and turn signal lights.
This mist has no influence on th e life of the lighting system.
Daylight driving lightsSwitching on daylight driving lights– Switch on the ignition without turning the light switch out of the position 0.
Fig. 37 Dash panel: Light switch
s2ug.6.book Page 53 Friday, April 9, 2010 2:24 PM
Page 55 of 271

Lights and Visibility
54
Deactivating the function daylight driving lights
– Pull the turn signal light lever towards the steering wheel up to 3 seconds after switching on the ignition and at the same time, slide it to the bottom and hold it in
this position for at least 3 seconds.Activating the function daylight driving lights– Pull the turn signal light lever towards the steering wheel up to 3 seconds after switching on the ignition and at the same time, slide it to the top and hold it in this
position for at least 3 seconds.
In some countries, the national legal provisions require that the rear parking lights
come on together with the bulbs for daylight driving lights when activating the function
daylight driving lights.
On vehicles which are fitted with bulbs for daylight driving lights in the fog lights, the
parking lights do not come on when activa ting the function daylight driving lights.
When the daylight driving lights are switched on, the lighting of the instrument cluster
is switched on as well.
On vehicles fitted with an information displa y*, you can also activate or deactivate in
the menu the function da ylight driving lights:
Setup
Lights & Vision (Lights & Vision)
Automatic driving lamp control*
Switching on automatic driving lamp control*– Turn the light switch fig. 38 into position
.
Switching off automatic driving lamp control*– Turn the light switch to the position 0,
or .
If the light switch is in the position
, the symbol illuminates when the ignition is
switched on
next to the light switch. If the low beam is activated with the light
sensor, the symbol illuminates additionally next to the light switch.
If the light comes on automatically, the side lights and low beam as well as licence plate
light light up at the same time.
If the automatic light control is switched on, the light is regulated with the light sensor
in the rear mirror holder. If the light intensity drops below the set value, e.g when
driving during the day into a tunnel, the lo w beam and the side lights as well as the
licence plate light come on automatically. If the light intensity increases again, the
lights switch off automatically.
Motorway lights
If the automatic light control has been swit ched on and the vehicle speed is over 140
km/h for at least 10 seconds, the side ligh ts and low beam are switched on automati-
cally.
If the vehicle speed is below 65 km/h for at least 2 minutes, the lights are switched off.
Rain lights
If you switch on the windscreen wipe in th e operation rain sensor* for longer than 10
seconds or in the operation perm anent wipe (position 2 or 3) page 63 switching on
for longer than 15 seconds, the side ligh ts and low beam are switched on automati-
cally. The light switches off if the windscreen wipe is in operation rain sensor* for more
than 4 minutes or is not switched on in the operation permanent wipe.
WARNING
The automatic light control only operat es as a support. The driver is not
released from his responsibility to inspect the light and if necessary to switch on
the light depending on the light conditions. The light sensor cannot detect for
Fig. 38 Dash panel: Light switch
s2ug.6.book Page 54 Friday, April 9, 2010 2:24 PM
Page 56 of 271

Lights and Visibility55
Using the system
Safety
Driving Tips
General Maintenance
Breakdown assistance
Technical Data
example rain or snow. For these conditions we recommend to switch on the low
beam
!
Note
Do not affix any stickers in front of the light sensor, so that you do not impair its
function or put it out of operation.
The same principles as for using the automa tic light control also apply to the light
which is switched on manually page 53.
Cornering lights*The cornering lights are used to illuminate the curves by means of the cone of light
swiveling together with the front headlight with Xenon lights*. This function is active
when the speed of the car increases to more than 10km/h.
The swiveling function of the headlights ca n be switched off / on via the menu point
Assistants in the main menu of the information display* page 24.
WARNING
If the cornering ligh ts are defective, the headlights are automatically lowered to
the emergency position, which prevents a possible dazzling of oncoming traffic.
Thus the illuminated length of the road is shortened. Drive carefully and have
the car inspected immediatel y by a specialist garage.Coming Home FunctionThe function makes it possible to switch on the lights in the darkness for a short time
after leaving the vehicle.Switching on Coming Home Function– The light switch is in the position automatic driving lamp control
and the low
beam illuminates.
– Switch off the ignition. – After opening the driver's door, the function Coming Home is switched on.
– Close all the doors and the boot lid and lo
ck the vehicle. After a short time, switch
all lights off.
Depending on equipment fitted the function Coming Home switches on the following
lights:
Parking lights,
Low beam,
Entry lighting in the exterior mirrors,
Licence plate light.
Coming Home Function
The lights go out 10 seconds after closing all the doors and the boot lid.
If a door or the boot lid re mains open, the lights go out 60 seconds after switching off
the ignition.
On vehicles fitted with automatic driving la mp control you can also switch the light
switch in the position
. The function Coming Home is controlled with the light
sensor in the mount of the interior rear mirror. If the light intensity is higher than the
set value of the light sensor, the Coming Home Function is not switched on after
switching off the ignition.
Note
If the Coming Home Function is switched on constantly, the battery will be heavily
discharged particularly in short-haul traffic.
The switching on of the described lights should only be undertaken in accordance
with the legal requirements.
You can change the illumination period for the Coming Home Function by means
of the information display*.
Leaving Home FunctionThis function makes it possible to switch on the lights when approaching the vehicle.
WARNING (continued)
s2ug.6.book Page 55 Friday, April 9, 2010 2:24 PM
 1
1 2
2 3
3 4
4 5
5 6
6 7
7 8
8 9
9 10
10 11
11 12
12 13
13 14
14 15
15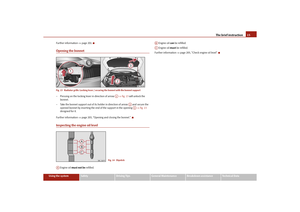 16
16 17
17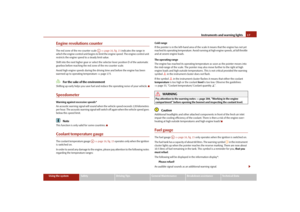 18
18 19
19 20
20 21
21 22
22 23
23 24
24 25
25 26
26 27
27 28
28 29
29 30
30 31
31 32
32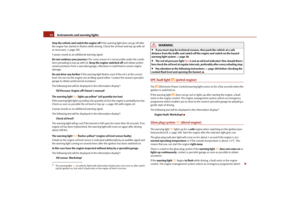 33
33 34
34 35
35 36
36 37
37 38
38 39
39 40
40 41
41 42
42 43
43 44
44 45
45 46
46 47
47 48
48 49
49 50
50 51
51 52
52 53
53 54
54 55
55 56
56 57
57 58
58 59
59 60
60 61
61 62
62 63
63 64
64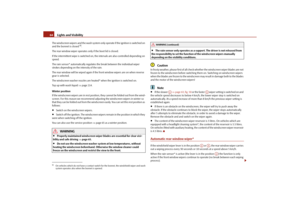 65
65 66
66 67
67 68
68 69
69 70
70 71
71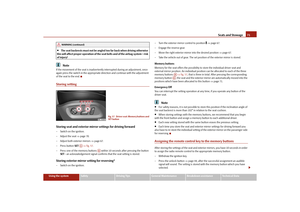 72
72 73
73 74
74 75
75 76
76 77
77 78
78 79
79 80
80 81
81 82
82 83
83 84
84 85
85 86
86 87
87 88
88 89
89 90
90 91
91 92
92 93
93 94
94 95
95 96
96 97
97 98
98 99
99 100
100 101
101 102
102 103
103 104
104 105
105 106
106 107
107 108
108 109
109 110
110 111
111 112
112 113
113 114
114 115
115 116
116 117
117 118
118 119
119 120
120 121
121 122
122 123
123 124
124 125
125 126
126 127
127 128
128 129
129 130
130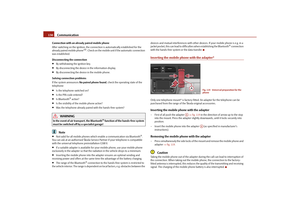 131
131 132
132 133
133 134
134 135
135 136
136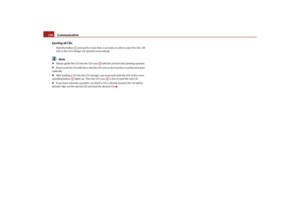 137
137 138
138 139
139 140
140 141
141 142
142 143
143 144
144 145
145 146
146 147
147 148
148 149
149 150
150 151
151 152
152 153
153 154
154 155
155 156
156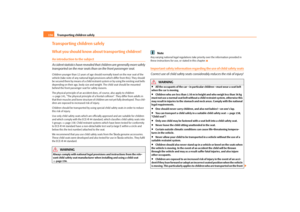 157
157 158
158 159
159 160
160 161
161 162
162 163
163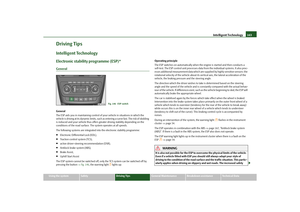 164
164 165
165 166
166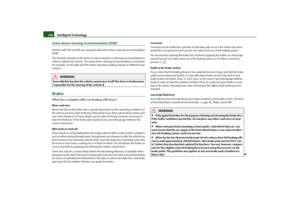 167
167 168
168 169
169 170
170 171
171 172
172 173
173 174
174 175
175 176
176 177
177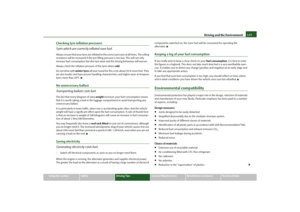 178
178 179
179 180
180 181
181 182
182 183
183 184
184 185
185 186
186 187
187 188
188 189
189 190
190 191
191 192
192 193
193 194
194 195
195 196
196 197
197 198
198 199
199 200
200 201
201 202
202 203
203 204
204 205
205 206
206 207
207 208
208 209
209 210
210 211
211 212
212 213
213 214
214 215
215 216
216 217
217 218
218 219
219 220
220 221
221 222
222 223
223 224
224 225
225 226
226 227
227 228
228 229
229 230
230 231
231 232
232 233
233 234
234 235
235 236
236 237
237 238
238 239
239 240
240 241
241 242
242 243
243 244
244 245
245 246
246 247
247 248
248 249
249 250
250 251
251 252
252 253
253 254
254 255
255 256
256 257
257 258
258 259
259 260
260 261
261 262
262 263
263 264
264 265
265 266
266 267
267 268
268 269
269 270
270