2010 NISSAN LATIO TRansmission
[x] Cancel search: TRansmissionPage 1227 of 3745
COMBINATION METERSDI-17
< SERVICE INFORMATION >
C
DE
F
G H
I
J
L
M A
B
DI
N
O P
OK or NG
OK >> Check harness or connector between combination meter and vehicle speed sensor.
NG >> Replace vehicle speed sensor.
WITH CVT, WITHOUT ABS
1.CHECK COMBINATION METER INPUT SIGNAL
1. Start engine and select “M ETER/M&A” on CONSULT-III.
2. Using “SPEED METER” on “DATA MONITOR”, comp are the value of “DATA MONITOR” with speedome-
ter pointer of combination meter.
OK or NG
OK >> Perform TCM self-diagnosis. Refer to CVT-48, "CONSULT-III Function (TRANSMISSION)" .
NG >> Replace combination meter. Refer to IP-12, "
Removal and Installation" .
Engine Speed Signal InspectionINFOID:0000000005395020
Symptom: Improper tachometer indication.
1.CHECK COMBINATION METER INPUT SIGNAL
1. Start engine and select “M ETER/M&A” on CONSULT-III.
2. Using “TACHO METER” on “DATA MONITOR”, compare the value of “DATA MONITOR” with tachometer pointer of combination meter.
OK or NG
OK >> Perform ECM self-diagnosis. Refer to EC-612, "CONSULT-III Function (ENGINE)" (MR18DE) or
EC-98, "
CONSULT-III Function" (HR16DE).
NG >> Replace combination meter. Refer to IP-12, "
Removal and Installation" .
Fuel Level Sensor Signal InspectionINFOID:0000000005395021
Symptom:• Improper fuel gauge indication.
• Low-fuel warning lamp indication is irregular.
NOTE:
The following symptoms do not indicate a malfunction.
• Depending on vehicle position or driving circumstance, the fuel level in the tank shifts and the indication may fluctuate.
• If the vehicle is fueled with the ignition switch ON, the indication will update slowly.
• If the vehicle is tilted when the ignition switch is turned ON, fuel in the tank may flow to one direction result-
ing in a change of reading.
1.CHECK COMBINATION METER INPUT SIGNAL
1. Select “METER/M&A” on CONSULT-III.
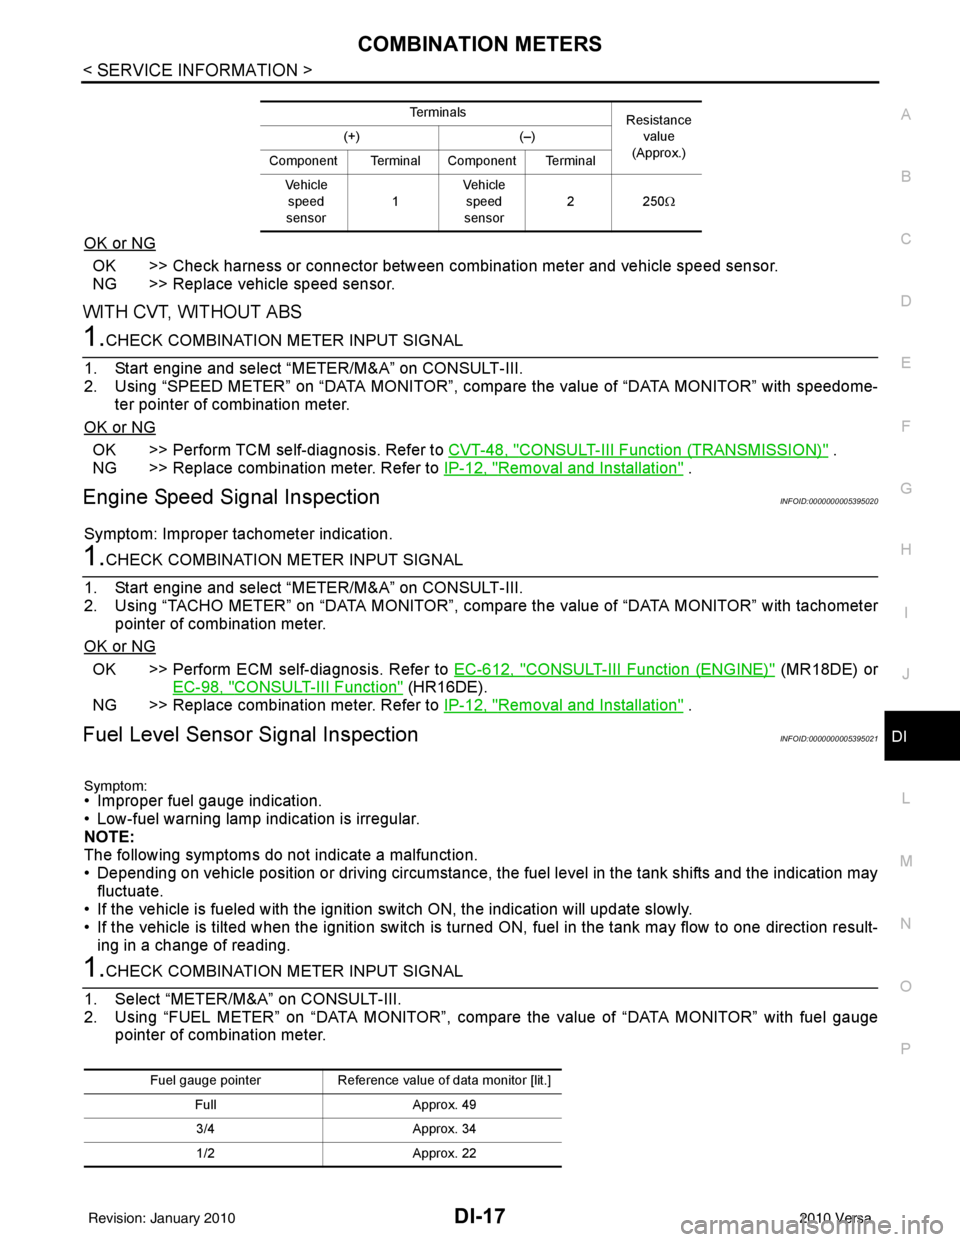
2. Using “FUEL METER” on “DATA MONITOR”, compare the value of “DATA MONITOR” with fuel gauge pointer of combination meter.
Te r m i n a l s Resistance
value
(Approx.)
(+)
(–)
Component Terminal Component Terminal Ve h i c l e speed
sensor 1Vehicle
speed
sensor 22
50Ω
Fuel gauge pointer Reference value of data monitor [lit.]
Full Approx. 49
3/4 Approx. 34
1/2 Approx. 22
Revision: January 20102010 Versa
Page 1244 of 3745
DI-34
< SERVICE INFORMATION >
A/T INDICATOR
A/T INDICATOR
System DescriptionINFOID:0000000005395032
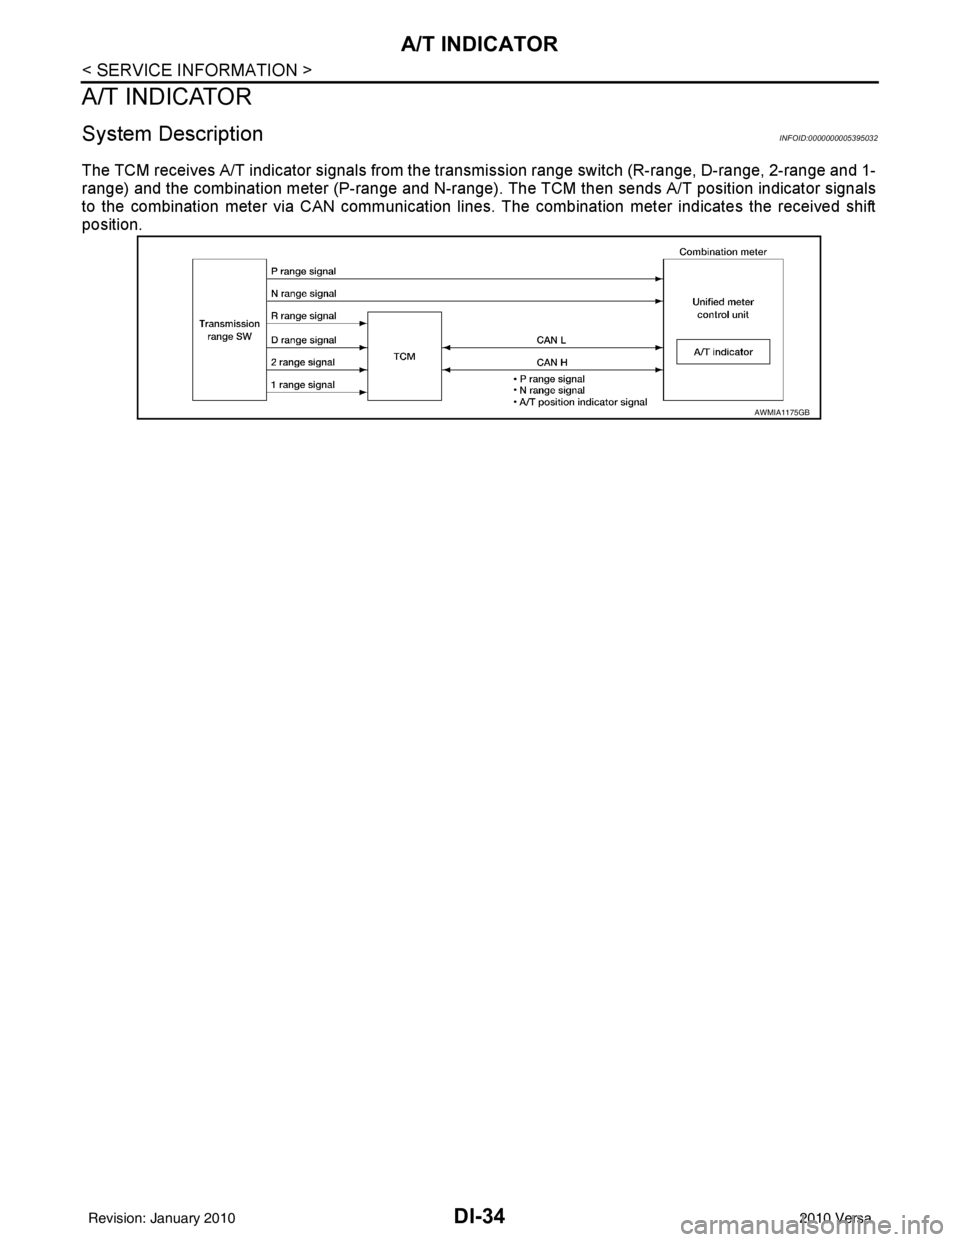
The TCM receives A/T indicator signals from the transmission range switch (R-range, D-range, 2-range and 1-
range) and the combination meter (P-range and N-range). The TCM then sends A/T position indicator signals
to the combination meter via CAN communication lines. The combination meter indicates the received shift
position.
AWMIA1175GB
Revision: January 20102010 Versa
Page 1247 of 3745
A/T INDICATORDI-37
< SERVICE INFORMATION >
C
DE
F
G H
I
J
L
M A
B
DI
N
O P
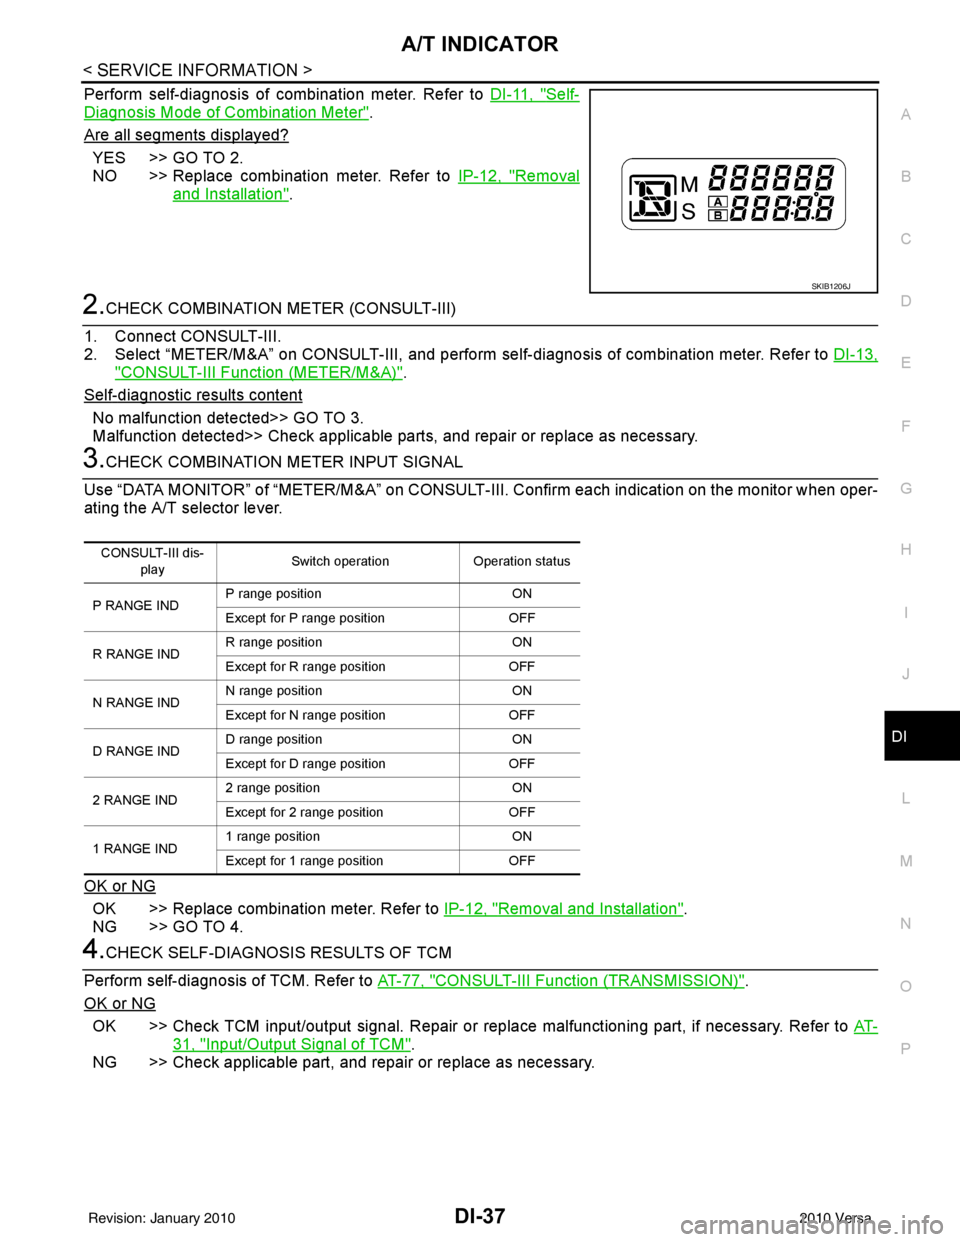
Perform self-diagnosis of combination meter. Refer to DI-11, "Self-
Diagnosis Mode of Combination Meter".
Are all segments displayed?
YES >> GO TO 2.
NO >> Replace combination meter. Refer to IP-12, "
Removal
and Installation".
2.CHECK COMBINATION METER (CONSULT-III)
1. Connect CONSULT-III.
2. Select “METER/M&A” on CONSULT-III, and perform se lf-diagnosis of combination meter. Refer to DI-13,
"CONSULT-III Function (METER/M&A)".
Self
-diagnostic results content
No malfunction detected>> GO TO 3.
Malfunction detected>> Check applicable parts, and repair or replace as necessary.
3.CHECK COMBINATION METER INPUT SIGNAL
Use “DATA MONITOR” of “METER/M&A” on CONSULT-II I. Confirm each indication on the monitor when oper-
ating the A/T selector lever.
OK or NG
OK >> Replace combination meter. Refer to IP-12, "Removal and Installation".
NG >> GO TO 4.
4.CHECK SELF-DIAGNOSIS RESULTS OF TCM
Perform self-diagnosis of TCM. Refer to AT-77, "
CONSULT-III Function (TRANSMISSION)".
OK or NG
OK >> Check TCM input/output signal. Repair or replace malfunctioning part, if necessary. Refer to AT-
31, "Input/Output Signal of TCM".
NG >> Check applicable part, and repair or replace as necessary.
SKIB1206J
CONSULT-III dis-
play Switch operation
Operation status
P RANGE IND P range position
ON
Except for P range position OFF
R RANGE IND R range position
ON
Except for R range position OFF
N RANGE IND N range position
ON
Except for N range position OFF
D RANGE IND D range position
ON
Except for D range position OFF
2 RANGE IND 2 range position
ON
Except for 2 range position OFF
1 RANGE IND 1 range position
ON
Except for 1 range position OFF
Revision: January 20102010 Versa
Page 1248 of 3745
DI-38
< SERVICE INFORMATION >
CVT INDICATOR
CVT INDICATOR
System DescriptionINFOID:0000000005395035
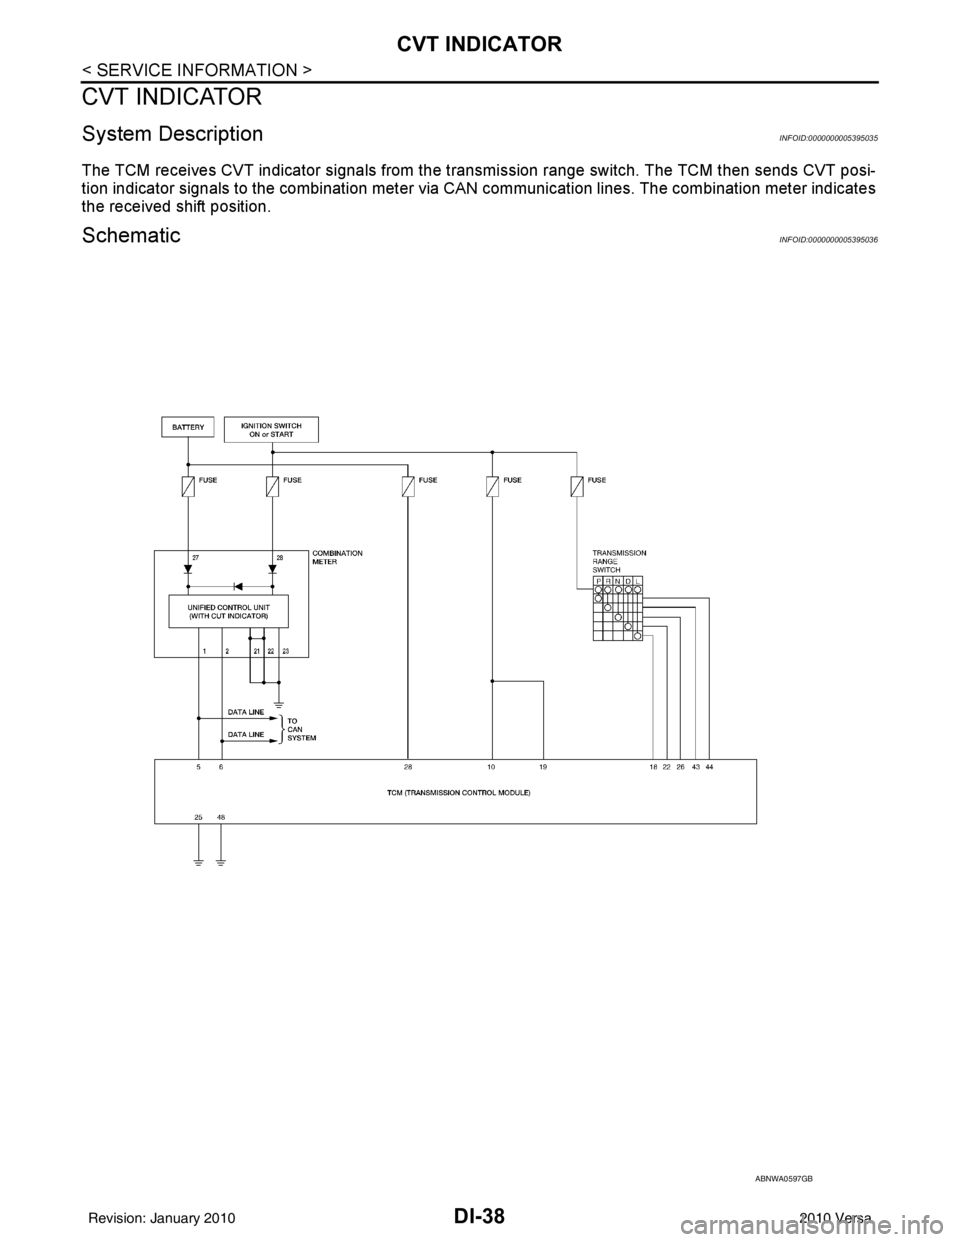
The TCM receives CVT indicator signals from the transmission range switch. The TCM then sends CVT posi-
tion indicator signals to the combination meter via CAN communication lines. The combination meter indicates
the received shift position.
SchematicINFOID:0000000005395036
ABNWA0597GB
Revision: January 20102010 Versa
Page 1252 of 3745
DI-42
< SERVICE INFORMATION >
CVT INDICATOR
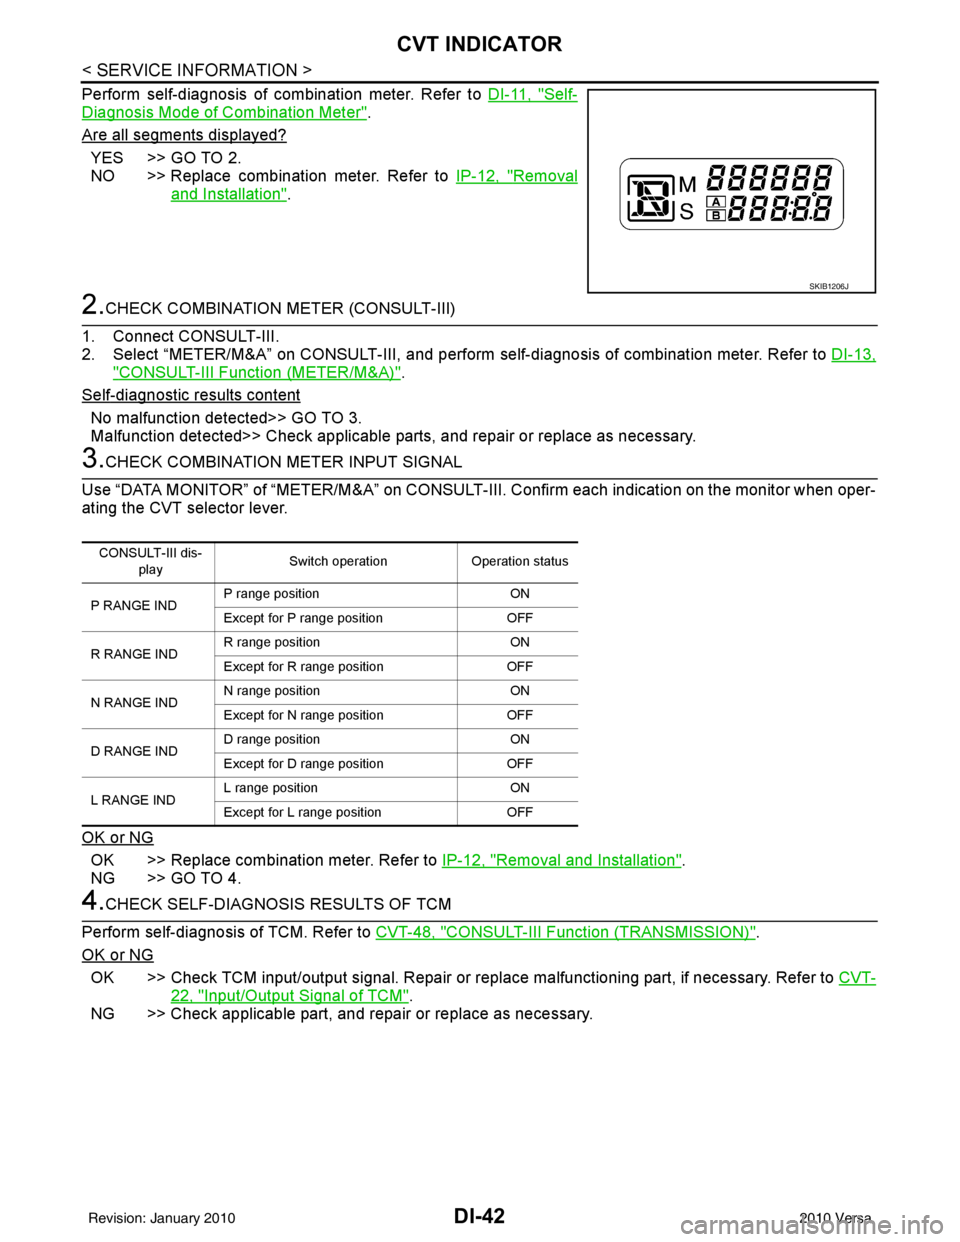
Perform self-diagnosis of combination meter. Refer to DI-11, "Self-
Diagnosis Mode of Combination Meter".
Are all segments displayed?
YES >> GO TO 2.
NO >> Replace combination meter. Refer to IP-12, "
Removal
and Installation".
2.CHECK COMBINATION METER (CONSULT-III)
1. Connect CONSULT-III.
2. Select “METER/M&A” on CONSULT- III, and perform self-diagnosis of combination meter. Refer to DI-13,
"CONSULT-III Function (METER/M&A)".
Self
-diagnostic results content
No malfunction detected>> GO TO 3.
Malfunction detected>> Check applicable parts, and repair or replace as necessary.
3.CHECK COMBINATION METER INPUT SIGNAL
Use “DATA MONITOR” of “METER/M&A” on CONSULT-III. Confirm each indication on the monitor when oper-
ating the CVT selector lever.
OK or NG
OK >> Replace combination meter. Refer to IP-12, "Removal and Installation".
NG >> GO TO 4.
4.CHECK SELF-DIAGNOSIS RESULTS OF TCM
Perform self-diagnosis of TCM. Refer to CVT-48, "
CONSULT-III Function (TRANSMISSION)".
OK or NG
OK >> Check TCM input/output signal. Repair or replace malfunctioning part, if necessary. Refer to CVT-
22, "Input/Output Signal of TCM".
NG >> Check applicable part, and repair or replace as necessary.
SKIB1206J
CONSULT-III dis-
play Switch operation
Operation status
P RANGE IND P range position
ON
Except for P range position OFF
R RANGE IND R range position
ON
Except for R range position OFF
N RANGE IND N range position
ON
Except for N range position OFF
D RANGE IND D range position
ON
Except for D range position OFF
L RANGE IND L range position
ON
Except for L range position OFF
Revision: January 20102010 Versa
Page 1283 of 3745
![NISSAN LATIO 2010 Service Repair Manual EC-18
< BASIC INSPECTION >[HR16DE]
DIAGNOSIS AND REPAIR WORK FLOW
NO-1 >> No request for I/M examination from the custom
er: Before returning the vehicle to the customer,
always erase unnecessary DTC NISSAN LATIO 2010 Service Repair Manual EC-18
< BASIC INSPECTION >[HR16DE]
DIAGNOSIS AND REPAIR WORK FLOW
NO-1 >> No request for I/M examination from the custom
er: Before returning the vehicle to the customer,
always erase unnecessary DTC](/manual-img/5/57358/w960_57358-1282.png)
EC-18
< BASIC INSPECTION >[HR16DE]
DIAGNOSIS AND REPAIR WORK FLOW
NO-1 >> No request for I/M examination from the custom
er: Before returning the vehicle to the customer,
always erase unnecessary DTC in ECM and TCM (Transmission Control Module). Refer to EC-
84, "Diagnosis Description".
NO-2 >> I/M examination, request ed from the customer: GO TO 13.
13.PREPARE FOR I/M EXAMINATION
1. Set SRT codes. Refer to EC-471, "
HowtoSetSRTCode".
2. Erase permanent DTCs. Refer to EC-473, "
How to Erase Permanent DTC".
>> INSPECTION END
Diagnostic Work SheetINFOID:0000000005398230
DESCRIPTION
There are many operating conditions that lead to the malfunction of
engine components. A good grasp of such conditions can make trou-
bleshooting faster and more accurate.
In general, each customer feels differently about an incident. It is
important to fully understand the symptoms or conditions for a cus-
tomer complaint.
Utilize a diagnostic worksheet like the one on the WORKSHEET
SAMPLE in order to organize all the information for troubleshooting.
Some conditions may cause the MIL to come on steady or blink and
DTC to be detected. Examples:
• Vehicle ran out of fuel, which caused the engine to misfire.
• Fuel filler cap was left off or incorrectly screwed on, allowing fuel to evaporate into the atmosphere.
SEF907L
Revision: January 20102010 Versa
Page 1291 of 3745
![NISSAN LATIO 2010 Service Repair Manual EC-26
< BASIC INSPECTION >[HR16DE]
INSPECTION AND ADJUSTMENT
• Each time electric throttle control actuator or ECM is replaced.
• Idle speed or ignition timing is out of specification.
IDLE AIR VO NISSAN LATIO 2010 Service Repair Manual EC-26
< BASIC INSPECTION >[HR16DE]
INSPECTION AND ADJUSTMENT
• Each time electric throttle control actuator or ECM is replaced.
• Idle speed or ignition timing is out of specification.
IDLE AIR VO](/manual-img/5/57358/w960_57358-1290.png)
EC-26
< BASIC INSPECTION >[HR16DE]
INSPECTION AND ADJUSTMENT
• Each time electric throttle control actuator or ECM is replaced.
• Idle speed or ignition timing is out of specification.
IDLE AIR VOLUME LEARNING
: Special Repair RequirementINFOID:0000000005398245
1.PRECONDITIONING
Make sure that all of the following conditions are satisfied.
Learning will be cancelled if any of the follo wing conditions are missed for even a moment.
• Battery voltage: More than 12.9 V (At idle)
• Engine coolant temperature: 70 - 100 °C (158 - 212° F)
• Selector lever: P or N (A/T), Neutral (M/T)
• Electric load switch: OFF (Air conditioner, headlamp, rear window defogger)
On vehicles equipped with daytime light systems, if the parking brake is applied before the engine is
started the headlamp will not be illuminated.
• Steering wheel: Neutral (Straight-ahead position)
• Vehicle speed: Stopped
• Transmission: Warmed-up
- A/T models
• With CONSULT-III: Drive vehicle until “FLUID TEMP SE” in “DATA MONITOR” mode of “TRANSMISSION”
system indicates less than 0.9 V.
• Without CONSULT-III: Drive vehicle for 10 minutes.
- M/T models
• Drive vehicle for 10 minutes.
Do you have CONSULT-III?
YES >> GO TO 2.
NO >> GO TO 3.
2.IDLE AIR VOLUME LEARNING
With CONSULT-III
1. Perform Accelerator Pedal Released Position Learning. Refer to EC-25, "
ACCELERATOR PEDAL
RELEASED POSITION LEARNING : Special Repair Requirement".
2. Perform Throttle Valve Closed Position Learning. Refer to EC-25, "
THROTTLE VALVE CLOSED POSI-
TION LEARNING : Special Repair Requirement".
3. Start engine and warm it up to normal operating temperature.
4. Select “IDLE AIR VOL LEARN” in “WORK SUPPORT” mode.
5. Touch “START” and wait 20 seconds.
Is
“CMPLT” displayed on CONSULT-III screen?
YES >> GO TO 4.
NO >> GO TO 5.
3.IDLE AIR VOLUME LEARNING
Without CONSULT-III
NOTE:
• It is better to count the ti me accurately with a clock.
• It is impossible to switch the di agnostic mode when an accelerator pedal position sensor circuit has
a malfunction.
1. Perform Accelerator Pedal Released Position Learning. Refer to EC-25, "
ACCELERATOR PEDAL
RELEASED POSITION LEARNING : Special Repair Requirement".
2. Perform Throttle Valve Closed Position Learning. Refer to EC-25, "
THROTTLE VALVE CLOSED POSI-
TION LEARNING : Special Repair Requirement".
3. Start engine and warm it up to normal operating temperature.
4. Turn ignition switch OFF and wait at least 10 seconds.
5. Confirm that accelerator pedal is fully releas ed, turn ignition switch ON and wait 3 seconds.
6. Repeat the following procedure quickly five times within 5 seconds.
- Fully depress the accelerator pedal.
- Fully release the accelerator pedal.
7. Wait 7 seconds, fully depress the accelerator pedal and keep it for approx. 20 seconds until the MIL stops
blinking and turned ON.
8. Fully release the accelerator pedal within 3 seconds after the MIL turned ON.
Revision: January 20102010 Versa
Page 1301 of 3745
![NISSAN LATIO 2010 Service Repair Manual EC-36
< FUNCTION DIAGNOSIS >[HR16DE]
MULTIPORT FUEL INJECTION SYSTEM
MULTIPORT FUEL INJECTION SYSTEM
System DiagramINFOID:0000000005398252
System DescriptionINFOID:0000000005398253
INPUT/OUTPUT SIGNAL NISSAN LATIO 2010 Service Repair Manual EC-36
< FUNCTION DIAGNOSIS >[HR16DE]
MULTIPORT FUEL INJECTION SYSTEM
MULTIPORT FUEL INJECTION SYSTEM
System DiagramINFOID:0000000005398252
System DescriptionINFOID:0000000005398253
INPUT/OUTPUT SIGNAL](/manual-img/5/57358/w960_57358-1300.png)
EC-36
< FUNCTION DIAGNOSIS >[HR16DE]
MULTIPORT FUEL INJECTION SYSTEM
MULTIPORT FUEL INJECTION SYSTEM
System DiagramINFOID:0000000005398252
System DescriptionINFOID:0000000005398253
INPUT/OUTPUT SIGNAL CHART
*1: This sensor is not used to control the engine system under normal conditions.
JMBIA2193GB
Sensor
Input signal to ECMECM functionActuator
Crankshaft position sensor (POS) Engine speed*
3
Piston position
Fuel injection
& mixture ratio
controlFuel injector
Camshaft position sensor (PHASE)
Mass air flow sensor
Amount of intake air
Intake air temperature sensor Intake air temperature
Engine coolant temperature sensor Engine coolant temperature
Air fuel ratio (A/F) sensor 1 Density of oxygen in exhaust gas
Throttle position sensor Throttle position
Accelerator pedal position sensor Accelerator pedal position
Park/neutral position (PNP) switch (M/T)
Transmission range switch (A/T) Gear position
Battery Battery voltage*
3
Knock sensorEngine knocking condition
Heated oxygen sensor 2*
1Density of oxygen in exhaust gas
EPS control unit Power steering operation*
2
ABS actuator and electric unit (control unit)
Vehicle speed*2
Combination meter
BCMAir conditioner ON signal*
2
Revision: January 20102010 Versa