2010 MERCEDES-BENZ SLK55AMG key
[x] Cancel search: keyPage 158 of 312
Call lists
The audio system displays the calls received
(including missed calls) or made during phone
mode in their own lists.
i The particular menu item can only be
selected if calls have already been received
or made from audio system.
Displaying missed calls in the audio system
display is not possible with all mobile
phones.
The control system displays the list of
dialed numbers in the multifunction
display.
i The audio system’s call lists are not
synchronized with the call lists on your
mobile phone. If you make a call from your
mobile phone and only use the audio
system’s hands-free device, these calls will
not be listed.
Calling up the list X
% Q Call Lists.
X Select Calls Received or Calls
Dialed.
The appropriate list appears.
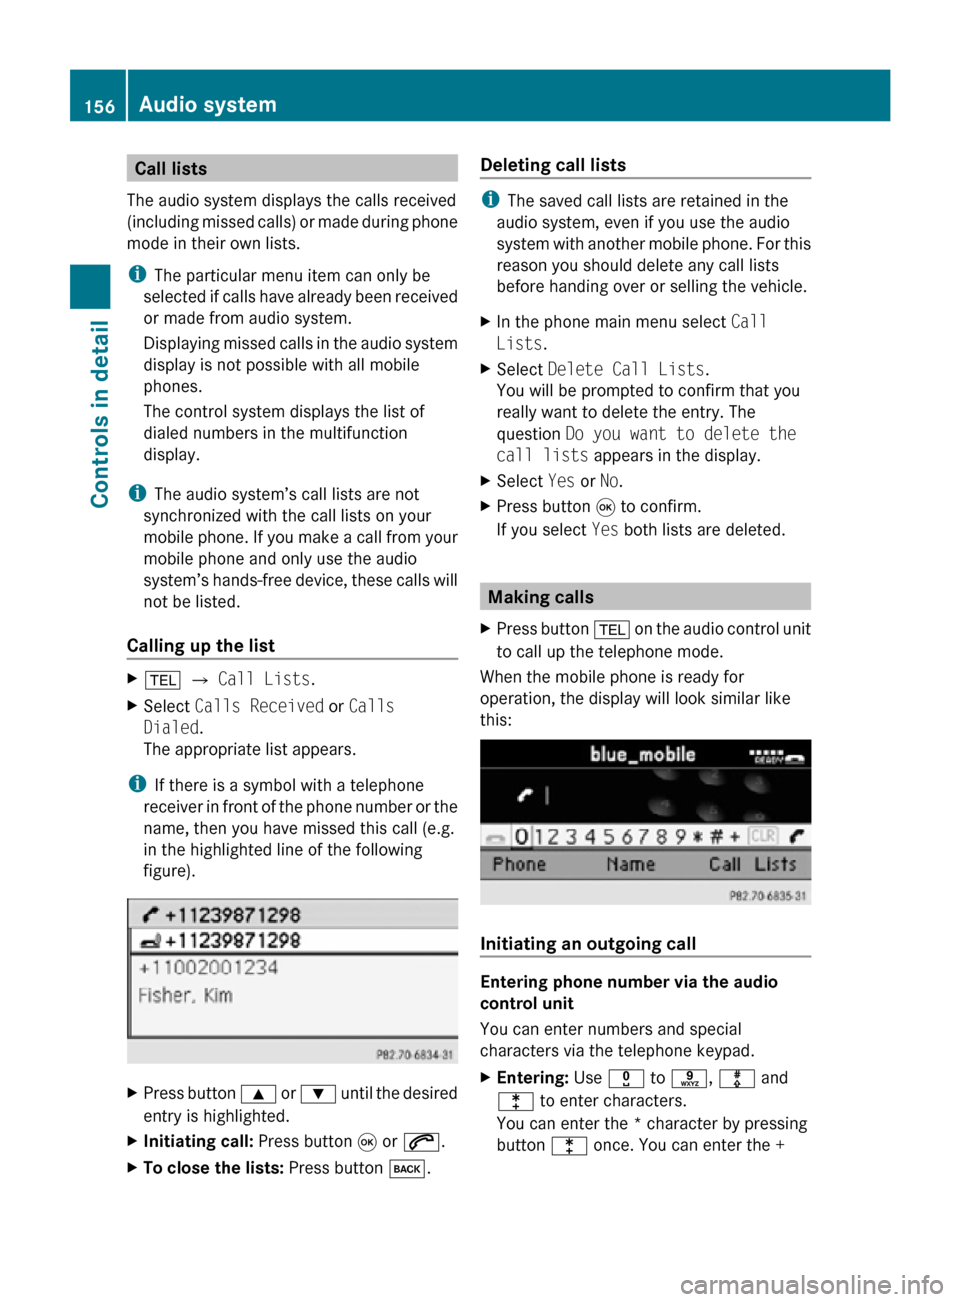
i If there is a symbol with a telephone
receiver in front of the phone number or the
name, then you have missed this call (e.g.
in the highlighted line of the following
figure). X
Press button 9 or : until the desired
entry is highlighted.
X Initiating call: Press button 9 or 6.
X To close the lists: Press button k. Deleting call lists i
The saved call lists are retained in the
audio system, even if you use the audio
system with another mobile phone. For this
reason you should delete any call lists
before handing over or selling the vehicle.
X In the phone main menu select Call
Lists.
X Select Delete Call Lists.
You will be prompted to confirm that you
really want to delete the entry. The
question Do you want to delete the
call lists appears in the display.
X Select Yes or No.
X Press button 9 to confirm.
If you select Yes both lists are deleted. Making calls
X Press button % on the audio control unit
to call up the telephone mode.
When the mobile phone is ready for
operation, the display will look similar like
this: Initiating an outgoing call
Entering phone number via the audio
control unit
You can enter numbers and special
characters via the telephone keypad.
X
Entering: Use x to s, m and
l to enter characters.
You can enter the * character by pressing
button l once. You can enter the + 156
Audio systemControls in detail
171_AKB; 3; 60, en-US
d2ureepe,
Version: 2.11.8.1 2009-05-11T16:00:23+02:00 - Seite 156
Page 173 of 312
G
Warning!
Before operating the retractable hardtop,
make sure there is no danger of anyone being
injured by the moving parts (retractable
hardtop, roof frame, and trunk lid).
Hands must never be placed near the roof
frame, upper windshield area, hardtop, shelf
behind roll bars, or trunk lid while the
retractable hardtop is being raised or
lowered. Serious personal injury may occur.
If potential danger exists, release the
retractable hardtop switch or button % or
& on the SmartKey. This immediately
interrupts the raising or lowering procedure.
You then can operate the retractable hardtop
switch or press button % or & on the
SmartKey to raise or lower the retractable
hardtop away from the danger zone
! Never sit or place heavy objects on the
rear shelf. Doing so could cause damage to
the retractable hardtop and the rear shelf.
! Please keep in mind that weather
conditions can sometimes change rapidly.
Make sure to close the retractable hardtop
when leaving the vehicle. If water enters
the vehicle interior, vehicle electronics
could be damaged which is not covered by
the Mercedes-Benz Limited Warranty.
! When opening and closing the retractable
hardtop, make sure
R there is sufficient clearance for the
retractable hardtop to move up and for
the trunk lid to move back
R the luggage cover is installed, extended
and closed
R the trunk is loaded only to the height of
the luggage cover
R the luggage/cargo does not push up the
closed luggage cover R
the trunk lid is closed
R the outside temperature is above +5‡
(-15†)
Otherwise the retractable hardtop and
trunk as well as other parts of the vehicle
could be damaged. Opening and closing
With the retractable hardtop switch G
Observe Safety notes, see page 170.
X Engage the parking brake.
X Close the luggage cover ( Y page 173).
X Close the trunk lid.
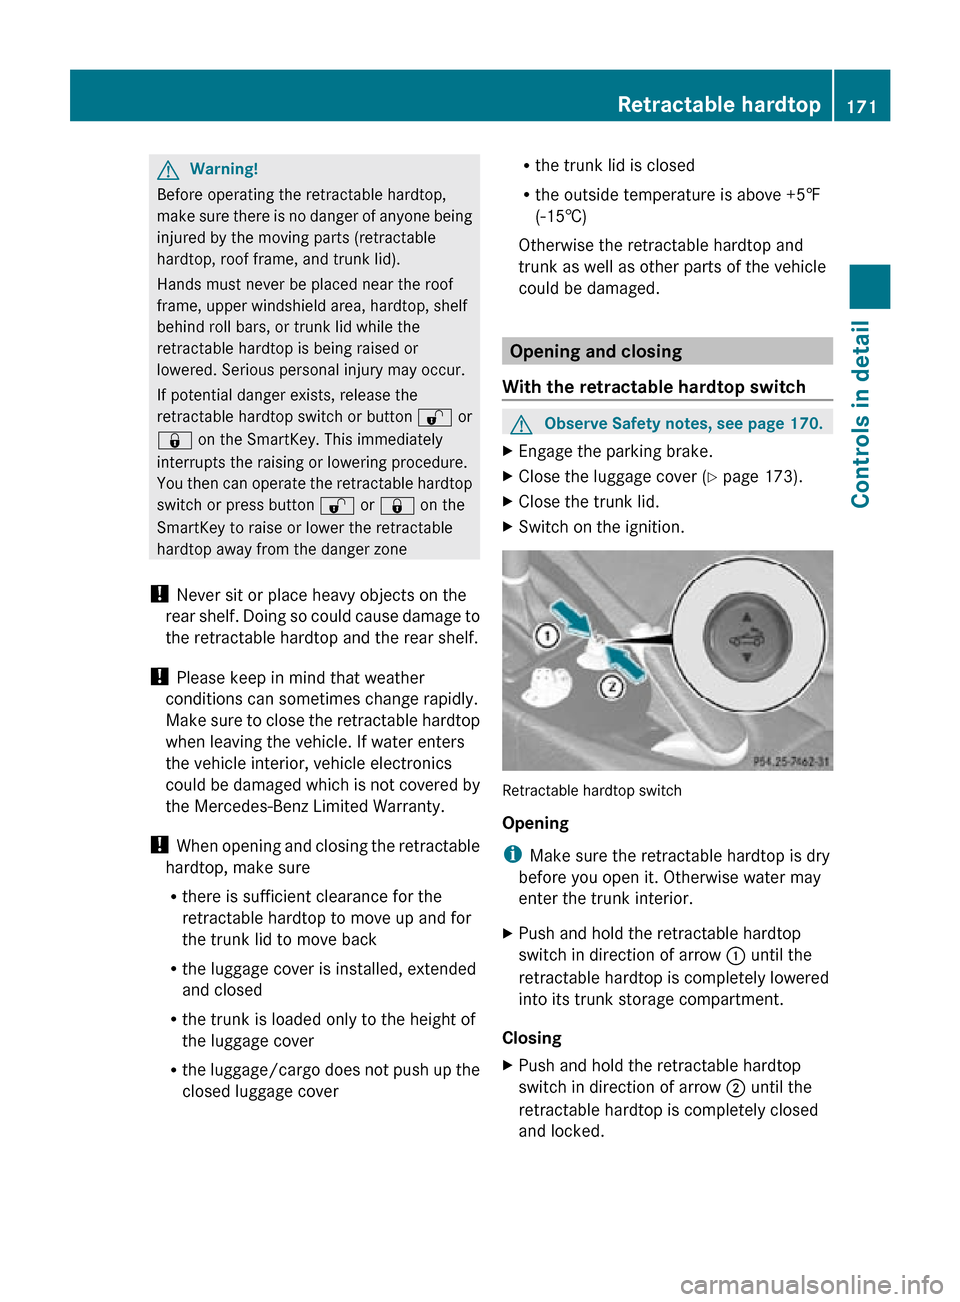
X Switch on the ignition. Retractable hardtop switch
Opening
i
Make sure the retractable hardtop is dry
before you open it. Otherwise water may
enter the trunk interior.
X Push and hold the retractable hardtop
switch in direction of arrow : until the
retractable hardtop is completely lowered
into its trunk storage compartment.
Closing
X Push and hold the retractable hardtop
switch in direction of arrow ; until the
retractable hardtop is completely closed
and locked. Retractable hardtop
171Controls in detail
171_AKB; 3; 60, en-US
d2ureepe, Version: 2.11.8.1 2009-05-11T16:00:23+02:00 - Seite 171 Z
Page 174 of 312
With the SmartKey
G
Observe Safety notes, see page 170. X
Close the luggage cover ( Y page 173).
X Close the trunk lid.
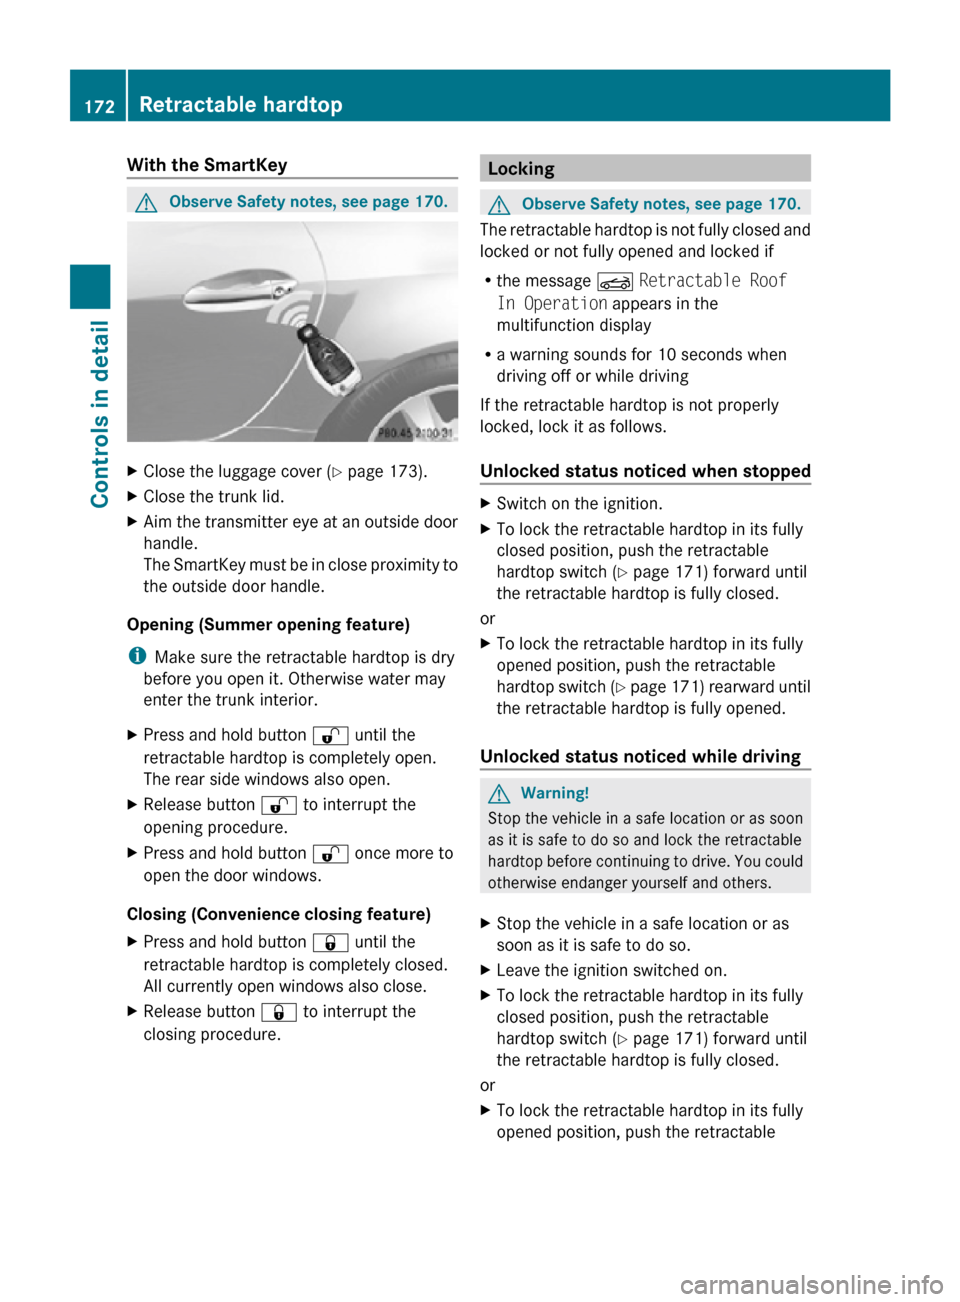
X Aim the transmitter eye at an outside door
handle.
The SmartKey must be in close proximity to
the outside door handle.
Opening (Summer opening feature)
i Make sure the retractable hardtop is dry
before you open it. Otherwise water may
enter the trunk interior.
X Press and hold button % until the
retractable hardtop is completely open.
The rear side windows also open.
X Release button % to interrupt the
opening procedure.
X Press and hold button % once more to
open the door windows.
Closing (Convenience closing feature)
X Press and hold button & until the
retractable hardtop is completely closed.
All currently open windows also close.
X Release button & to interrupt the
closing procedure. Locking
G
Observe Safety notes, see page 170.
The retractable hardtop is not fully closed and
locked or not fully opened and locked if
R the message K Retractable Roof
In Operation appears in the
multifunction display
R a warning sounds for 10 seconds when
driving off or while driving
If the retractable hardtop is not properly
locked, lock it as follows.
Unlocked status noticed when stopped X
Switch on the ignition.
X To lock the retractable hardtop in its fully
closed position, push the retractable
hardtop switch ( Y page 171) forward until
the retractable hardtop is fully closed.
or
X To lock the retractable hardtop in its fully
opened position, push the retractable
hardtop switch (Y page 171) rearward until
the retractable hardtop is fully opened.
Unlocked status noticed while driving G
Warning!
Stop the vehicle in a safe location or as soon
as it is safe to do so and lock the retractable
hardtop before continuing to drive. You could
otherwise endanger yourself and others.
X Stop the vehicle in a safe location or as
soon as it is safe to do so.
X Leave the ignition switched on.
X To lock the retractable hardtop in its fully
closed position, push the retractable
hardtop switch ( Y page 171) forward until
the retractable hardtop is fully closed.
or
X To lock the retractable hardtop in its fully
opened position, push the retractable 172
Retractable hardtopControls in detail
171_AKB; 3; 60, en-US
d2ureepe,
Version: 2.11.8.1 2009-05-11T16:00:23+02:00 - Seite 172
Page 184 of 312

i
If the indicator lamp in Information
button : is flashing continuously and
there was no voice connection to the
Customer Assistance Center established,
then the Tele Aid system could not initiate
an Information call (e.g. the relevant
cellular phone network is not available).
The message Call Failed appears in the
multifunction display.
X Terminating calls: Press button ~ on
the multifunction steering wheel.
or
X Press the respective button for ending a
telephone call on the audio system or the
COMAND system.
Call priority If other service calls such as a Roadside
Assistance
call or Information call are active,
an emergency call is still possible. In this
case, the emergency call will take priority and
override all other active calls.
The indicator lamp in the respective button
flashes until the call is concluded. Automatic
initiated emergency calls can only be
terminated by a Customer Assistance Center
representative. All other calls can be
terminated by pressing button ~ on the
multifunction steering wheel or the
respective button for ending a telephone call
on the audio system or the COMAND system.
i When a Tele Aid call has been initiated,
the audio system or the COMAND system
is muted. The mobile phone is no longer
connected to the COMAND system. If you
must use this phone, we recommend that
you use it only with the vehicle at a
standstill in a safe location.
Destination Download to the COMAND
system i
The
components and operating principles
of the COMAND system can be found in the separate COMAND system operating
instructions.
Destination
Download allows you access to a
database of over 10 million points of interest
(POIs) that can be downloaded to your
vehicle’s navigation system. If you know the
destination, the address can be downloaded,
or can be provided with points of interests
near your location.
Route guidance
You will be prompted to confirm that route
guidance to the entered address is to be
started.
X Select Yes using button = or ; on
the COMAND system.
X Press button 9 on the COMAND system
to confirm.
The system calculates the route and
subsequently
starts the route guidance to the
defined address.
i If you select No, you can save the address
to your address book.
i The Destination Download feature is
available if the relevant mobile phone
network is available and data connection is
possible.
Search & Send “Search & Send” is a navigation destination
address entry service. For more information
on “Search & Send”, refer to separate
COMAND system operating instructions.
Remote door unlock
In case you have locked your vehicle
unintentionally
(e.g. SmartKey inside vehicle),
and the reserve SmartKey is not available:
X Contact the Customer Assistance Center
at 1-800-FOR-MERCedes 182
Useful features
Controls in detail
171_AKB; 3; 60, en-US
d2ureepe,
Version: 2.11.8.1 2009-05-11T16:00:23+02:00 - Seite 182
Page 193 of 312

fuel is not covered by the Mercedes-Benz
Limited Warranty.
! If you have accidentally filled the tank
with incorrect or non-approved fuel, do not
switch on the ignition. Otherwise the
incorrect or non-approved fuel will get into
the fuel lines. The fuel system must be
drained completely. Contact an authorized
Mercedes-Benz Center to have the fuel
system drained completely.
! To prevent damage to the catalytic
converters, only use premium unleaded
gasoline in this vehicle.
Any noticeable irregularities in engine
operation should be repaired promptly.
Otherwise, excessive unburned fuel may
reach the catalytic converter, causing it to
overheat and potentially start a fire.
i Only use premium unleaded gasoline with
a minimum Posted Octane Rating of 91
(average of 96 RON/86 MON).
Information on gasoline quality can
normally be found on the fuel pump. Please
contact gas station personnel in case
labels on the pump cannot be found.
For more information on gasoline, see
“Premium unleaded gasoline”
(Y page 303), see “Fuel requirements”
(Y page 303), or contact an authorized
Mercedes-Benz Center, or visit
www.mbusa.com (USA only).
Locking/unlocking the vehicle with the
SmartKey automatically locks/unlocks the
fuel filler flap.
i In case the central locking system does
not release the fuel filler flap, or the
opening mechanism is clamping, contact
Roadside Assistance or an authorized
Mercedes-Benz Center.
The fuel filler flap is located on the right-hand
side of the vehicle towards the rear. X
Turn off the engine.
i Leaving the engine running and the fuel
filler cap open can cause the yellow fuel
tank reserve warning lamp to flash and the
malfunction indicator lamp ! (USA
only) or ; (Canada only) to illuminate.
For more information, see also “Practical
hints” (Y page 262).
X Remove the SmartKey from the starter
switch.
X Opening: Press fuel filler flap : at the
point indicated by the arrow.
X Turn fuel filler cap ; counterclockwise.
X Take off fuel filler cap ;.
X Place fuel filler cap ; in direction of arrow
into holder =.
X Fully insert filler nozzle unit and refuel.
X Only fill your tank until the filler nozzle unit
cuts out – do not top off or overfill .
X Closing: Turn fuel filler cap ; clockwise
until it audibly engages.
i Close the fuel filler flap before locking the
vehicle. Otherwise the flap locking pin will
prevent closing the fuel filler flap.
X Close fuel filler flap :. Check regularly and before a long trip
For information on quantities and
requirements of operating agents, see “Fuels,
coolants, lubricants, etc.” (Y page 300). At the gas station
191Operation
171_AKB; 3; 60, en-US
d2ureepe, Version: 2.11.8.1 2009-05-11T16:00:23+02:00 - Seite 191 Z
Page 225 of 312
parking brake is released. Observe
additional messages in the multifunction
display that may appear.
Brake
pad wear or a leak in the system may
be the reason for low brake fluid in the
reservoir.
Have the brake system inspected
immediately. Contact an authorized
Mercedes-Benz Center.
All checks and service work on the brake
system should be carried out by qualified
technicians only. Contact an authorized
Mercedes-Benz Center.
Only install brake pads and use brake fluid
recommended by Mercedes-Benz. G
Warning!
If other than recommended brake pads are
installed, or other than recommended brake
fluid is used, the braking properties of the
vehicle
can be degraded to an extent that safe
braking is substantially impaired. This could
result in an accident.
! Because the ESP ®
operates
automatically, the engine and ignition must
be shut off (SmartKey in starter switch
position 0 or 1) when the parking brake is
being tested on a brake test dynamometer
or when the vehicle is being towed with the
front axle raised.
Active braking action through the ESP ®
may otherwise seriously damage the brake
system which is not covered by the
Mercedes-Benz Limited Warranty.
If your brake system is only subjected to
moderate loads, you should occasionally test
the effectiveness of the brakes by applying
above-normal braking pressure at higher
speeds. This will also enhance the grip of the
brake pads. G
Warning!
Make sure not to endanger any other road
users when carrying out these braking
maneuvers. Refer to the description of the Brake Assist
System (BAS) (
Y page 49).
High-performance brake system The high-performance brake system is only
available on SLK 55 AMG.
G
Warning!
New vehicle brake pads and discs, and
replacement brake pads and discs may take
several hundred miles of driving until they
provide
optimum braking efficiency. Until that
time, you may need to use increased brake
pedal pressure while braking. Please be aware
of this and adjust your driving and braking
accordingly during this break-in period.
Excessive high-demand braking will cause
correspondingly high brake wear. Please be
attentive to the brake warning lamp in the
instrument cluster and brake condition
messages in the multifunction display.
Especially for high performance driving, it is
important to maintain and have the brake
system checked regularly.
The high-performance brake system is
designed to operate under the extremely high
operating demands required to
accommodate the performance capabilities
of the vehicle.
The brakes may produce a squeaking-type
noise depending on the
R vehicle speed
R brake force applied
R ambient conditions, e.g. temperature and
humidity
As with any brake system, the wear of
individual brake system components such as
brake pads or disks strongly depends on your
driving style and the conditions under which
you operate the vehicle. Thus, a driving style
calling for high-demand braking will cause
your vehicle’s brakes to wear more quickly. Driving instructions
223
Operation
171_AKB; 3; 60, en-US
d2ureepe, Version: 2.11.8.1 2009-05-11T16:00:23+02:00 - Seite 223 Z
Page 232 of 312
G
Warning!
For safety reasons, switch off wipers and
remove SmartKey from starter switch before
cleaning the windshield and/or the wiper
blades. Otherwise, the wiper motor could
suddenly turn on and cause injury.
! Do not pull on the wiper blade inserts.
They could tear.
X Fold the wiper arms forward until they snap
into place.
X Clean the windshield and the wiper blade
inserts with a clean cloth and mild
detergent solution.
X Use a soft, clean cloth and a mild window
cleaning solution on all outside and inside
glass surfaces.
An automotive glass cleaner is
recommended.
! Fold the windshield wiper arms back onto
the windshield before turning the SmartKey
in the starter switch.
Hold on to the wiper when folding the wiper
arm back. If released, the force of the
impact from the tensioning spring could
crack the windshield.
! To clean the window interior, do not use
a dry cloth, abrasives, solvents or cleaners
containing solvents. Do not touch the
inside of the windows with hard objects
such as an ice scraper or ring. Doing so may
damage the windows.
Rear window cleaning
Clean the rear window with the hardtop fully
raised and closed. G
Warning!
Do not clean the rear window with the hardtop
in a position other than the fully raised and
closed position. Otherwise, the hardtop may
move unexpectedly which may result in
personal injury to you or others. X
Use a soft, clean cloth and a mild window
cleaning solution on all outside and inside
glass surfaces.
An automotive glass cleaner is
recommended.
Light alloy wheels If possible, clean wheels once a week.
X
Use Mercedes-Benz approved Wheel Care,
a soft bristle brush and a strong spray of
water for cleaning the light alloy wheels.
! Only use acid-free cleaning materials.
Acid may cause corrosion or damage the
clear coat.
! The vehicle should not be parked for an
extended period of time immediately after
it
has been cleaned. This applies especially
after the wheel rims have been cleaned
with wheel rim cleaner. Wheel rim cleaners
can lead to increased corrosion of the
brake disks and brake pads. Non-approved
wheel cleaners may also damage the wheel
paint if the vehicle is not driven after
cleaning.
Therefore, the vehicle’s brake system
should always be warmed-up before it is
parked after cleaning. Drive your vehicle for
several minutes to allow the brakes to dry.
When applying Mercedes-Benz approved
Tire Care and Mercedes-Benz approved
Wheel Care products, take care not to
spray them on the brake disks.
Plastic and rubber parts X
Use a gentle dishwashing detergent or mild
detergent
for delicate fabrics as a washing
solution.
X Wipe with a cloth moistened in a lukewarm
solution.
The
surface may temporarily change color.
If this is the case, wait for it to dry. 230
Vehicle care
Operation
171_AKB; 3; 60, en-US
d2ureepe,
Version: 2.11.8.1 2009-05-11T16:00:23+02:00 - Seite 230
Page 235 of 312
Vehicle equipment ............................
234
Where will I find ...? .......................... 234
Vehicle status messages in the
multifunction display ....................... 236
What to do if … .................................. 256
Unlocking/locking manually ...........264
Opening/closing manually ..............266
Replacing SmartKey batteries ......... 266
Replacing bulbs ................................. 267
Replacing wiper blades ....................271
Flat tire .............................................. 273
Battery ............................................... 282
Jump starting .................................... 283
Towing the vehicle ............................285
Fuses .................................................. 288 233Practical hints
171_AKB; 3; 60, en-US
d2ureepe,
Version: 2.11.8.1 2009-05-11T16:00:23+02:00 - Seite 233