2010 MERCEDES-BENZ SLK55AMG key
[x] Cancel search: keyPage 89 of 312
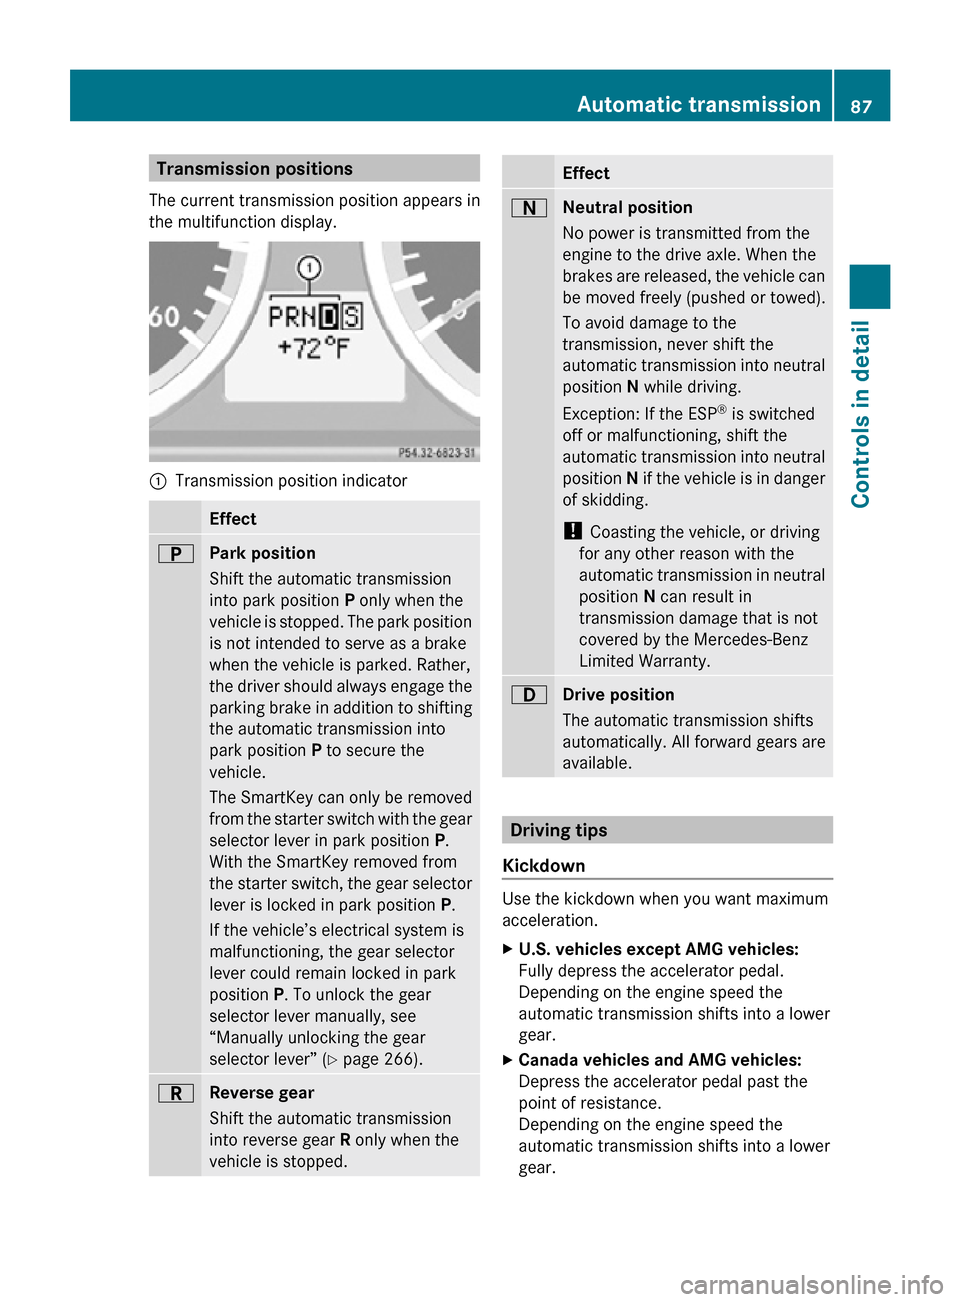
Transmission positions
The current transmission position appears in
the multifunction display. :
Transmission position indicator Effect
B
Park position
Shift the automatic transmission
into park position P only when the
vehicle is stopped. The park position
is not intended to serve as a brake
when the vehicle is parked. Rather,
the driver should always engage the
parking brake in addition to shifting
the automatic transmission into
park position P to secure the
vehicle.
The SmartKey can only be removed
from the starter switch with the gear
selector lever in park position P.
With the SmartKey removed from
the starter switch, the gear selector
lever is locked in park position
P.
If the vehicle’s electrical system is
malfunctioning, the gear selector
lever could remain locked in park
position P. To unlock the gear
selector lever manually, see
“Manually unlocking the gear
selector lever” ( Y page 266). C
Reverse gear
Shift the automatic transmission
into reverse gear R only when the
vehicle is stopped. Effect
A
Neutral position
No power is transmitted from the
engine to the drive axle. When the
brakes are released, the vehicle can
be moved freely (pushed or towed).
To avoid damage to the
transmission, never shift the
automatic transmission into neutral
position N while driving.
Exception: If the ESP ®
is switched
off or malfunctioning, shift the
automatic transmission into neutral
position N if the vehicle is in danger
of skidding.
! Coasting the vehicle, or driving
for any other reason with the
automatic transmission in neutral
position N can result in
transmission damage that is not
covered by the Mercedes-Benz
Limited Warranty. 7
Drive position
The automatic transmission shifts
automatically. All forward gears are
available.
Driving tips
Kickdown Use the kickdown when you want maximum
acceleration.
X
U.S. vehicles except AMG vehicles:
Fully depress the accelerator pedal.
Depending on the engine speed the
automatic transmission shifts into a lower
gear.
X Canada vehicles and AMG vehicles:
Depress the accelerator pedal past the
point of resistance.
Depending on the engine speed the
automatic transmission shifts into a lower
gear. Automatic transmission
87Controls in detail
171_AKB; 3; 60, en-US
d2ureepe, Version: 2.11.8.1 2009-05-11T16:00:23+02:00 - Seite 87 Z
Page 100 of 312
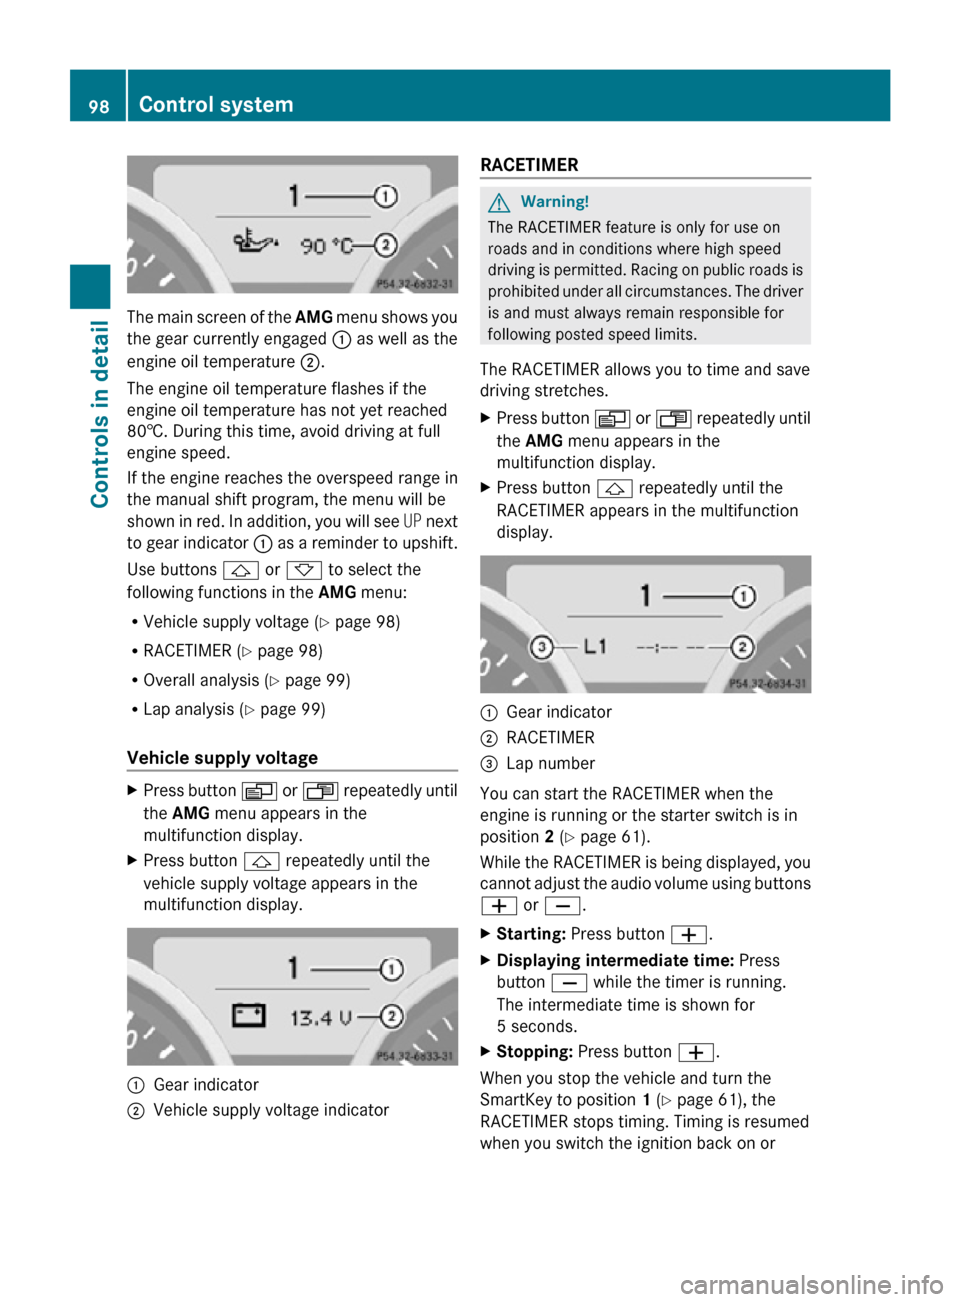
The main screen of the
AMG menu shows you
the gear currently engaged : as well as the
engine oil temperature ;.
The engine oil temperature flashes if the
engine oil temperature has not yet reached
80†. During this time, avoid driving at full
engine speed.
If the engine reaches the overspeed range in
the manual shift program, the menu will be
shown in red. In addition, you will see UP next
to gear indicator : as a reminder to upshift.
Use buttons & or * to select the
following functions in the AMG menu:
R Vehicle supply voltage ( Y page 98)
R RACETIMER (Y page 98)
R Overall analysis ( Y page 99)
R Lap analysis (Y page 99)
Vehicle supply voltage X
Press button V or U repeatedly until
the AMG menu appears in the
multifunction display.
X Press button & repeatedly until the
vehicle supply voltage appears in the
multifunction display. :
Gear indicator
; Vehicle supply voltage indicator RACETIMER G
Warning!
The RACETIMER feature is only for use on
roads and in conditions where high speed
driving is permitted. Racing on public roads is
prohibited under all circumstances. The driver
is and must always remain responsible for
following posted speed limits.
The RACETIMER allows you to time and save
driving stretches.
X Press button V or U repeatedly until
the AMG menu appears in the
multifunction display.
X Press button & repeatedly until the
RACETIMER appears in the multifunction
display. :
Gear indicator
; RACETIMER
= Lap number
You can start the RACETIMER when the
engine is running or the starter switch is in
position 2 (Y page 61).
While the RACETIMER is being displayed, you
cannot adjust the audio volume using buttons
W or X.
X Starting: Press button W.
X Displaying intermediate time: Press
button X while the timer is running.
The intermediate time is shown for
5 seconds.
X Stopping: Press button W.
When you stop the vehicle and turn the
SmartKey to position 1 (Y page 61), the
RACETIMER stops timing. Timing is resumed
when you switch the ignition back on or 98
Control systemControls in detail
171_AKB; 3; 60, en-US
d2ureepe,
Version: 2.11.8.1 2009-05-11T16:00:23+02:00 - Seite 98
Page 104 of 312

simply a reminder with respect to the
operation of certain systems. They do not
replace the owner’s and/or driver’s
responsibility to maintain the vehicle’s
operating safety. Have all required
maintenance and safety checks performed on
the vehicle. Bring the vehicle to an authorized
Mercedes-Benz Center to address the
malfunction and warning messages.
X Press button V or U repeatedly until
the Vehicle status message memory
menu appears in the multifunction display.
If conditions have occurred causing status
messages to be recorded, the number of
messages appears in the multifunction
display. :
Number of recorded status messages
X Press button & or *.
The stored messages will now be displayed
in the order in which they have occurred.
For malfunction and warning messages,
see “Vehicle status messages in the
multifunction display” ( Y page 236).
Should the vehicle’s system record any
conditions while driving, the number of
messages will reappear in the multifunction
display when the SmartKey in the starter
switch is turned to position 0 or removed
from the starter switch.
Except for high-priority messages, the vehicle
status message memory will be cleared when
you switch off the ignition. Settings menu
Introduction In the
Settings menu there are two
functions: The function To reset, push
reset button for 3 seconds, with which
you can reset all the settings to the original
factory settings and a collection of submenus
with which you can make individual settings
for your vehicle.
The following settings and submenus are
available in the Settings menu:
R Resetting to factory settings
(Y page 102)
R Submenus in the Settings menu
(Y page 103)
R Instrument cluster submenu
(Y page 103)
R Time/Date submenu ( Y page 105)
R Lighting submenu ( Y page 105)
R Vehicle submenu ( Y page 108)
R Convenience submenu ( Y page 108)
Resetting to factory settings You can reset the settings of all submenus to
the factory settings.
For safety reasons, the function
Headlamp
Mode in the Lighting submenu cannot be
reset while driving.
X Press button V or U repeatedly until
the Settings menu appears in the
multifunction display. 102
Control systemControls in detail
171_AKB; 3; 60, en-US
d2ureepe,
Version: 2.11.8.1 2009-05-11T16:00:23+02:00 - Seite 102
Page 108 of 312
The following functions are available:
R
Switching daytime running lamp mode on
or off (USA only) (Y page 106)
R Switching locator lighting on or off
(Y page 106)
R Switching night security illumination
(Headlamps delayed shut-off feature) on or
off (Y page 107)
R Switching interior lighting delayed shut-off
on or off ( Y page 107)
Switching daytime running lamp mode on
or off (USA only)
X Press button V or U repeatedly until
the Settings menu appears in the
multifunction display.
X Press button &.
X Move the selection marker with button
W or X to the Lighting submenu.
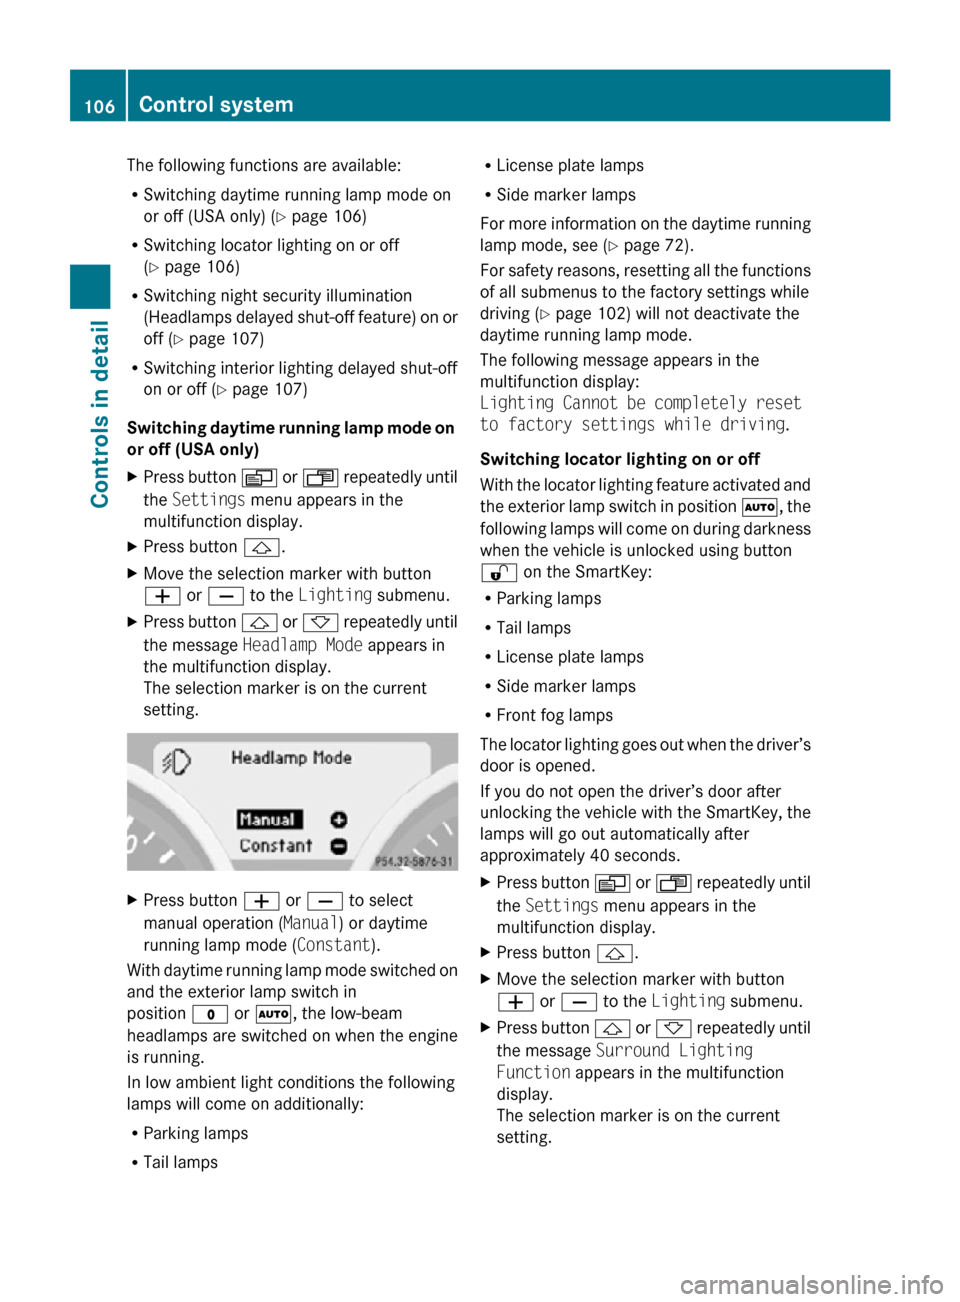
X Press button & or * repeatedly until
the message Headlamp Mode appears in
the multifunction display.
The selection marker is on the current
setting. X
Press button W or X to select
manual operation ( Manual) or daytime
running lamp mode ( Constant).
With daytime running lamp mode switched on
and the exterior lamp switch in
position $ or Ã, the low-beam
headlamps are switched on when the engine
is running.
In low ambient light conditions the following
lamps will come on additionally:
R Parking lamps
R Tail lamps R
License plate lamps
R Side marker lamps
For more information on the daytime running
lamp mode, see ( Y page 72).
For safety reasons, resetting all the functions
of all submenus to the factory settings while
driving ( Y page 102) will not deactivate the
daytime running lamp mode.
The following message appears in the
multifunction display:
Lighting Cannot be completely reset
to factory settings while driving.
Switching locator lighting on or off
With the locator lighting feature activated and
the exterior lamp switch in position Ã, the
following lamps will come on during darkness
when the vehicle is unlocked using button
% on the SmartKey:
R Parking lamps
R Tail lamps
R License plate lamps
R Side marker lamps
R Front fog lamps
The locator lighting goes out when the driver’s
door is opened.
If you do not open the driver’s door after
unlocking the vehicle with the SmartKey, the
lamps will go out automatically after
approximately 40 seconds.
X Press button V or U repeatedly until
the Settings menu appears in the
multifunction display.
X Press button &.
X Move the selection marker with button
W or X to the Lighting submenu.
X Press button & or * repeatedly until
the message Surround Lighting
Function appears in the multifunction
display.
The selection marker is on the current
setting. 106
Control systemControls in detail
171_AKB; 3; 60, en-US
d2ureepe,
Version: 2.11.8.1 2009-05-11T16:00:23+02:00 - Seite 106
Page 109 of 312
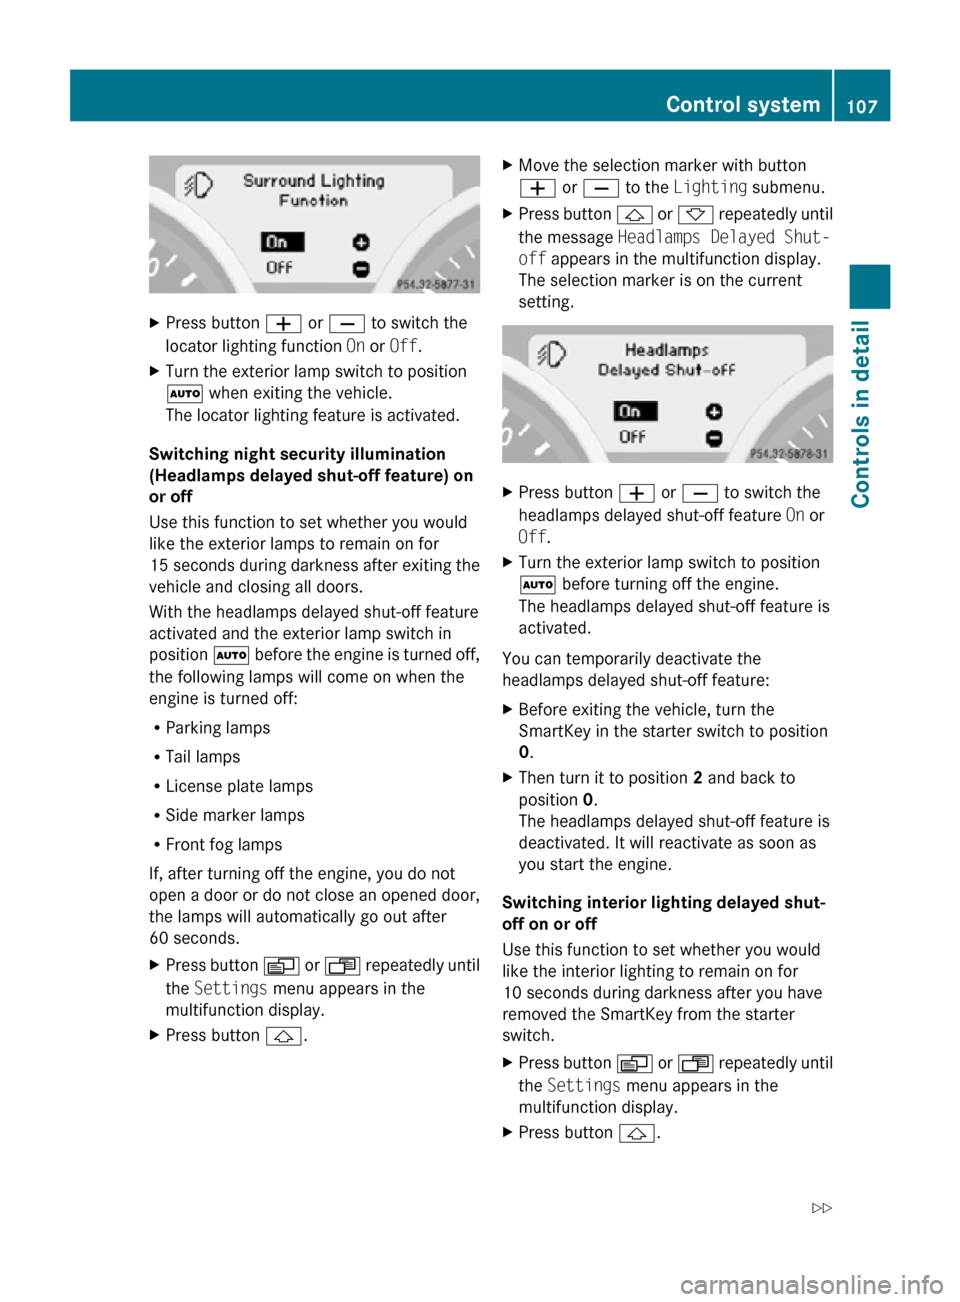
X
Press button W or X to switch the
locator lighting function On or Off.
X Turn the exterior lamp switch to position
à when exiting the vehicle.
The locator lighting feature is activated.
Switching night security illumination
(Headlamps delayed shut-off feature) on
or off
Use this function to set whether you would
like the exterior lamps to remain on for
15 seconds during darkness after exiting the
vehicle and closing all doors.
With the headlamps delayed shut-off feature
activated and the exterior lamp switch in
position à before the engine is turned off,
the following lamps will come on when the
engine is turned off:
R Parking lamps
R Tail lamps
R License plate lamps
R Side marker lamps
R Front fog lamps
If, after turning off the engine, you do not
open a door or do not close an opened door,
the lamps will automatically go out after
60 seconds.
X Press button V or U repeatedly until
the Settings menu appears in the
multifunction display.
X Press button &. X
Move the selection marker with button
W or X to the Lighting submenu.
X Press button & or * repeatedly until
the message Headlamps Delayed Shut-
off appears in the multifunction display.
The selection marker is on the current
setting. X
Press button W or X to switch the
headlamps delayed shut-off feature On or
Off.
X Turn the exterior lamp switch to position
à before turning off the engine.
The headlamps delayed shut-off feature is
activated.
You can temporarily deactivate the
headlamps delayed shut-off feature:
X Before exiting the vehicle, turn the
SmartKey in the starter switch to position
0.
X Then turn it to position 2 and back to
position 0.
The headlamps delayed shut-off feature is
deactivated. It will reactivate as soon as
you start the engine.
Switching interior lighting delayed shut-
off on or off
Use this function to set whether you would
like the interior lighting to remain on for
10 seconds during darkness after you have
removed the SmartKey from the starter
switch.
X Press button V or U repeatedly until
the Settings menu appears in the
multifunction display.
X Press button &. Control system
107Controls in detail
171_AKB; 3; 60, en-US
d2ureepe, Version: 2.11.8.1 2009-05-11T16:00:23+02:00 - Seite 107 Z
Page 111 of 312
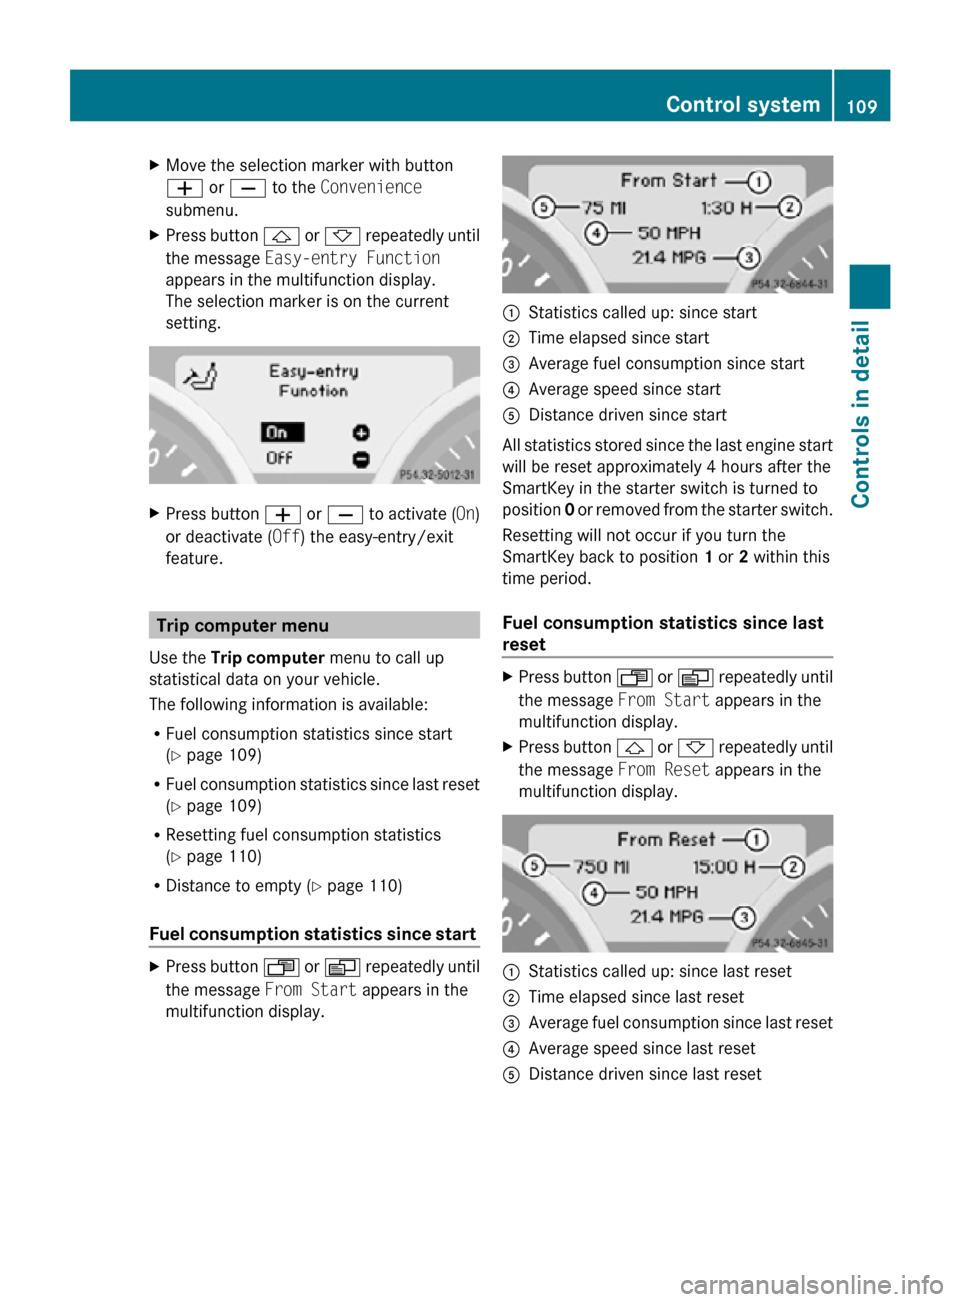
X
Move the selection marker with button
W or X to the Convenience
submenu.
X Press button & or * repeatedly until
the message Easy-entry Function
appears in the multifunction display.
The selection marker is on the current
setting. X
Press button W or X to activate ( On)
or deactivate (Off) the easy-entry/exit
feature. Trip computer menu
Use the Trip computer menu to call up
statistical data on your vehicle.
The following information is available:
R Fuel consumption statistics since start
(Y page 109)
R Fuel consumption statistics since last reset
(Y page 109)
R Resetting fuel consumption statistics
(Y page 110)
R Distance to empty ( Y page 110)
Fuel consumption statistics since start X
Press button U or V repeatedly until
the message From Start appears in the
multifunction display. :
Statistics called up: since start
; Time elapsed since start
= Average fuel consumption since start
? Average speed since start
A Distance driven since start
All statistics stored since the last engine start
will be reset approximately 4 hours after the
SmartKey in the starter switch is turned to
position 0 or removed from the starter switch.
Resetting will not occur if you turn the
SmartKey back to position 1 or 2 within this
time period.
Fuel consumption statistics since last
reset X
Press button U or V repeatedly until
the message From Start appears in the
multifunction display.
X Press button & or * repeatedly until
the message From Reset appears in the
multifunction display. :
Statistics called up: since last reset
; Time elapsed since last reset
= Average fuel consumption since last reset
? Average speed since last reset
A Distance driven since last reset Control system
109Controls in detail
171_AKB; 3; 60, en-US
d2ureepe, Version: 2.11.8.1 2009-05-11T16:00:23+02:00 - Seite 109 Z
Page 114 of 312
Audio system
Audio and telephone operation
These instructions are intended to help you
become familiar with your Mercedes-Benz
audio system. They contain useful tips and a
detailed description of the user functions. G
Warning!
In order to avoid distraction which could lead
to an accident, the driver should enter system
settings with the vehicle at a standstill and
operate the system only when road and traffic
conditions permit. Always pay full attention to
traffic conditions first before operating
system controls while driving.
Bear in mind that at a speed of just 30 mph
(approximately 50 km/h), your vehicle is
covering a distance of 44 feet (approximately
14 m) every second. Operating safety
G
Warning!
Any alterations made to electronic
components can cause malfunctions.
The radio, amplifier, CD changer, satellite
radio, and telephone are interconnected.
When one of the components is not
operational or has not been removed/
replaced properly, the function of other
components may be impaired.
This condition might seriously impair the
operating safety of your vehicle. We recommend that you have any service
work
on electronic components carried out at
an authorized Mercedes-Benz Center. Audio system components
With the audio system you can operate the
following main functions:
R Audio function with the radio, Satellite
radio,
disc (CD audio or MP3 mode), Audio
AUX and external audio devices
R the mobile phone with the phone book
R various system settings
In addition, the audio system can also be
operated with the multifunction steering
wheel (Y page 94).
In these instructions, the keypad (right side
of audio control unit) and the function buttons
are referred to as “buttons”.
Audio control unit With the audio control unit you can
R
switch the audio system on/off
R adjust the volume
R select the operating modes
R enter telephone numbers and accept,
reject, initiate and end telephone calls
R load and eject CDs 112
Audio system
Controls in detail
171_AKB; 3; 60, en-US
d2ureepe,
Version: 2.11.8.1 2009-05-11T16:00:23+02:00 - Seite 112
Page 115 of 312
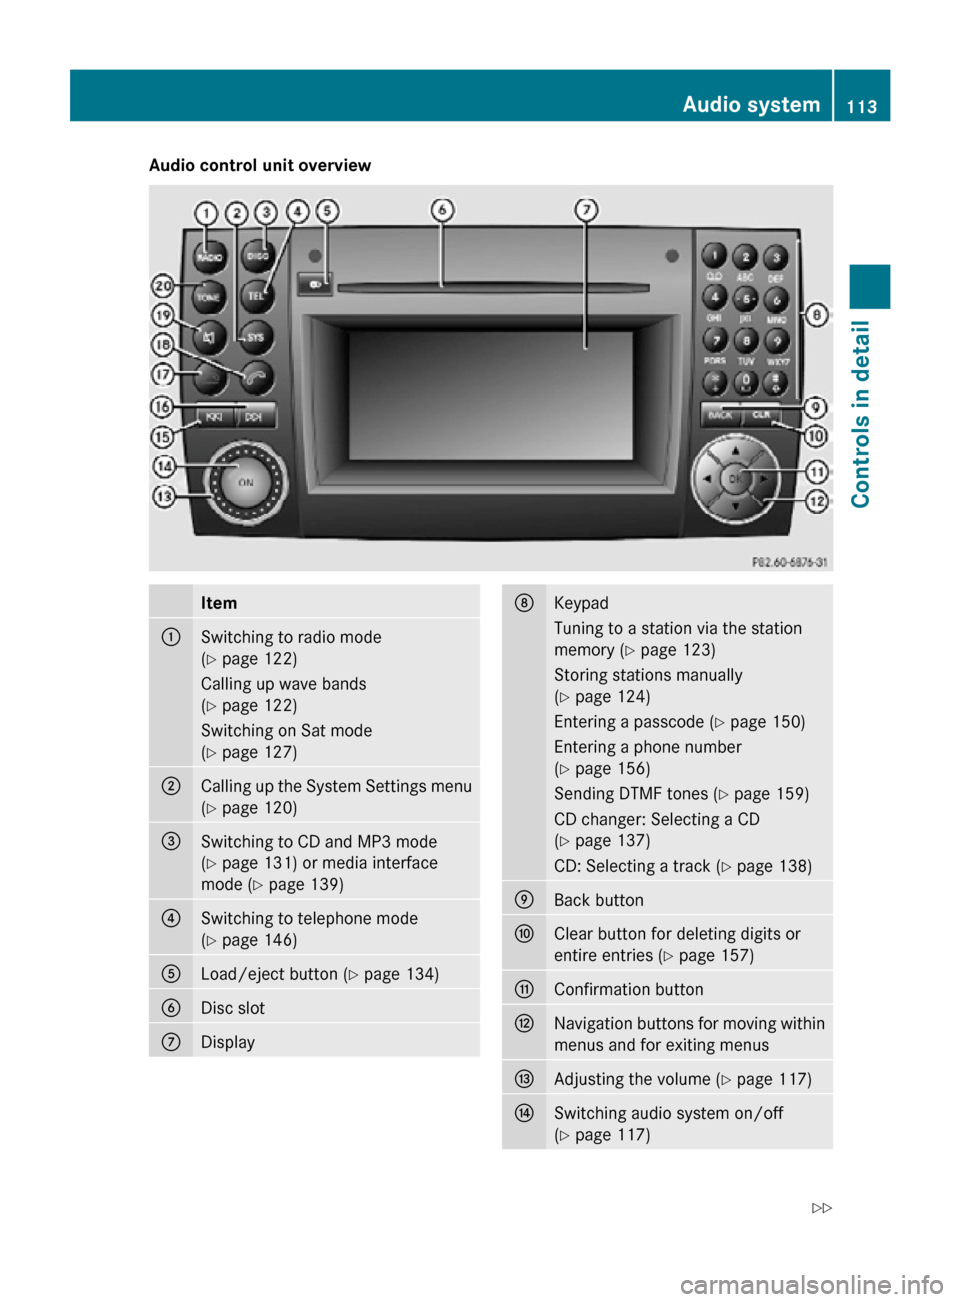
Audio control unit overview
Item
:
Switching to radio mode
(Y page 122)
Calling up wave bands
(Y page 122)
Switching on Sat mode
(Y page 127)
;
Calling up the System Settings menu
(Y page 120)
=
Switching to CD and MP3 mode
(Y page 131) or media interface
mode (
Y page 139) ?
Switching to telephone mode
(Y page 146)
A
Load/eject button (Y page 134)
B
Disc slot
C
Display D
Keypad
Tuning to a station via the station
memory (
Y page 123)
Storing stations manually
(Y page 124)
Entering a passcode (Y page 150)
Entering a phone number
(Y page 156)
Sending DTMF tones ( Y page 159)
CD changer: Selecting a CD
(Y page 137)
CD: Selecting a track (Y page 138) E
Back button
F
Clear button for deleting digits or
entire entries (
Y page 157) G
Confirmation button
H
Navigation buttons for moving within
menus and for exiting menus
I
Adjusting the volume (Y page 117)
J
Switching audio system on/off
(Y page 117) Audio system
113Controls in detail
171_AKB; 3; 60, en-US
d2ureepe, Version: 2.11.8.1 2009-05-11T16:00:23+02:00 - Seite 113 Z