2010 MERCEDES-BENZ SLK350 display
[x] Cancel search: displayPage 185 of 312
(1-800-367-6372) (USA only) or
1-888-923-8367
(Canada only).
You will be asked to provide your password.
X Then return to your vehicle at the time
arranged with the Customer Assistance
Center and pull the trunk recessed handle
for a minimum of 20 seconds until the
indicator
lamp in the SOS button is flashing.
The message Connecting Call appears in
the multifunction display.
As an alternative, you may unlock the vehicle
via Internet in the “My Tele Aid” section of
“Owner’s
Online”, using your ID and password
(USA only).
i The remote door unlock feature is
available if the relevant cellular phone
network is available.
The SOS button will flash and the message
Connecting Call will appear in the
multifunction display to indicate receipt of
the door unlock command.
If the trunk recessed handle was pulled for
more than 20 seconds before door unlock
authorization was received by the
Customer Assistance Center, you must
wait 15 minutes before pulling the trunk
recessed handle again.
Stolen Vehicle Recovery Services In the event your vehicle was stolen:
X
Report the incident to the police.
The police will issue a numbered incident
report.
X Pass this number on to the Customer
Assistance Center along with your
password.
The Customer Assistance Center will then
attempt to covertly contact the vehicle’s
Tele Aid system. Once the vehicle is
located, the Customer Assistance Center
will contact the local law enforcement and
you. The vehicle’s location will only be
provided to law enforcement.
i If the anti-theft alarm or the tow-away
alarm stays on for more than 30 seconds, a call to the Customer Assistance Center is
initiated automatically by the Tele Aid
system provided Tele Aid service was
subscribed to and properly activated, and
that necessary cellular service and GPS
coverage are available. See “Anti-theft
alarm system”
(Y page 51) and “Tow-away
alarm” ( Y page 52). Garage door opener
The
integrated remote control can operate up
to three separately controlled devices
compatible with HomeLink ®
or some other
systems. G
Warning!
Before programming the integrated remote
control to a garage door opener or gate
operator, make sure people and objects are
out of the way of the device to prevent
potential harm or damage. When
programming
a garage door opener, the door
moves up or down. When programming a gate
operator, the gate opens or closes.
Do not use the integrated remote control with
any garage door opener that lacks safety stop
and reverse features as required by U.S.
federal safety standards (this includes any
garage door opener model manufactured
before April 1, 1982). A garage door that
cannot detect an object - signaling the door
to stop and reverse - does not meet current
U.S. federal safety standards.
When programming a garage door opener,
park vehicle outside the garage.
Do not run the engine while programming the
integrated remote control. Inhalation of
exhaust gas is hazardous to your health. All
exhaust gas contains carbon monoxide (CO),
and inhaling it can cause unconsciousness
and possible death. Useful features
183
Controls in detail
171_AKB; 3; 60, en-US
d2ureepe, Version: 2.11.8.1 2009-05-11T16:00:23+02:00 - Seite 183 Z
Page 194 of 312
Check the following:
R
Engine oil level ( Y page 193)
R Tire inflation pressure ( Y page 201)
R Coolant level ( Y page 196)
R Vehicle lighting ( Y page 267)
R Washer system and headlamp cleaning
system (Y page 196)
R Brake fluid ( Y page 197) Engine compartment
Hood
G
Warning!
Do not pull the release lever while the vehicle
is in motion. Otherwise the hood could be
forced open by passing air flow.
This could cause the hood to come loose and
injure you and/or others.
Opening G
Warning!
Do not open the hood when the engine is
overheated. You could be seriously injured.
Observe the coolant temperature display to
determine whether the engine may be
overheated. If you see flames or smoke
coming from the engine compartment, move
away from the vehicle. Wait until the engine
has cooled. If necessary, call the fire
department. G
Warning!
You could be injured when the hood is open –
even when the engine is turned off.
Parts of the engine can become very hot. To
prevent burns, let the engine cool completely
before touching any components on the
vehicle. Comply with all relevant safety
precautions. G
Warning!
To help prevent personal injury, stay clear of
moving parts when the hood is open and the
engine is running.
The radiator fan may continue to run for
approximately 30 seconds or may even
restart after the engine has been turned off.
Stay clear of fan blades. G
Warning!
The engine is equipped with a transistorized
ignition system. Because of the high voltage
it is dangerous to touch any components
(ignition coils, spark plug sockets, diagnostic
socket) of the ignition system
R with the engine running
R while starting the engine
R when the ignition is switched on and the
engine is turned manually X
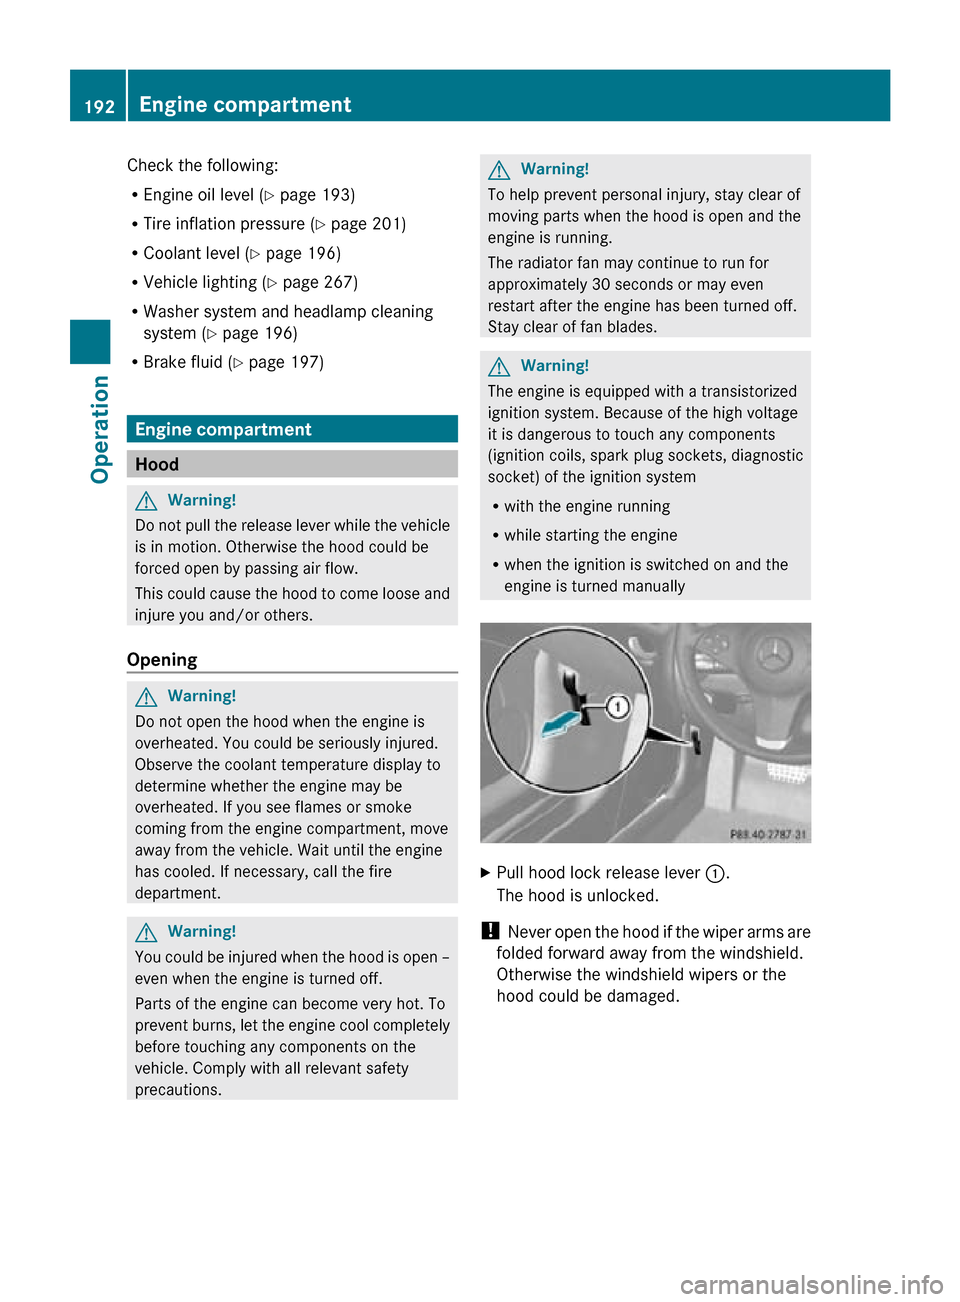
Pull hood lock release lever :.
The hood is unlocked.
! Never open the hood if the wiper arms are
folded forward away from the windshield.
Otherwise the windshield wipers or the
hood could be damaged. 192
Engine compartmentOperation
171_AKB; 3; 60, en-US
d2ureepe,
Version: 2.11.8.1 2009-05-11T16:00:23+02:00 - Seite 192
Page 196 of 312
X
Slowly insert oil dipstick : fully into the
dipstick guide tube.
X Pull out oil dipstick : again after
approximately 3 seconds to obtain
accurate reading.
The oil level is correct when it is between
lower (min) mark = and upper (max)
mark ; of oil dipstick :.
i The filling quantity between the upper and
lower marks on the oil dipstick is
approximately 2.1 US qt. (2.0 l).
X If necessary, add engine oil.
For more information on engine oil, see
“Fuels, coolants, lubricants etc.”
(Y page 300).
For information on messages in the
multifunction display concerning engine oil,
see the “Practical hints” section
(Y page 250).
Checking engine oil level with the
control system On the SLK 55 AMG you can check the engine
oil level with the control system.
X
Switch on the ignition.
The standard display appears in the
multifunction display ( Y page 96).
X Press button * or & on the
multifunction steering wheel repeatedly
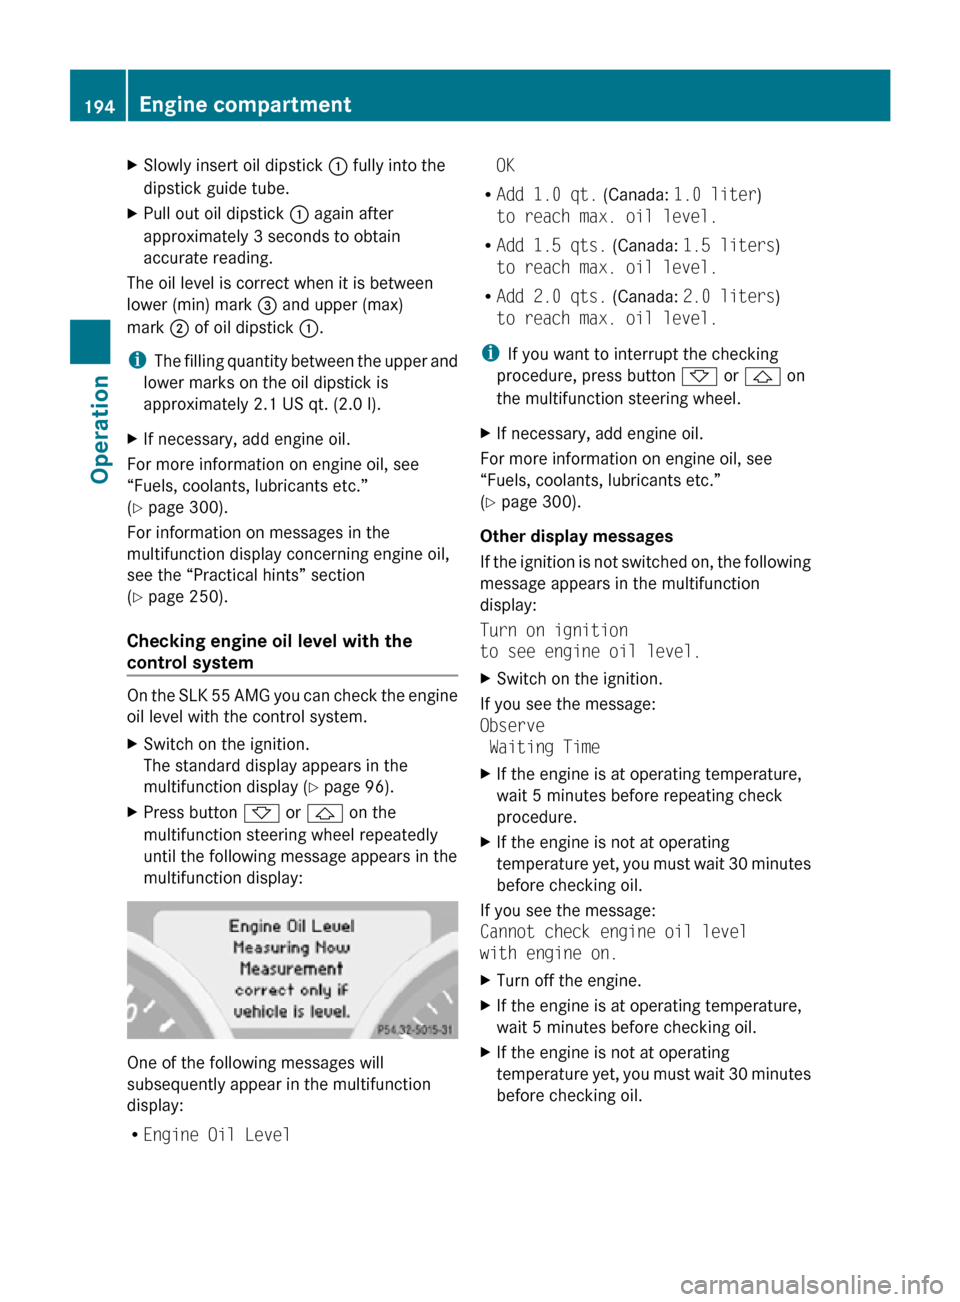
until the following message appears in the
multifunction display: One of the following messages will
subsequently appear in the multifunction
display:
R
Engine Oil Level OK
R Add 1.0 qt. (Canada: 1.0 liter)
to reach max. oil level.
R Add 1.5 qts. (Canada: 1.5 liters)
to reach max. oil level.
R Add 2.0 qts. (Canada: 2.0 liters)
to reach max. oil level.
i If you want to interrupt the checking
procedure, press button * or & on
the multifunction steering wheel.
X If necessary, add engine oil.
For more information on engine oil, see
“Fuels, coolants, lubricants etc.”
(Y page 300).
Other display messages
If the ignition is not switched on, the following
message appears in the multifunction
display:
Turn on ignition
to see engine oil level.
X Switch on the ignition.
If you see the message:
Observe
Waiting Time
X If the engine is at operating temperature,
wait 5 minutes before repeating check
procedure.
X If the engine is not at operating
temperature yet, you must wait 30 minutes
before checking oil.
If you see the message:
Cannot check engine oil level
with engine on.
X Turn off the engine.
X If the engine is at operating temperature,
wait 5 minutes before checking oil.
X If the engine is not at operating
temperature yet, you must wait 30 minutes
before checking oil. 194
Engine compartmentOperation
171_AKB; 3; 60, en-US
d2ureepe,
Version: 2.11.8.1 2009-05-11T16:00:23+02:00 - Seite 194
Page 197 of 312

i
If you want to interrupt the checking
procedure, press button * or & on
the multifunction steering wheel.
If there is excess engine oil with the engine at
normal operating temperature, the following
message appears in the multifunction
display:
Engine Oil Level
Reduce Oil Level
X Have excess oil siphoned or drained off.
Contact an authorized Mercedes-Benz
Center.
! Excess oil must be siphoned or drained
off. It could cause damage to the engine
and emission control system not covered
by the Mercedes-Benz Limited Warranty.
For information on messages in the
multifunction display concerning engine oil,
see the “Practical hints” section
(Y page 251).
Adding engine oil !
Only use approved engine oils and oil
filters required for vehicles with
Maintenance System. For a listing of
approved engine oils and oil filters, contact
an authorized Mercedes-Benz Center or
visit www.mbusa.com (USA only).
The following will result in engine or
emission control system damage not
covered by the Mercedes-Benz Limited
Warranty:
R Using engine oils and oil filters of
specification other than those expressly
required for the Maintenance System.
R Changing of oil and oil filter at change
intervals longer than those called for by
the Maintenance System.
R Using any oil additives. Example illustration: SLK 350 (SLK 300 similar)
SLK 55 AMG
X
Unscrew filler cap : from filler neck.
X Add engine oil as required. Be careful not
to overfill with oil.
Be careful not to spill any oil when adding.
Avoid environmental damage caused by oil
entering the ground or water.
! Excess oil must be siphoned or drained
off. It could cause damage to the engine
and emission control system not covered
by the Mercedes-Benz Limited Warranty.
X Screw filler cap : back on filler neck.
For more information on engine oil, see the
“Technical data” section ( Y page 300) and
(Y page 302). Transmission fluid level
Vehicles with automatic transmission:
The transmission fluid level does not need to
be checked. If you notice transmission fluid
loss or gearshifting malfunctions, have an Engine compartment
195Operation
171_AKB; 3; 60, en-US
d2ureepe, Version: 2.11.8.1 2009-05-11T16:00:23+02:00 - Seite 195 Z
Page 198 of 312

authorized Mercedes-Benz Center check the
transmission.
Coolant level
The engine coolant is a mixture of water and
anticorrosion/antifreeze.
When checking the coolant level, the vehicle
must be parked on level ground, and the
coolant temperature must be below 158‡
(70†). G
Warning!
In order to avoid any potentially serious burns:
R Use extreme caution when opening the
hood if there are any signs of steam or
coolant leaking from the cooling system, or
if the coolant temperature display indicates
that the coolant is overheated.
R Do not remove the cap on the coolant
expansion tank if the coolant temperature
is above 158‡ (70†). Allow the engine to
cool down before removing the cap. The
coolant expansion tank contains hot fluid
and is under pressure.
R Using a rag, slowly open the cap
approximately 1
/ 2 turn counterclockwise
to relieve excess pressure. If opened
immediately, scalding hot fluid and steam
will be blown out under pressure.
R Do not spill antifreeze on hot engine parts.
Antifreeze contains ethylene glycol which
may burn if it comes into contact with hot
engine parts. Example illustration: SLK 350
X
Using a rag, slowly open cap ;
approximately 1
/ 2 turn counterclockwise
to relieve excess pressure.
X Continue turning cap ; counterclockwise
and remove it.
The coolant level is correct if the level
R for cold coolant: reaches marking bar
= in coolant expansion tank :
R for warm coolant: is approximately 0.6 in
(1.5 cm) higher
X Add coolant as required.
X Screw cap ; back on and tighten it.
For more information on coolant, see the
“Technical data” section ( Y page 301) and
(Y page 304). Washer system and headlamp
cleaning system
G
Warning!
Washer solvent/antifreeze is highly
flammable. Do not spill washer solvent/
antifreeze on hot engine parts, because it may
ignite and burn. You could be seriously
burned.
! Always use washer solvent/antifreeze
where temperatures may fall below
freezing point. Failure to do so could result
in damage to the washer system/fluid
reservoir. 196
Engine compartmentOperation
171_AKB; 3; 60, en-US
d2ureepe,
Version: 2.11.8.1 2009-05-11T16:00:23+02:00 - Seite 196
Page 204 of 312

G
Warning!
The TPMS does not indicate a warning for
wrongly selected inflation pressures. Always
adjust
tire inflation pressure according to the
Tire and Loading Information placard or the
supplemental tire inflation pressure
information on the inside of the fuel filler flap.
The TPMS is not able to issue a warning due
to a sudden dramatic loss of pressure (e.g. tire
blowout caused by a foreign object). In this
case bring the vehicle to a halt by carefully
applying the brakes and avoiding abrupt
steering maneuvers. G
Warning!
Each tire, including the spare (if provided),
should be checked at least once a month
when cold and inflated to the inflation
pressure recommended by the vehicle
manufacturer on the Tire and Loading
Information placard on the driver’s door B-
pillar
or the tire inflation pressure label on the
inside of the fuel filler flap. If your vehicle has
tires of a different size than the size indicated
on the Tire and Loading Information placard
or the tire inflation pressure label, you should
determine the proper tire inflation pressure
for those tires.
As an added safety feature, your vehicle has
been equipped with a tire pressure monitoring
system (TPMS) that illuminates a low tire
pressure telltale when one or more of your
tires are significantly underinflated.
Accordingly, when the low tire pressure
telltale illuminates, you should stop and check
your tires as soon as possible, and inflate
them to the proper pressure. Driving on a
significantly underinflated tire causes the tire
to overheat and can lead to tire failure.
Underinflation also reduces fuel efficiency
and tire tread life, and may affect the vehicle’s
handling and stopping ability. Please note that
the TPMS is not a substitute for proper tire
maintenance, and it is the driver’s
responsibility to maintain correct tire
pressure, even if underinflation has not reached the level to trigger illumination of the
TPMS low tire pressure telltale.
Your vehicle has also been equipped with a
TPMS malfunction indicator to indicate when
the system is not operating properly. The
TPMS
malfunction indicator is combined with
the low tire pressure telltale. When the
system detects a malfunction, the telltale will
flash for approximately 1 minute and then
remain continuously illuminated. This
sequence will continue upon subsequent
vehicle start-ups as long as the malfunction
exists. When the malfunction indicator is
illuminated, the system may not be able to
detect or signal low tire pressure as intended.
TPMS malfunctions may occur for a variety of
reasons, including the installation of
incompatible replacement or alternate tires
or wheels on the vehicle that prevent the
TPMS from functioning properly. Always
check the TPMS malfunction telltale after
replacing one or more tires or wheels on your
vehicle to ensure that the replacement or
alternate tires and wheels allow the TPMS to
continue to function properly.
i If a condition causing the TPMS to
malfunction develops, it may take up to
10 minutes for the system to signal a
malfunction using the TPMS telltale
flashing and illumination sequence.
The telltale extinguishes after a few
minutes driving if the malfunction has been
corrected.
Tire pressure inquiries are made using the
multifunction display. The current tire
inflation pressure for each tire appears in the
multifunction display after a few minutes of
driving.
i Possible differences between the
readings of a tire pressure gauge of an air
hose, e.g. gas station equipment, and the
vehicle’s control system can occur. The tire
pressure displayed by the control system
apply to sea level. In high-altitude
locations, the reading on a tire pressure 202
Tires and wheels
Operation
171_AKB; 3; 60, en-US
d2ureepe,
Version: 2.11.8.1 2009-05-11T16:00:23+02:00 - Seite 202
Page 205 of 312
gauge will be higher than the reading issued
by the vehicle’s control system. Do not
reduce the tire inflation pressure under
such circumstances.
X Switch on the ignition.
X Press button V or U on the
multifunction steering wheel repeatedly
until the standard display appears in the
multifunction display ( Y page 96).
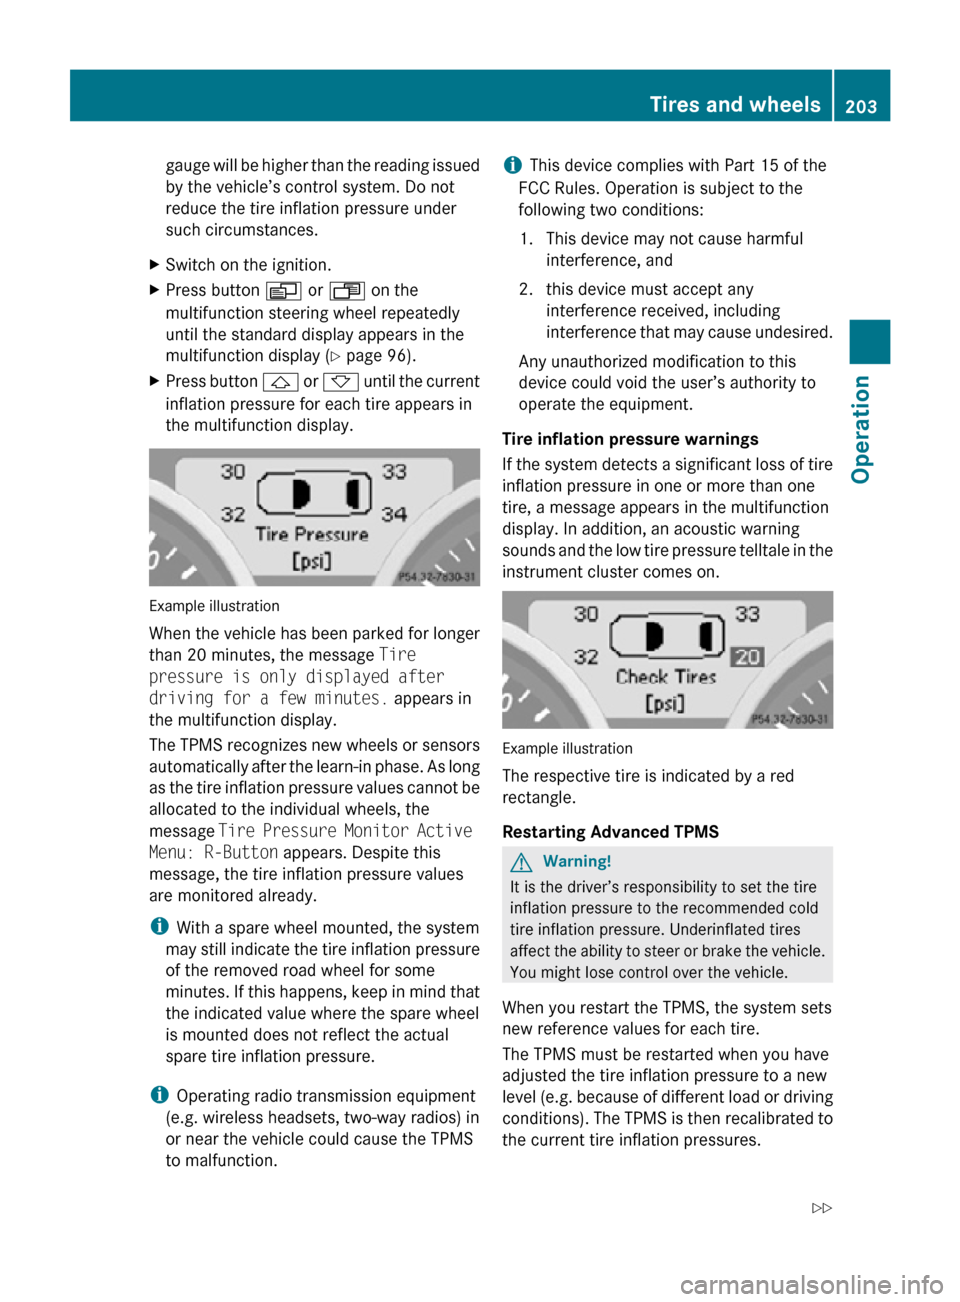
X Press button & or * until the current
inflation pressure for each tire appears in
the multifunction display. Example illustration
When the vehicle has been parked for longer
than 20 minutes, the message Tire
pressure is only displayed after
driving for a few minutes. appears in
the multifunction display.
The TPMS recognizes new wheels or sensors
automatically after the learn-in phase. As long
as the tire inflation pressure values cannot be
allocated to the individual wheels, the
message
Tire Pressure Monitor Active
Menu: R-Button appears. Despite this
message, the tire inflation pressure values
are monitored already.
i With a spare wheel mounted, the system
may still indicate the tire inflation pressure
of the removed road wheel for some
minutes. If this happens, keep in mind that
the indicated value where the spare wheel
is mounted does not reflect the actual
spare tire inflation pressure.
i Operating radio transmission equipment
(e.g. wireless headsets, two-way radios) in
or near the vehicle could cause the TPMS
to malfunction. i
This device complies with Part 15 of the
FCC Rules. Operation is subject to the
following two conditions:
1. This device may not cause harmful interference, and
2. this device must accept any interference received, including
interference that may cause undesired.
Any unauthorized modification to this
device could void the user’s authority to
operate the equipment.
Tire inflation pressure warnings
If the system detects a significant loss of tire
inflation pressure in one or more than one
tire, a message appears in the multifunction
display. In addition, an acoustic warning
sounds and the low tire pressure telltale in the
instrument cluster comes on. Example illustration
The respective tire is indicated by a red
rectangle.
Restarting Advanced TPMS
G
Warning!
It is the driver’s responsibility to set the tire
inflation pressure to the recommended cold
tire inflation pressure. Underinflated tires
affect the ability to steer or brake the vehicle.
You might lose control over the vehicle.
When you restart the TPMS, the system sets
new reference values for each tire.
The TPMS must be restarted when you have
adjusted the tire inflation pressure to a new
level (e.g. because of different load or driving
conditions). The TPMS is then recalibrated to
the current tire inflation pressures. Tires and wheels
203Operation
171_AKB; 3; 60, en-US
d2ureepe, Version: 2.11.8.1 2009-05-11T16:00:23+02:00 - Seite 203 Z
Page 206 of 312
Restart the TPMS after adjusting the tire
inflation pressure to the inflation pressure
recommended for the vehicle operating
condition. Tire inflation pressure should only
be adjusted on cold tires. Observe the
recommended tire inflation pressure on the
Tire and Loading Information placard on the
driver’s door B-pillar. Some vehicles may have
supplemental tire inflation pressure
information for driving at high speeds or for
vehicle loads less than the maximum loaded
vehicle condition. If such information is
provided, it can be found on the inside of the
fuel filler flap.
X
Using the Tire and Loading Information
placard on the driver’s door B-pillar
(Y page 205) or the supplemental tire
inflation pressure information on the inside
of the fuel filler flap, make sure the tire
inflation pressure of all four tires is correct.
X Switch on the ignition.
X Press button V or U on the
multifunction steering wheel repeatedly
until the standard display appears in the
multifunction display ( Y page 96).
X Press button & or * repeatedly until
you see the current inflation pressures for
each tire appear in the display or the
following message appears in the
multifunction display:
Tire pressure is
only displayed
after driving for
a few minutes.
X Press the reset button (Y page 92).
The following message will appear in the
multifunction display:
Restart tire
pressure monitor?
X If you wish to confirm: Press button
W.
The following message will appear in the
multifunction display:
Tire Pressure Monitor
Restarted After driving a few minutes the system
verifies that the current tire inflation
pressures are within the system’s specified
range. Afterwards the current tire inflation
pressures are accepted as reference values
and then monitored.
X If you wish to cancel: Press button X.
i When the wheel positions have been
changed, the inflation pressure of a tire
may be displayed for the wrong position
temporarily. After driving for a few minutes,
the inflation pressure will be shown for the
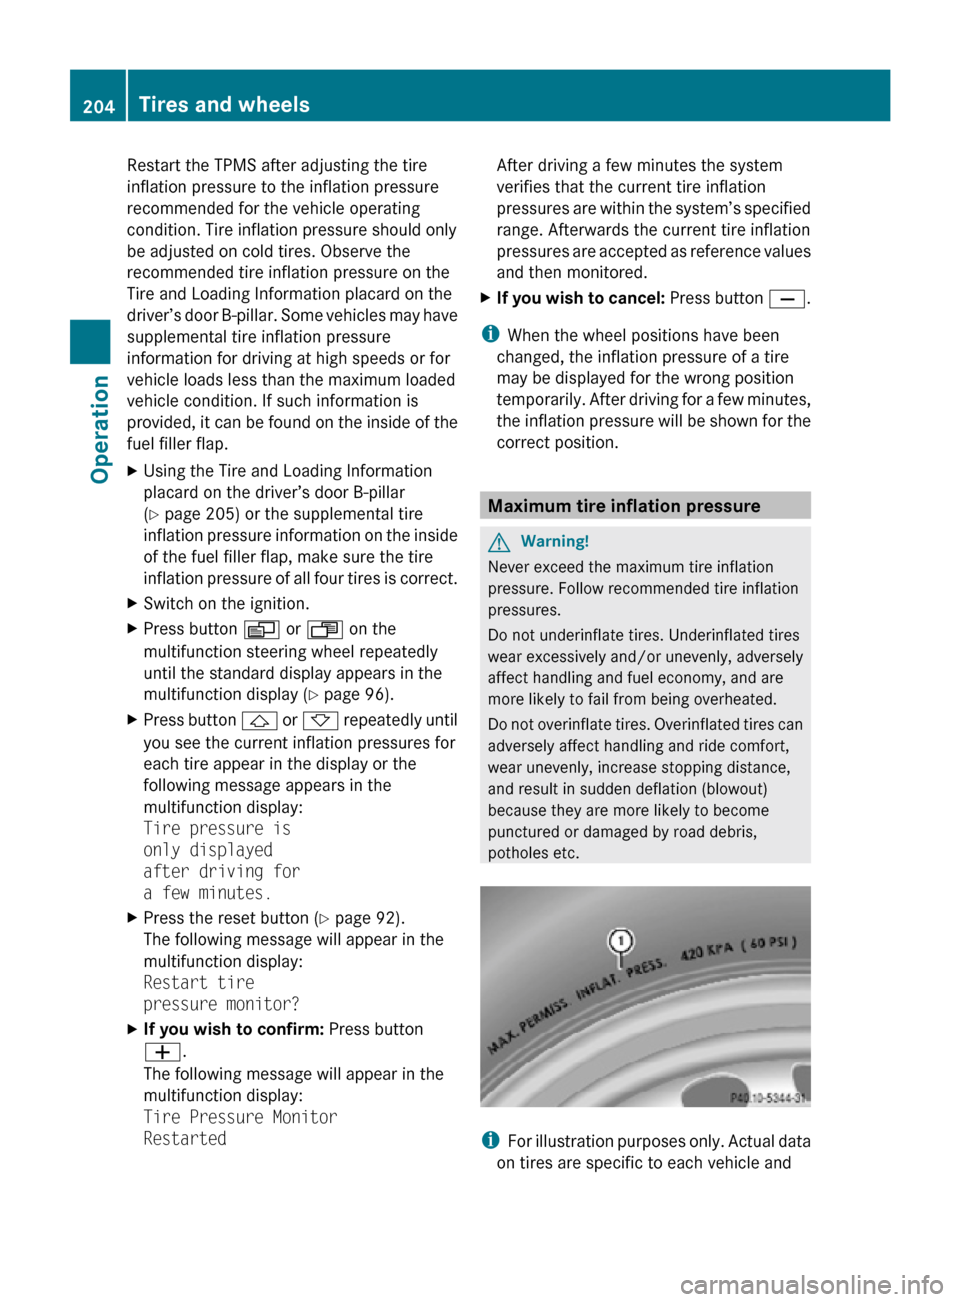
correct position. Maximum tire inflation pressure
G
Warning!
Never exceed the maximum tire inflation
pressure. Follow recommended tire inflation
pressures.
Do not underinflate tires. Underinflated tires
wear excessively and/or unevenly, adversely
affect handling and fuel economy, and are
more likely to fail from being overheated.
Do not overinflate tires. Overinflated tires can
adversely affect handling and ride comfort,
wear unevenly, increase stopping distance,
and result in sudden deflation (blowout)
because they are more likely to become
punctured or damaged by road debris,
potholes etc. i
For illustration purposes only. Actual data
on tires are specific to each vehicle and 204
Tires and wheelsOperation
171_AKB; 3; 60, en-US
d2ureepe,
Version: 2.11.8.1 2009-05-11T16:00:23+02:00 - Seite 204