2010 MERCEDES-BENZ SLK350 Vin location
[x] Cancel search: Vin locationPage 16 of 312

SmartKey
see Key, SmartKey
Snow chains ...................................... 220
Snow tires see Winter tires
Spare wheel ....................................... 297
Mounting ....................................... 277
Storage location ............................ 235
Speed settings
Cruise control ................................ 160
Resume function ............................ 161
SRS (Supplemental Restraint System)
Indicator lamp ................... 26, 32, 260
Messages in the multifunction
display ........................................... 245
Standing water, driving through ......224
Starter switch positions SmartKey ......................................... 61
Starting difficulties (engine) ..............80
Starting the engine ............................. 80
Steering column see Multifunction steering wheel,
Adjustment
Steering wheel
see Multifunction steering wheel
Steering wheel gearshift control .......89
Stolen Vehicle Recovery Services ...183
Storage compartments .....................174
Storing tires ....................................... 210
Sun visors .......................................... 176T
Tachometer .......................................... 93
Overspeed range ............................. 93
Tail lamps
Cleaning lenses
............................. 229
Messages in the multifunction
display ........................................... 254
Tar stains ........................................... 228
Technical data Air conditioning refrigerant ............ 303
Brake fluid ..................................... 303
Capacities fuels, coolants,
lubricants etc. ................................ 300
Coolant .......................................... 304
Engine oil additives ........................303
Engine oils ..................................... 302Fuel requirements .......................... 303
Gasoline additives
.......................... 304
Identification labels .......................292
Premium unleaded gasoline ...........303
Rims and tires ................................ 297
Spare wheel ................................... 300
Vehicle specification SLK 300 .......294
Vehicle specification SLK 350 .......295
Vehicle specification SLK 55 AMG . 296
Washer and headlamp cleaning
system ................................... 302, 306
Technical data (dimensions)
see Vehicle specification
Technical data (electrical system)
see Vehicle specification
Technical data (engine)
see Vehicle specification
Technical data (weights)
see Vehicle specification
Tele Aid ............................................... 178
Emergency calls ............................. 179
Information button .........................181
Initiating an emergency call
manually ........................................ 180
Messages in the multifunction
display ........................................... 245
Remote door unlock ...................... 182
Roadside Assistance button .......... 180
Search & Send ............................... 182
SOS button .................................... 180
Stolen Vehicle Recovery Services .. 183
System self-test ............................. 178
Telephone .................................... 27, 146
Answering/ending a call ................ 110
Call lists ......................................... 156
Emergency calls “911” .................. 152
Hands-free microphone ...................30
Making calls ................................... 156
Menu ............................................. 110
Operation ....................................... 110
Phone book ........................... 111, 153
Redialing ........................................ 111
Temperature
Interior temperature ......................166
Outside .................................... 97, 104
Tightening torque
Wheels ........................................... 281
Time setting ....................................... 10514
Index 171_AKB; 3; 60, en-US
d2ureepe,
Version: 2.11.8.1 2009-05-11T16:00:23+02:00 - Seite 14
Page 74 of 312
G
Warning!
If the exterior lamp switch is set to Ã, the
headlamps will not automatically come on
under foggy conditions.
To
minimize risk to you and to others, activate
headlamps by turning exterior lamp switch to
L when driving or when traffic and/or
ambient lighting conditions require you to do
so.
In low ambient lighting conditions, only switch
from position à to L with the vehicle
at a standstill in a safe location. Switching
from à to L will briefly switch off the
headlamps. Doing so while driving in low
ambient lighting conditions may result in an
accident.
The automatic headlamp feature is only an aid
to the driver. The driver is responsible for the
operation of the vehicle’s lights at all times.
X Switching on: Turn the exterior lamp
switch to position Ã.
The following lamps come on and go out
depending on the brightness of the ambient
light with the SmartKey in starter switch
position 1:
R Tail lamps
R Parking lamps
R License plate lamps
R Side marker lamps
When the engine is running, the low-beam
headlamps will also come on and turn off
automatically.
Canada
only: High-beam headlamps are only
available with the exterior lamp switch in
position L.
Daytime running lamp mode In Canada, the daytime running lamp mode is
mandatory
and therefore in a constant mode.
In the USA, the daytime running lamp mode
is deactivated by default. X
Activate the daytime running lamp mode
using the control system, see “Switching
daytime
running lamp mode on or off (USA
only)” (Y page 106).
X Turn the exterior lamp switch to position
$ or Ã.
When the engine is running, the low-beam
headlamps come on.
In low ambient lighting conditions, the
following lamps will come on additionally:
R
Tail lamps
R Parking lamps
R License plate lamps
R Side marker lamps
With the daytime running lamp mode
activated
and the engine running, you cannot
switch off the low-beam headlamps manually.
Canada only
With the exterior lamp switch in position
$ or Ã, you cannot switch on the
high-beam headlamps.
The high-beam flasher is available at all times.
X For nighttime driving turn the exterior lamp
switch
to position L to permit activation
of the high-beam headlamps.
When the engine is running, and you
R shift from a driving position to neutral
position N or park position P with the
vehicle at a standstill (vehicles with
automatic transmission), the low-beam
headlamps will go out with a delay of
3 minutes
R turn the exterior lamp switch to position
T, the low-beam headlamps, the tail
and
parking lamps, the license plate lamps
and the side marker lamps come on
R turn the exterior lamp switch to position
L, the manual headlamp mode has
priority over the daytime running lamp
mode
The corresponding exterior lamps come on
(Y page 71). 72
Lighting
Controls in detail
171_AKB; 3; 60, en-US
d2ureepe,
Version: 2.11.8.1 2009-05-11T16:00:23+02:00 - Seite 72
Page 75 of 312
USA only
With the exterior lamp switch in position
$ or
Ã, you cannot switch on the high-
beam headlamps.
The high-beam flasher is available at all times.
X For nighttime driving turn the exterior lamp
switch to position L to permit activation
of the high-beam headlamps.
When the engine is running, and you turn the
exterior lamp switch to position T or
L, the manual headlamp mode has
priority over the daytime running lamp mode.
The corresponding exterior lamps come on
(Y page 71).
Fog lamps Fog lamps cannot be switched on with the
exterior lamp switch in position Ã.
G
Warning!
In low ambient lighting or foggy conditions,
only switch from position à to L with
the vehicle at a standstill in a safe location.
Switching from à to L will briefly
switch off the headlamps. Doing so while
driving in low ambient lighting conditions may
result in an accident.
Fog lamps will operate with the parking lamps
and/or the low-beam headlamps on. Fog
lamps should only be used in conjunction with
low-beam headlamps. Consult your State or
Province Motor Vehicle Regulations
regarding permissible lamp operation.
X Turn the exterior lamp switch to position
T or L (Y page 71).
X Switching on front fog lamps: Pull out the
exterior lamp switch to first stop.
The green indicator lamp N in the
exterior lamp switch comes on. X
Switching on rear fog lamp: Pull out the
exterior lamp switch to second stop.
The rear fog lamp, the front fog lamps, the
green N and the yellow indicator lamp
R in the exterior lamp switch come on.
X Switching off front fog lamps/rear fog
lamp: Push in the exterior lamp switch to
its stop.
Locator lighting and night security
illumination Locator lighting and night security
illumination are described in the “Control
system” section, see “Switching locator
lighting on or off” (Y page 106) and
“Switching night security illumination
(Headlamps delayed shut-off feature) on or
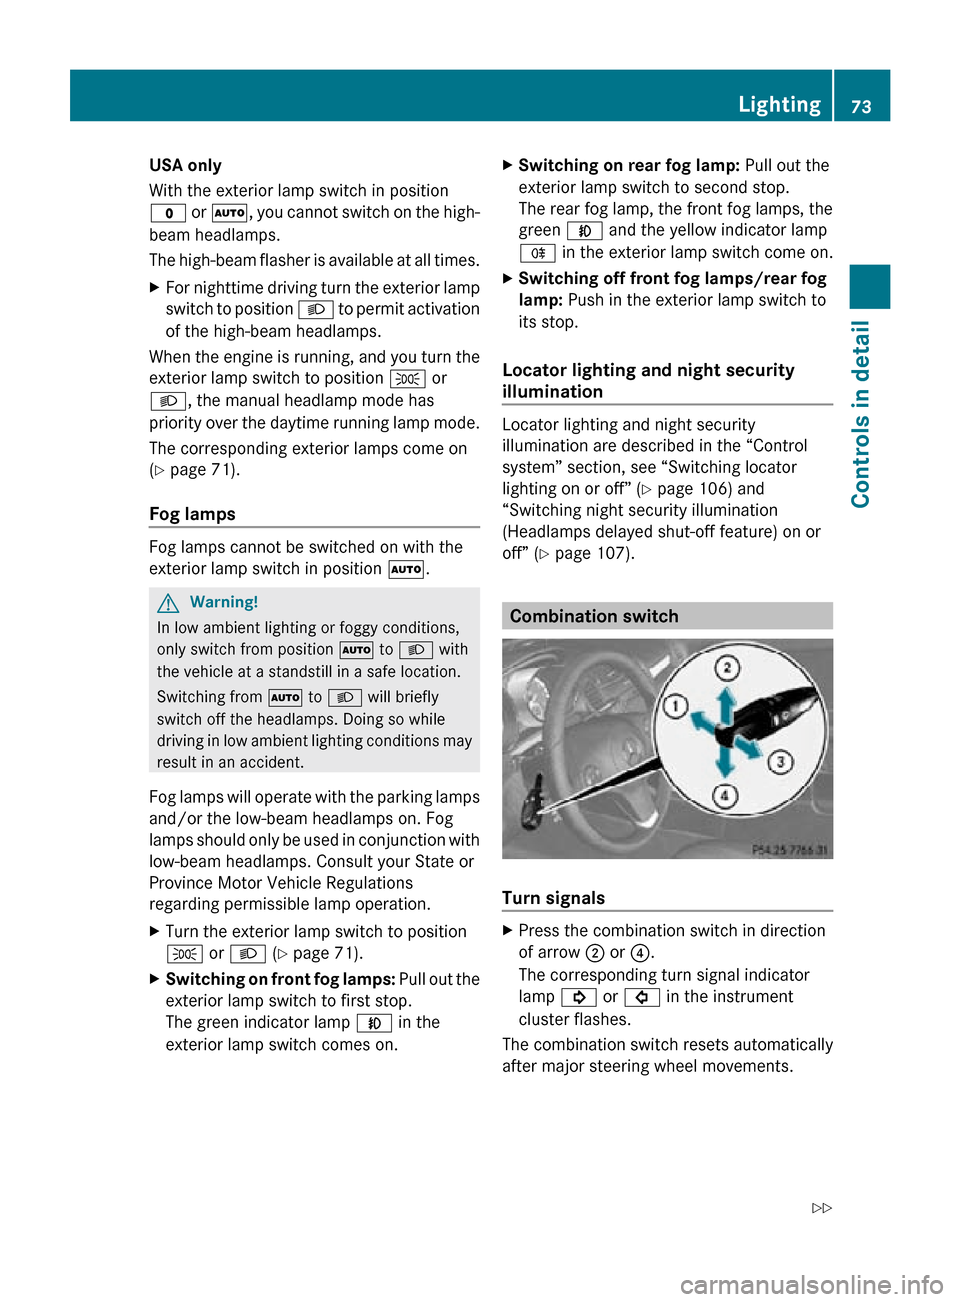
off” (Y page 107). Combination switch
Turn signals
X
Press the combination switch in direction
of arrow ; or ?.
The corresponding turn signal indicator
lamp ! or # in the instrument
cluster flashes.
The combination switch resets automatically
after major steering wheel movements. Lighting
73Controls in detail
171_AKB; 3; 60, en-US
d2ureepe, Version: 2.11.8.1 2009-05-11T16:00:23+02:00 - Seite 73 Z
Page 84 of 312
!
Avoid driving at excessive engine speeds.
This may result in serious engine damage
that is not covered by the Mercedes-Benz
Limited Warranty.
Shift gear in a timely manner.
For more information on driving, see “Driving
instructions” ( Y page 221).
Automatic transmission G
Warning!
It is dangerous to shift the automatic
transmission
out of park position P or neutral
position N if the engine speed is higher than
idle speed. If your foot is not firmly on the
brake pedal, the vehicle could accelerate
quickly forward or in reverse. You could lose
control of the vehicle and hit someone or
something. Only shift into gear when the
engine is idling normally and when your right
foot is firmly on the brake pedal.
! Only shift the automatic transmission into
reverse gear R or park position P when the
vehicle is stopped. Otherwise the
automatic transmission could be damaged.
X Depress the brake pedal.
The gear selector lever lock is released.
X Shift the automatic transmission into drive
position D or reverse gear R.
i Shifting
the automatic transmission out of
park position P is only possible with the
brake pedal depressed.
Only depressing the brake pedal releases
the gear selector lever lock.
X Wait for the gear selection process to
complete before setting the vehicle in
motion.
X If engaged, release the parking brake.
X Release the brake pedal.
X Carefully depress the accelerator pedal.
After a cold start, the automatic transmission
shifts at a higher engine speed. This allows the catalytic converter to reach its operating
temperature earlier.
For
more information on driving, see “Driving
instructions” ( Y page 221). Problems while driving
The
engine runs erratically and misfires R
An ignition cable may be damaged.
R The engine electronics may not be
operating properly.
R Unburned gasoline may have entered the
catalytic converter and damaged it.
X Give very little gas.
X Have the problem checked at an authorized
Mercedes-Benz
Center as soon as possible.
The coolant temperature is above
248‡
(120†) The coolant is too hot and is no longer cooling
the engine.
X
Stop the vehicle in a safe location as soon
as possible.
X Turn off the engine immediately.
X Allow the engine and coolant to cool off.
X Check the coolant level and add coolant if
necessary ( Y page 196).
In case of accident If the vehicle is leaking fuel:
X
Do not start the engine under any
circumstances.
X Exit the vehicle at a safe distance from the
roadway.
X Notify local fire and/or police authorities.
If the extent of the damage cannot be
determined:
X Contact an authorized Mercedes-Benz
Center or call Roadside Assistance. 82
Driving and parking
Controls in detail
171_AKB; 3; 60, en-US
d2ureepe,
Version: 2.11.8.1 2009-05-11T16:00:23+02:00 - Seite 82
Page 94 of 312

the optimal gear for maximum
acceleration.
i When you brake or stop, the automatic
transmission shifts down into a gear from
which you can easily accelerate or take off.
Kickdown Using the kickdown while driving in manual
program mode
M is not possible.
Deactivating manual shift program X
Press the program mode selector switch
repeatedly until C or S appears in the
multifunction display.
or
X Restart the engine.
The automatic transmission will go to
automatic program mode C.
Manual program mode M is not stored.Emergency operation (limp-home
mode)
If vehicle acceleration becomes less
responsive or sluggish or the automatic
transmission no longer shifts, the automatic
transmission is most likely operating in limp-
home (emergency operation) mode. In this
mode only second gear and reverse gear R
can be selected.
X Stop the vehicle in a safe location.
X Shift the automatic transmission into park
position P.
X Turn off the engine.
X Wait at least 10 seconds before restarting.
X Restart the engine.
X Shift the automatic transmission into drive
position D (for second gear) or reverse gear
R.
X Have the automatic transmission checked
at an authorized Mercedes-Benz Center as
soon as possible. Instrument cluster
Introduction
For a full view illustration of the instrument
cluster, see “Instrument cluster”
(Y page 26). G
Warning!
No messages will be displayed if either the
instrument cluster or the multifunction
display is inoperative.
As a result, you will not be able to see
information about your driving conditions,
such as
R speed
R outside temperature
R warning/indicator lamps
R malfunction/warning messages
R failure of any systems
Driving characteristics may be impaired.
If you must continue to drive, do so with added
caution. Contact an authorized Mercedes-
Benz Center as soon as possible. :
To brighten instrument cluster
illumination (knob +)
; To dim instrument cluster illumination
(knob -)
= Reset button .
For information on changing the instrument
cluster settings, e.g. the language, see
(Y page 103). 92
Instrument clusterControls in detail
171_AKB; 3; 60, en-US
d2ureepe,
Version: 2.11.8.1 2009-05-11T16:00:23+02:00 - Seite 92
Page 99 of 312

The following functions are available:
R
Checking tire inflation pressure with the
Advanced TPMS (Y page 201) (USA only)
R Checking coolant temperature
(Y page 97)
R Calling up digital speedometer or outside
temperature ( Y page 97)
R Calling up maintenance service indicator
display ( Y page 226)
R Checking engine oil level (SLK 55 AMG
only) ( Y page 194)
Checking coolant temperature G
Warning!
Driving when your engine is overheated can
cause some fluids which may have leaked into
the engine compartment to catch fire. You
could be seriously burned.
Steam from an overheated engine can cause
serious burns which can occur just by opening
the engine hood. Stay away from the engine
if you see or hear steam coming from it.
Stop the vehicle in a safe location away from
other traffic. Turn off the engine, get out of the
vehicle and do not stand near the vehicle until
the engine has cooled down.
X Press button & or * repeatedly until
the coolant temperature appears in the
multifunction display. During severe operating conditions, e.g. stop-
and-go traffic, the coolant temperature may
rise close to 248‡ (120†).
!
Excessive coolant temperature triggers a
warning in the multifunction display. The engine should not be operated with a
coolant temperature above 248‡
(120†). Doing so may cause serious
engine damage which is not covered by the
Mercedes-Benz Limited Warranty.
Calling up digital speedometer or
outside temperature You can select whether the digital
speedometer or the outside temperature
appears in the multifunction display
(Y page 104).
G
Warning!
The outside temperature indicator is not
designed to serve as an ice-warning device
and is therefore unsuitable for that purpose.
Indicated temperatures just above the
freezing point do not guarantee that the road
surface is free of ice. The road may still be icy,
especially in wooded areas or on bridges.
X Press button & or * repeatedly until
the digital speedometer or the outside
temperature appears in the multifunction
display. Digital speedometer
AMG menu
This function is only available in AMG
vehicles.
X Press button V or U repeatedly until
the AMG menu appears in the
multifunction display. Control system
97Controls in detail
171_AKB; 3; 60, en-US
d2ureepe, Version: 2.11.8.1 2009-05-11T16:00:23+02:00 - Seite 97 Z
Page 112 of 312
Resetting fuel consumption statistics
X
Press button U or V repeatedly until
the message From Start appears in the
multifunction display.
X Press button & or * repeatedly until
the reading that you want to reset appears
in the multifunction display.
X Press and hold the reset button . in the
instrument cluster until the respective
values are reset to 0.
The fuel consumption statistics reset
automatically to 0 after 99 999 miles or
9 999 hours, whichever occurs first.
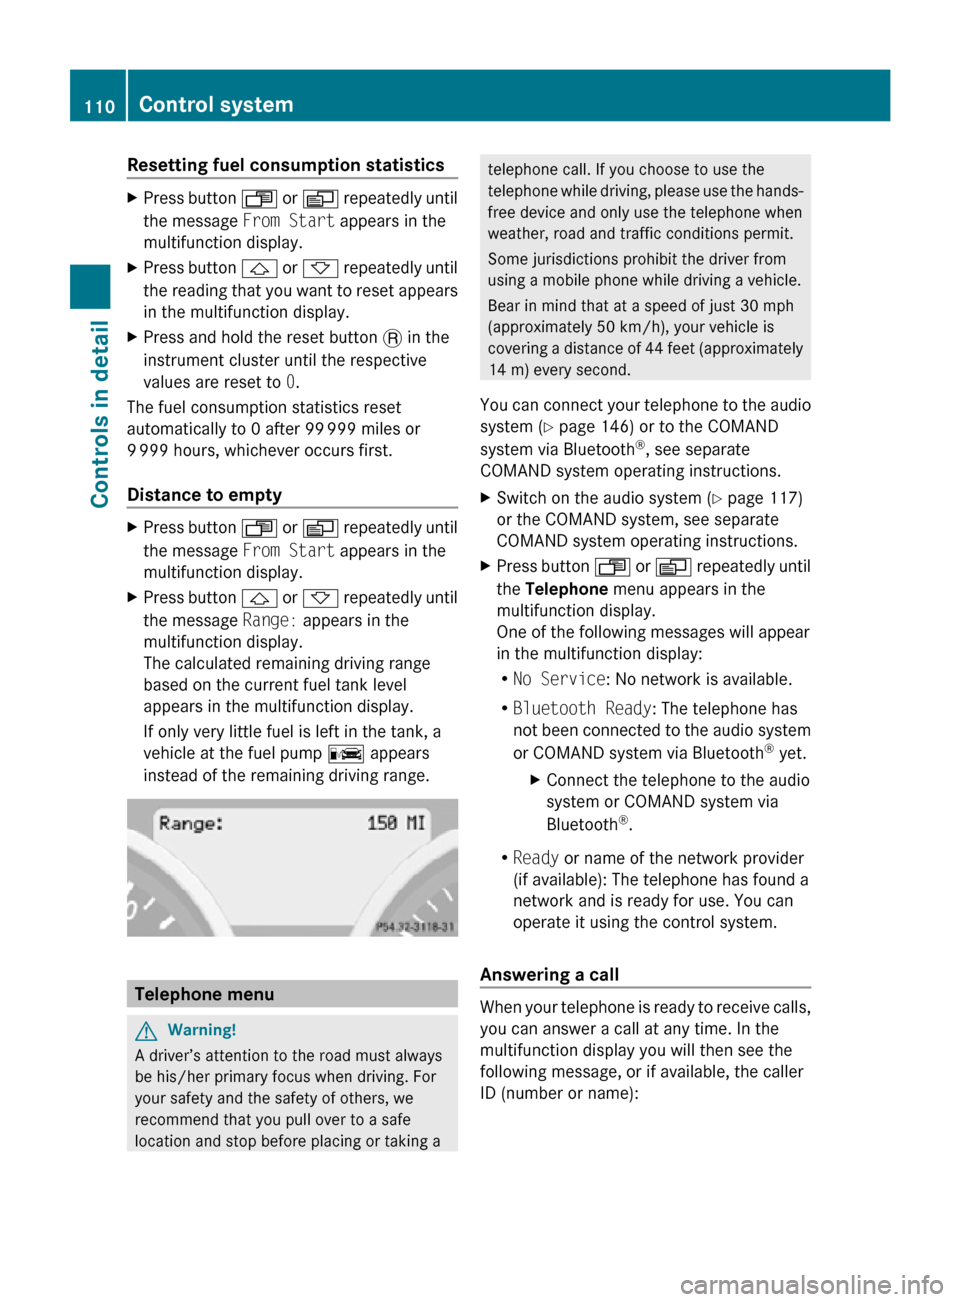
Distance to empty X
Press button U or V repeatedly until
the message From Start appears in the
multifunction display.
X Press button & or * repeatedly until
the message Range: appears in the
multifunction display.
The calculated remaining driving range
based on the current fuel tank level
appears in the multifunction display.
If only very little fuel is left in the tank, a
vehicle at the fuel pump C appears
instead of the remaining driving range. Telephone menu
G
Warning!
A driver’s attention to the road must always
be his/her primary focus when driving. For
your safety and the safety of others, we
recommend that you pull over to a safe
location and stop before placing or taking a telephone call. If you choose to use the
telephone while driving, please use the hands-
free device and only use the telephone when
weather, road and traffic conditions permit.
Some jurisdictions prohibit the driver from
using a mobile phone while driving a vehicle.
Bear in mind that at a speed of just 30 mph
(approximately 50 km/h), your vehicle is
covering a distance of 44 feet (approximately
14 m) every second.
You can connect your telephone to the audio
system (Y page 146) or to the COMAND
system via Bluetooth ®
, see separate
COMAND system operating instructions.
X Switch on the audio system ( Y page 117)
or the COMAND system, see separate
COMAND system operating instructions.
X Press button U or V repeatedly until
the Telephone menu appears in the
multifunction display.
One of the following messages will appear
in the multifunction display:
R No Service: No network is available.
R Bluetooth Ready: The telephone has
not been connected to the audio system
or COMAND system via Bluetooth ®
yet.
X Connect the telephone to the audio
system or COMAND system via
Bluetooth ®
.
R Ready or name of the network provider
(if available): The telephone has found a
network and is ready for use. You can
operate it using the control system.
Answering a call When your telephone is ready to receive calls,
you can answer a call at any time. In the
multifunction display you will then see the
following message, or if available, the caller
ID (number or name):110
Control systemControls in detail
171_AKB; 3; 60, en-US
d2ureepe,
Version: 2.11.8.1 2009-05-11T16:00:23+02:00 - Seite 110
Page 148 of 312
Calling up AUX mode
G
Warning!
Due to the different volumes of the external
audio sources, system messages of the
vehicle may be much louder. You may need to
disable these system messages or adjust the
volume of these messages manually.
X Selecting audio AUX mode:
Press button h repeatedly until the
main menu for AUX operation appears.
or
X In CD mode: Select CD/MP3 Q Aux.
The audio AUX menu appears. The medium in
the external audio source is heard, provided
it is connected and switched to playback.
i Please refer to the relevant operating
guide for operation of the external audio
source.
The following settings can be made in the
audio AUX mode:
R Volume ( Y page 117)
R Balance control ( Y page 118)
R Bass and treble control (Y page 118)
R Surround sound ( Y page 119)
i The volume of external audio sources is
extremely variable. It is possible that a
device connected as an external audio
source will sound quieter or louder in the
vehicle or that the usual maximum volume
cannot be achieved. On certain devices the
volume can be set separately. In this case,
start at a moderate volume and increase it
slowly. In this way, you can determine
whether the system is capable of playback
without distortion, even at high volume.
Volume adjustment for the audio device
You can increase the volume for the AUX
socket in case the internal volume of the
connected audio device is too low. Use the
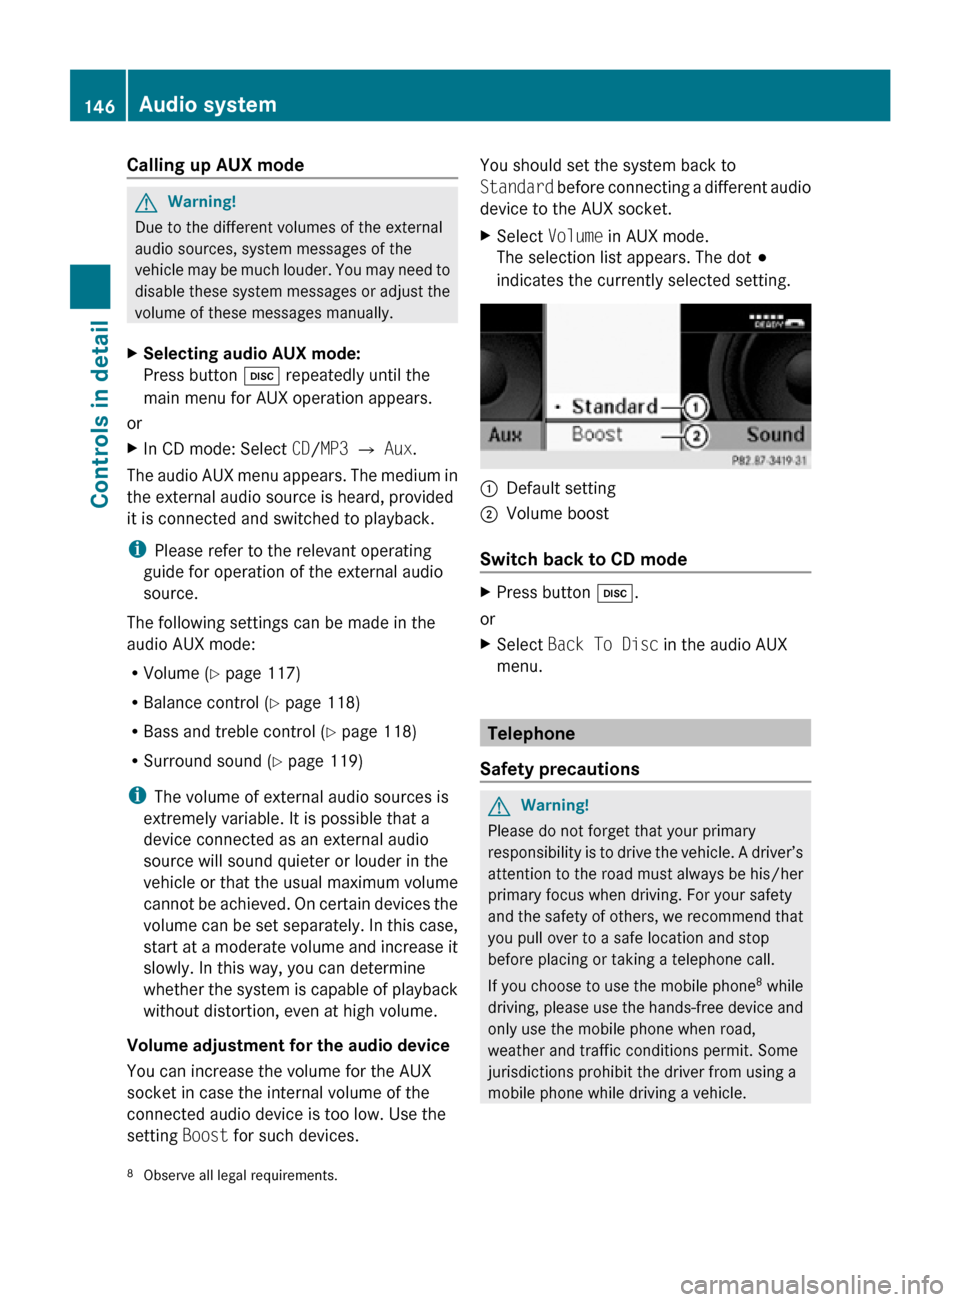
setting Boost for such devices. You should set the system back to
Standard before connecting a different audio
device to the AUX socket.
X
Select Volume in AUX mode.
The selection list appears. The dot #
indicates the currently selected setting. :
Default setting
; Volume boost
Switch back to CD mode X
Press button h.
or
X Select Back To Disc in the audio AUX
menu. Telephone
Safety precautions G
Warning!
Please do not forget that your primary
responsibility is to drive the vehicle. A driver’s
attention to the road must always be his/her
primary focus when driving. For your safety
and the safety of others, we recommend that
you pull over to a safe location and stop
before placing or taking a telephone call.
If you choose to use the mobile phone 8
while
driving, please use the hands-free device and
only use the mobile phone when road,
weather and traffic conditions permit. Some
jurisdictions prohibit the driver from using a
mobile phone while driving a vehicle.
8 Observe all legal requirements. 146
Audio systemControls in detail
171_AKB; 3; 60, en-US
d2ureepe,
Version: 2.11.8.1 2009-05-11T16:00:23+02:00 - Seite 146