2010 MERCEDES-BENZ SLK350 SD card
[x] Cancel search: SD cardPage 12 of 312

Unlocking/locking manually ..........
264
Valet locking .................................... 61
Key, SmartKey
Battery check lamp .......................... 57
Checking batteries ........................... 57
Factory setting
................................. 57
Global locking (SmartKey) ................ 57
Global unlocking
(SmartKey) ....................................... 57
Locking/unlocking ........................... 56
Loss of ............................................. 58
Messages in the multifunction
display ........................................... 246
Remote control ................................ 56
Replacing ......................................... 58
Replacing batteries ........................ 266
Restoring to factory setting ............. 57
Selective setting .............................. 57
Starter switch positions ................... 61
Kickdown ............................................. 87
Kickdown (manual shift program) ..... 92
Kilopascal (air pressure unit) ...........218
Knee bags ............................................ 36L
Labels
Certification ................................... 292
Emission control information
......... 293
Tire and Loading Information
placard ........................................... 205
Tire inflation pressure ....................200
Lamps, exterior
Exterior lamp switch ........................ 71
Front .............................................. 269
Messages in the multifunction
display ........................................... 252
Switching on/off .............................. 71
Lamps, indicator and warning
ABS .......................................... 26, 257
Brakes ..................................... 27, 257
Engine malfunction .................. 26, 262
ESP ®
........................................ 26, 260
Fog lamps ........................................ 73
Fuel tank reserve ..................... 26, 261
High-beam headlamps ...............26, 74
Instrument cluster ...................26, 256 Low tire pressure/TPMS
malfunction telltale ..................
26, 262
Passenger front air bag
off ...................................... 29, 37, 263
Seat belt telltale ................26, 42, 259
SRS ....................................
26, 32, 260
Turn signals ..................................... 26
Language, selecting ..........................104
License plate lamps
Messages in the multifunction
display ........................................... 253
Replacing bulbs ............................. 269
Light alloy wheels, cleaning .............230
Lighter see Cigarette lighter
Lighting ................................................ 70
Daytime running lamp mode ............72
Exterior ............................................ 71
Interior ............................................. 75
Limp-home mode ................................. 92
Load index (tires) ......................213, 218
Locator lighting ................................. 106
Locking the vehicle
Manually ........................................ 265
SmartKey ......................................... 56
Loss of
Key .................................................. 58
Service and Warranty Information
booklet .......................................... 292
Low-beam headlamps ......................... 71
Exterior lamp switch ........................ 71
Switching on .................................... 71
Lubricants .......................................... 300
Luggage cover ................................... 173
Lumbar support ................................... 64 M
Maintenance ........................................ 19
Maintenance System Service indicator display
................226
Service indicator message ............. 225
Service term exceeded ..................226
Manual headlamp mode (Low-
beam headlamps) ................................ 71
Manual shift program .........................90
Manual transmission .......................... 84
Gearshift lever ................................. 8410
Index 171_AKB; 3; 60, en-US
d2ureepe,
Version: 2.11.8.1 2009-05-11T16:00:23+02:00 - Seite 10
Page 17 of 312

TIN (Tire Identification Number) ......
219
Tire and Loading Information
placard ............................................... 205
Tire and loading terminology ...........217
TIREFIT ............................................... 273
Tire Identification Number see TIN
Tire inflation pressure
Checking ........................................ 201
Important notes on ........................ 199
Label on the inside of fuel filler
flap ................................................ 200
Placard on driver’s door B-pillar ..... 205
Tire labeling ....................................... 212
Tire load rating .................................. 218
Tire ply composition and material
used .................................................... 219
Tire repair kit see TIREFIT
Tires ........................................... 197, 297
Advanced Tire Pressure
Monitoring System (Advanced
TPMS) ............................................ 201
Air pressure ................................... 198
Care and maintenance ................... 209
Cleaning ......................................... 210
Direction of rotation, spinning .......209
Important notes on tire inflation
pressure ........................................ 199
Inflation pressure .................. 200, 201
Information placard ....................... 205
Inspection ...................................... 209
Labeling ......................................... 212
Load index ............................. 213, 218
Load rating .................................... 218
Messages in the multifunction
display ................................... 241, 255
Ply composition and material
used ............................................... 219
Problems under-/overinflation ...... 200
Retreads ........................................ 197
Rims and tires (technical data) ...... 297
Rotation ......................................... 212
Service life ..................................... 210
Sizes .............................................. 297
Snow chains .................................. 220
Speed rating .......................... 214, 219
Storing ........................................... 210Temperature
.......................... 199, 211
Terminology ................................... 217
TIREFIT (tire repair kit) ................... 273
Tire Identification Number ............. 219
TPMS low tire pressure/
malfunction telltale .................. 26, 262
Traction ................................. 211, 219
Tread ............................................. 219
Tread depth ........................... 210, 219
Treadwear
...................................... 211
Treadwear indicators ............. 210, 219
Vehicle maximum load on ..............219
Wear pattern .................................. 212
Winter tires ............................ 219, 297
Tire speed rating .......................214, 219
Total load limit ................................... 219
Tow-away alarm .................................. 52
Towing
Towing eye bolt .............................. 286
Vehicle ........................................... 285
Towing eye bolt ................................. 286
Traction ...................................... 211, 219
Transmission see Automatic transmission or
Manual transmission
Transmission fluid level .................... 195
Transmission gear selector lever see Gear selector lever
Transmission positions ....................... 87
Traveling abroad ............................... 224
Tread (tires) ....................................... 219
Tread depth (tires) ....................210, 219
Treadwear .......................................... 211
Treadwear indicators (tires) .... 210, 219
Trip computer menu .........................109
Trip odometer, resetting ..................... 93
Trunk
Closing ............................................. 60
Messages in the multifunction
display ........................................... 245
Opening ........................................... 60
Trunk lid emergency release ............ 60
Unlocking manually .......................265
Valet locking .................................... 61
Turning off the engine ........................84
Turn signals ......................................... 73
Cleaning lenses ............................. 229 Index
15 171_AKB; 3; 60, en-US
d2ureepe,
Version: 2.11.8.1 2009-05-11T16:00:23+02:00 - Seite 15
Page 60 of 312
If the battery check lamp does not come on
briefly during check, the SmartKey batteries
are discharged.
X
Replace the batteries ( Y page 266).
i You can obtain the required batteries at
any authorized Mercedes-Benz Center.
i If the batteries are checked within signal
range of the vehicle, pressing button
& or % will lock or unlock the vehicle
accordingly. Loss of the SmartKey
If you lose your SmartKey or mechanical key,
you should do the following:
X Have the SmartKey deactivated by an
authorized Mercedes-Benz Center.
X Report the loss of the SmartKey or the
mechanical key to your car insurance
company immediately.
X Have the mechanical lock replaced if
necessary.
Any authorized Mercedes-Benz Center will be
glad to supply you with a replacement. For
information on replacing the SmartKey, see
“Replacing the SmartKey” ( Y page 58).Replacing the SmartKey
Only you, or someone authorized by you can
order a replacement key from any Mercedes-
Benz Center. In order to do so, the Mercedes-
Benz Center will require proof of identity and
vehicle ownership with original documents,
including the following:
If you are the current owner of the vehicle:
R the vehicle’s current state registration
R a current identity card, passport, or drivers
license If you are an authorized person:
R
the vehicle’s current state registration
R a current identity card, passport, or drivers
license for the authorized individual
R signed and dated authorization from the
owner of the vehicle for which the key is
being requested
i Duplicated or photocopied
documentation will not be accepted.
Activating the key Once you, or an authorized person, has
provided the appropriate documents, the
Mercedes-Benz Center will need to
synchronize the key to your vehicle before it
can be used. In order to do so, the Mercedes-
Benz Center need access to your vehicle.
Opening the doors from the inside
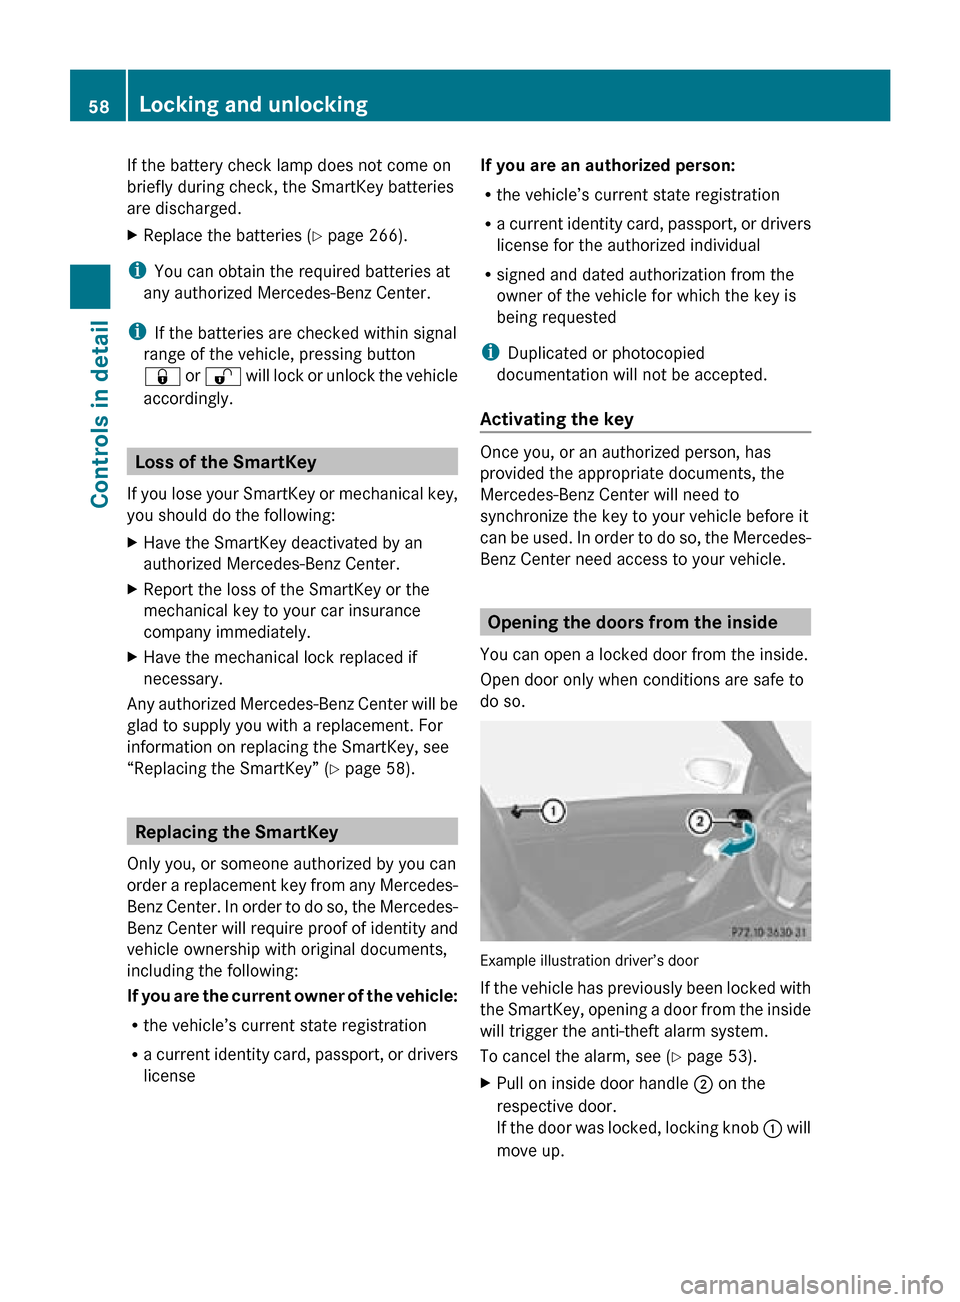
You can open a locked door from the inside.
Open door only when conditions are safe to
do so. Example illustration driver’s door
If the vehicle has previously been locked with
the SmartKey, opening a door from the inside
will trigger the anti-theft alarm system.
To cancel the alarm, see (
Y page 53).
X Pull on inside door handle ; on the
respective door.
If the door was locked, locking knob : will
move up. 58
Locking and unlockingControls in detail
171_AKB; 3; 60, en-US
d2ureepe,
Version: 2.11.8.1 2009-05-11T16:00:23+02:00 - Seite 58
Page 122 of 312
Menu
Night Mode
Automatic
Bluetooth
®
(Y page 120) Reset (Y page 121)
Display off
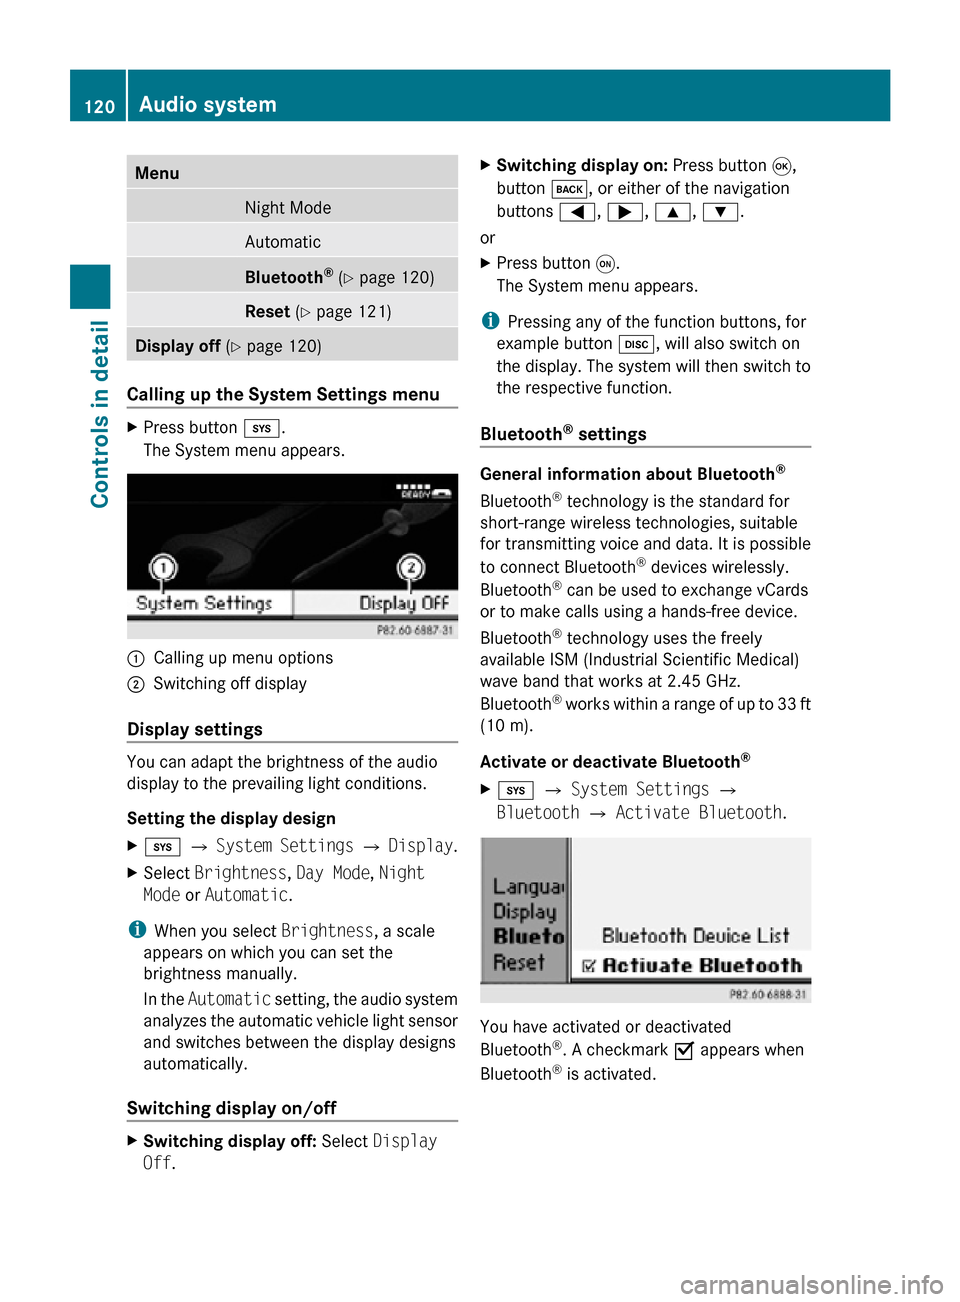
(Y page 120) Calling up the System Settings menu
X
Press button i.
The System menu appears. :
Calling up menu options
; Switching off display
Display settings You can adapt the brightness of the audio
display to the prevailing light conditions.
Setting the display design
X
i Q System Settings Q Display.
X Select Brightness, Day Mode, Night
Mode or Automatic.
i When you select Brightness, a scale
appears on which you can set the
brightness manually.
In the Automatic setting, the audio system
analyzes the automatic vehicle light sensor
and switches between the display designs
automatically.
Switching display on/off X
Switching display off: Select Display
Off. X
Switching display on: Press button 9,
button k, or either of the navigation
buttons =, ;, 9, :.
or
X Press button q.
The System menu appears.
i Pressing any of the function buttons, for
example button h, will also switch on
the display. The system will then switch to
the respective function.
Bluetooth ®
settings General information about Bluetooth
®
Bluetooth ®
technology is the standard for
short-range wireless technologies, suitable
for transmitting voice and data. It is possible
to connect Bluetooth ®
devices wirelessly.
Bluetooth ®
can be used to exchange vCards
or to make calls using a hands-free device.
Bluetooth ®
technology uses the freely
available ISM (Industrial Scientific Medical)
wave band that works at 2.45 GHz.
Bluetooth ®
works within a range of up to 33 ft
(10 m).
Activate or deactivate Bluetooth ®
X i Q System Settings Q
Bluetooth Q Activate Bluetooth. You have activated or deactivated
Bluetooth
®
. A checkmark O appears when
Bluetooth ®
is activated. 120
Audio systemControls in detail
171_AKB; 3; 60, en-US
d2ureepe,
Version: 2.11.8.1 2009-05-11T16:00:23+02:00 - Seite 120
Page 128 of 312
i
Note that categories and channels shown
in illustrations are dependent on
programming content delivered by the
service provider. Programming content is
subject to change. Therefore, channels and
categories shown in illustrations and
descriptions contained in this manual may
differ from the channels and categories
delivered by the service provider.
i Satellite radio service may be unavailable
or interrupted from time to time for a
variety of reasons, such as environmental
or topographic conditions and other things
we cannot control. Service might also not
be available in certain places (e.g. in
tunnels, parking garages, under leafy trees,
or within or next to buildings) or near other
obstructions. In such situations, the
satellite radio’s main menu shows the No
Service screen. At this point, the radio’s
functions are restricted.
Subscribing to satellite radio X
Press button $ on audio control unit
repeatedly until Sat is selected.
The following conditions are possible:
R Satellite radio service is not activated
(only the preview channel is displayed).
R Satellite radio service is activated.
i If a satellite receiver is not installed or not
properly installed:
The message Device Unavailable will
appear.
If the satellite radio service is not activated,
the “SIRIUS Preview” display appears.
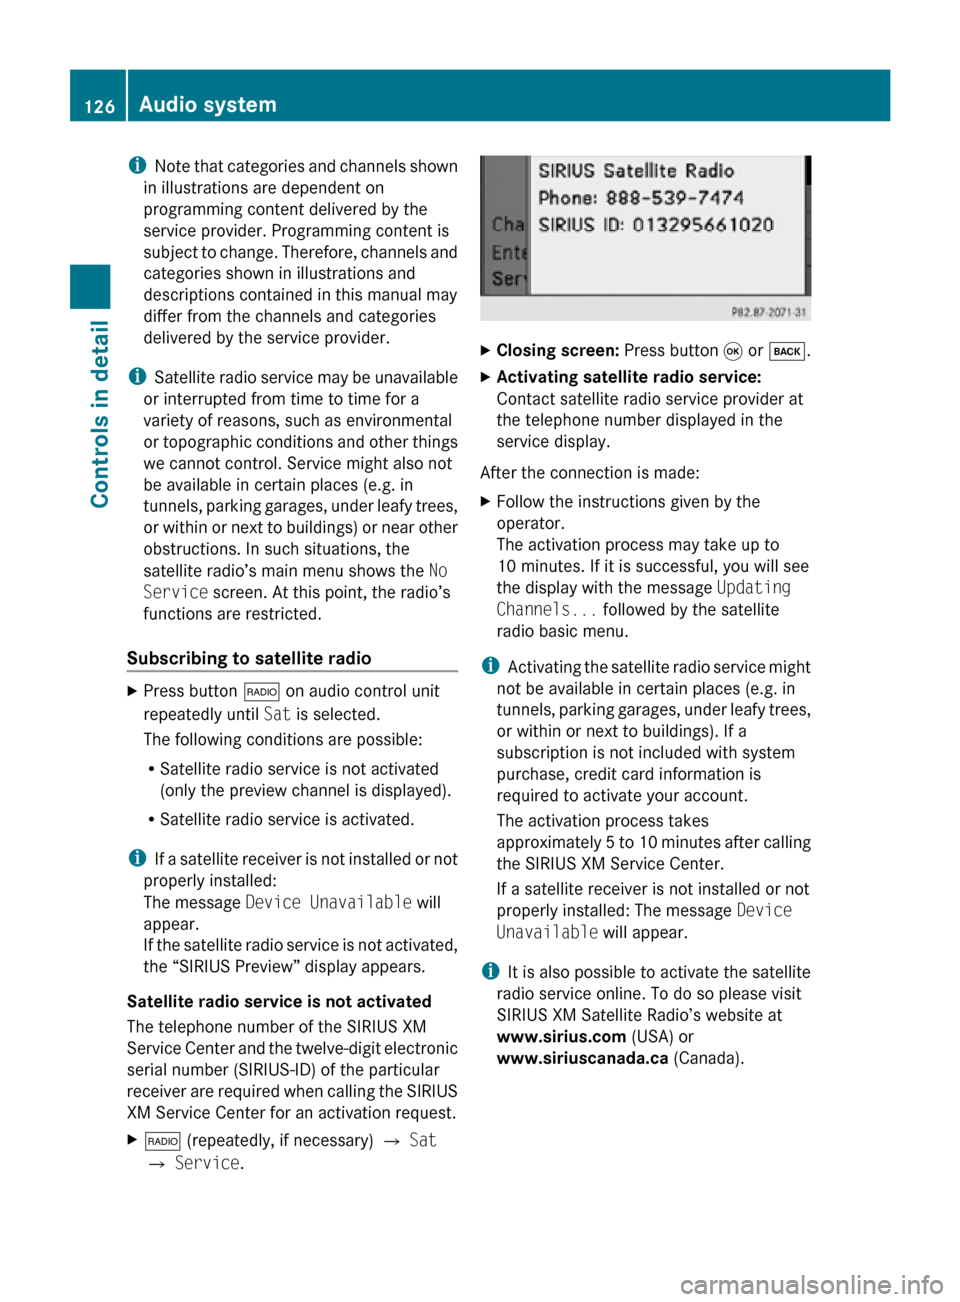
Satellite radio service is not activated
The telephone number of the SIRIUS XM
Service Center and the twelve-digit electronic
serial number (SIRIUS-ID) of the particular
receiver are required when calling the SIRIUS
XM Service Center for an activation request.
X $ (repeatedly, if necessary) Q Sat
Q Service. X
Closing screen: Press button 9 or k.
X Activating satellite radio service:
Contact satellite radio service provider at
the telephone number displayed in the
service display.
After the connection is made:
X Follow the instructions given by the
operator.
The activation process may take up to
10 minutes. If it is successful, you will see
the display with the message Updating
Channels... followed by the satellite
radio basic menu.
i Activating the satellite radio service might
not be available in certain places (e.g. in
tunnels, parking garages, under leafy trees,
or within or next to buildings). If a
subscription is not included with system
purchase, credit card information is
required to activate your account.
The activation process takes
approximately 5 to 10 minutes after calling
the SIRIUS XM Service Center.
If a satellite receiver is not installed or not
properly installed: The message Device
Unavailable will appear.
i It is also possible to activate the satellite
radio service online. To do so please visit
SIRIUS XM Satellite Radio’s website at
www.sirius.com (USA) or
www.siriuscanada.ca (Canada).126
Audio systemControls in detail
171_AKB; 3; 60, en-US
d2ureepe,
Version: 2.11.8.1 2009-05-11T16:00:23+02:00 - Seite 126
Page 149 of 312
Bear in mind that at a speed of just 30 mph
(approximately
50 km/h), your vehicle is
covering a distance of 44 feet (approximately
14 m) every second.
i The functions and services available to
you while using the mobile phone depend
on your service provider and the type of
mobile phone you are using. Also see
separate operating manual of your mobile
phone for instructions on how to use your
mobile phone.
When the mobile phone is connected via the
Bluetooth ®
interface to the audio system, you
can operate the mobile phone using the
following devices:
R Audio control unit (Y page 156)
R Buttons 6 and ~ on the
multifunction steering wheel ( Y page 94)
R Mobile phone keypad or similar input
device
Please note that these functions are only
available with Mercedes-Benz approved
mobile phones.
TEL Menu Menu Function
Telephone
Bluetooth
®
phones Download contacts
Delete contacts
Adjust volume
Name
Phone book
Call lists
Microphone off/
on
Call Lists or Mic On/
Mic Off
Delete Call Lists General notes
Making calls via Bluetooth
®
interface
The audio system telephone function via the
Bluetooth ®
interface is available in
conjunction with a Bluetooth ®
enabled
mobile phone.
With
a suitable mobile phone, you can use the
hands-free device and receive electronic
business cards (vCards) via the Bluetooth ®
interface.
Calls disconnected while the vehicle is in
motion
Interruptions to the connection may occur if
R there is insufficient mobile network
coverage
R you move from one mobile network
transmitter/receiver area (mobile network
cell) into another and no channels are free
or the cell is full
R you are using a SIM card that is not
compatible with the available network
R when using a mobile phone with
“Twincard”, the mobile phone is
simultaneously logged into the network
with the second SIM card
Operating options
i The components and operating principles
of the audio system can be found on
(Y page 112) and ( Y page 116).
When the mobile phone is connected via the
Bluetooth ®
interface to the audio system, you
can operate the mobile phone using the
following devices:
R Buttons 6 and ~ and keypad on
audio control unit ( Y page 113)
R Multifunction steering wheel ( Y page 94)
Please note that these functions are only
available with Mercedes-Benz approved
mobile phones. Please contact an authorized
Mercedes-Benz Center for information on Audio system
147
Controls in detail
171_AKB; 3; 60, en-US
d2ureepe, Version: 2.11.8.1 2009-05-11T16:00:23+02:00 - Seite 147 Z
Page 153 of 312
X
Start Bluetooth ®
search procedure on the
mobile phone (see mobile phone operating
instructions).
X Select the audio system (“MB Bluetooth”)
at your mobile phone.
X When prompted to do so, enter the
passcode on the mobile phone and then on
the audio system.
Displaying details on a mobile phone X
% Q Phone Q Bluetooth Phones.
X Select the mobile phone from the list.
X Select Options Q Details.
The details screen for the device is shown
in the audio display.
X Closing details screen: Press
button ;, = or 9.
De-authorizing a Bluetooth ®
device X
% Q Phone Q Bluetooth Phones.
X Select authorized device.
X Select Options Q De-Authorize.
A prompt appears asking whether you
really want to de-authorize this device.
X Select Yes or No.
If you select Yes, the device will be de-
authorized.
i If you de-authorize a device which has
been authorized in the past and which is not
detected in the search, this device will no
longer be displayed in the device list.
Devices which have been authorized in the
past but which are not detected in the
search are either not switched on or not in
the vehicle.
Activating another mobile phone If you have several authorized mobile phones,
you can switch between the individual mobile
phones.
i
You cannot switch to another authorized
mobile phone during a call. When you authorize a new mobile phone, it is
automatically activated. Only one mobile
phone can be active at a time.
X
% Q Phone Q Bluetooth Phones.
X Select an authorized mobile phone from
the list.
X Press button 9 to confirm.
The selected mobile phone will be searched
for and connected if it is located in the
Bluetooth ®
range and Bluetooth ®
is
activated on the corresponding device.
The selected mobile phone is activated.
A dot # in front of the entry, indicates the
current active mobile phone in the phone
list.
Receiving business cards You can import business cards (vCards) into
the address book from external Bluetooth
®
devices ( Y page 153).
TEL-Basic display X
Press button % on the audio control unit
to call up the telephone mode.
i When in telephone mode, you can access
the TEL-Basic display by pressing button
k repeatedly.
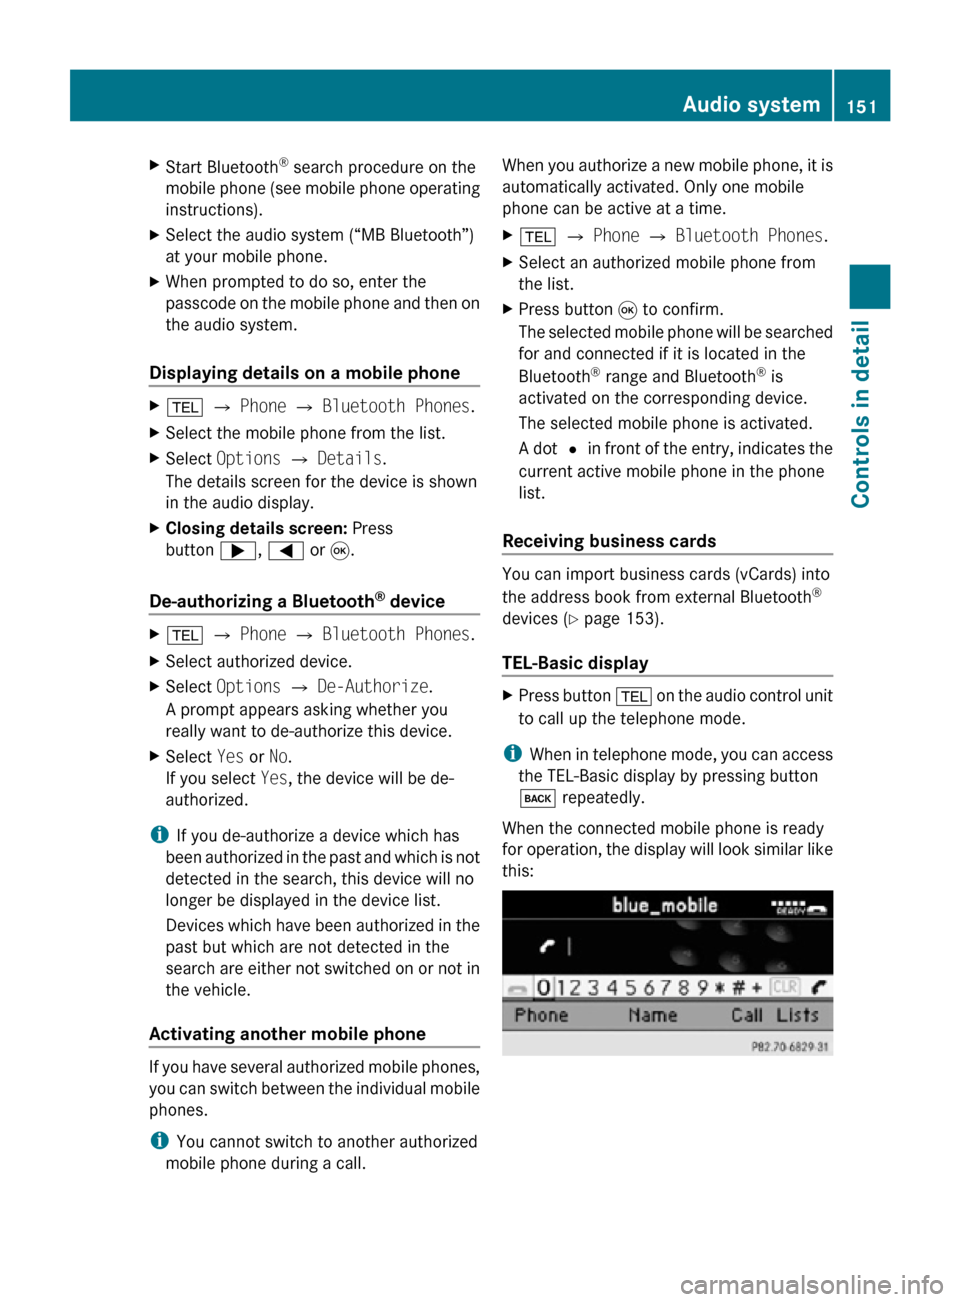
When the connected mobile phone is ready
for operation, the display will look similar like
this: Audio system
151Controls in detail
171_AKB; 3; 60, en-US
d2ureepe, Version: 2.11.8.1 2009-05-11T16:00:23+02:00 - Seite 151 Z
Page 155 of 312
X
Press button 6.
Connecting... appears in the audio
display
while the mobile phone establishes
the connection.
X Wait until the emergency call center
answers, then describe the emergency.
i Depending on the phone type, if no SIM
card is inserted in a GSM mobile phone or
if there is no service on a CDMA mobile
phone, NO SERVICE may appear in the
audio display. In that case, you only can
make an emergency call on the mobile
phone itself, without the use of the audio
control unit.
Placing
a “911” emergency call with the
mobile phone locked i
If
the mobile phone is locked, you only can
make an emergency call on the mobile
phone itself, without the use of the audio
control unit. Phone book
You
can save telephone numbers in the audio
system’s phone book.
i These entries are retained even if you use
the audio system with another mobile
phone. You should delete these entries
before handing over or selling your vehicle.
Receiving business cards (vCards) You can import business cards (vCards) from
external Bluetooth
®
phones into your audio
system’s phone book. To do this:
R Bluetooth ®
must be activated on the audio
system and on the external Bluetooth ®
phone (see the operating instructions of
the mobile phone).
R The external Bluetooth ®
phone must be
able to send vCards via Bluetooth ®
(see the operating instructions of the mobile
phone).
R The external Bluetooth ®
phone in the
vehicle must be switched on and
authorized.
i If you switch to a different mode while
vCards are being received (e.g., press
button $), reception of vCards will be
aborted.
X % Q Phone Q Download
Contacts.
X Press button 9 to confirm.
X Importing: Start the data transfer on the
external Bluetooth ®
phone (“Export
business
cards (vCards)”, see the operating
instructions of the mobile phone).
The audio system imports the data for the
business cards and displays the number of
business cards received.
i Select Back,
press button k or switch
to a different mode to abort reception.
X Aborting reception: Press 9.
or
X Press button k.
Deleting external Data X
% Q Phone Q Delete Contacts.
A
prompt appears asking whether the data
should be deleted.
X Select Yes or No.
If
you select Yes all personal data are then
deleted from the phone book.
Opening the phone book X
% Q Name.
Entries in the phone book are displayed in
alphabetical order. The search speller is
active when more multiple entries are
available. The search speller appears on
the lower edge of the display.
You can use the search speller to reduce the
number of entries you need to make. Audio system
153
Controls in detail
171_AKB; 3; 60, en-US
d2ureepe, Version: 2.11.8.1 2009-05-11T16:00:23+02:00 - Seite 153 Z