2010 MERCEDES-BENZ S550 4MATIC display
[x] Cancel search: displayPage 158 of 548
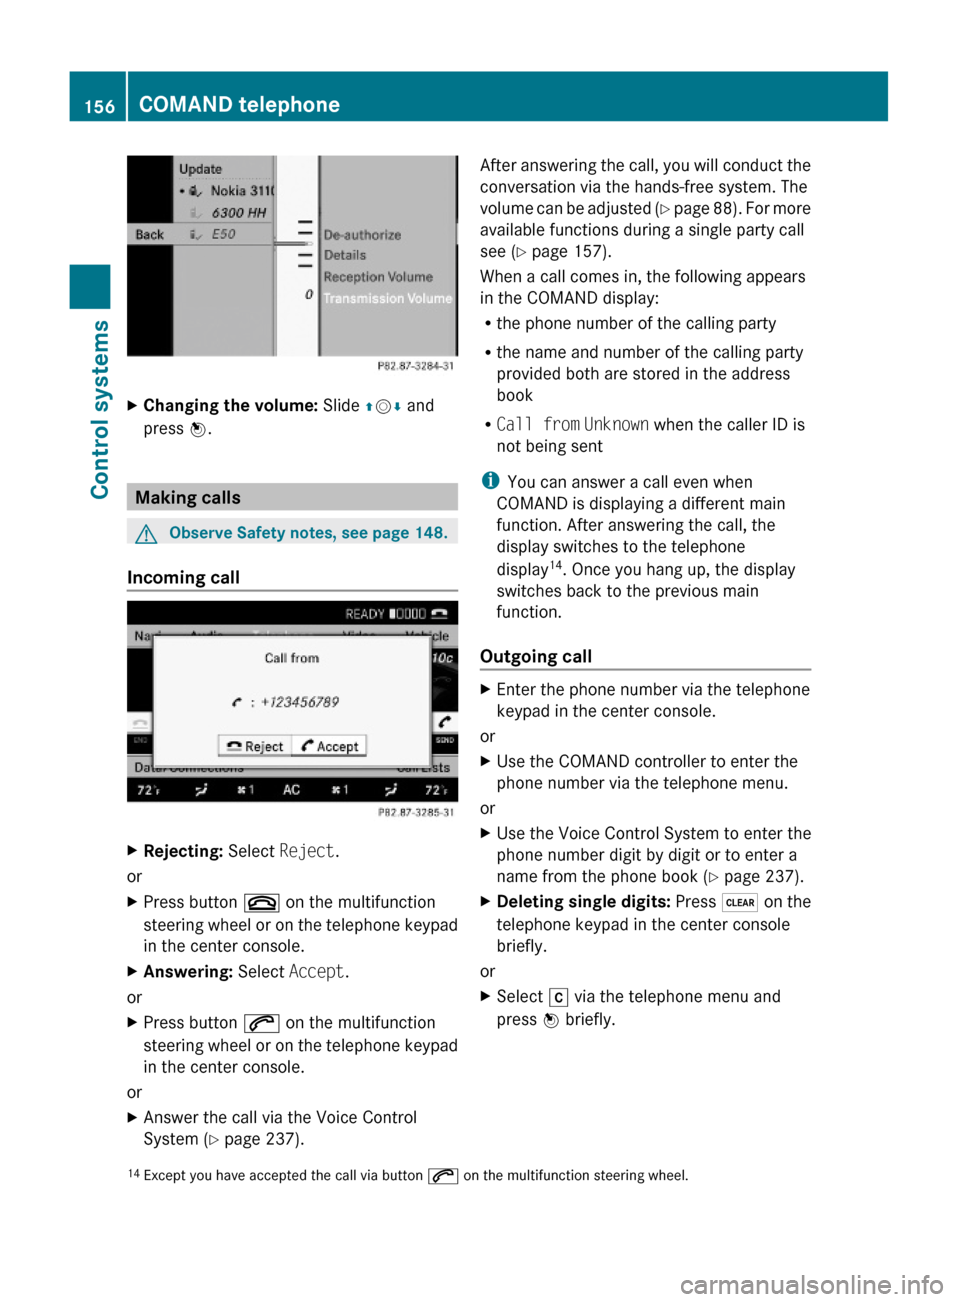
XChanging the volume: Slide ZVÆ and
press W.
Making calls
GObserve Safety notes, see page 148.
Incoming call
XRejecting: Select Reject.
or
XPress button ~ on the multifunction
steering wheel or on the telephone keypad
in the center console.
XAnswering: Select Accept.
or
XPress button 6 on the multifunction
steering wheel or on the telephone keypad
in the center console.
or
XAnswer the call via the Voice Control
System (Y page 237).
After answering the call, you will conduct the
conversation via the hands-free system. The
volume can be adjusted (Y page 88). For more
available functions during a single party call
see (Y page 157).
When a call comes in, the following appears
in the COMAND display:
Rthe phone number of the calling party
Rthe name and number of the calling party
provided both are stored in the address
book
RCall from Unknown when the caller ID is
not being sent
iYou can answer a call even when
COMAND is displaying a different main
function. After answering the call, the
display switches to the telephone
display14. Once you hang up, the display
switches back to the previous main
function.
Outgoing call
XEnter the phone number via the telephone
keypad in the center console.
or
XUse the COMAND controller to enter the
phone number via the telephone menu.
or
XUse the Voice Control System to enter the
phone number digit by digit or to enter a
name from the phone book (Y page 237).
XDeleting single digits: Press $ on the
telephone keypad in the center console
briefly.
or
XSelect r via the telephone menu and
press W briefly.14Except you have accepted the call via button 6 on the multifunction steering wheel.156COMAND telephoneControl systems
221_AKB; 6; 20, en-USd2ugruen,Version: 2.11.8.12009-09-24T13:28:17+02:00 - Seite 156
Page 159 of 548

XDeleting entire number: Press and hold
$ on the telephone keypad in the center
console until the number is deleted.
or
XSelect r via the telephone menu and
press and hold W until the number is
deleted.
XConnecting call: Press button 6 on the
multifunction steering wheel or on the
telephone keypad in the center console.
or
XSelect 6 via the telephone menu
Redial
XGo to the telephone menu.XPress 6 on the telephone keypad in the
center console.
or
XSelect SEND from the telephone menu and
press W.
The list of previously dialed number
appears. The last number you have called
at the top of the list.
XSelecting number and connecting call:
Slide ZVÆ and press W to select a number
or press 6 on the telephone keypad in
the center console.
Calling voice mail15
Your voice mail number must be stored on the
SIM card of your mobile phone and be
assigned to key 4 on the mobile phone
keypad.
XPress and hold ´ on the telephone
keypad in the center console.
Functions during a single party call
(non-conference calls) :Called or calling party;6 Active call=NEW Connect to more parties16?Switching hands-free microphone on/offAEnable touch-tone dialing17BEnding call
Switching hands-free microphone on or
off
This function is available during an active call.
XSwitching off: Select Mike OFF in the
telephone menu.
Symbol Q appears and the message The
microphone is turned OFF. is displayed
briefly.
XSwitching on: Select Mike ON in the
telephone menu.
Symbol Q goes out. The message The
microphone is turned ON. appears
briefly.
Touch-tone dialing17
You can use touch-tone dialing to control
answering machines and other devices for
remote inquiry.
When you want to check your answering
machine for example, dial the respective
number.
15Function only available when supported by the respective network provider.16Function only available when the mobile phone supports HFP 1.5 or higher.17Not available on all mobile phones.
COMAND telephone157Control systems221_AKB; 6; 20, en-USd2ugruen,Version: 2.11.8.12009-09-24T13:28:17+02:00 - Seite 157Z
Page 160 of 548
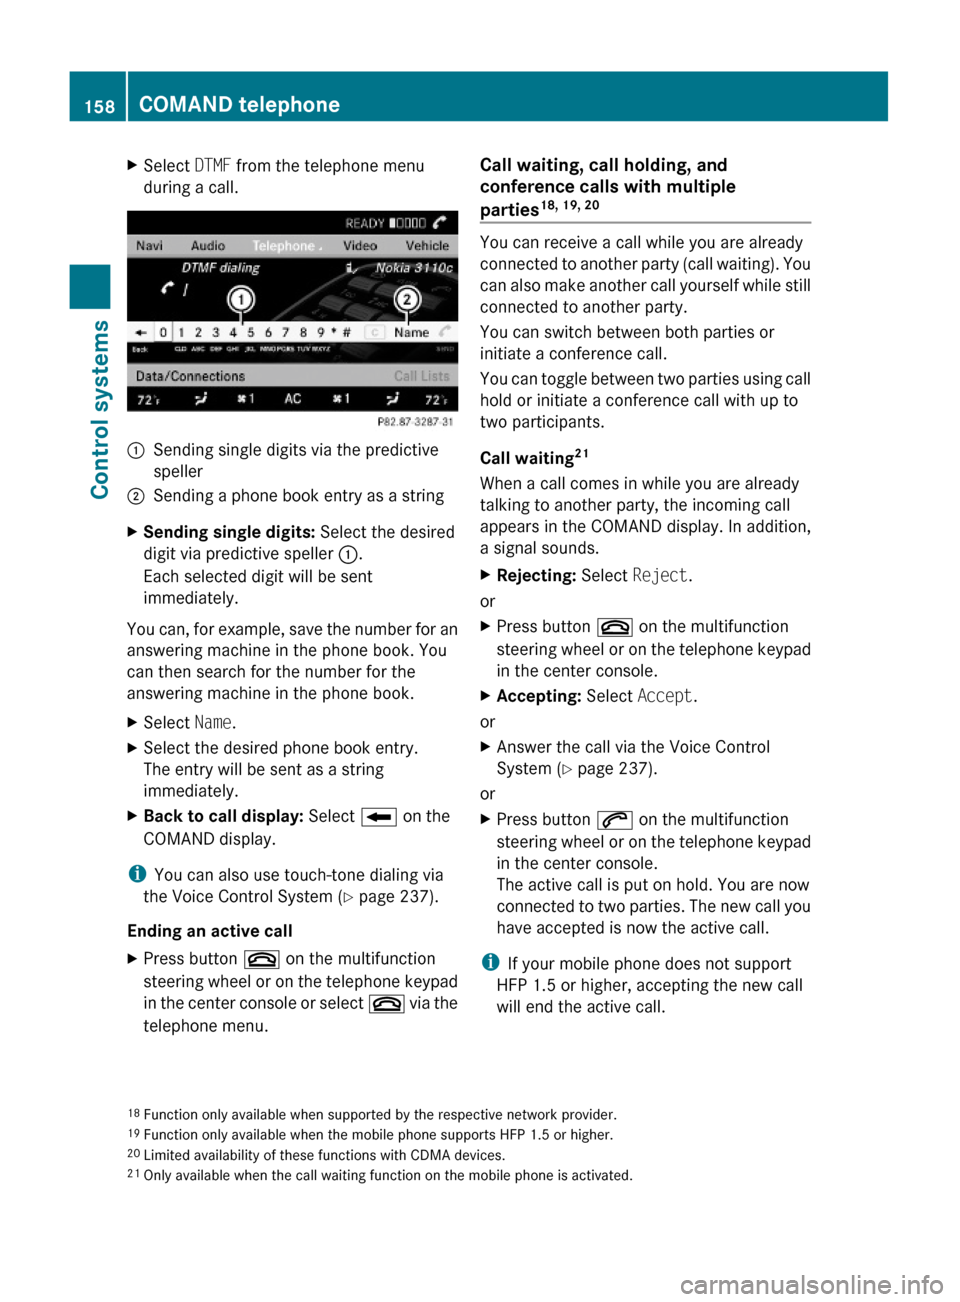
XSelect DTMF from the telephone menu
during a call.:Sending single digits via the predictive
speller
;Sending a phone book entry as a stringXSending single digits: Select the desired
digit via predictive speller :.
Each selected digit will be sent
immediately.
You can, for example, save the number for an
answering machine in the phone book. You
can then search for the number for the
answering machine in the phone book.
XSelect Name.XSelect the desired phone book entry.
The entry will be sent as a string
immediately.
XBack to call display: Select B on the
COMAND display.
iYou can also use touch-tone dialing via
the Voice Control System (Y page 237).
Ending an active call
XPress button ~ on the multifunction
steering wheel or on the telephone keypad
in the center console or select ~ via the
telephone menu.
Call waiting, call holding, and
conference calls with multiple
parties18, 19, 20
You can receive a call while you are already
connected to another party (call waiting). You
can also make another call yourself while still
connected to another party.
You can switch between both parties or
initiate a conference call.
You can toggle between two parties using call
hold or initiate a conference call with up to
two participants.
Call waiting21
When a call comes in while you are already
talking to another party, the incoming call
appears in the COMAND display. In addition,
a signal sounds.
XRejecting: Select Reject.
or
XPress button ~ on the multifunction
steering wheel or on the telephone keypad
in the center console.
XAccepting: Select Accept.
or
XAnswer the call via the Voice Control
System (Y page 237).
or
XPress button 6 on the multifunction
steering wheel or on the telephone keypad
in the center console.
The active call is put on hold. You are now
connected to two parties. The new call you
have accepted is now the active call.
iIf your mobile phone does not support
HFP 1.5 or higher, accepting the new call
will end the active call.
18Function only available when supported by the respective network provider.19Function only available when the mobile phone supports HFP 1.5 or higher.20Limited availability of these functions with CDMA devices.21Only available when the call waiting function on the mobile phone is activated.
158COMAND telephoneControl systems
221_AKB; 6; 20, en-USd2ugruen,Version: 2.11.8.12009-09-24T13:28:17+02:00 - Seite 158
Page 162 of 548
be accessed when the respective mobile
phone is connected to COMAND via the
Bluetooth® interface.
Importing contacts manually
iContacts that were imported manually
can always be accessed. Contacts that
were imported automatically can only be
accessed when the respective mobile
phone is connected to COMAND via the
Bluetooth® interface.
Data can be imported
Rfrom memory card
Rvia the Bluetooth® interface (for example
Bluetooth® phone or Bluetooth® PC)
XImporting data: Load the memory card or
activate Bluetooth® in COMAND and the
Bluetooth® mobile phone/PC. Refer to
operating instructions of the respective
Bluetooth® device.
XSelect Data/Connections Q Download
Contacts Q From Memory Card or Via
Bluetooth.
XSelect Add or Overwrite.
iThe contact data, or vCards22, must be
sent from the Bluetooth® device to
COMAND. Refer to operating instructions
of the respective Bluetooth® device.
XStopping data import: Press W.
or
XPress %.
When the data have been imported, the
message Import successful. appears in
the COMAND display.
When the COMAND phone book memory is
full, the message Memory full.
Contacts could not be imported
completely. appears in the COMAND
display.
iWhen switching to another main function,
such as navigation, while importing data via
Bluetooth®, the import is aborted. The
import of vCards from a memory card
however will be continued.
Accessing contacts/details
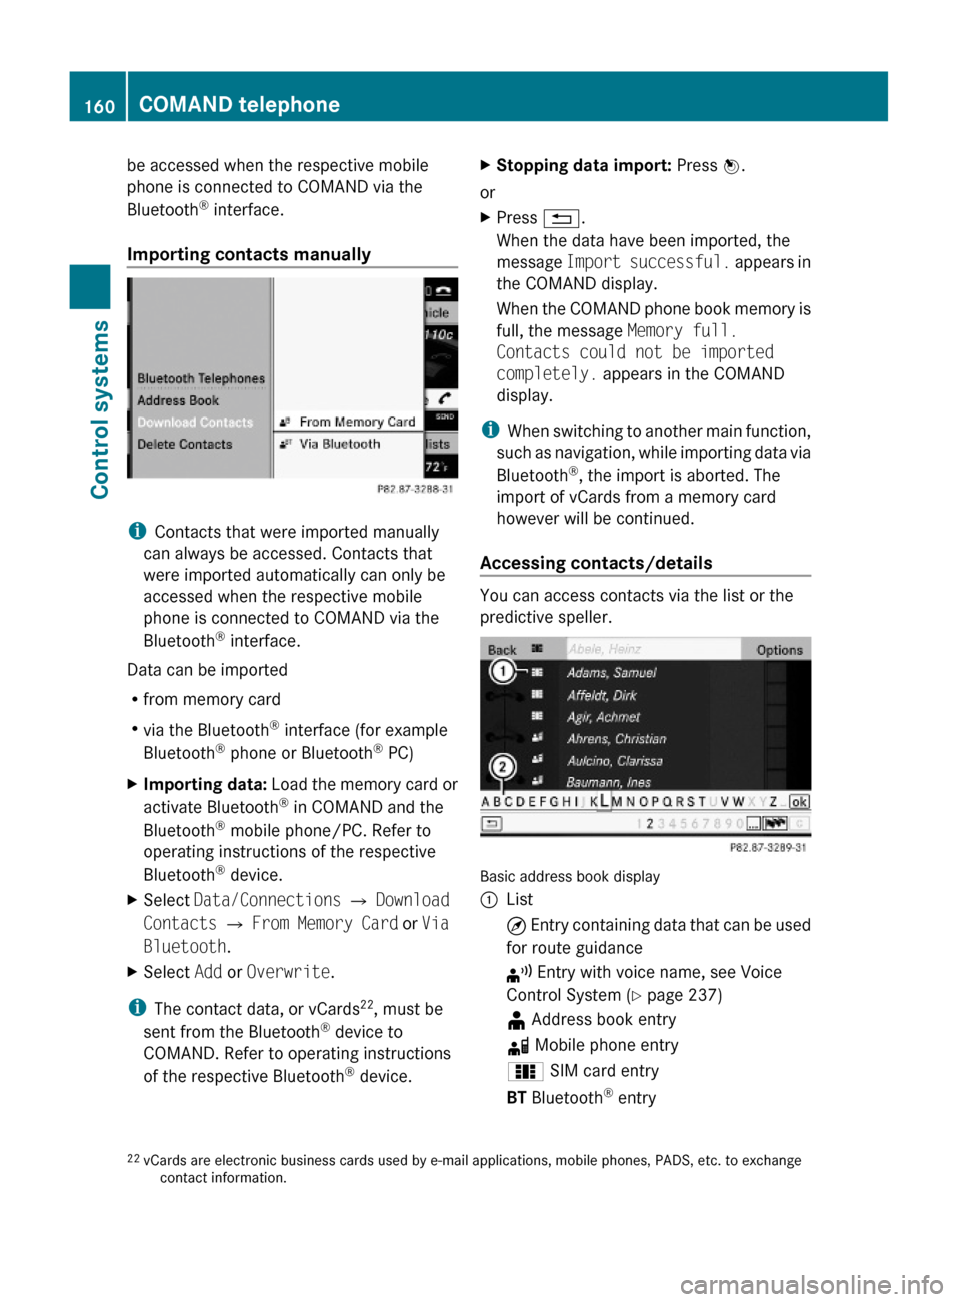
You can access contacts via the list or the
predictive speller.
Basic address book display
:List¤ Entry containing data that can be used
for route guidance
¦ Entry with voice name, see Voice
Control System (Y page 237)
¥ Address book entryd Mobile phone entry0 SIM card entryBT Bluetooth® entry22vCards are electronic business cards used by e-mail applications, mobile phones, PADS, etc. to exchangecontact information.
160COMAND telephoneControl systems
221_AKB; 6; 20, en-USd2ugruen,Version: 2.11.8.12009-09-24T13:28:17+02:00 - Seite 160
Page 163 of 548

¯ Memory card entryG Entry containing multiple phone
numbers
;Two-row predictive spellerB Changing predictive speller
language
p Changing character setF Deleting selection¬ Confirming selection% Back
Selecting contacts from list
XPhone book: Select Name.XAddress book: Select Data/Connections
Q Address Book.
XChanging from predictive speller to
list: Press ZV until the predictive speller
disappears.
or
XSelect ¬.XSelecting contact: Slide ZVÆ or rotate
cVd and press W.
Selecting contacts via predictive speller
XPhone book: Select Name.XAddress book: Select Data/Connections
Q Address Book.
XChanging from list to predictive
speller: Select Back from the list.
or
XPress %.XSelecting character: Slide ZVÆ or XVY
and press W. Repeat this procedure until
COMAND changes to the list automatically.
The first character you enter determines
the first letter of the entry you are
searching. When similar entries exist, the
next character that is different is
highlighted and thus offered for selection.
iYou can also enter the characters via the
telephone keypad in the center console.
Displaying contact detailsXSelect Options Q Details.
The contact details appear.
XBack to list: Slide XVY until the list is
highlighted.
Creating/editing contacts
iThis function is not available at a vehicle
speed of above approximately 3 mph
(5 km/h). When the vehicle speed is below
approximately 2 mph (3 km/h), the
function is available again.
iYou can create address data in the
address book directly. When you save
phone numbers to the phone book, they are
created in the address book. When you
save a destination for navigation, COMAND
creates an address book entry that
contains the entire data usable for route
guidance.
XSelect the contact23 (Y page 160).XSelect Options Q New Entry or
Change.
The input menu with the data fields
appears.
23For changing contact only.COMAND telephone161Control systems221_AKB; 6; 20, en-USd2ugruen,Version: 2.11.8.12009-09-24T13:28:17+02:00 - Seite 161Z
Page 165 of 548
Via address bookXSelect Data/Connections.XOpen Address Book.XSelect contact (Y page 160).XPress W.XRotate cVd and press W.
or
XSelect Options Q Call.
Starting route guidance to an entry
iYou can use this function once you have
saved a destination to the destination
memory (Y page 120). COMAND will then
also save the entire destination data in the
address book.
XSelect an address book entry with symbol
¤.
XDisplay the entry details and select the
address data field.
XSelect Options Q Navigate Q Start.
iYou can only select the function
Navigate when the address data field
contains complete data usable for route
guidance. Entries with complete, usable
data is indicated by symbol ¤.
Voice names
iVoice names are made via the Voice
Control System (Y page 237).
Adding or changing voice names
iYou can add one voice name for each
address book entry.
XSearch for an address book entry. Entries
with voice name are indicated by symbol
¦.
XSelect Options Q Voice Name Q Add
or Change.
Further operations is conducted via the
Voice Control System. The Voice Control
System will lead you through the menus.
Deleting voice nameXSearch for an address book entry with voice
name.
XSelect Options Q Voice Name Q
Delete.
You will be asked if you want to delete the
voice name.
Listening to a voice name
XSearch for an address book entry with voice
name.
XSelect Options Q Voice Name Q
Listen.
You will hear the voice name.
Call lists
COMAND displays separate lists of the phone
calls that came in and went out while the
mobile phone was in operation. The list of
incoming calls includes the ones you have
missed.
iThe respective menu item can only be
selected when calls were made or received
via COMAND or when call lists were
imported from the mobile phone.
Selecting a call list entry
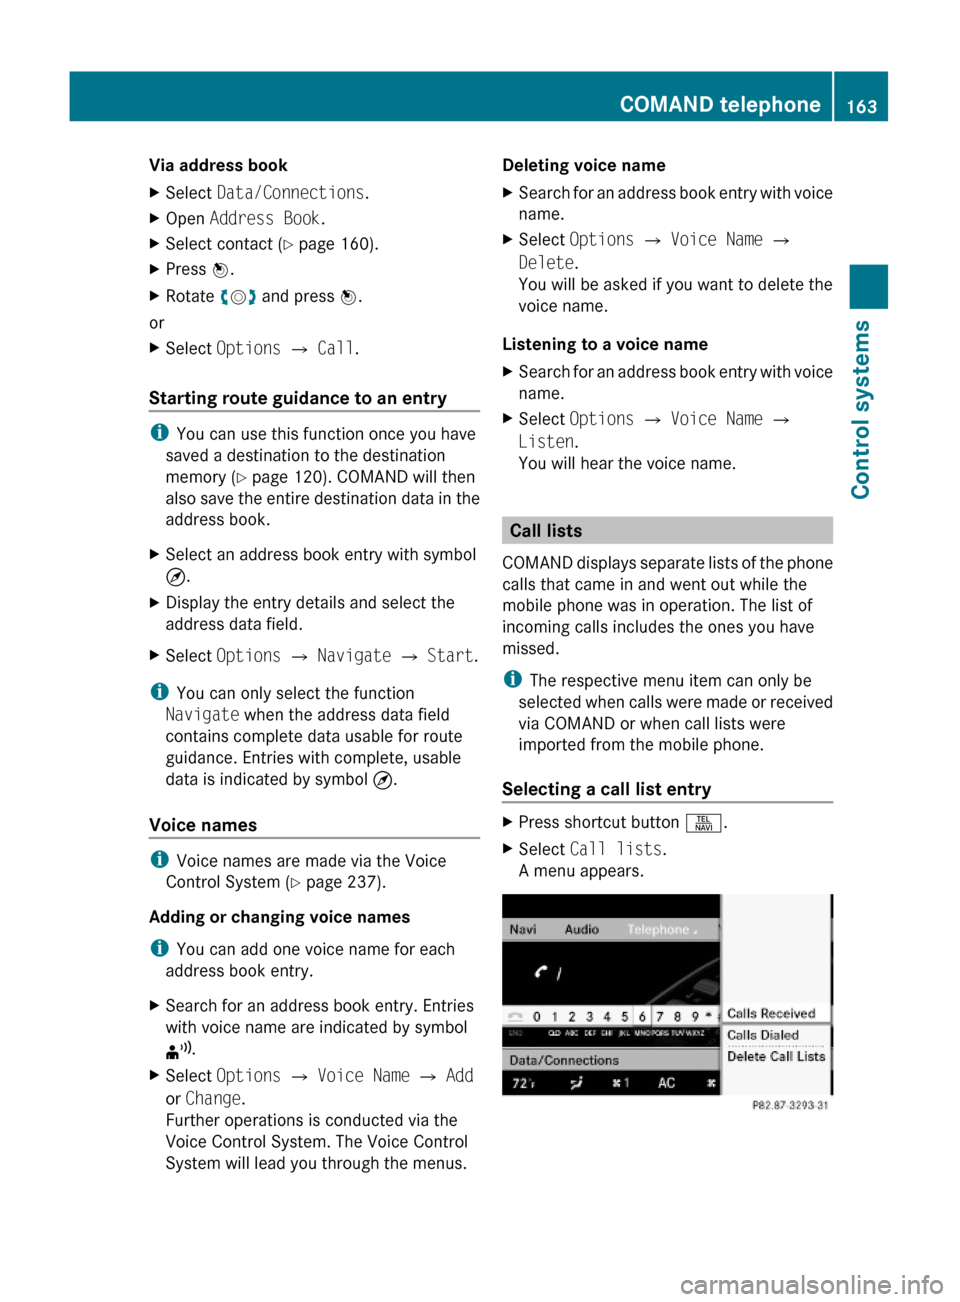
XPress shortcut button S.XSelect Call lists.
A menu appears.
COMAND telephone163Control systems221_AKB; 6; 20, en-USd2ugruen,Version: 2.11.8.12009-09-24T13:28:17+02:00 - Seite 163Z
Page 166 of 548
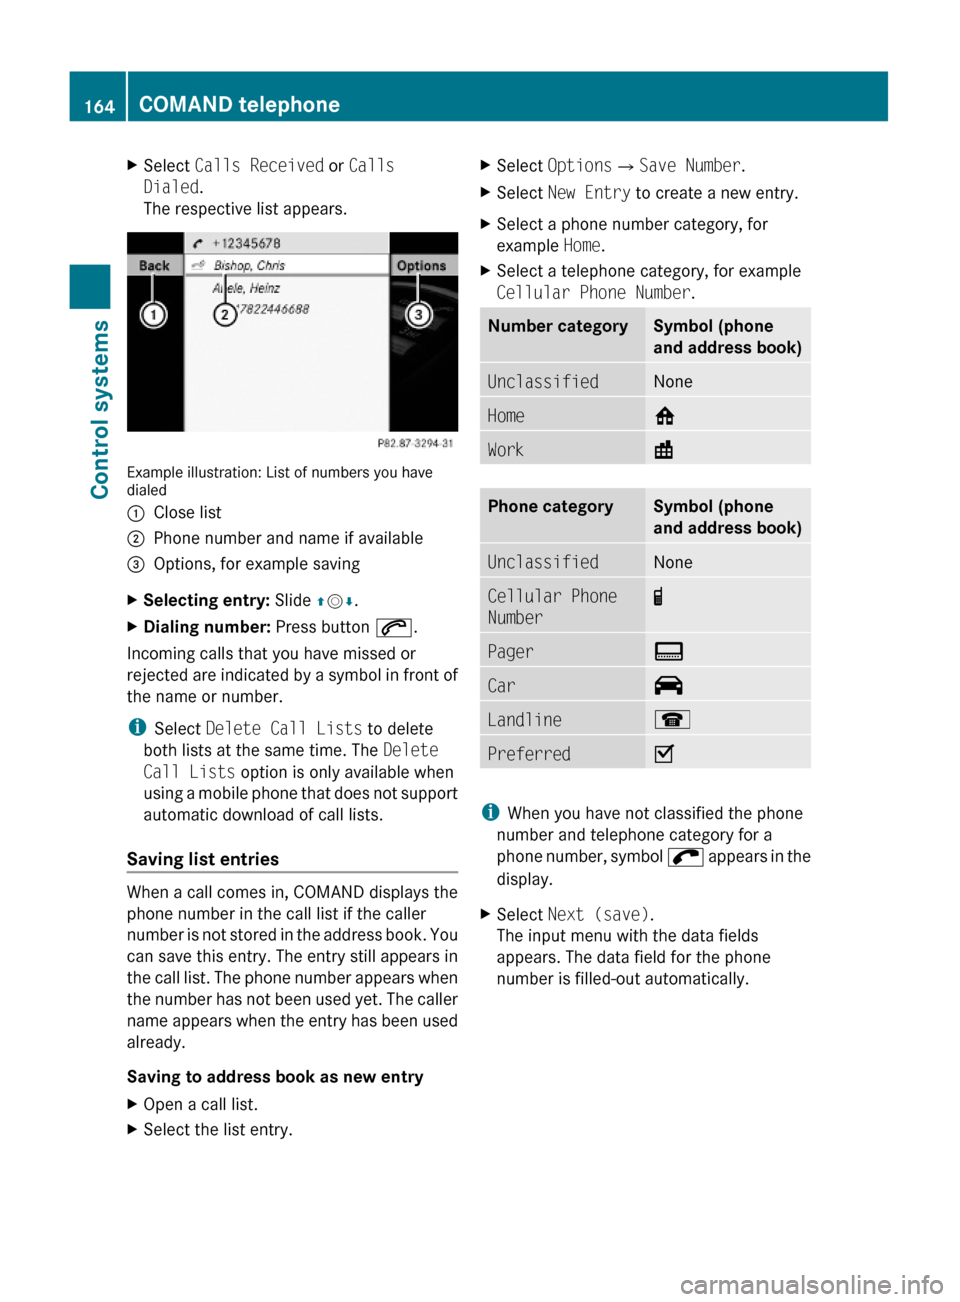
XSelect Calls Received or Calls
Dialed.
The respective list appears.
Example illustration: List of numbers you havedialed
:Close list;Phone number and name if available=Options, for example savingXSelecting entry: Slide ZVÆ.XDialing number: Press button 6.
Incoming calls that you have missed or
rejected are indicated by a symbol in front of
the name or number.
iSelect Delete Call Lists to delete
both lists at the same time. The Delete
Call Lists option is only available when
using a mobile phone that does not support
automatic download of call lists.
Saving list entries
When a call comes in, COMAND displays the
phone number in the call list if the caller
number is not stored in the address book. You
can save this entry. The entry still appears in
the call list. The phone number appears when
the number has not been used yet. The caller
name appears when the entry has been used
already.
Saving to address book as new entry
XOpen a call list.XSelect the list entry.XSelect OptionsQSave Number.XSelect New Entry to create a new entry.XSelect a phone number category, for
example Home.
XSelect a telephone category, for example
Cellular Phone Number.
Number categorySymbol (phone
and address book)
UnclassifiedNoneHome6Work\Phone categorySymbol (phone
and address book)
UnclassifiedNoneCellular Phone
Number
¢Pager¨Car^Landline¬PreferredO
iWhen you have not classified the phone
number and telephone category for a
phone number, symbol ; appears in the
display.
XSelect Next (save).
The input menu with the data fields
appears. The data field for the phone
number is filled-out automatically.
164COMAND telephoneControl systems
221_AKB; 6; 20, en-USd2ugruen,Version: 2.11.8.12009-09-24T13:28:17+02:00 - Seite 164
Page 168 of 548
Radio
(except
Weather Band)
Presets
(except
Weather
Band)
Channel
(only
Weather
Band)
InfoFM or AM
or WB
SoundSave StationAutostoreChannel listProgram
Information
Switch to
FM wave
band
TrebleFrequency EntryPreset
station list
Switch to
AM wave
band
BassShow Station
Info
Switch to
Weather
Band
Balance/
Fader
ª¥Radio3D SoundActive Source
for Rear
Rear OFFSwitching to radio modeXSelect Audio Q FM/AM Radio.
or
XPress shortcut button R (Y page 77)
once or twice.
The radio display appears once you have
switched to radio mode. You will hear the
last tuned station/channel in the
previously selected wave band, provided
that the station/channel can be received.
iThe number of times you have to press
shortcut button R depends on the
operating mode currently selected.
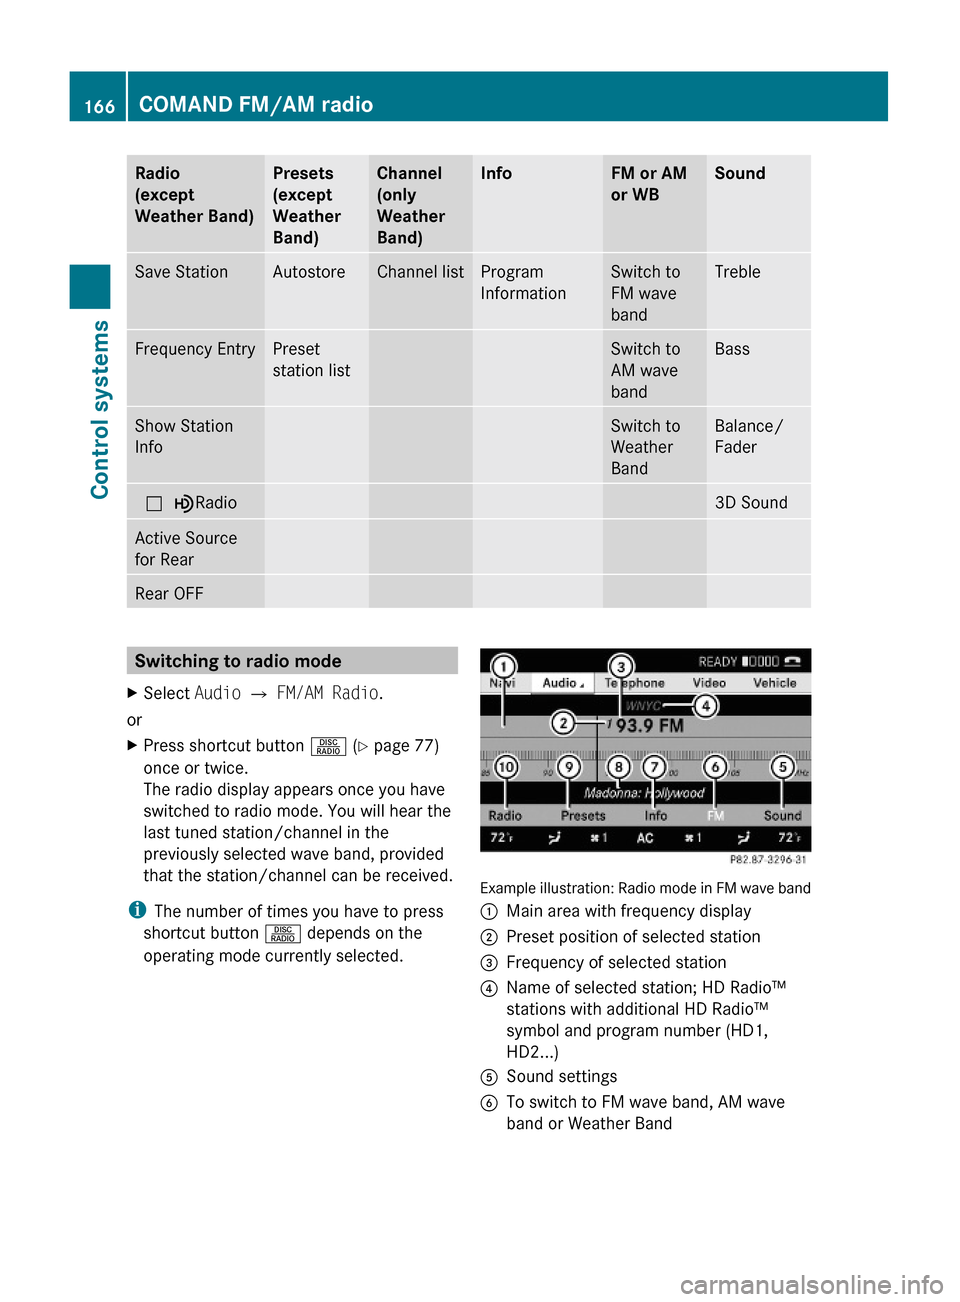
Example illustration: Radio mode in FM wave band
:Main area with frequency display;Preset position of selected station=Frequency of selected station?Name of selected station; HD Radio™
stations with additional HD Radio™
symbol and program number (HD1,
HD2...)
ASound settingsBTo switch to FM wave band, AM wave
band or Weather Band
166COMAND FM/AM radioControl systems
221_AKB; 6; 20, en-USd2ugruen,Version: 2.11.8.12009-09-24T13:28:17+02:00 - Seite 166