2010 MERCEDES-BENZ GL tailgate
[x] Cancel search: tailgatePage 81 of 380
Opening/closing the tailgate from the
inside
Opening
GObserve Safety notes, see page 76.GWarning!
Maintain sight of the area around the rear of
the vehicle while operating the tailgate with
the door-mounted remote tailgate switch.
Monitor the opening procedure carefully to
make sure no one is in danger of being
injured.
To interrupt the opening procedure, press or
pull the door-mounted remote tailgate switch.
When the SmartKey is not inserted in the
starter switch (vehicles with KEYLESS-GO:
Make sure the vehicle’s on-board electronics
have status 0): Press button F on the
SmartKey.
You can unlock and open the tailgate
simultaneously from the driver’s seat when
the vehicle is stationary.
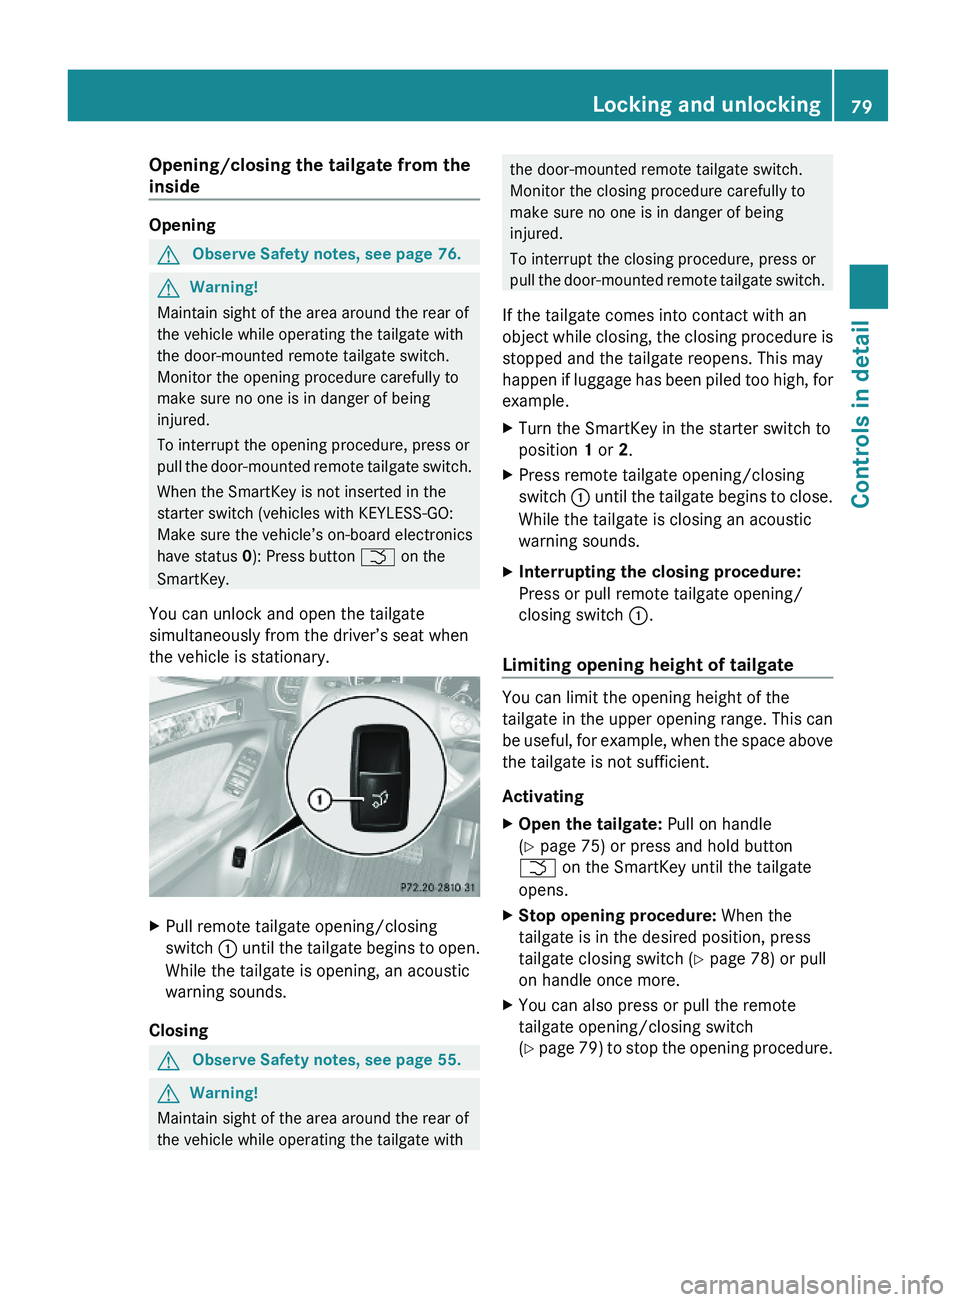
XPull remote tailgate opening/closing
switch : until the tailgate begins to open.
While the tailgate is opening, an acoustic
warning sounds.
Closing
GObserve Safety notes, see page 55.GWarning!
Maintain sight of the area around the rear of
the vehicle while operating the tailgate with
the door-mounted remote tailgate switch.
Monitor the closing procedure carefully to
make sure no one is in danger of being
injured.
To interrupt the closing procedure, press or
pull the door-mounted remote tailgate switch.
If the tailgate comes into contact with an
object while closing, the closing procedure is
stopped and the tailgate reopens. This may
happen if luggage has been piled too high, for
example.
XTurn the SmartKey in the starter switch to
position 1 or 2.
XPress remote tailgate opening/closing
switch : until the tailgate begins to close.
While the tailgate is closing an acoustic
warning sounds.
XInterrupting the closing procedure:
Press or pull remote tailgate opening/
closing switch :.
Limiting opening height of tailgate
You can limit the opening height of the
tailgate in the upper opening range. This can
be useful, for example, when the space above
the tailgate is not sufficient.
Activating
XOpen the tailgate: Pull on handle
(Y page 75) or press and hold button
F on the SmartKey until the tailgate
opens.
XStop opening procedure: When the
tailgate is in the desired position, press
tailgate closing switch (Y page 78) or pull
on handle once more.
XYou can also press or pull the remote
tailgate opening/closing switch
(Y page 79) to stop the opening procedure.
Locking and unlocking79Controls in detailX164_AKB; 5; 31, en-USd2ureepe,Version: 2.11.8.12009-09-11T12:30:16+02:00 - Seite 79Z
Page 82 of 380
XPress and hold the tailgate closing switch
in the tailgate (Y page 78) until you hear a
short acoustic signal.
The opening height of the tailgate is limited.
The tailgate will now stop at the stored
position when opened.
Deactivating
XPress and hold the tailgate closing switch
in the tailgate (Y page 78) until you hear
two short, consecutive acoustic signals.
Starter switch positions
SmartKey
GObserve Safety notes, see page 55.
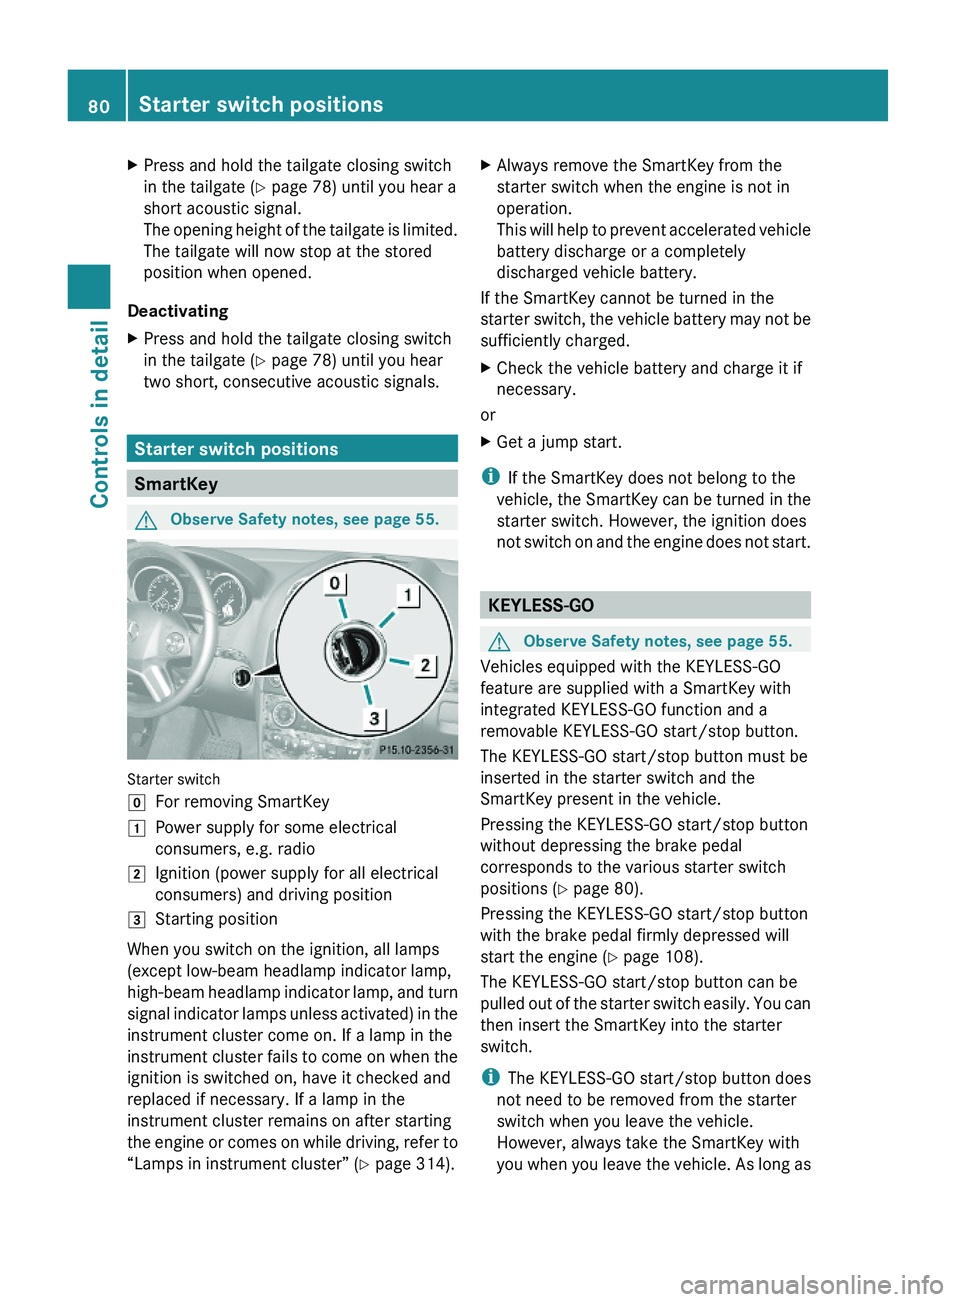
Starter switch
gFor removing SmartKey1Power supply for some electrical
consumers, e.g. radio
2Ignition (power supply for all electrical
consumers) and driving position
3Starting position
When you switch on the ignition, all lamps
(except low-beam headlamp indicator lamp,
high-beam headlamp indicator lamp, and turn
signal indicator lamps unless activated) in the
instrument cluster come on. If a lamp in the
instrument cluster fails to come on when the
ignition is switched on, have it checked and
replaced if necessary. If a lamp in the
instrument cluster remains on after starting
the engine or comes on while driving, refer to
“Lamps in instrument cluster” (Y page 314).
XAlways remove the SmartKey from the
starter switch when the engine is not in
operation.
This will help to prevent accelerated vehicle
battery discharge or a completely
discharged vehicle battery.
If the SmartKey cannot be turned in the
starter switch, the vehicle battery may not be
sufficiently charged.
XCheck the vehicle battery and charge it if
necessary.
or
XGet a jump start.
iIf the SmartKey does not belong to the
vehicle, the SmartKey can be turned in the
starter switch. However, the ignition does
not switch on and the engine does not start.
KEYLESS-GO
GObserve Safety notes, see page 55.
Vehicles equipped with the KEYLESS-GO
feature are supplied with a SmartKey with
integrated KEYLESS-GO function and a
removable KEYLESS-GO start/stop button.
The KEYLESS-GO start/stop button must be
inserted in the starter switch and the
SmartKey present in the vehicle.
Pressing the KEYLESS-GO start/stop button
without depressing the brake pedal
corresponds to the various starter switch
positions (Y page 80).
Pressing the KEYLESS-GO start/stop button
with the brake pedal firmly depressed will
start the engine (Y page 108).
The KEYLESS-GO start/stop button can be
pulled out of the starter switch easily. You can
then insert the SmartKey into the starter
switch.
iThe KEYLESS-GO start/stop button does
not need to be removed from the starter
switch when you leave the vehicle.
However, always take the SmartKey with
you when you leave the vehicle. As long as
80Starter switch positionsControls in detail
X164_AKB; 5; 31, en-USd2ureepe,Version: 2.11.8.12009-09-11T12:30:16+02:00 - Seite 80
Page 104 of 380
Runlock the vehicle
Rremove the SmartKey from the starter
switch (Interior Lighting Delayed
Shut-off must be switched on
(Y page 138))
Ropen a door
Ropen the tailgate
The interior lighting goes out after a short
time.
iIf a door remains open, the interior lamps
go out automatically after approximately
5 minutes when the SmartKey is removed
or in starter switch position 0.
XDeactivating: Press button ~.
Button ~ engages.
Manual control
! An interior lamp switched on manually
does not go out automatically.
Leaving an interior lamp switched on for an
extended period of time with the engine
turned off could result in a discharged
battery.
XSwitching front interior lighting on/
off: Press switch c.
XSwitching rear interior lighting on/off:
Press switch v.
XSwitching front reading lamps on/off:
Press respective switch p.
Ambient lighting
The brightness of the ambient lighting C is
adjusted via the “Control system”
(Y page 137).
Emergency lighting
The interior lighting comes on automatically
if the vehicle is involved in an accident.
Switching off: XPress button ~.
or
XPress hazard warning flasher switch
(Y page 101).
or
XUnlock the vehicle with the SmartKey.
Interior lighting in the rear
! An interior lamp switched on manually
does not go out automatically.
Leaving an interior lamp switched on for an
extended period of time with the engine
turned off could result in a discharged
battery.
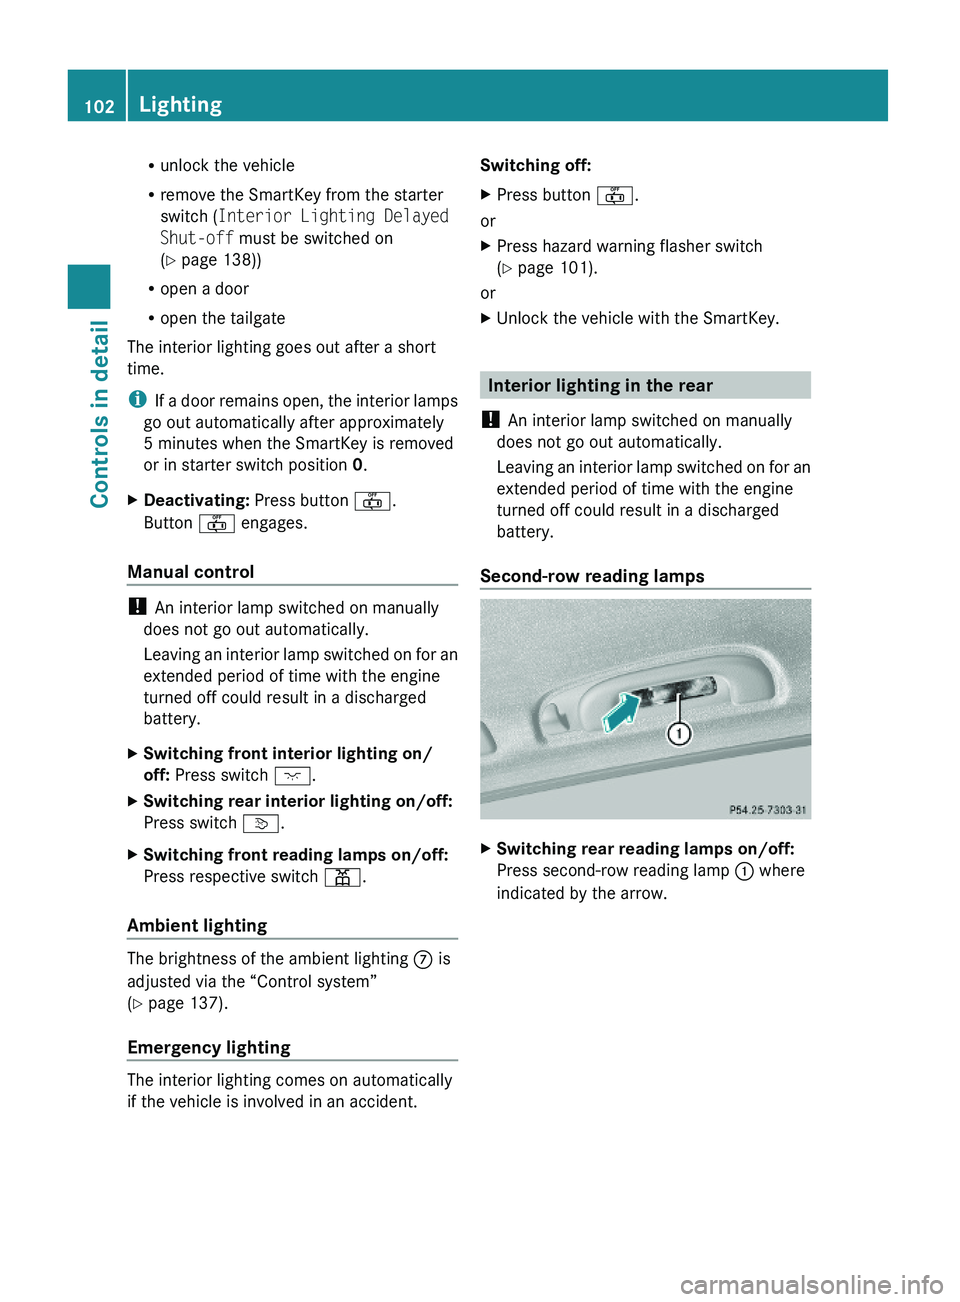
Second-row reading lamps
XSwitching rear reading lamps on/off:
Press second-row reading lamp : where
indicated by the arrow.
102LightingControls in detail
X164_AKB; 5; 31, en-USd2ureepe,Version: 2.11.8.12009-09-11T12:30:16+02:00 - Seite 102
Page 162 of 380
Changes to the vehicle level should be made
while the vehicle is moving. The vehicle will
then reach the set level as fast as possible.
When you park the vehicle and the ambient
temperature changes, the vehicle level may
change visibly. When the temperature drops,
the vehicle lowers. When the temperature
rises, the vehicle raises.
The vehicle automatically regulates its ride
height based on the set vehicle height and the
current speed:
RAs your driving speed increases, the vehicle
is lowered by increments until it reaches
highspeed level.
RVehicles with ADS: If you are driving with
the ADS setting COMF or AUTO, the
vehicle is raised back to highway level as
your driving speed decreases.
RVehicles with ADS: You can select the
highspeed level via the ADS setting
SPORT. In ADS SPORT, the vehicle is
lowered directly to highspeed level as your
driving speed increases.
The vehicle begins adjusting to the set vehicle
level as soon as the doors or tailgate are
unlocked or opened or closed with the vehicle
unlocked.
In order to operate the vehicle level control
switch (Y page 160) or (Y page 162),
however, the engine must be running.
GWarning!
Make sure no one is near the wheel housing
or under the vehicle when you lower the
vehicle while it is standing still. Limbs could
become wedged into or under the vehicle.
For safety reasons, the vehicle can only be
lowered with all doors and the tailgate closed.
Lowering is interrupted if a door or the tailgate
is opened and will continue after the door is
closed again.
GWarning!
Please be aware that by raising the vehicle
level, the center of gravity also rises.
Therefore, always ensure that the vehicle
level is as low as possible. With higher ride
height the ESP® may activate earlier in certain
situations.
Adapt your speed and driving to possible
changed driving behavior of the vehicle after
changing the vehicle level. The ESP® cannot
prevent accidents, including those resulting
from excessive speed. The ESP® cannot
prevent the natural laws of physics from
acting on the vehicle.
! Keep in mind that in rough or uneven
terrain, adjusting the vehicle to a lower
level may cause the vehicle underbody to
come in contact with the ground and result
in damage to the vehicle underbody.
Always make sure the vehicle has sufficient
ground clearance before adjusting it to a
lower level.
! Before jacking up the vehicle with
equipment that lifts one or more of the
wheels completely off of the ground,
remove the SmartKey from the starter
switch.
For information on off-road driving, see “Off-
road driving” (Y page 262).
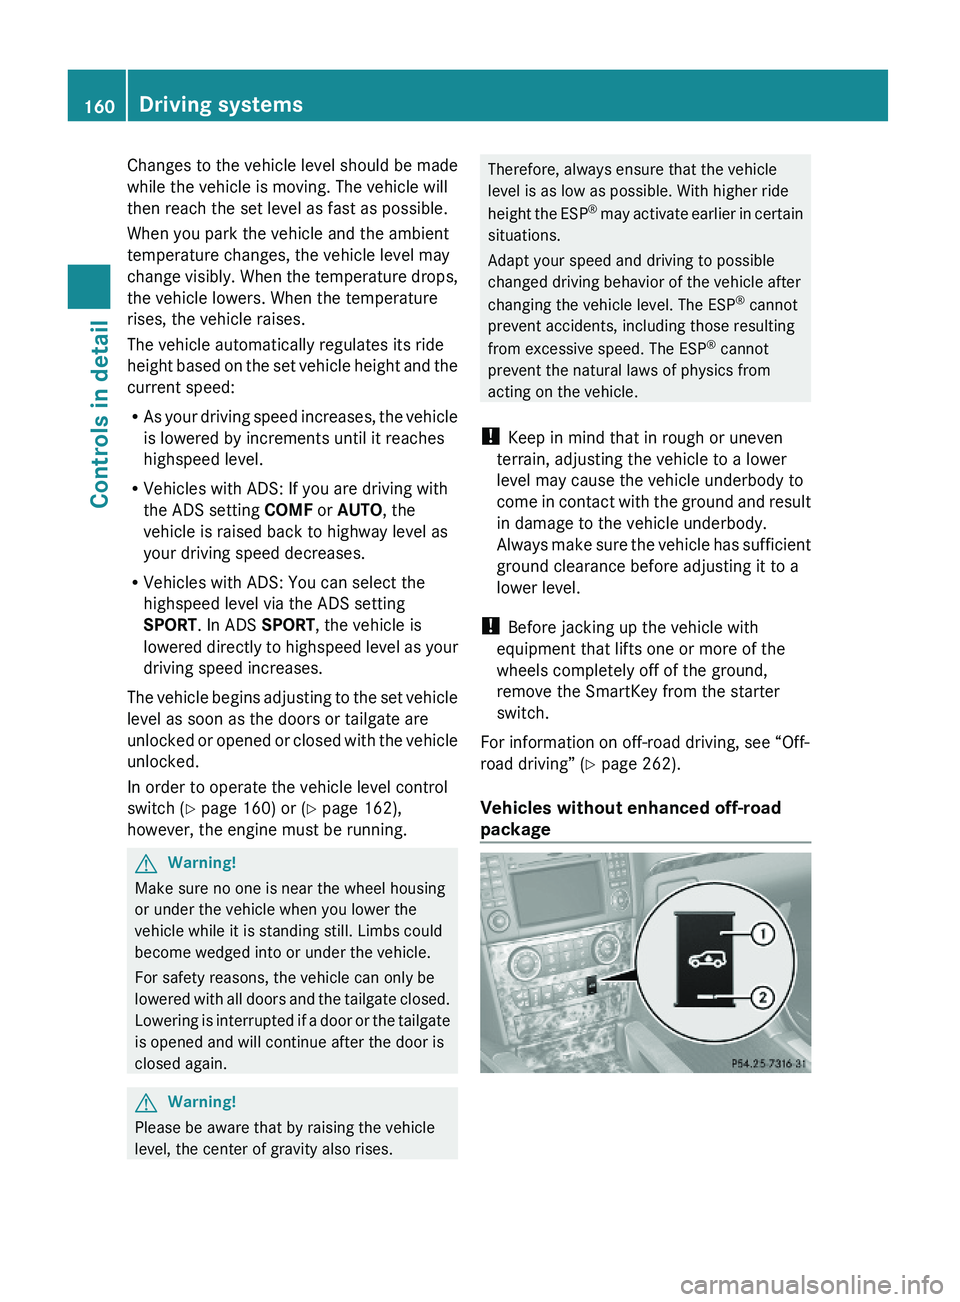
Vehicles without enhanced off-road
package
160Driving systemsControls in detail
X164_AKB; 5; 31, en-USd2ureepe,Version: 2.11.8.12009-09-11T12:30:16+02:00 - Seite 160
Page 172 of 380
GWarning!
The rear view camera is only an aid and may
display obstacles
Rfrom a distorted perspective
Rinaccurately
Rmay not display obstacles at all
The rear view camera does not relieve you of
the responsibility to be cautious. Take care
and pay careful attention. The rear view
camera may not show objects which are
Rvery close to the rear bumper
Runder the rear bumper
Rabove the tailgate handle
You are responsible for safety at all times and
must continue to pay attention to the
immediate surroundings when parking and
maneuvering. This includes the area behind,
in front of, and beside the vehicle. Otherwise
you could endanger yourself and/or others.
GWarning!
The rear view camera either will not function
or will not function to its full capability if
Rthe tailgate is open
Rit is raining very hard, snowing or foggy
Rit is night or you are parking/maneuvering
your vehicle in an area where it is very dark
Rthe camera is exposed to a very bright white
light
Rthe immediate surroundings are
illuminated with fluorescent light (the
display may flicker)
Rthere is a sudden change in temperature,
e.g. if you drive into a heated garage from
the cold (lens condensation)
Rthe camera lens is dirty or covered
Rthe rear of your vehicle is damaged
In this case, have the position and setting
of the camera checked by a qualified
specialist workshop. Mercedes-Benz
recommends that you contact a Mercedes-
Benz Center for this purpose.
Do not use the rear view camera in these
situations. Otherwise you could injure
yourself or others and/or damage property
including your vehicle while parking/
maneuvering.
GWarning!
Use of rear view camera can be dangerous if
you are color-blind or have impaired color
vision.
Only use rear view camera if you can see and
distinguish all colored guidelines shown by
rear view camera on the COMAND system
display.
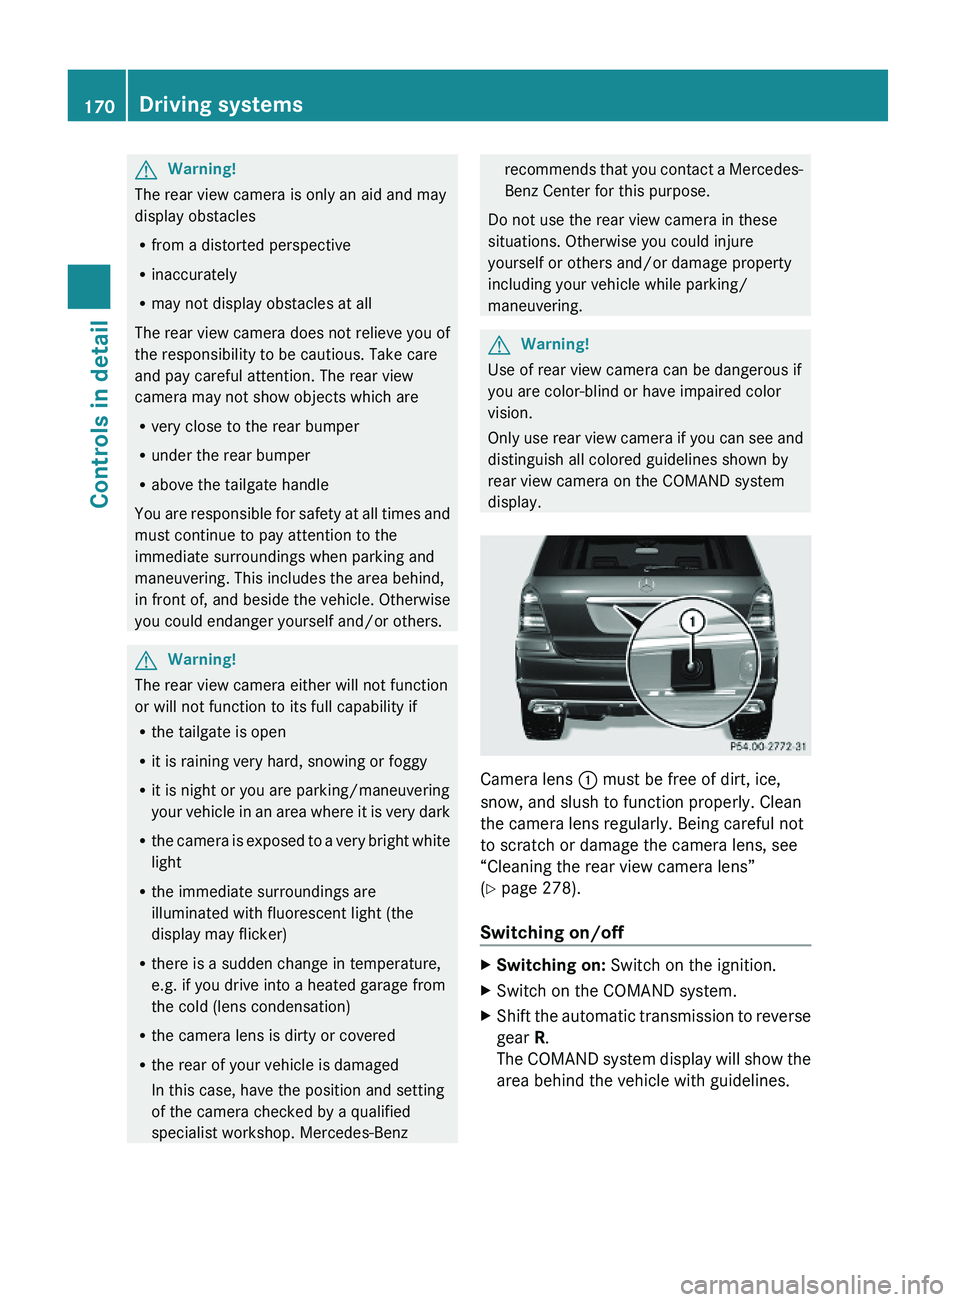
Camera lens : must be free of dirt, ice,
snow, and slush to function properly. Clean
the camera lens regularly. Being careful not
to scratch or damage the camera lens, see
“Cleaning the rear view camera lens”
(Y page 278).
Switching on/off
XSwitching on: Switch on the ignition.XSwitch on the COMAND system.XShift the automatic transmission to reverse
gear R.
The COMAND system display will show the
area behind the vehicle with guidelines.
170Driving systemsControls in detail
X164_AKB; 5; 31, en-USd2ureepe,Version: 2.11.8.12009-09-11T12:30:16+02:00 - Seite 170
Page 197 of 380
The cargo compartment is the preferred place
to carry objects. Always use cargo tie-down
rings, and if so equipped, always use the cargo
net when transporting cargo.
Never drive a vehicle with the tailgate open.
Deadly carbon monoxide (CO) gases may
enter vehicle interior resulting in
unconsciousness and death.
Load distribution
The Gross Vehicle Weight (GVW) is the weight
of the vehicle including:Rfuel
Rtools
Rspare wheel
Rinstalled accessories
Rpassengers
Rluggage/cargo
It must never exceed the load limit and the
Gross Vehicle Weight Rating (GVWR) for your
vehicle. The load limit and the GVWR are
specified on the placard located on the
driver’s door B-pillar (Y page 242).
In addition, the load must be distributed so
that the weight on each axle never exceeds
the Gross Axle Weight Rating (GAWR) for the
front and rear axle. The GVWR and GAWR for
your vehicle are indicated on the certification
label located on the driver’s door B-pillar
(Y page 242).
For more information, see “Tire and Loading
Information” (Y page 242).
The handling characteristics of a fully loaded
vehicle depend greatly on the load
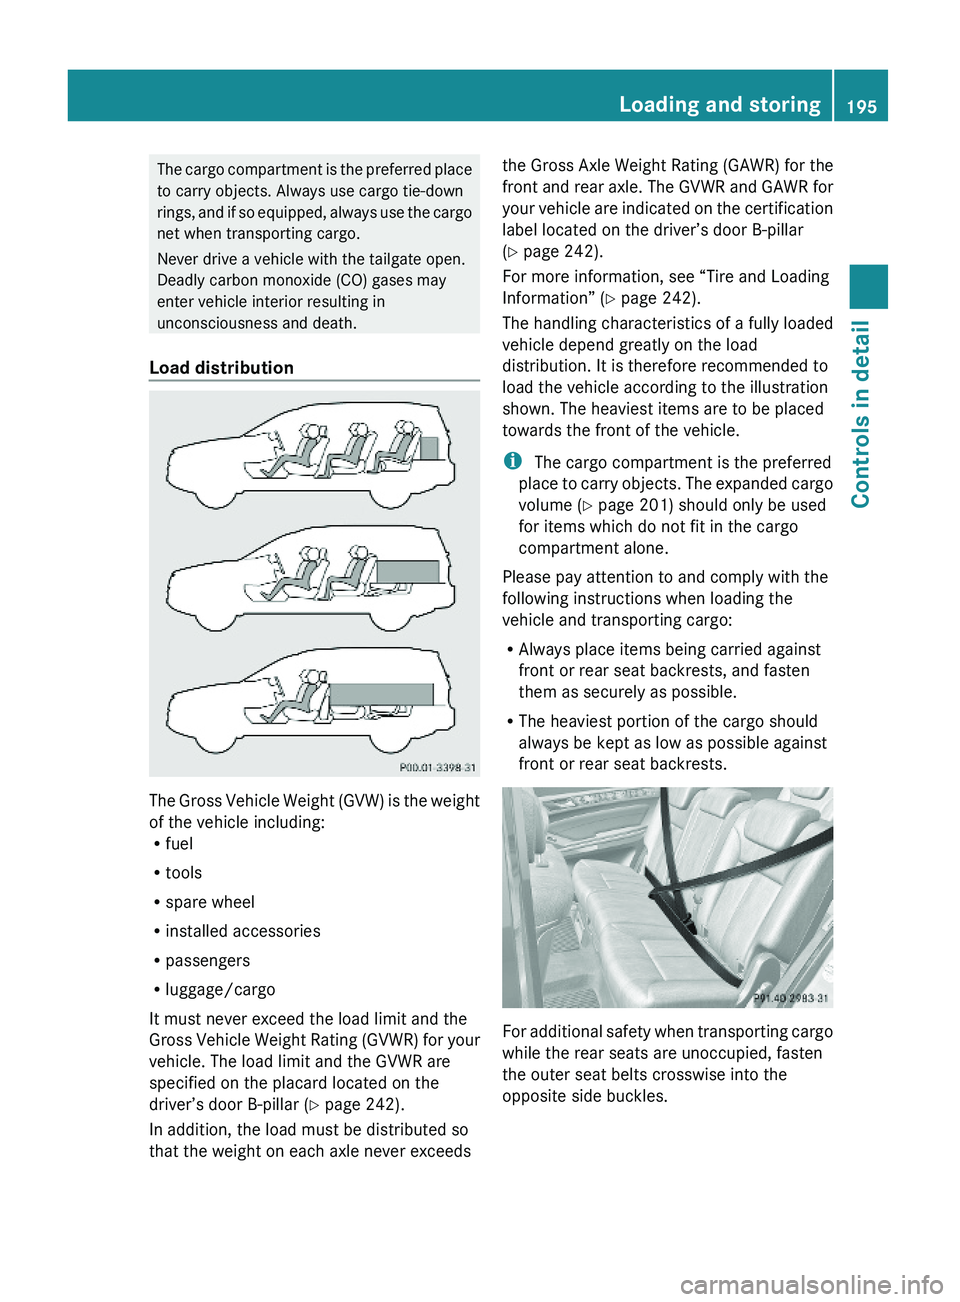
distribution. It is therefore recommended to
load the vehicle according to the illustration
shown. The heaviest items are to be placed
towards the front of the vehicle.
i The cargo compartment is the preferred
place to carry objects. The expanded cargo
volume (Y page 201) should only be used
for items which do not fit in the cargo
compartment alone.
Please pay attention to and comply with the
following instructions when loading the
vehicle and transporting cargo:
RAlways place items being carried against
front or rear seat backrests, and fasten
them as securely as possible.
RThe heaviest portion of the cargo should
always be kept as low as possible against
front or rear seat backrests.
For additional safety when transporting cargo
while the rear seats are unoccupied, fasten
the outer seat belts crosswise into the
opposite side buckles.
Loading and storing195Controls in detailX164_AKB; 5; 31, en-USd2ureepe,Version: 2.11.8.12009-09-11T12:30:16+02:00 - Seite 195Z
Page 198 of 380
Carriers
For information about further carriers,
contact an authorized Mercedes-Benz
Center.
GWarning!
Only use carriers when the crossbars have
been completely mounted. The left and right
roof rails are only stabilized by means of the
crossbars mounted.
Follow the manufacturer’s installation
instructions. Otherwise, an improperly
attached carrier or its load could become
detached from the vehicle.
Do not exceed the maximum roof load of
198 lb (90 kg).
Take into consideration that when the roof is
loaded, the handling characteristics are
different from those when operating the
vehicle without the roof loaded.
Make sure
Ryou can raise the tilt/sliding sunroof at the
rear completely
Ryou can open the tailgate completely
iThe following accessories are available
for your Mercedes-Benz:
RRoof Cargo Container – Small, Medium,
or Large
RSki and Snowboard Carrier – Standard
RSki and Snowboard Carrier – Deluxe
(Only in connection with corresponding
adapter.)
For more information on Mercedes-Benz
accessories, contact your authorized
Mercedes-Benz Center.
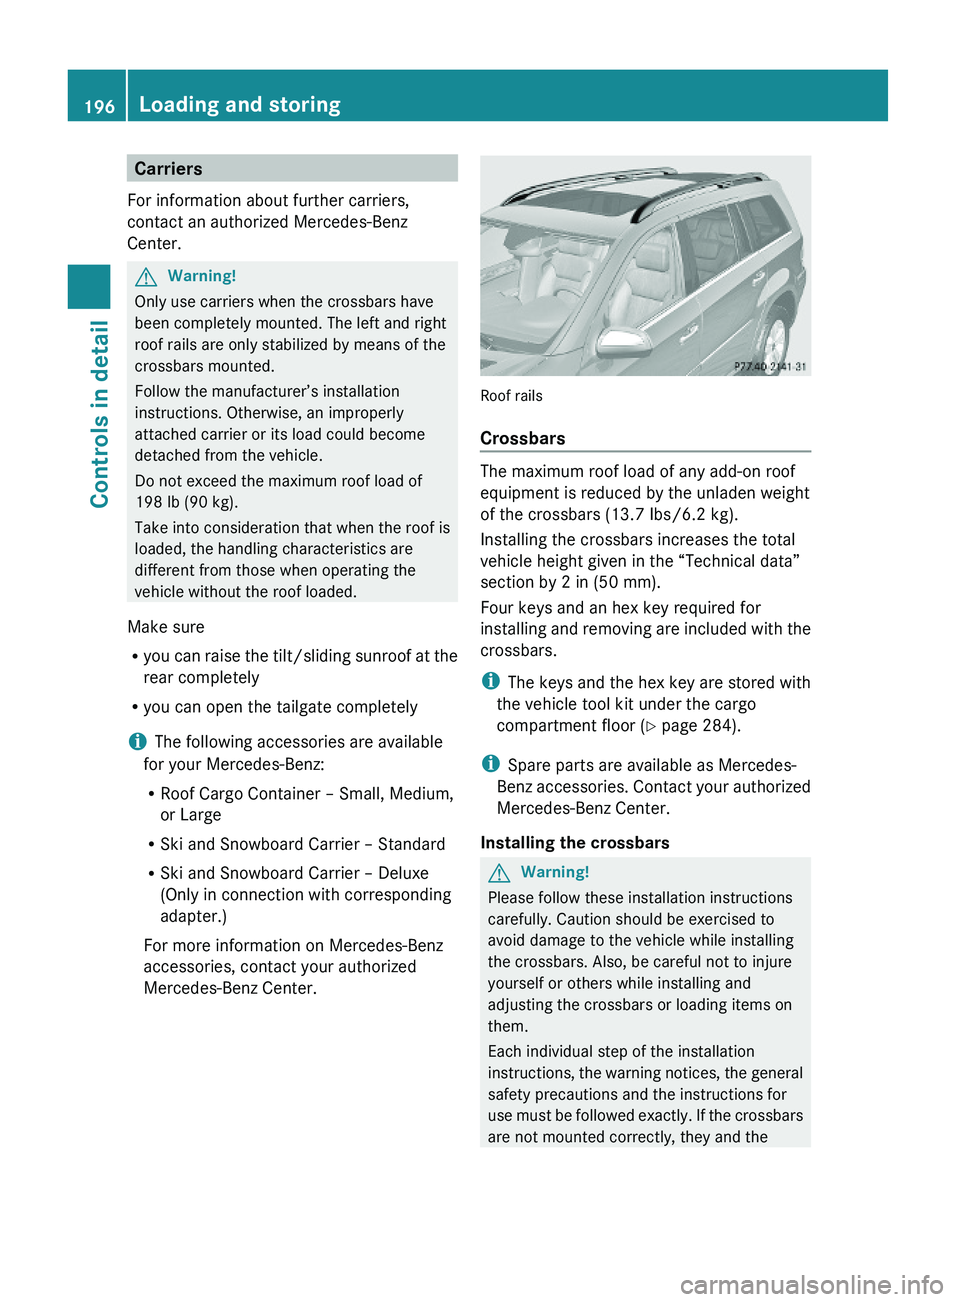
Roof rails
Crossbars
The maximum roof load of any add-on roof
equipment is reduced by the unladen weight
of the crossbars (13.7 Ibs/6.2 kg).
Installing the crossbars increases the total
vehicle height given in the “Technical data”
section by 2 in (50 mm).
Four keys and an hex key required for
installing and removing are included with the
crossbars.
iThe keys and the hex key are stored with
the vehicle tool kit under the cargo
compartment floor (Y page 284).
iSpare parts are available as Mercedes-
Benz accessories. Contact your authorized
Mercedes-Benz Center.
Installing the crossbars
GWarning!
Please follow these installation instructions
carefully. Caution should be exercised to
avoid damage to the vehicle while installing
the crossbars. Also, be careful not to injure
yourself or others while installing and
adjusting the crossbars or loading items on
them.
Each individual step of the installation
instructions, the warning notices, the general
safety precautions and the instructions for
use must be followed exactly. If the crossbars
are not mounted correctly, they and the
196Loading and storingControls in detail
X164_AKB; 5; 31, en-USd2ureepe,Version: 2.11.8.12009-09-11T12:30:16+02:00 - Seite 196
Page 203 of 380
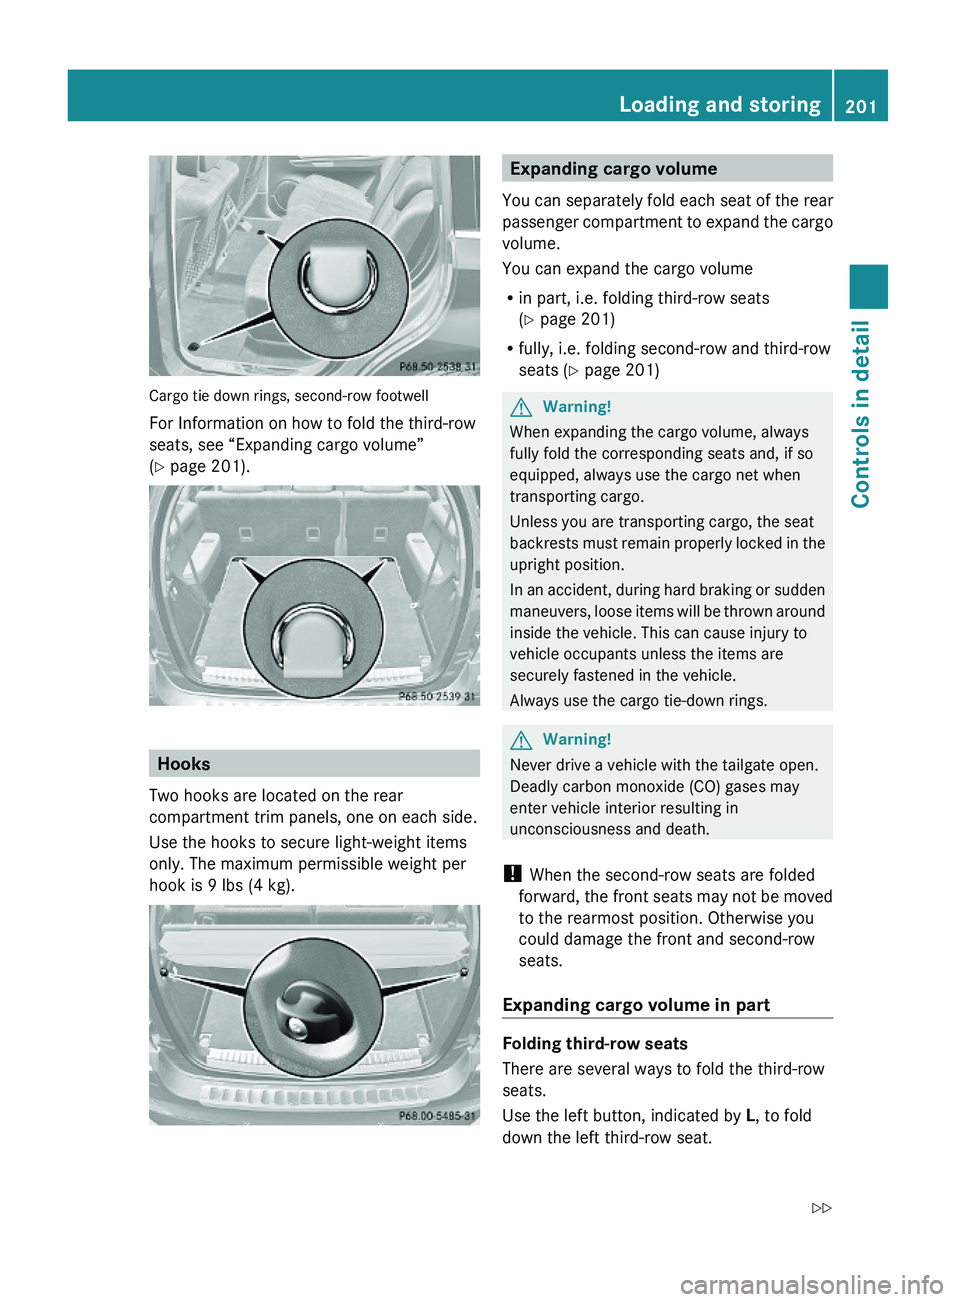
Cargo tie down rings, second-row footwell
For Information on how to fold the third-row
seats, see “Expanding cargo volume”
(Y page 201).
Hooks
Two hooks are located on the rear
compartment trim panels, one on each side.
Use the hooks to secure light-weight items
only. The maximum permissible weight per
hook is 9 lbs (4 kg).
Expanding cargo volume
You can separately fold each seat of the rear
passenger compartment to expand the cargo
volume.
You can expand the cargo volume
Rin part, i.e. folding third-row seats
(Y page 201)
Rfully, i.e. folding second-row and third-row
seats (Y page 201)
GWarning!
When expanding the cargo volume, always
fully fold the corresponding seats and, if so
equipped, always use the cargo net when
transporting cargo.
Unless you are transporting cargo, the seat
backrests must remain properly locked in the
upright position.
In an accident, during hard braking or sudden
maneuvers, loose items will be thrown around
inside the vehicle. This can cause injury to
vehicle occupants unless the items are
securely fastened in the vehicle.
Always use the cargo tie-down rings.
GWarning!
Never drive a vehicle with the tailgate open.
Deadly carbon monoxide (CO) gases may
enter vehicle interior resulting in
unconsciousness and death.
! When the second-row seats are folded
forward, the front seats may not be moved
to the rearmost position. Otherwise you
could damage the front and second-row
seats.
Expanding cargo volume in part
Folding third-row seats
There are several ways to fold the third-row
seats.
Use the left button, indicated by L, to fold
down the left third-row seat.
Loading and storing201Controls in detailX164_AKB; 5; 31, en-USd2ureepe,Version: 2.11.8.12009-09-11T12:30:16+02:00 - Seite 201Z