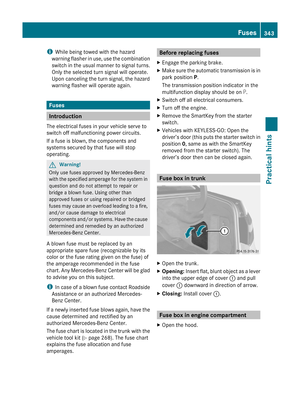
Page 217 of 372

Reprogramming a single signal
transmitter button
To program a device using a signal
transmitter button previously trained, follow
these steps:
XSwitch on the ignition.XPress and hold the desired signal
transmitter button ( ;, = or ?). Do not
release the button.
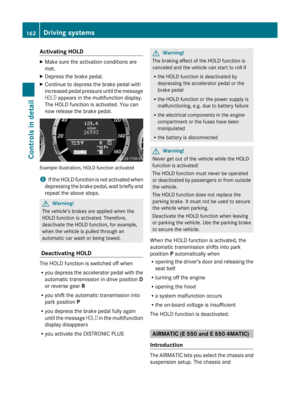
Indicator lamp : will begin to flash after
20 seconds.XWithout releasing the signal transmitter
button, proceed with programming starting
with step 3.
Operation of integrated remote control
XSwitch on the ignition.XSelect and press the appropriate
integrated signal transmitter button ( ;,
= or ?) to activate the remote controlled
device.
The integrated remote control transmitter
continues to send the signal as long as the
button is pressed – up to 20 seconds.
Erasing the integrated remote control
memory
i If you sell your vehicle, erase the codes of
all three channels.
XSwitch on the ignition.XSimultaneously press and hold outer signal
transmitter buttons ; and ?, for
approximately 20 seconds, until indicator
lamp : flashes rapidly. Do not hold for
longer than 30 seconds.
The codes of all three channels are erased.Programming tips
If you are having difficulty programming the
integrated remote control, here are some
helpful tips:
R Check the frequency of hand-held remote
control A (typically located on the reverse
side of the remote). The integrated remote
control is compatible with radio-frequency
devices operating between 280-390 MHz.
R Put a new battery in hand-held remote
control A. This will increase the likelihood
of the hand-held remote control sending a
stronger and more accurate signal to the
integrated remote control.
R While performing step 3, hold hand-held
remote control A at different lengths and
angles from the signal transmitter button
( ; , = or ?) you are programming.
Attempt varying angles at the distance of 2
to 12 inches (5 to 30 cm) away or the same
angle at varying distances.
R If another hand-held remote control is
available for the same device, try the
programming steps again using that other
hand-held remote control. Make sure new
batteries are in the hand-held remote
control before beginning the procedure.
R Straighten the antenna wire from the
garage door opener assembly. This may
help improve transmitting and/or receiving
signals.
i Certain types of garage door openers are
incompatible with the integrated remote
control. If you should experience further
difficulties with programming the
integrated remote control, contact an
authorized Mercedes-Benz Center, or call
the Mercedes-Benz Customer Assistance
Center (USA only) at
1-800-FOR-MERCedes (1-800-367-6372),
or the HomeLink ®
Hotline (USA only) at
1-800-355-3515, or the Customer Service
(Canada only) at 1-800-387-0100.
Useful features215Controls in detail212_AKB; 2; 41, en-USd2ureepe,Version: 2.11.8.12009-07-17T09:14:21+02:00 - Seite 215Z
Page 218 of 372

iUSA only:
This device complies with Part 15 of the
FCC Rules. Operation is subject to the
following two conditions:
1. This device may not cause harmful
interference, and
2. this device must accept any
interference received, including
interference that may cause undesired
operation.
Any unauthorized modification to this
device could void the user’s authority to
operate the equipment.
iCanada only:
This device complies with RSS-210 of
Industry Canada. Operation is subject to
the following two conditions:
1.This device may not cause interference,
and
2. this device must accept any
interference received, including
interference that may cause undesired
operation of the device.
Any unauthorized modification to this
device could void the user’s authority to
operate the equipment.
Compass
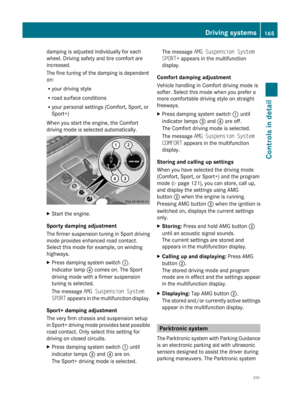
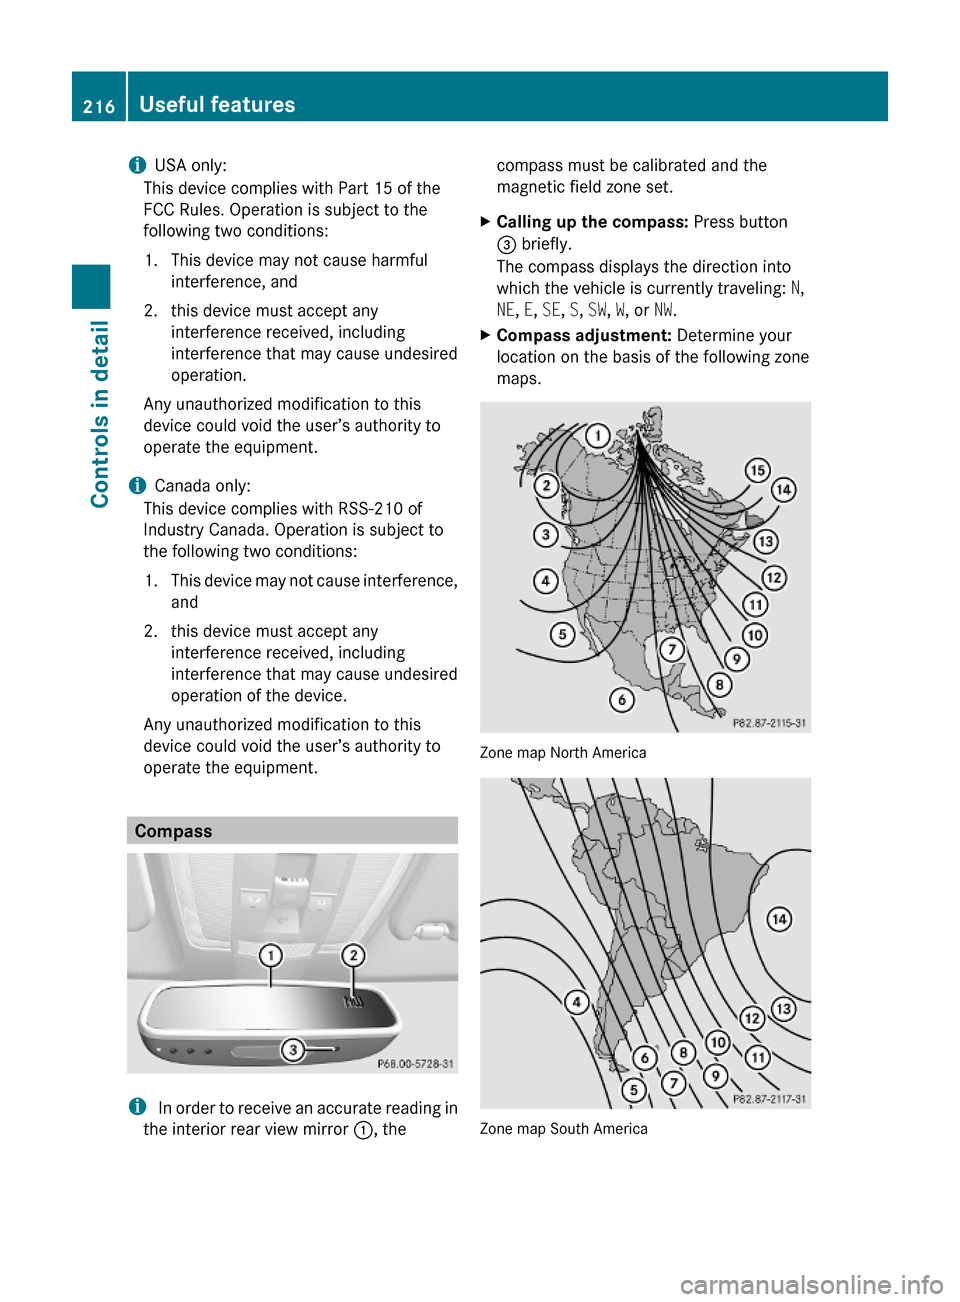
i In order to receive an accurate reading in
the interior rear view mirror :, the
compass must be calibrated and the
magnetic field zone set.
XCalling up the compass: Press button
= briefly.
The compass displays the direction into
which the vehicle is currently traveling: N,
NE, E, SE, S, SW, W, or NW.
XCompass adjustment: Determine your
location on the basis of the following zone
maps.
Zone map North America
Zone map South America
216Useful featuresControls in detail
212_AKB; 2; 41, en-USd2ureepe,Version: 2.11.8.12009-07-17T09:14:21+02:00 - Seite 216
Page 219 of 372

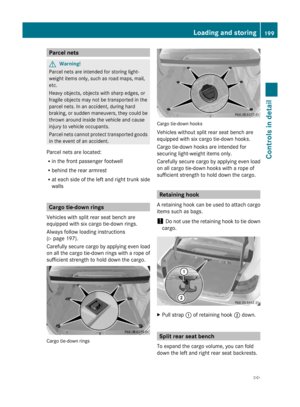
XPress button = approximately 3 seconds.
The currently selected zone appears in
compass display ;.
XSelecting zone: Press button = until the
desired zone is selected.
Do not press the button again until the
direction is indicated.
XCompass calibration: Make sure you are
in an area where you can drive a full circle
with your vehicle without disturbing traffic
in order to calibrate the compass.
In order to calibrate the compass properly,
mind the following:
RCalibrate the compass in open terrain.
Nearby buildings, bridges, power lines and
large antenna masts, for example, could
impair compass calibration.
RSwitch off electrical consumers (e.g.
climate control, windshield wipers, or rear
window defroster).
RClose all doors and the trunk.
XStart the engine.XPress button = approximately 6 seconds
until symbol C appears in compass
display ;.
XDrive a full circle at a vehicle speed of
between 3 mph (5 km/h) and 6 mph
(10 km/h).
When calibration was successful, the
current direction appears in compass
display ;.
Floormat (driver’s side only)
GWarning!
Whenever you are using a floormat, make sure
there is enough clearance and that the
floormat is securely fastened.
The floormat should always be securely
fastened using the fastening equipment.
Before driving off, check that the floormat is
securely in place and adjust it if necessary. A
loose floormat could slip and hinder proper
functioning of the pedals.
Do not place several floormats on top of each
other as this may impair pedal movement.
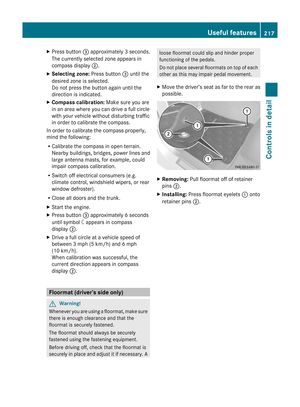
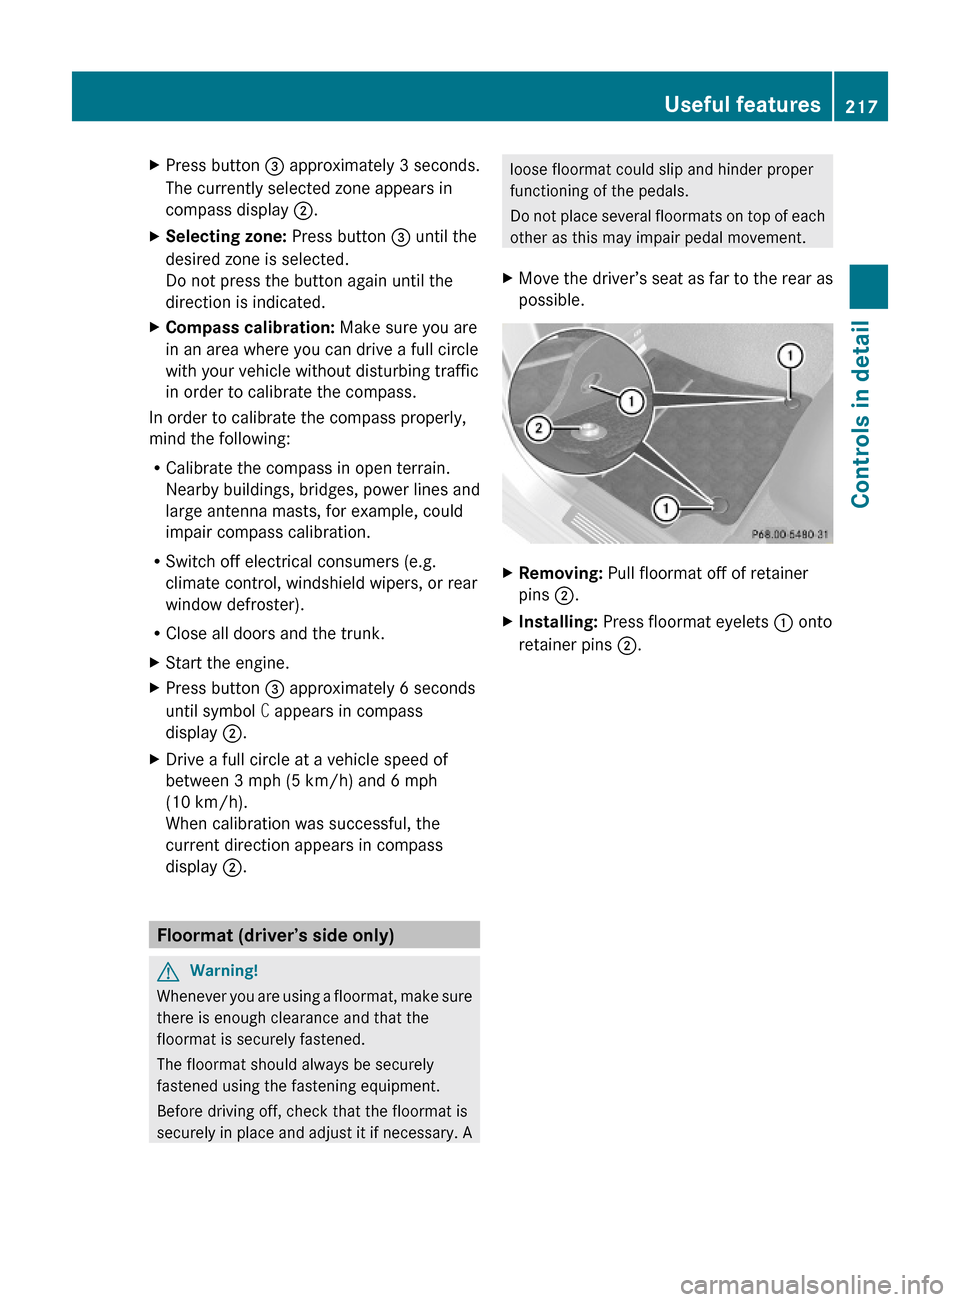
XMove the driver’s seat as far to the rear as
possible.
XRemoving: Pull floormat off of retainer
pins ;.
XInstalling: Press floormat eyelets : onto
retainer pins ;.
Useful features217Controls in detail212_AKB; 2; 41, en-USd2ureepe,Version: 2.11.8.12009-07-17T09:14:21+02:00 - Seite 217Z
Page 220 of 372
218212_AKB; 2; 41, en-USd2ureepe,Version: 2.11.8.12009-07-17T09:14:21+02:00 - Seite 218
Page 221 of 372
Vehicle equipment ............................220
The first 1000 miles (1500 km) .......220
At the gas station .............................220
Engine compartment ........................223
Tires and wheels ...............................228
Winter driving ...................................252
Driving instructions ..........................254
Maintenance ......................................258
Vehicle care .......................................260
219Operation212_AKB; 2; 41, en-USd2ureepe,Version: 2.11.8.12009-07-17T09:14:21+02:00 - Seite 219
Page 222 of 372

Vehicle equipment
i This Operator’s Manual describes all
features, standard or optional, potentially
available for your vehicle at the time of
purchase. Please be aware that your
vehicle might not be equipped with all
features described in this manual.
The first 1000 miles (1500 km)
The more cautiously you treat your vehicle
during the break-in period, the more satisfied
you will be with its performance later on.
R Drive your vehicle during the first
1 000 miles (1 500 km) at varying but
moderate vehicle and engine speeds.
R During this period, avoid heavy loads (full
throttle driving) and excessive engine
speeds (no more than 2
/ 3 of maximum rpm
in each gear).
R Avoid accelerating by kickdown.
R Select gear ranges 3, 2 or 1 (Y page 120)
only when driving at moderate speeds (for
hill driving).
After 1 000 miles (1 500 km) you may
gradually increase vehicle and engine speeds
to the permissible maximum.
! Additional instructions for AMG vehicles:
R During the first 1 000 miles (1 500 km),
do not exceed a speed of 85 mph
(140 km/h).
R During this period, avoid engine speeds
above 4 500 rpm in each gear.
R Shift gears in a timely manner.
All of the above instructions, as may apply to
your vehicle type, also apply when driving the
first 1 000 miles (1 500 km) after the engine
or the rear differential has been replaced.
i Always obey applicable speed limits.
Notes on breaking-in the rear
differential (AMG vehicles only)
The vehicle is equipped with a self-locking
rear differential. For increased protection of
the rear differential, carry out an oil change
after a break-in phase of 2 000 miles
(3 000 km). This oil change will extend the
useful life of the differential. Have the oil
change carried out at a qualified specialist
workshop. Mercedes-Benz recommends you
have this work done at a authorized
Mercedes-Benz Center.
At the gas station
Refueling
GWarning!
Gasoline and diesel fuels are highly flammable
and poisonous. They burn violently and can
cause serious injury.
Never allow sparks, flames or smoking
materials near gasoline or diesel fuel!
Turn off the engine before refueling.
Whenever you are around gasoline or diesel
fuel, avoid inhaling fumes and any skin or
clothing contact. Extinguish all smoking
materials.
Direct skin contact with fuels and the
inhalation of fuel vapors are damaging your
health.
GWarning!
Overfilling of the fuel tank may create
pressure in the system which could cause a
gas discharge. This could cause the gas to
spray back out when removing the fuel pump
nozzle, which could cause personal injury.
GWarning!
Do not fill diesel tanks with gasoline. Do not
mix diesel fuel with gasoline. Otherwise the
fuel system and engine could be damaged. In
addition, the vehicle could catch fire.
220At the gas stationOperation
212_AKB; 2; 41, en-USd2ureepe,Version: 2.11.8.12009-07-17T09:14:21+02:00 - Seite 220
Page 223 of 372

! Never refuel vehicles with gasoline engine
with diesel fuel. Never refuel vehicles with
diesel engine with gasoline. Even small
amounts of incorrect fuel will damage the
fuel system and engine. Damage resulting
from the use of non-approved fuels or fuel
additives or resulting from mixing gasoline
with diesel fuel or vice versa is not covered
by the Mercedes-Benz Limited Warranty.
! If you have accidentally filled the tank
with incorrect or non-approved fuel, do not
switch on the ignition. Otherwise the
incorrect or non-approved fuel will get into
the fuel lines. The fuel system must be
drained completely. Contact an authorized
Mercedes-Benz Center to have the fuel
system drained completely.
! Gasoline engine:
To prevent damage to the catalytic
converters, only use premium unleaded
gasoline in this vehicle.
Any noticeable irregularities in engine
operation should be repaired promptly.
Otherwise, excessive unburned fuel may
reach the catalytic converter, causing it to
overheat and potentially start a fire.
! Diesel engine:
When filling the diesel fuel tank using fuel
containers, place a filling filter, a suede
cloth or a clean flannel cloth as a filter.
Otherwise, particles from the fuel container
could clog the fuel lines and/or the diesel
injection system.
! Diesel engine:
The engine is more susceptible to wear and
damage if you use
R marine diesel fuel
R heating oil
R additives
The exhaust aftertreatment device will be
seriously damaged if you use any other
diesel fuel than ULTRA-LOW SULFURHIGHWAY DIESEL FUEL (ULSD, 15 ppm
SULFUR MAXIMUM).
The use of such non-approved fuels and/or
special additives is not covered by the
Mercedes-Benz Limited Warranty.
i Gasoline engine:
Only use premium unleaded gasoline with
a minimum Posted Octane Rating of 91
(average of 96 RON/86 MON).
Information on gasoline quality can
normally be found on the fuel pump. Please
contact gas station personnel in case
labels on the pump cannot be found.
For more information on gasoline, see
“Premium unleaded gasoline (gasoline
engine)” ( Y page 362), see “Fuel
requirements” ( Y page 363), or contact an
authorized Mercedes-Benz Center, or visit
www.mbusa.com (USA only).
i Diesel engine:
Only use commercially available vehicular
ULTRA-LOW SULFUR HIGHWAY DIESEL
FUEL (ULSD, 15 ppm SULFUR MAXIMUM).
Information on diesel quality can normally
be found on the fuel pump. Please contact
gas station personnel in case labels on the
pump cannot be found.
For more information on diesel fuels, see
“Fuel requirements” ( Y page 363), or
contact an authorized Mercedes-Benz
Center, or visit www.mbusa.com (USA
only).
i Diesel engine:
If you have driven the vehicle until the tank
is empty, the fuel system needs to be bled
( Y page 333).
Locking/unlocking the vehicle with the
SmartKey or KEYLESS-GO automatically
locks/unlocks the fuel filler flap.
i In case the central locking system does
not release the fuel filler flap, see “Fuel filler
flap” ( Y page 316).At the gas station221Operation212_AKB; 2; 41, en-USd2ureepe,Version: 2.11.8.12009-07-17T09:14:21+02:00 - Seite 221Z
Page 224 of 372

The fuel filler flap is located on the right-hand
side of the vehicle towards the rear.
XTurn off the engine.
iLeaving the engine running and the fuel
filler cap open can cause the yellow engine
malfunction indicator lamp ; to
illuminate.
For more information, see also “Practical
hints” (Y page 310).
XRemove the SmartKey from the starter
switch.
KEYLESS-GO: Open the driver’s door. This
puts the starter switch in position 0, same
as with the SmartKey removed from the
starter switch. The driver’s door then can
be closed again.
XOpening: Press fuel filler flap : at the
point indicated by the arrow.
XTurn fuel filler cap ; counterclockwise.XTake off fuel filler cap ;.
! The fuel filler cap is tethered to the fuel
filler neck. Do not drop the cap. It could
damage the vehicle paint finish.
XPlace fuel filler cap ; in direction of arrow
into holder =.
XFully insert filler nozzle unit and refuel.XOnly fill your tank until the filler nozzle unit
cuts out – do not top off or overfill.
XClosing: Turn fuel filler cap ; clockwise
until it audibly engages.
iClose the fuel filler flap before locking the
vehicle. Otherwise the flap locking pin will
prevent closing the fuel filler flap.
XClose fuel filler flap :.
Low outside temperatures (diesel
engine)
! Do not fill the tank with gasoline. Do not
blend diesel fuel with gasoline or kerosene.
The fuel system and engine will otherwise
be damaged, which is not covered by the
Mercedes-Benz Limited Warranty.
To prevent malfunctions, diesel fuel with
improved cold flow characteristics is offered
in the winter months. Check with your fuel
retailer.
Check regularly and before a long trip
For information on quantities and
requirements of operating agents, see “Fuels,
coolants, lubricants, etc.” (Y page 359).
Check the following:
REngine oil level (Y page 224)
RTire inflation pressure (Y page 231)
RCoolant level (Y page 226)
RVehicle lighting (Y page 318)
RWasher system and headlamp cleaning
system (Y page 227)
RBrake fluid (Y page 227)
222At the gas stationOperation
212_AKB; 2; 41, en-USd2ureepe,Version: 2.11.8.12009-07-17T09:14:21+02:00 - Seite 222