2010 MERCEDES-BENZ E350 change time
[x] Cancel search: change timePage 125 of 372
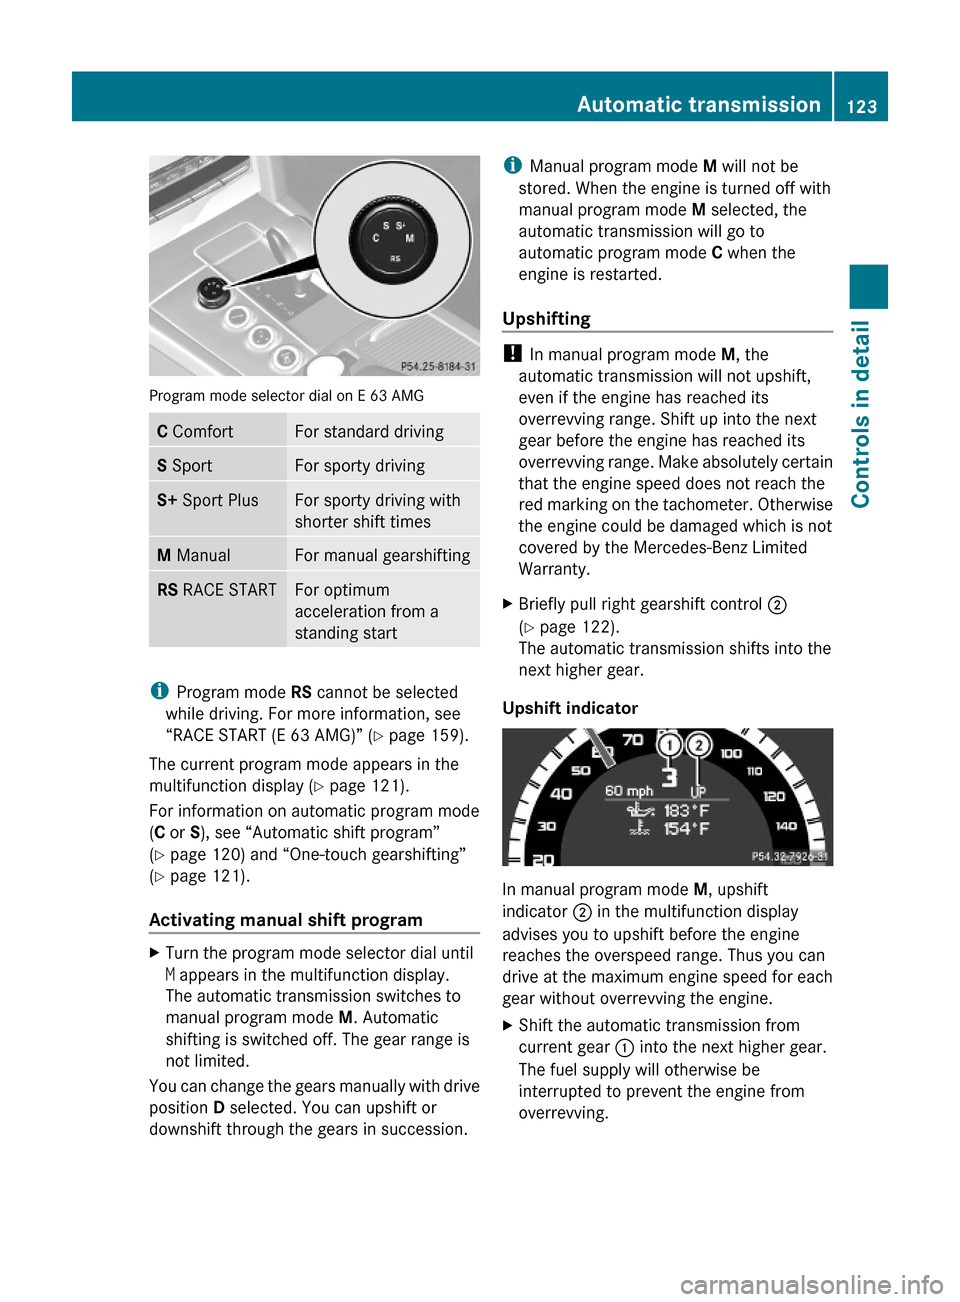
Program mode selector dial on E 63 AMG
C ComfortFor standard drivingS SportFor sporty drivingS+ Sport PlusFor sporty driving with
shorter shift times
M ManualFor manual gearshiftingRS RACE STARTFor optimum
acceleration from a
standing start
iProgram mode RS cannot be selected
while driving. For more information, see
“RACE START (E 63 AMG)” (Y page 159).
The current program mode appears in the
multifunction display (Y page 121).
For information on automatic program mode
(C or S), see “Automatic shift program”
(Y page 120) and “One-touch gearshifting”
(Y page 121).
Activating manual shift program
XTurn the program mode selector dial until
M appears in the multifunction display.
The automatic transmission switches to
manual program mode M. Automatic
shifting is switched off. The gear range is
not limited.
You can change the gears manually with drive
position D selected. You can upshift or
downshift through the gears in succession.
iManual program mode M will not be
stored. When the engine is turned off with
manual program mode M selected, the
automatic transmission will go to
automatic program mode C when the
engine is restarted.
Upshifting
! In manual program mode M, the
automatic transmission will not upshift,
even if the engine has reached its
overrevving range. Shift up into the next
gear before the engine has reached its
overrevving range. Make absolutely certain
that the engine speed does not reach the
red marking on the tachometer. Otherwise
the engine could be damaged which is not
covered by the Mercedes-Benz Limited
Warranty.
XBriefly pull right gearshift control ;
(Y page 122).
The automatic transmission shifts into the
next higher gear.
Upshift indicator
In manual program mode M, upshift
indicator ; in the multifunction display
advises you to upshift before the engine
reaches the overspeed range. Thus you can
drive at the maximum engine speed for each
gear without overrevving the engine.
XShift the automatic transmission from
current gear : into the next higher gear.
The fuel supply will otherwise be
interrupted to prevent the engine from
overrevving.
Automatic transmission123Controls in detail212_AKB; 2; 41, en-USd2ureepe,Version: 2.11.8.12009-07-17T09:14:21+02:00 - Seite 123Z
Page 142 of 372

XPress button : or 9 to select the
Factory Setting function.
XPress button a.
The function Reset All Settings?
appears in the multifunction display.
XPress button : or 9 to select Yes or
No. Select Yes if you want to reset to
factory settings.
XPress button a to confirm.
The confirmation message appears in the
multifunction display.
Submenus in the Settings menu
XPress button = or ; to select the
Sett. menu.
XPress button : or 9 to select a
submenu.
Scroll down with button :, scroll up with
button 9.
With the selection marker on the desired
submenu, use the button a to access the
individual functions within that submenu.
Once within the submenu, you can use button
9 to move to the next function or
button : to move to the previous function
within that submenu.
The following lists show what settings can be
changed within the various menus. Detailed
instructions on making individual settings can
be found on the following pages.
Instrument cluster submenu
RSelecting speedometer display mode
(Y page 141)
RPermanent display (speed display or
outside temperature) (Y page 141)
Lights submenu
RSwitching daytime running lamp mode on
or off (USA only) (Y page 141)
RSwitching Adaptive Highbeam Assist on or
off (Y page 142)
RSwitching locator lighting on or off
(Y page 142)
RSetting ambient lighting (Y page 143)
RSwitching interior lighting delayed shut-off
on or off (Y page 143)
Vehicle submenu
RSwitching automatic central locking on or
off (Y page 144)
RSwitching the radar sensors on or off
(Y page 144)
Convenience submenu
RActivating easy-entry/exit feature
(Y page 145)
RActivating/deactivating seat belt
adjustment function (Y page 145)
Instrument cluster submenu
Access the Instr. Cluster submenu via
the Sett. menu. Use the Instr. Cluster
submenu to change the instrument cluster
display settings.
The following functions are available:
RSelecting speedometer display mode
(Y page 141)
RPermanent display (speed display or
outside temperature) (Y page 141)
140Control systemControls in detail
212_AKB; 2; 41, en-USd2ureepe,Version: 2.11.8.12009-07-17T09:14:21+02:00 - Seite 140
Page 143 of 372
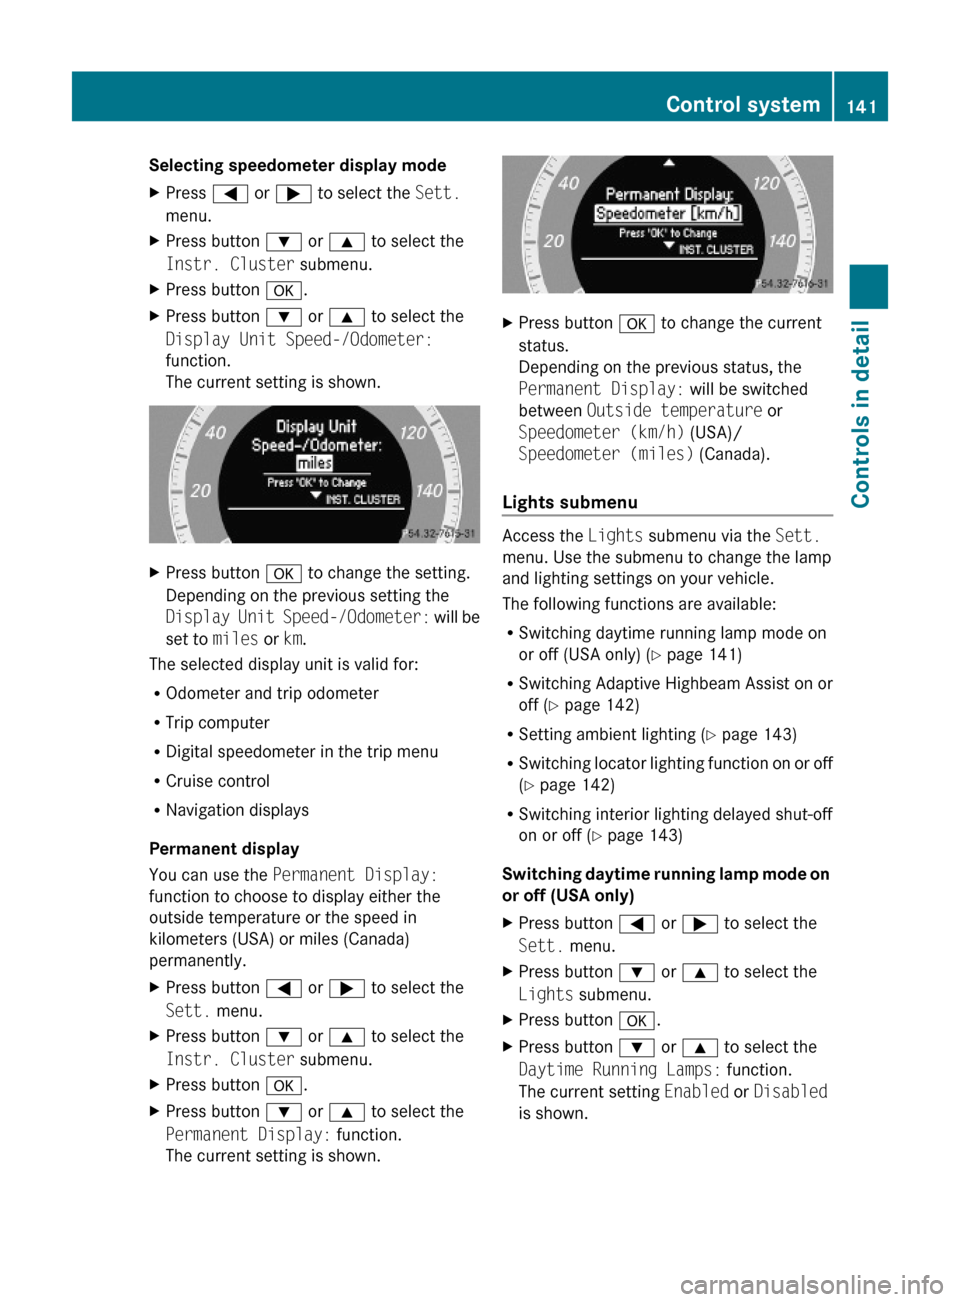
Selecting speedometer display mode XPress = or ; to select the Sett.
menu.
XPress button : or 9 to select the
Instr. Cluster submenu.
XPress button a.XPress button : or 9 to select the
Display Unit Speed-/Odometer:
function.
The current setting is shown.
XPress button a to change the setting.
Depending on the previous setting the
Display Unit Speed-/Odometer: will be
set to miles or km.
The selected display unit is valid for:
ROdometer and trip odometer
RTrip computer
RDigital speedometer in the trip menu
RCruise control
RNavigation displays
Permanent display
You can use the Permanent Display:
function to choose to display either the
outside temperature or the speed in
kilometers (USA) or miles (Canada)
permanently.
XPress button = or ; to select the
Sett. menu.
XPress button : or 9 to select the
Instr. Cluster submenu.
XPress button a.XPress button : or 9 to select the
Permanent Display: function.
The current setting is shown.
XPress button a to change the current
status.
Depending on the previous status, the
Permanent Display: will be switched
between Outside temperature or
Speedometer (km/h) (USA)/
Speedometer (miles) (Canada).
Lights submenu
Access the Lights submenu via the Sett.
menu. Use the submenu to change the lamp
and lighting settings on your vehicle.
The following functions are available:
RSwitching daytime running lamp mode on
or off (USA only) (Y page 141)
RSwitching Adaptive Highbeam Assist on or
off (Y page 142)
RSetting ambient lighting (Y page 143)
RSwitching locator lighting function on or off
(Y page 142)
RSwitching interior lighting delayed shut-off
on or off (Y page 143)
Switching daytime running lamp mode on
or off (USA only)
XPress button = or ; to select the
Sett. menu.
XPress button : or 9 to select the
Lights submenu.
XPress button a.XPress button : or 9 to select the
Daytime Running Lamps: function.
The current setting Enabled or Disabled
is shown.
Control system141Controls in detail212_AKB; 2; 41, en-USd2ureepe,Version: 2.11.8.12009-07-17T09:14:21+02:00 - Seite 141Z
Page 144 of 372

XPress button a to change the current
status.
Depending on the previous status, the
Daytime Running Lamps: mode will be
Enabled or Disabled.
With Daytime Running Lamps mode
enabled and the exterior lamp switch at
position $ or c, the daytime running
lamps are switched on when the engine is
running.
In low ambient light conditions the following
lamps will come on additionally:
RLow-beam headlamps
RParking lamps
RTail lamps
RLicense plate lamps
RSide marker lamps
For more information on the daytime running
lamp mode, see (Y page 98).
iMake sure the exterior lamp switch is set
to M or c when you switch off the
daytime running lamps while driving at
night.
For safety reasons, resetting all the functions
of all submenus to the factory settings while
driving (Y page 139) will not deactivate the
daytime running lamp mode.
The following message appears in the
multifunction display:
Cannot Be Completely Reset to
Factory Settings while Driving..
Switching Adaptive Highbeam Assist on
or off
XPress button = or ; to select the
Sett. menu.
XPress button : or 9 to select the
Lights submenu.
XPress button a.XPress button : or 9 to select the
Adaptive Highbeam Assist: function.
The current setting Enabled or Disabled
is shown.
XPress button a to change the current
status.
Depending on the previous status, the
Adaptive Highbeam Assist: function
will be Enabled or Disabled.
For more information on the Adaptive
Highbeam Assist, see (Y page 100).
Switching locator lighting on or off
With the Locator Lighting: function
activated and the exterior lamp switch in
position c
Rthe exterior lamps will come on during
darkness when the vehicle is unlocked with
the SmartKey.
The lamps will go out when the driver’s door
is opened.
If you do not open the driver’s door after
unlocking the vehicle with the SmartKey,
the lamps will go out automatically after
approximately 40 seconds.
Rthe exterior lamps will remain on for
15 seconds during darkness after exiting
the vehicle and closing all doors.
142Control systemControls in detail
212_AKB; 2; 41, en-USd2ureepe,Version: 2.11.8.12009-07-17T09:14:21+02:00 - Seite 142
Page 148 of 372
XPress button = or ; to select the
Sett. menu.
XPress button : or 9 to select the
Convenience submenu.
XPress a.XPress button : or 9 to select the
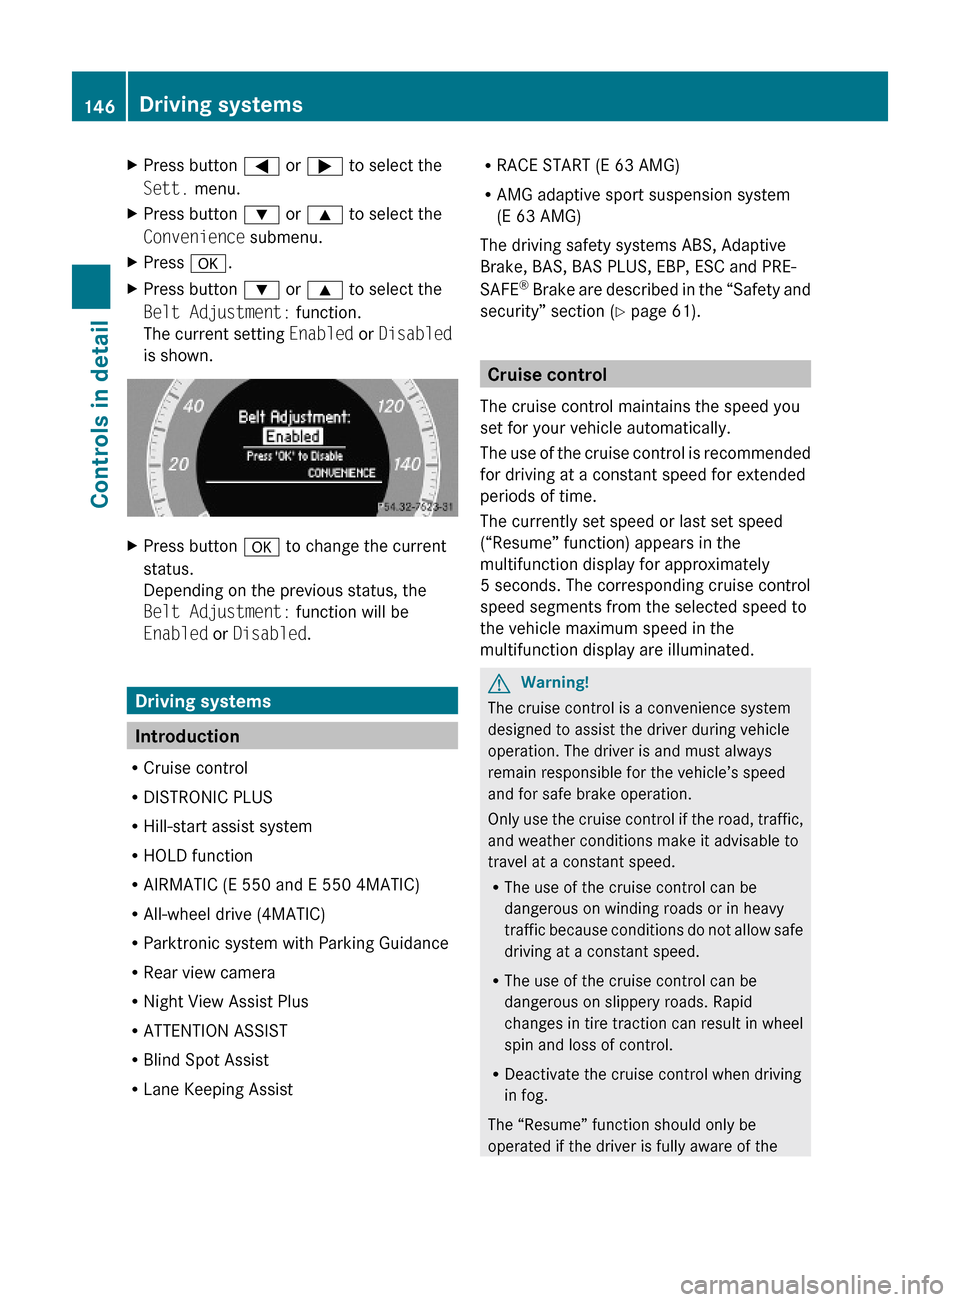
Belt Adjustment: function.
The current setting Enabled or Disabled
is shown.
XPress button a to change the current
status.
Depending on the previous status, the
Belt Adjustment: function will be
Enabled or Disabled.
Driving systems
Introduction
RCruise control
RDISTRONIC PLUS
RHill-start assist system
RHOLD function
RAIRMATIC (E 550 and E 550 4MATIC)
RAll-wheel drive (4MATIC)
RParktronic system with Parking Guidance
RRear view camera
RNight View Assist Plus
RATTENTION ASSIST
RBlind Spot Assist
RLane Keeping Assist
RRACE START (E 63 AMG)
RAMG adaptive sport suspension system
(E 63 AMG)
The driving safety systems ABS, Adaptive
Brake, BAS, BAS PLUS, EBP, ESC and PRE-
SAFE® Brake are described in the “Safety and
security” section (Y page 61).
Cruise control
The cruise control maintains the speed you
set for your vehicle automatically.
The use of the cruise control is recommended
for driving at a constant speed for extended
periods of time.
The currently set speed or last set speed
(“Resume” function) appears in the
multifunction display for approximately
5 seconds. The corresponding cruise control
speed segments from the selected speed to
the vehicle maximum speed in the
multifunction display are illuminated.
GWarning!
The cruise control is a convenience system
designed to assist the driver during vehicle
operation. The driver is and must always
remain responsible for the vehicle’s speed
and for safe brake operation.
Only use the cruise control if the road, traffic,
and weather conditions make it advisable to
travel at a constant speed.
RThe use of the cruise control can be
dangerous on winding roads or in heavy
traffic because conditions do not allow safe
driving at a constant speed.
RThe use of the cruise control can be
dangerous on slippery roads. Rapid
changes in tire traction can result in wheel
spin and loss of control.
RDeactivate the cruise control when driving
in fog.
The “Resume” function should only be
operated if the driver is fully aware of the
146Driving systemsControls in detail
212_AKB; 2; 41, en-USd2ureepe,Version: 2.11.8.12009-07-17T09:14:21+02:00 - Seite 146
Page 151 of 372

XBriefly pull the cruise control lever in
direction of arrow ?.
If no speed is stored, the current speed is
set and stored.XRemove your foot from the accelerator
pedal.
The last stored speed is deleted from memory
when the engine is turned off.
DISTRONIC PLUS
Safety notes
When activated, the DISTRONIC PLUS
adaptive cruise control system increases the
driving convenience afforded by the cruise
control while traveling on expressways and
other major roadways.
R If the DISTRONIC PLUS distance sensor
detects a slower moving vehicle directly
ahead, your vehicle speed will be reduced
so that you follow that vehicle at your
preset following distance.
R If there is no vehicle directly ahead of you,
the DISTRONIC PLUS will function in the
same way as standard cruise control
( Y page 146).
GWarning!
The DISTRONIC PLUS requires familiarity with
its operational characteristics. We strongly
recommend that you review the following
information carefully before operating the
system.
GWarning!
The DISTRONIC PLUS is a convenience
system. Its speed adjustment reduction
capability is intended to make cruise control
more effective and usable when traffic speeds
vary. It is not however, intended to, nor does
it, replace the need for extreme care.
The responsibility for the vehicle’s speed,
distance to the preceding vehicle and, most
importantly, brake operation to ensure a safe
stopping distance, always remains with the
driver.
The DISTRONIC PLUS cannot take street and
traffic conditions into account.
Complex driving situations are not always
fully recognized by the DISTRONIC PLUS. This
could result in wrong or missing distance
warnings.GWarning!
The DISTRONIC PLUS adaptive cruise control
is not a substitute for active driving
involvement. It does not react to pedestrians
or on stationary objects, nor does it recognize
or predict the curvature and lane layout or the
movement of preceding vehicles. The
DISTRONIC PLUS can only apply a maximum
of 40% of the vehicle’s braking power.
The DISTRONIC PLUS may not detect narrow
vehicles possibly driving in front of you, such
as motorcycles and vehicles driving in an
offset formation.
It is the driver’s responsibility at all times to
be attentive to the road, weather and traffic
conditions. Additionally, the driver must
provide the steering, braking and other driving
inputs necessary to remain in control of the
vehicle.
High-frequency sources such as toll stations,
speed measuring systems etc. can cause the
DISTRONIC PLUS system to temporarily
cease functioning.
GWarning!
The DISTRONIC PLUS cannot take road and
traffic conditions into account. Only use the
DISTRONIC PLUS if the road, weather and
traffic conditions make it advisable to travel
at a constant speed.
GWarning!
Use of the DISTRONIC PLUS can be
dangerous on slippery roads. Rapid changes
in tire traction can result in wheel spin and
loss of control.
Driving systems149Controls in detail212_AKB; 2; 41, en-USd2ureepe,Version: 2.11.8.12009-07-17T09:14:21+02:00 - Seite 149Z
Page 159 of 372
Ryou shift the automatic transmission into
park position P, reverse gear R, or neutral
position N while driving
Rthe radar sensors are switched off
Ryou pull the DISTRONIC PLUS lever in
direction of arrow ? (Y page 153) for
driving off and the passenger door is open
The segments indicating the set speed in the
multifunction display go out, an acoustic
signal sounds, and the message DISTRONIC
PLUS Off appears in the multifunction
display for approximately 5 seconds.
GWarning!
The DISTRONIC PLUS switches off and
releases the brakes when the vehicle
decelerates below the minimum speed of
20 mph (30 km/h) by operation of the system
unless the DISTRONIC PLUS detects a vehicle
directly ahead of you. At that time the driver
must apply the brakes in order to reduce
vehicle speed further or bring it to a stop.
Depressing the accelerator pedal does not
deactivate the DISTRONIC PLUS. After a brief
acceleration (e.g. for passing), the
DISTRONIC PLUS will resume the last set
speed.
Setting the following distance in
DISTRONIC PLUS
You can set the specified following distance
for the DISTRONIC PLUS by varying the time
setting between 1.0 and 2.0 seconds. Using
this time setting and the current speed of
your vehicle, the DISTRONIC PLUS calculates
and sets the required following distance to
the preceding vehicle.
The set distance will be shown in the
multifunction display.
GWarning!
It is up to the driver to exercise discretion to
select the appropriate setting given road
conditions, traffic, driver’s preferred driving
style and applicable laws and driving
recommendations for safe following distance.
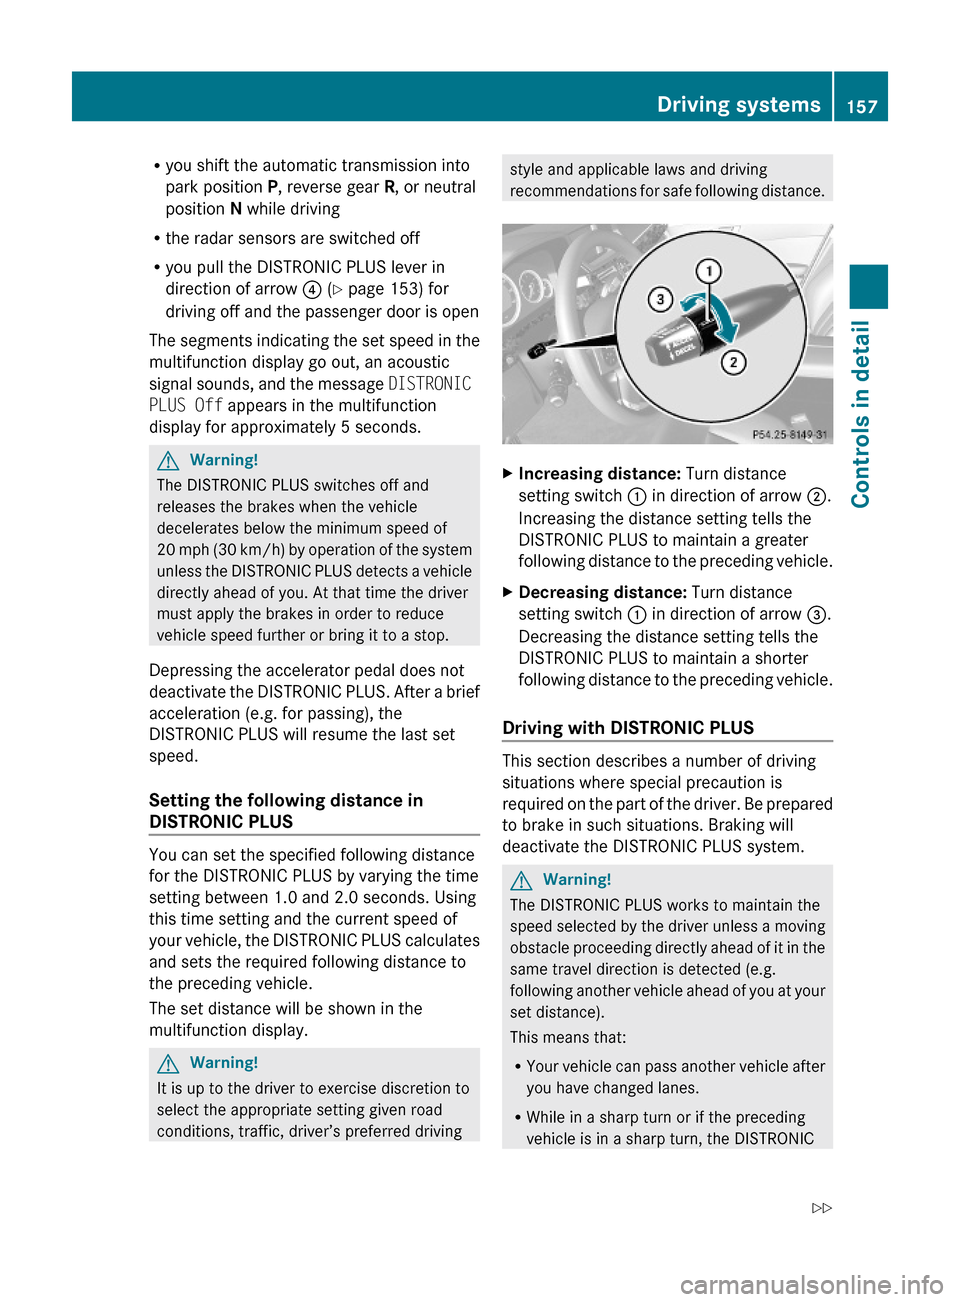
XIncreasing distance: Turn distance
setting switch : in direction of arrow ;.
Increasing the distance setting tells the
DISTRONIC PLUS to maintain a greater
following distance to the preceding vehicle.
XDecreasing distance: Turn distance
setting switch : in direction of arrow =.
Decreasing the distance setting tells the
DISTRONIC PLUS to maintain a shorter
following distance to the preceding vehicle.
Driving with DISTRONIC PLUS
This section describes a number of driving
situations where special precaution is
required on the part of the driver. Be prepared
to brake in such situations. Braking will
deactivate the DISTRONIC PLUS system.
GWarning!
The DISTRONIC PLUS works to maintain the
speed selected by the driver unless a moving
obstacle proceeding directly ahead of it in the
same travel direction is detected (e.g.
following another vehicle ahead of you at your
set distance).
This means that:
RYour vehicle can pass another vehicle after
you have changed lanes.
RWhile in a sharp turn or if the preceding
vehicle is in a sharp turn, the DISTRONIC
Driving systems157Controls in detail212_AKB; 2; 41, en-USd2ureepe,Version: 2.11.8.12009-07-17T09:14:21+02:00 - Seite 157Z
Page 171 of 372
GWarning!
The Parking Guidance is only an aid and may
display parking spaces that are not suitable
for parking such as
R no-parking zones
R parking space with unsuitable road/ground
surface
R driveways
R entrances/exits
The Parking Guidance scans for and measures
potential parking spaces when driving past.
Subsequent changes to the parking space are
not taken into account. This may be the case
if the position of the vehicle parked in front or
behind the space changes or obstacles in the
parking space are moved.
The Parking Guidance does not relieve you of
the responsibility to pay attention. If you only
rely on the Parking Guidance, you may cause
an accident and injure yourself and others.
You are always responsible for safety and
must continue to pay attention to your
immediate surroundings when parking and
maneuvering.
GWarning!
The system cannot detect objects located
above the area that the sensors scan. These
objects, e.g. protruding load, overhang, or
truck tail lifts, will be ignored when computing
the parking procedure. The Parking Guidance
might therefore provide untimely steering
instructions. This could cause a collision.
Thus, do not use the Parking Guidance in such
situations.
GWarning!
Make sure no persons or animals are in the
area in which you are maneuvering. You could
otherwise injure them.
! Special attention must be paid to objects
with smooth surfaces or low silhouettes
(e.g. trailer couplings, painted posts,
elevated crossbars or road curbs). Such
objects may not be detected by the system
and can damage the vehicle.
Use the Parking Guidance for parking spaces
that are
R parallel to the direction of travel
R located on straight streets, i.e. not in
curves
R on the same level as the street, i.e. not on
sidewalks, for example.
Parking instructions:
R On narrow streets, drive by the parking
space as close as possible.
R Parking spaces that are dirty, overgrown or
located in front of trailers may not be
detected correctly.
R Snowfall or heavy rain may cause imprecise
measurement of the parking space.
R Also observe the Parktronic system
warning indicator ( Y page 167) while the
Parking Guidance is active.
R You may not use the Parking Guidance
when transporting cargo that protrudes the
vehicle.
R Do not use the Parking Guidance when
driving with snow chains or when a spare
wheel is mounted.
R How well your vehicle will be parked after
completion of the Parking Guidance
depends on the position and shape of the
vehicles parked in front of and behind the
parking space as well as the conditions of
the immediate surroundings. In certain
cases, the Parking Guidance may guide you
too far into the parking space or not far
enough. If this is the case, cancel the
parking procedure with the Parking
Guidance and correct the vehicle position
yourself.
Detecting a parking space
The Parking Guidance is active when driving
forward. The system operates at a vehicle
Driving systems169Controls in detail212_AKB; 2; 41, en-USd2ureepe,Version: 2.11.8.12009-07-17T09:14:21+02:00 - Seite 169Z