2010 MERCEDES-BENZ E350 comand
[x] Cancel search: comandPage 8 of 372

C
CAC (Customer Assistance Center) ... 23
California retail buyers and
lessees, important notice for ............. 21
Calls (phone) ...................................... 135
Can holders see Cup holders
Capacities and recommended
fuel/lubricants .................................. 359
Cargo tie-down rings ......................... 199
Carpets, cleaning .............................. 266
Center console ..................................... 32
Central locking
Automatic ................................ 80, 144
KEYLESS-GO .................................... 77
Locking/unlocking from inside ........81
SmartKey ......................................... 76
Central locking/unlocking switch ..... 81
Ceramic brake system ...................... 256
Certification label .............................. 346
Children in the vehicle
Air bags ........................................... 37
BabySmart™ air bag deactivation
system ............................................. 46
Child safety locks (rear doors) .........60
Child seat anchors – LATCH-type
(ISOFIX) ........................................... 59
Indicator lamp, front passenger
front air bag off (Canada only) .........46
Indicator lamp, front passenger
front air bag off (USA only) ..............43
Infant and child restraint systems .... 56
ISOFIX (Child seat anchors –
LATCH-type) ..................................... 59
OCS (Occupant Classification
System) ........................................... 43
Override switch ................................ 60
Safety notes ..................................... 56
Tether anchorage points ..................58
Top tether ........................................ 58
Child safety
see Children in the vehicle
Child seat anchors – LATCH-type
(ISOFIX) see Children in the vehicle
Chrome-plated exhaust tip,
cleaning .............................................. 266Cigarette lighter ................................ 206
Climate control see Climate control system
Climate control system .................... 180
Air conditioning ............................. 185
Air conditioning refrigerant ............362
Air distribution ............................... 189
Air recirculation mode ...................190
Air volume ..................................... 189
Automatic mode ............................ 186
Deactivating system ......................185
Front defroster .............................. 189
Maximum cooling MAX COOL ........190
Residual heat and ventilation .........191
Temperature .................................. 186
Cockpit ................................................. 27
Cold tire inflation pressure .............. 250
Collapsible wheel chock ................... 270
COMAND system see separate COMAND system
operating instructions
Combination switch .......................... 100
Compass ............................................ 216
Control system .................................. 126
Multifunction display .....................128
Multifunction steering wheel .........126
Resetting to factory settings ..........139
Control system menus ...................... 129
AMG ............................................... 131
Assistance ..................................... 137
Audio ............................................. 134
Navi ............................................... 134
Service ........................................... 138
Settings ......................................... 139
Telephone ...................................... 135
Trip ................................................ 129
Control system submenus
Convenience .................................. 145
Instrument cluster .........................140
Lighting .......................................... 141
Vehicle ........................................... 144
Convenience submenu
Easy-entry/exit feature .................. 145
Seat belt adjustment function .......145
Coolant
Anticorrosion/antifreeze ...............365
Capacities ...................................... 361
Checking level ............................... 2266Index212_AKB; 2; 41, en-USd2ureepe,Version: 2.11.8.12009-07-17T09:14:21+02:00 - Seite 6
Page 34 of 372
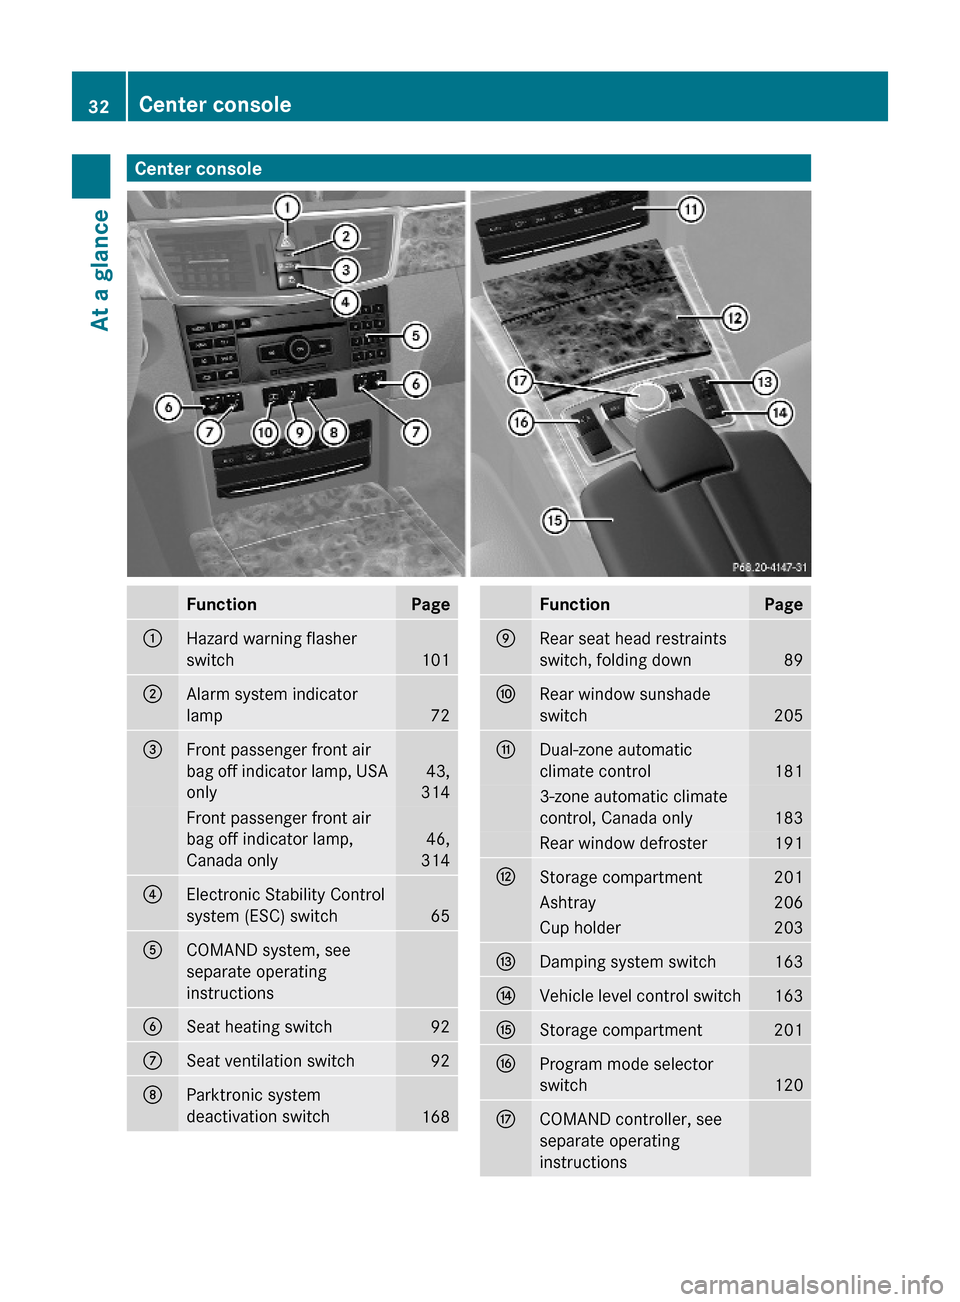
Center consoleFunctionPage:Hazard warning flasher
switch101
;Alarm system indicator
lamp72
=Front passenger front air
bag off indicator lamp, USA
only
43,
314
Front passenger front air
bag off indicator lamp,
Canada only
46,
314
?Electronic Stability Control
system (ESC) switch65
ACOMAND system, see
separate operating
instructions
BSeat heating switch92CSeat ventilation switch92DParktronic system
deactivation switch168
FunctionPageERear seat head restraints
switch, folding down89
FRear window sunshade
switch205
GDual-zone automatic
climate control181
3-zone automatic climate
control, Canada only183
Rear window defroster191HStorage compartment201Ashtray206Cup holder203IDamping system switch163JVehicle level control switch163KStorage compartment201LProgram mode selector
switch120
MCOMAND controller, see
separate operating
instructions
32Center consoleAt a glance
212_AKB; 2; 41, en-USd2ureepe,Version: 2.11.8.12009-07-17T09:14:21+02:00 - Seite 32
Page 127 of 372

Instrument cluster
Introduction
For a full view illustration of the instrument
cluster, see “Instrument cluster”
(Y page 28).
GWarning!
No messages will be displayed if either the
instrument cluster or the multifunction
display is inoperative.
As a result, you will not be able to see
information about your driving conditions,
such as
Rspeed
Routside temperature
Rwarning/indicator lamps
Rmalfunction/warning messages
Rfailure of any systems
Driving characteristics may be impaired.
If you must continue to drive, do so with added
caution. Contact an authorized Mercedes-
Benz Center as soon as possible.
The language setting for the multifunction
display can be changed via COMAND, see
separate operating instructions.
Activating the instrument cluster
The instrument cluster is activated when you
Ropen the driver’s door
Rswitch on the ignition
Rswitch on the exterior lamps
Adjusting the instrument cluster
illumination
XTo brighten illumination: Turn
dimmer : clockwise.
XTo dim illumination: Turn dimmer :
counterclockwise.
iThe instrument cluster illumination is
dimmed or brightened automatically to suit
ambient light conditions.
Coolant temperature gauge
The coolant temperature gauge is located on
the right side in the instrument cluster
(Y page 28).
GWarning!
Driving when your engine is overheated can
cause some fluids which may have leaked into
the engine compartment to catch fire. You
could be seriously burned.
Steam from an overheated engine can cause
serious burns which can occur just by opening
the engine hood. Stay away from the engine
if you see or hear steam coming from it.
Stop the vehicle in a safe location away from
other traffic. Turn off the engine, get out of the
vehicle and do not stand near the vehicle until
the engine has cooled down.
During severe operating conditions, e.g. stop-
and-go traffic, the coolant temperature may
rise close to 248‡ (120†), i.e close to the
red zone of the temperature gauge.
Instrument cluster125Controls in detail212_AKB; 2; 41, en-USd2ureepe,Version: 2.11.8.12009-07-17T09:14:21+02:00 - Seite 125Z
Page 136 of 372
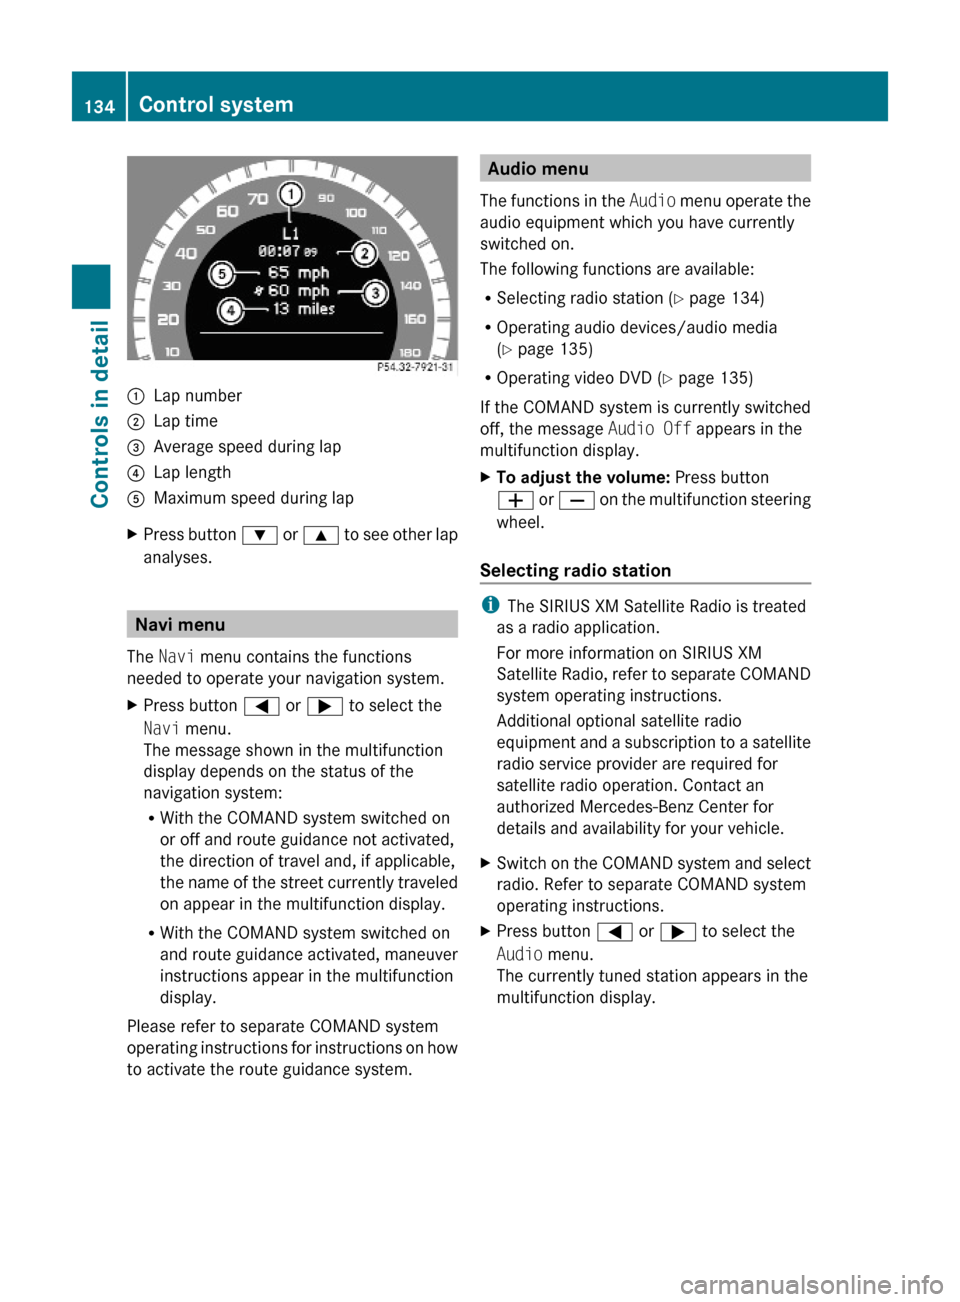
:Lap number;Lap time=Average speed during lap?Lap lengthAMaximum speed during lapXPress button : or 9 to see other lap
analyses.
Navi menu
The Navi menu contains the functions
needed to operate your navigation system.
XPress button = or ; to select the
Navi menu.
The message shown in the multifunction
display depends on the status of the
navigation system:
RWith the COMAND system switched on
or off and route guidance not activated,
the direction of travel and, if applicable,
the name of the street currently traveled
on appear in the multifunction display.
RWith the COMAND system switched on
and route guidance activated, maneuver
instructions appear in the multifunction
display.
Please refer to separate COMAND system
operating instructions for instructions on how
to activate the route guidance system.
Audio menu
The functions in the Audio menu operate the
audio equipment which you have currently
switched on.
The following functions are available:
RSelecting radio station (Y page 134)
ROperating audio devices/audio media
(Y page 135)
ROperating video DVD (Y page 135)
If the COMAND system is currently switched
off, the message Audio Off appears in the
multifunction display.
XTo adjust the volume: Press button
W or X on the multifunction steering
wheel.
Selecting radio station
iThe SIRIUS XM Satellite Radio is treated
as a radio application.
For more information on SIRIUS XM
Satellite Radio, refer to separate COMAND
system operating instructions.
Additional optional satellite radio
equipment and a subscription to a satellite
radio service provider are required for
satellite radio operation. Contact an
authorized Mercedes-Benz Center for
details and availability for your vehicle.
XSwitch on the COMAND system and select
radio. Refer to separate COMAND system
operating instructions.
XPress button = or ; to select the
Audio menu.
The currently tuned station appears in the
multifunction display.
134Control systemControls in detail
212_AKB; 2; 41, en-USd2ureepe,Version: 2.11.8.12009-07-17T09:14:21+02:00 - Seite 134
Page 137 of 372
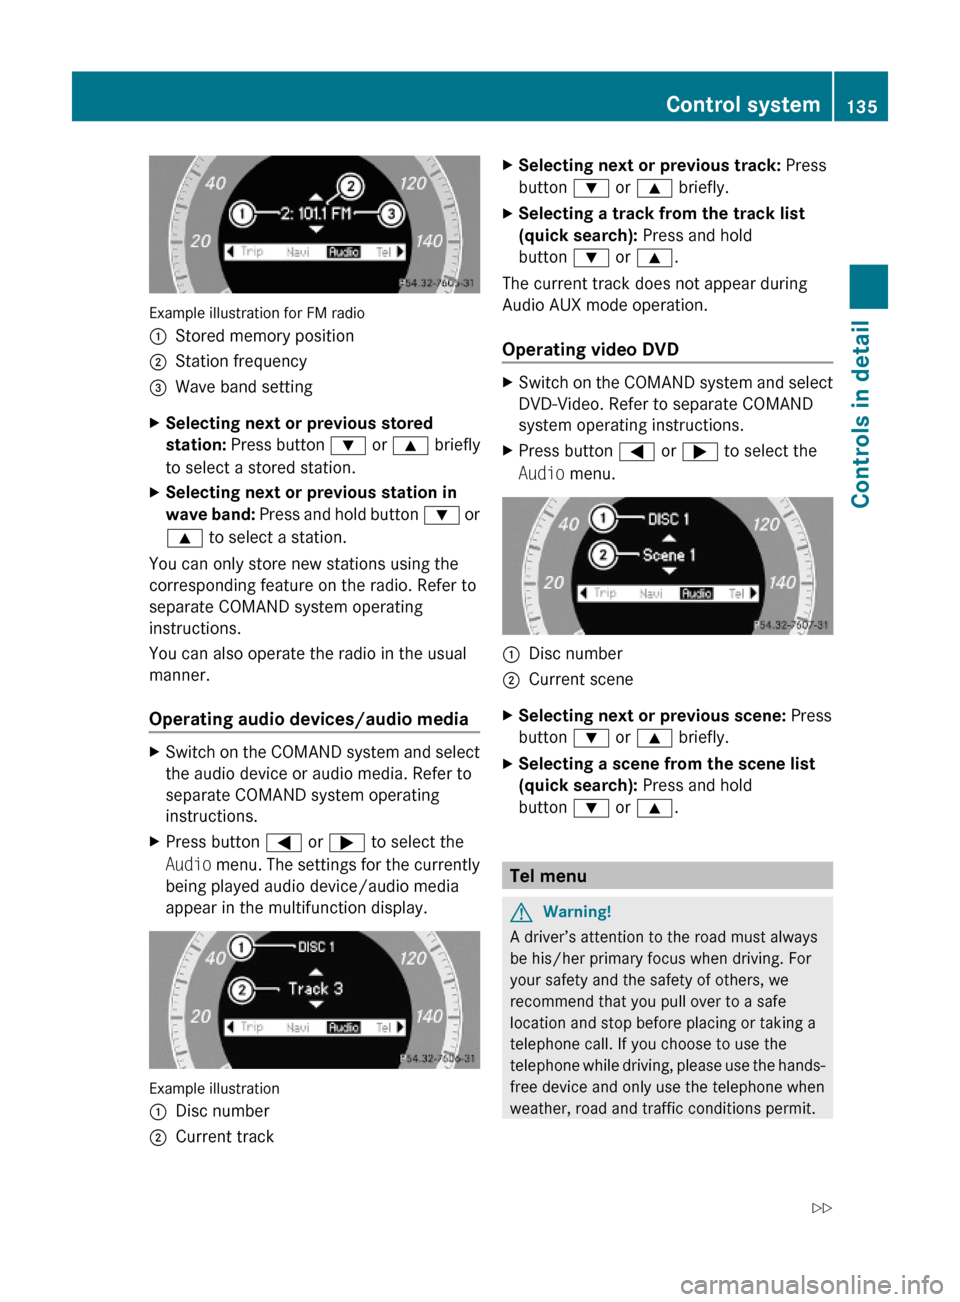
Example illustration for FM radio
:Stored memory position;Station frequency=Wave band settingXSelecting next or previous stored
station: Press button : or 9 briefly
to select a stored station.
XSelecting next or previous station in
wave band: Press and hold button : or
9 to select a station.
You can only store new stations using the
corresponding feature on the radio. Refer to
separate COMAND system operating
instructions.
You can also operate the radio in the usual
manner.
Operating audio devices/audio media
XSwitch on the COMAND system and select
the audio device or audio media. Refer to
separate COMAND system operating
instructions.
XPress button = or ; to select the
Audio menu. The settings for the currently
being played audio device/audio media
appear in the multifunction display.
Example illustration
:Disc number;Current trackXSelecting next or previous track: Press
button : or 9 briefly.
XSelecting a track from the track list
(quick search): Press and hold
button : or 9.
The current track does not appear during
Audio AUX mode operation.
Operating video DVD
XSwitch on the COMAND system and select
DVD-Video. Refer to separate COMAND
system operating instructions.
XPress button = or ; to select the
Audio menu.
:Disc number;Current sceneXSelecting next or previous scene: Press
button : or 9 briefly.
XSelecting a scene from the scene list
(quick search): Press and hold
button : or 9.
Tel menu
GWarning!
A driver’s attention to the road must always
be his/her primary focus when driving. For
your safety and the safety of others, we
recommend that you pull over to a safe
location and stop before placing or taking a
telephone call. If you choose to use the
telephone while driving, please use the hands-
free device and only use the telephone when
weather, road and traffic conditions permit.
Control system135Controls in detail212_AKB; 2; 41, en-USd2ureepe,Version: 2.11.8.12009-07-17T09:14:21+02:00 - Seite 135Z
Page 138 of 372
Some jurisdictions prohibit the driver from
using a mobile phone while driving a vehicle.
Bear in mind that at a speed of just 30 mph
(approximately 50 km/h), your vehicle is
covering a distance of 44 feet (approximately
14 m) every second.
You can connect your telephone to the
COMAND system via Bluetooth®, see
separate COMAND system operating
instructions.
XSwitch on the COMAND system.
Refer to separate COMAND system
operating instructions.
XPress button = or ; to select the
Tel menu.
One of the following messages will appear
in the multifunction display:
RNo Service: No network is available.
RReady for Bluetooth Telephony...:
The telephone has not been connected
to the COMAND system via Bluetooth®
yet.
XConnect the telephone to the
COMAND system via Bluetooth®.
RPhone READY or name of the network
provider (if available): The telephone has
found a network and is ready for use. You
can operate it using the control system.
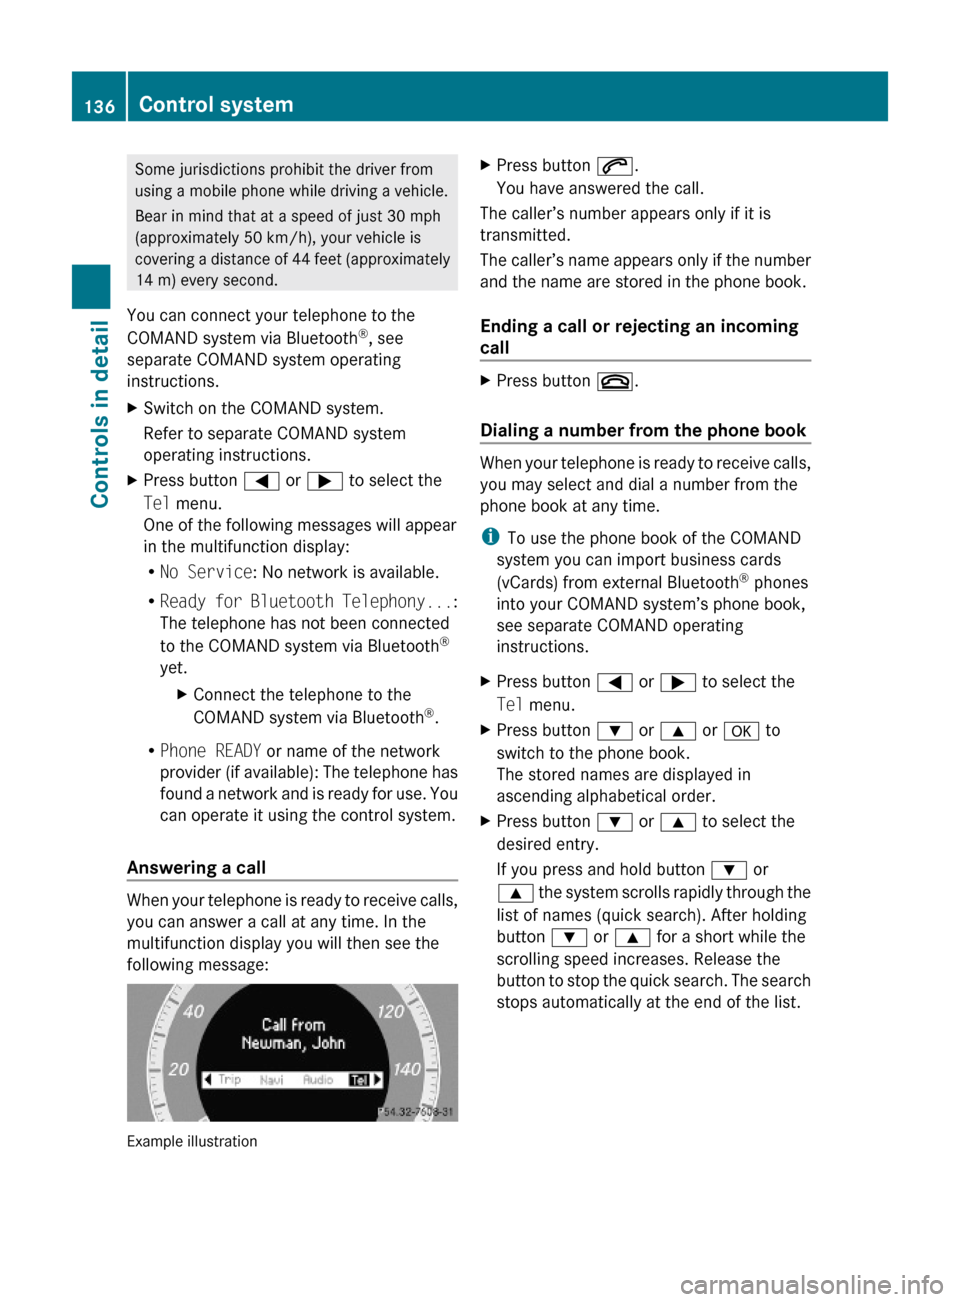
Answering a call
When your telephone is ready to receive calls,
you can answer a call at any time. In the
multifunction display you will then see the
following message:
Example illustration
XPress button 6.
You have answered the call.
The caller’s number appears only if it is
transmitted.
The caller’s name appears only if the number
and the name are stored in the phone book.
Ending a call or rejecting an incoming
call
XPress button ~.
Dialing a number from the phone book
When your telephone is ready to receive calls,
you may select and dial a number from the
phone book at any time.
iTo use the phone book of the COMAND
system you can import business cards
(vCards) from external Bluetooth® phones
into your COMAND system’s phone book,
see separate COMAND operating
instructions.
XPress button = or ; to select the
Tel menu.
XPress button : or 9 or a to
switch to the phone book.
The stored names are displayed in
ascending alphabetical order.
XPress button : or 9 to select the
desired entry.
If you press and hold button : or
9 the system scrolls rapidly through the
list of names (quick search). After holding
button : or 9 for a short while the
scrolling speed increases. Release the
button to stop the quick search. The search
stops automatically at the end of the list.
136Control systemControls in detail
212_AKB; 2; 41, en-USd2ureepe,Version: 2.11.8.12009-07-17T09:14:21+02:00 - Seite 136
Page 173 of 372
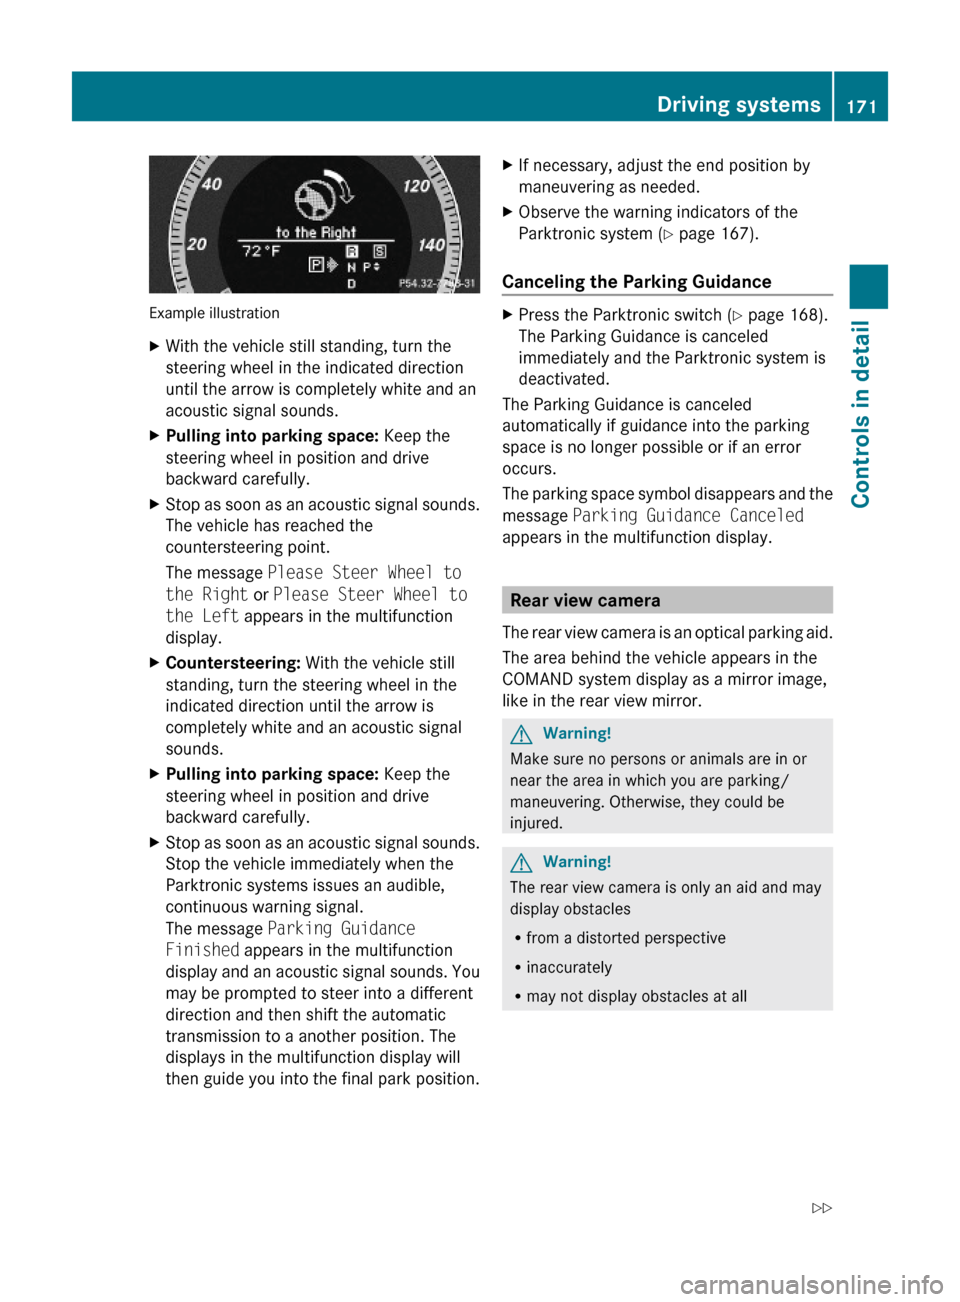
Example illustration
XWith the vehicle still standing, turn the
steering wheel in the indicated direction
until the arrow is completely white and an
acoustic signal sounds.
XPulling into parking space: Keep the
steering wheel in position and drive
backward carefully.
XStop as soon as an acoustic signal sounds.
The vehicle has reached the
countersteering point.
The message Please Steer Wheel to
the Right or Please Steer Wheel to
the Left appears in the multifunction
display.
XCountersteering: With the vehicle still
standing, turn the steering wheel in the
indicated direction until the arrow is
completely white and an acoustic signal
sounds.
XPulling into parking space: Keep the
steering wheel in position and drive
backward carefully.
XStop as soon as an acoustic signal sounds.
Stop the vehicle immediately when the
Parktronic systems issues an audible,
continuous warning signal.
The message Parking Guidance
Finished appears in the multifunction
display and an acoustic signal sounds. You
may be prompted to steer into a different
direction and then shift the automatic
transmission to a another position. The
displays in the multifunction display will
then guide you into the final park position.
XIf necessary, adjust the end position by
maneuvering as needed.
XObserve the warning indicators of the
Parktronic system (Y page 167).
Canceling the Parking Guidance
XPress the Parktronic switch (Y page 168).
The Parking Guidance is canceled
immediately and the Parktronic system is
deactivated.
The Parking Guidance is canceled
automatically if guidance into the parking
space is no longer possible or if an error
occurs.
The parking space symbol disappears and the
message Parking Guidance Canceled
appears in the multifunction display.
Rear view camera
The rear view camera is an optical parking aid.
The area behind the vehicle appears in the
COMAND system display as a mirror image,
like in the rear view mirror.
GWarning!
Make sure no persons or animals are in or
near the area in which you are parking/
maneuvering. Otherwise, they could be
injured.
GWarning!
The rear view camera is only an aid and may
display obstacles
Rfrom a distorted perspective
Rinaccurately
Rmay not display obstacles at all
Driving systems171Controls in detail212_AKB; 2; 41, en-USd2ureepe,Version: 2.11.8.12009-07-17T09:14:21+02:00 - Seite 171Z
Page 174 of 372
The rear view camera does not relieve you of
the responsibility to be cautious. Take care
and pay careful attention. The rear view
camera may not show objects which are
Rvery close to the rear bumper
Runder the rear bumper
Rabove the trunk handle
You are responsible for safety at all times and
must continue to pay attention to the
immediate surroundings when parking and
maneuvering. This includes the area behind,
in front of, and beside the vehicle. Otherwise
you could endanger yourself and/or others.
GWarning!
The rear view camera either will not function
or will not function to its full capability if
Rthe trunk lid is open
Rit is raining very hard, snowing or foggy
Rit is night or you are parking/maneuvering
your vehicle in an area where it is very dark
Rthe camera is exposed to a very bright white
light
Rthe immediate surroundings are
illuminated with fluorescent light (the
COMAND system display can flicker)
Rthere is a sudden change in temperature,
e.g. if you drive into a heated garage from
the cold (lens condensation)
Rthe camera lens is dirty or covered
Rthe rear of your vehicle is damaged
In this case, have the position and setting
of the camera checked by a qualified
specialist workshop. Mercedes-Benz
recommends that you contact a Mercedes-
Benz Center for this purpose.
Do not use the rear view camera in these
situations. Otherwise you could injure
yourself or others and/or damage property
including your vehicle while parking/
maneuvering.
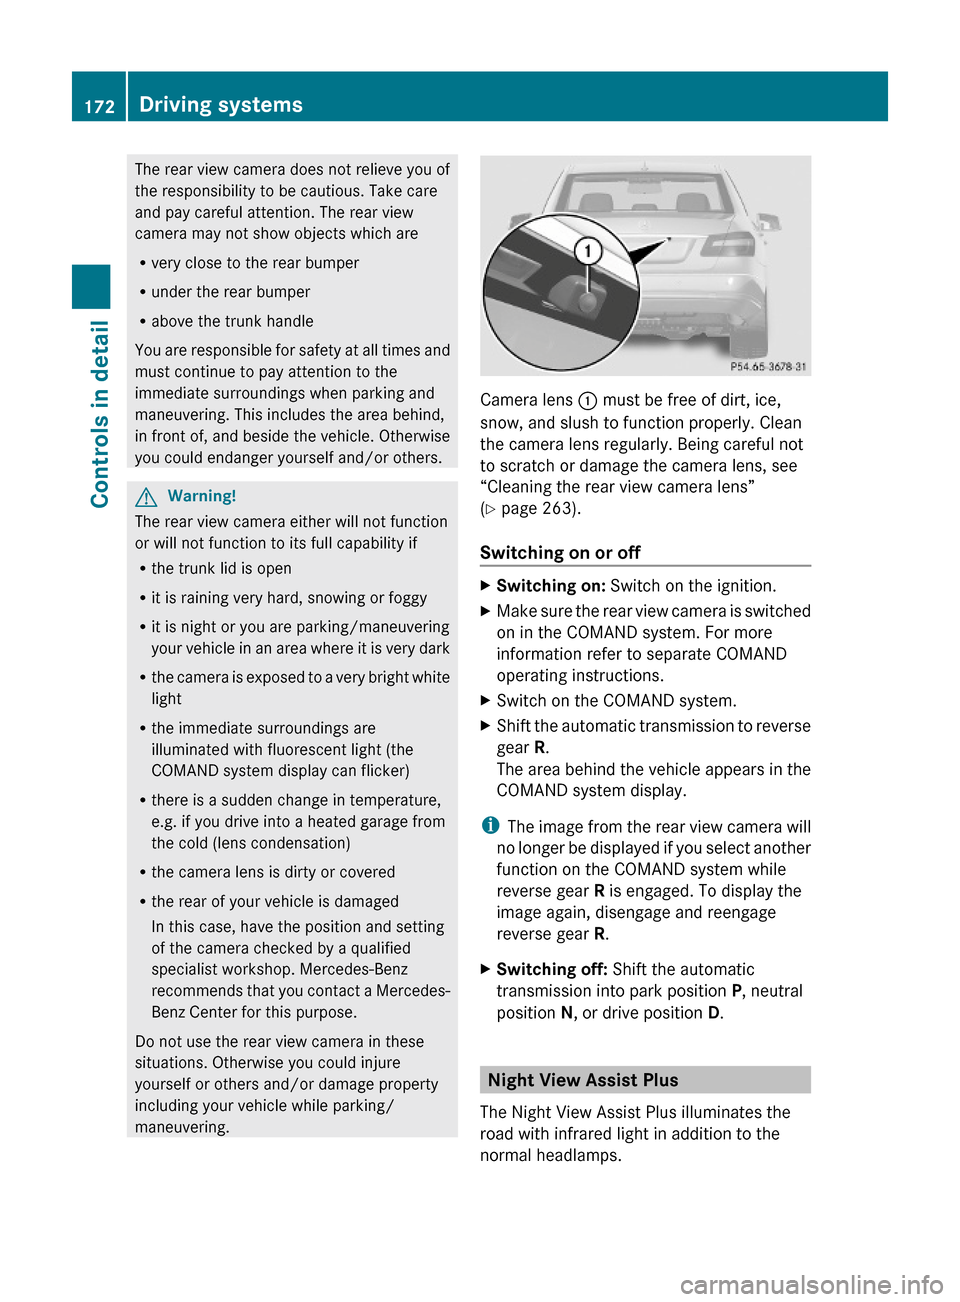
Camera lens : must be free of dirt, ice,
snow, and slush to function properly. Clean
the camera lens regularly. Being careful not
to scratch or damage the camera lens, see
“Cleaning the rear view camera lens”
(Y page 263).
Switching on or off
XSwitching on: Switch on the ignition.XMake sure the rear view camera is switched
on in the COMAND system. For more
information refer to separate COMAND
operating instructions.
XSwitch on the COMAND system.XShift the automatic transmission to reverse
gear R.
The area behind the vehicle appears in the
COMAND system display.
iThe image from the rear view camera will
no longer be displayed if you select another
function on the COMAND system while
reverse gear R is engaged. To display the
image again, disengage and reengage
reverse gear R.
XSwitching off: Shift the automatic
transmission into park position P, neutral
position N, or drive position D.
Night View Assist Plus
The Night View Assist Plus illuminates the
road with infrared light in addition to the
normal headlamps.
172Driving systemsControls in detail
212_AKB; 2; 41, en-USd2ureepe,Version: 2.11.8.12009-07-17T09:14:21+02:00 - Seite 172