2010 MERCEDES-BENZ CLS COUPE wiper blades
[x] Cancel search: wiper bladesPage 9 of 337
Bel
ttensioner
Activation ........................................ .35
Function ........................................... 45
Blin dSpot Assist
Activating/deactivating (on-
board computer) ............................ 204
Display message ............................ 229
Function/notes ............................. 183
Bonnet
Closing .......................................... .267
Display message ............................ 235
Opening ......................................... 266
Boot
Automatic opening ........................... 76
Emergency release ..........................77
Important safety guidelines .............75
Opening automatically from
insid e............................................... 77
Boot lid
Display message ............................ 235
Opening dimensions ......................326
Boot load (maximum) ........................ 323
Bottle holder ...................................... 256
Box (boot) .......................................... .252
Brake fluid Notes ............................................. 322
Brake lamps
Adaptive .......................................... .58
Display message ............................ 222
Brakes
ABS .................................................. 57
BAS .................................................. 57
BAS PLUS ........................................ 57
Brake fluid (notes) .........................322
Display message ............................ 220
High-performance brake system ....150
Important safety notes ..................149
Parking brake ................................ 148
Warning lamp ................................. 238
Breakdown
see Flat tyre
Bulbs
Overview ........................................ 105 C
Care Automatic car wash .......................271
Display ........................................... 274
Exterior lighting ............................. 273
High-pressure cleaner .................... 272
Matt paintwork .............................. 272
Nigh tView Assist Plus ...................274
Notes ............................................. 270
Paint .............................................. 272
Plastic trim .................................... 275
Reversing camera ..........................274
Seat bel t........................................ 276
Seat covers .................................... 275
Sensors ......................................... 274
Tai lpipes ....................................... 274
Trim strips ..................................... 275
Wheels ........................................... 272
Windows ........................................ 273
Wiper blades .................................. 273
Wooden trim .................................. 275
CD player/CD changer(on-board
computer) .......................................... 201
Central locking Automatic locking (on-board com-
puter) ............................................. 209
Key .................................................. 68
Central unlocking
Key .................................................. 68
Centre console ..................................... 30
Changing bulbs Headlamps ..................................... 104
Changing gears .................................. 138
Child-proof locks Rea rdoors ....................................... 55
Children
In the vehicle ................................... 46
Restraint systems ............................ 46
Child seat
Automatic recognition .....................48
Display message ............................ 217
ISOFIX .............................................. 49
On the front-passenger sea t............ 47
Recommendations ...........................54
Suitable positions ............................ 52
Troubleshooting ............................... 51
Cigarette lighter ................................ 2586
Index
Page 21 of 337
Washer fluid (display message)
.......236
see Washer fluid (display message)
Wheel bol ttightening torque ...........288
Wheel chock ...................................... 285
Wheels Changing/replacing .......................309
Changing awheel .......................... 284
Checking ........................................ 302
Cleaning ......................................... 272
Fitting awheel ............................... 287
Removing awheel .......................... 286
Storing ........................................... 310
Tightening torque ........................... 288
Whee lsize/tyre size ...................... 310
Windowbag
Display message ............................ 218
Operation ........................................ .39
Windows
see Side windows
Windows (cleaning instructions) .....273
Windscreen Demisting ...................................... 116
Windscreen washe rsystem ............. 269
Windscreen wipers Replacing the wiper blades ............107
Switching on/off ........................... 106
Troubleshooting ............................. 107
Winte rdriving ............................ 151, 303
Winter tyres Limiting the speed (on-board com-
puter) ............................................. 209
M+S tyres ...................................... 303
Wiper blades
Cleaning ......................................... 273
Replacing ....................................... 10718
Index
Page 109 of 337

Changing the rea
rbulbs
Reversing lamp Lamp cluster
X
Switch off the lights.
X Open the boot.
X Reach into the top of the side trim panel
and pull dow nuntil the lamp cluster is eas-
ily accessible.
X Press connector grid ;and pull ou tcon-
nector ;.
X Use a suitable tool to loosen and remove
four nuts :.
X Remove the complete lamp cluster.
X Turn bulb holder =anti-clockwise and pull
it out.
X Pull out the bulb.
X Insert the new bulb into bulb holder =.
X Insert bulb holder =into the lamp and turn
it clockwise.
X Insert the lamp cluster again.
X Tighten four nuts :.
X Push in connector ;until it engages.
X Insert the side trim panel. Windscreen wipers
Switching the windscreen wipers on/
off
G
Risk of accident
The windscreen will not longer be wiped prop-
erly if the wiper blades are worn. This could
prevent you from observing the traffic condi-
tions, thereby causing an accident .Replace
the wiper blades twice a year, ideally in spring
and autumn.
! Do not operate the windscreen wipers
when the windscreen is dry, as this could
damage the wiper blades. Moreover, dirt
that has collected on the windscreen can
scratch the glass if wiping takes place when
the windscreen is dry.
! If the windscreen wipers leave smears on
the windscreen after the vehicle has been
washed in an automatic car wash, this may
be due to wax or other residue. Clean the
windscreen with washer fluid after an auto-
matic car wash. Combination switch
1
$ Windscreen wipers off
2 Ä Intermittent wipe, low 22
3 Å Intermittent wipe, high 23
4 ° Continuous wipe, slow
5 ¯ Continuous wipe, fast
B í Single wipe/ îTo wipe the
windscreen using washer fluid
22 Rain sensor set to low sensitivity.
23 Rain sensor set to high sensitivity. 106
Windscreen wipersLights and windscreen wipers
Page 110 of 337
X
Turn the key to position 1or 2in the ignition
lock.
X Turn the combination switch to the corre-
sponding position.
! Intermittent wiping with rain sensor: due
to optical influences and the windscreen
becoming dirty in dry weather conditions,
the windscreen wipers may be activated
inadvertently. This could damage the wind-
screen wiper blades or scratch the wind-
screen.
For this reason, you should always switch
off the windscreen wipers in dry weather.
In the ÄorÅ position, the appropriate
wiping frequency is set automatically accord-
ing to the intensity of the rain. In the Å
position, the rain sensor is more sensitive
than in the Äposition, causing the wind-
screen wiper to wipe more frequently. Replacing the wiper blades
Important safety notes G
Risk of accident
The wiper arms could start moving and cause
an injury if you leave the windscreen wipers
switched on.
Remove the key from the ignition lock before
replacing the wiper blades.
! To avoid damaging the windscreen wiper
blades, make sure that you touch only the
wiper arm of the windscreen wiper.
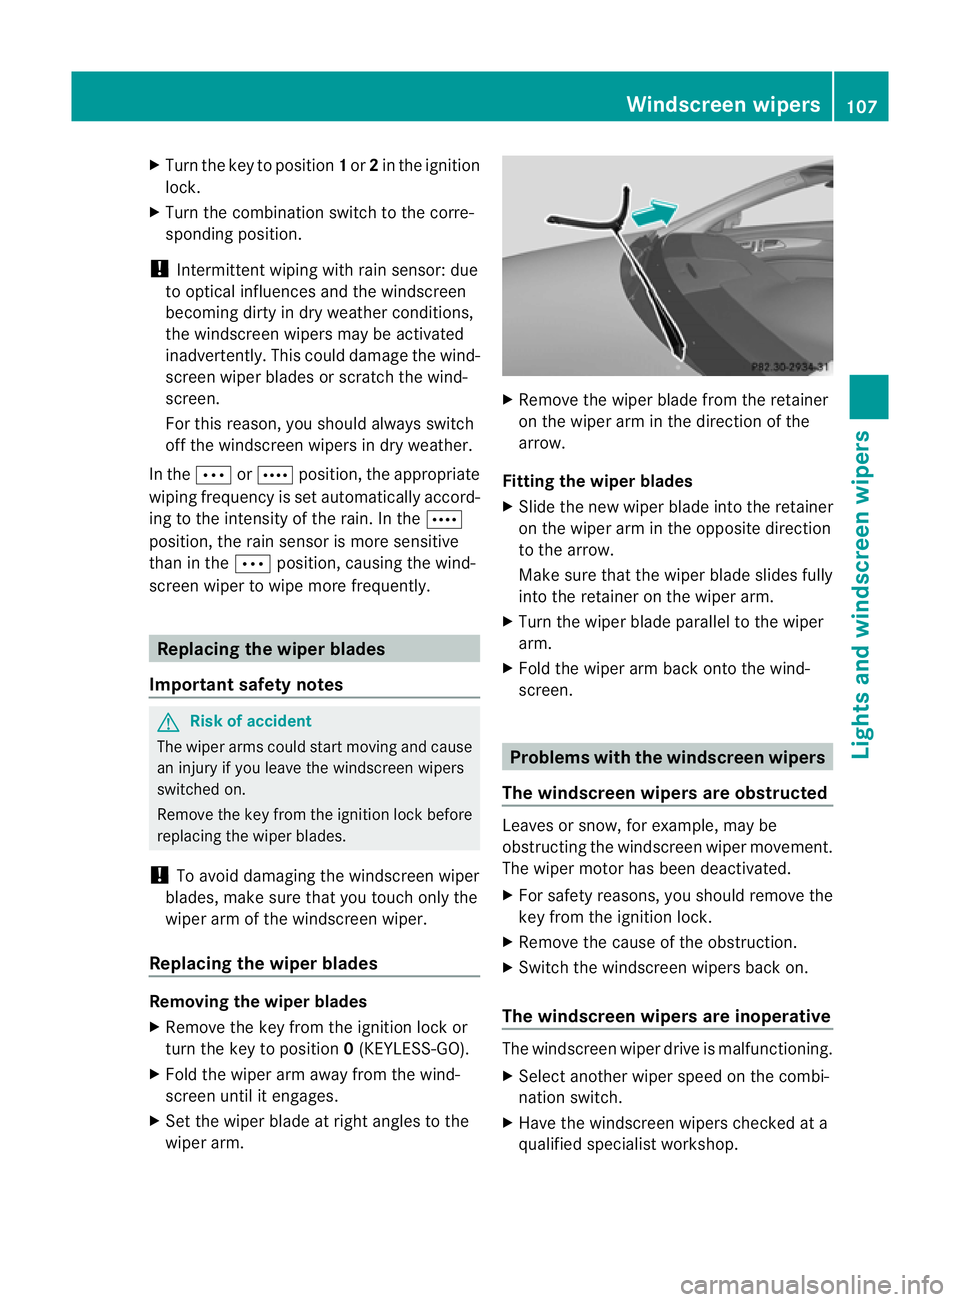
Replacing the wiper blades Removing the wiper blades
X
Remove the key from the ignition lock or
turn the key to position 0(KEYLESS-GO).
X Fold the wiper arm away from the wind-
screen until it engages.
X Set the wiper blade at right angles to the
wiper arm. X
Remove the wiper blade from the retainer
on the wiper arm in the direction of the
arrow.
Fitting the wiper blades
X Slide the new wiper blade into the retainer
on the wiper arm in the opposite direction
to the arrow.
Make sure that the wiper blade slides fully
into the retainer on the wiper arm.
X Turn the wiper blade parallel to the wiper
arm.
X Fold the wiper arm back onto the wind-
screen. Problems with the windscreen wipers
The windscreen wipers are obstructed Leaves or snow, for example, may be
obstructing the windscreen wiper movement.
The wiper motor has been deactivated.
X
For safety reasons, you should remove the
key from the ignition lock.
X Remove the cause of the obstruction.
X Switch the windscreen wipers back on.
The windscreen wipers are inoperative The windscreen wiper drive is malfunctioning.
X
Select another wiper speed on the combi-
nation switch.
X Have the windscreen wipers checked at a
qualified specialist workshop. Windscreen wipers
107Lights and windscreen wipers Z
Page 186 of 337
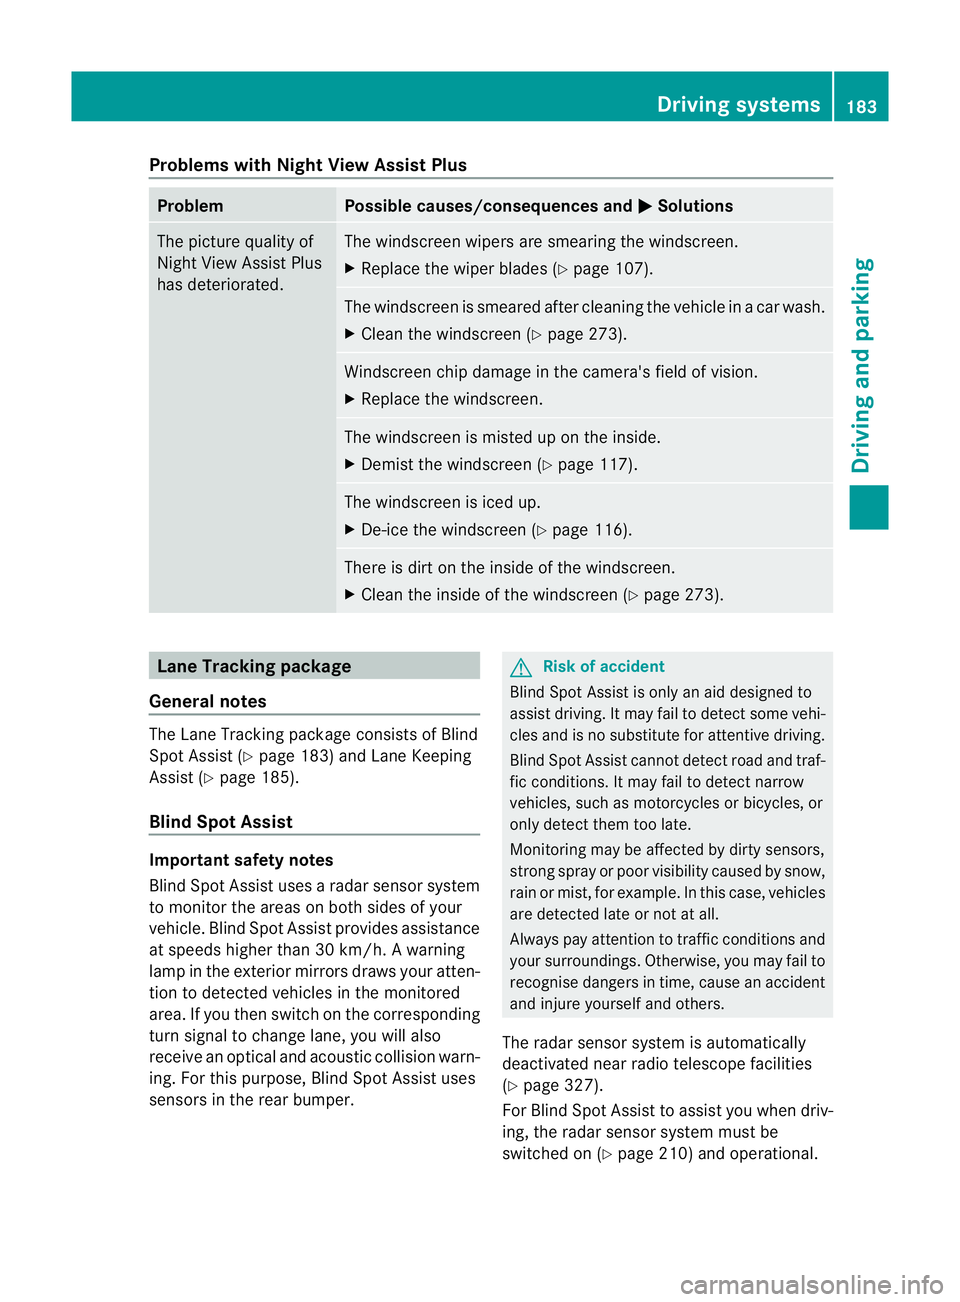
Problems with Night View Assist Plus
Problem Possible causes/consequences and
M Solutions
The picture quality of
Night View Assist Plus
has deteriorated. The windscreen wipers are smearing the windscreen.
X
Replace the wiper blades (Y page 107). The windscreen is smeared after cleaning the vehicle in a car wash.
X Cleant he windscreen (Y page 273). Windscreen chip damage in the camera's field of vision.
X
Replace the windscreen. The windscreen is misted up on the inside.
X
Demist the windscreen (Y page 117). The windscreen is iced up.
X
De-ice the windscreen (Y page 116). There is dirt on the inside of the windscreen.
X
Cleant he inside of the windscreen (Y page 273).Lane Tracking package
General notes The Lane Tracking package consists of Blind
Spot Assist (Y page 183) and Lane Keeping
Assist (Y page 185).
Blind Spot Assist Important safety notes
Blind Spot Assist uses a radar sensor system
to monitor the areas on both sides of your
vehicle. Blind Spot Assist provides assistance
at speeds higher than 30 km/h. A warning
lamp in the exterior mirrors draws your atten-
tion to detected vehicles in the monitored
area. If you then switch on the corresponding
turn signal to change lane, you will also
receive an optical and acoustic collision warn-
ing. For this purpose, Blind Spot Assist uses
sensors in the rear bumper. G
Risk of accident
Blind Spot Assist is only an aid designed to
assist driving. It may fail to detect some vehi-
cles and is no substitute for attentive driving.
Blind Spot Assist cannot detect road and traf-
fic conditions. It may fail to detect narrow
vehicles, such as motorcycles or bicycles, or
only detect them too late.
Monitoring may be affected by dirty sensors,
strong spray or poor visibility caused by snow,
rain or mist, for example. In this case, vehicles
are detected late or not at all.
Always pay attention to traffic conditions and
your surroundings. Otherwise, you may fail to
recognise dangers in time, cause an accident
and injure yourself and others.
The radar sensor system is automatically
deactivated near radio telescope facilities
(Y page 327).
For Blind Spot Assist to assist you when driv-
ing, the radar sensor system must be
switched on (Y page 210) and operational. Driving systems
183Driving and parking Z
Page 274 of 337
scraper. You could otherwise scratch or
damage the surfaces and protective film. H
Environmental note
Dispose of empty packaging and cleaning
cloths in an environmentally responsible man-
ner.
! Do not park up the vehicle for an extended
period straight after cleaning it, particularly
after having cleaned the wheels with wheel
cleaner. Wheel cleaners could cause
increased corrosion of the brake discs and
brake pads/linings. For this reason, you
should drive for a few minutes after clean-
ing. Braking heats the brake discs and
brake pads, thus drying them. The vehicle
can then be parked up. Care of the exterior
Automatic car wash G
Risk of accident
Braking efficiency is reduced after washing
the vehicle. This could cause an accident. For
this reason, following a car wash, drive with
particular care until the brakes are dry. G
Risk of accident
The vehicle is braked when the HOLD function
or DISTRONIC PLUS is activated. Therefore,
deactivate the HOLD function and DISTRONIC
PLUS before the vehicle is washed in an auto-
matic car wash.
You can wash the vehicle in an automatic car
wash from the very start.
If the vehicle is very dirty, pre-wash it before
cleaning it in an automatic car wash.
! In car washes with a towing mechanism,
make sure that the automatic transmission
is in transmission position N, otherwise the
vehicle could be damaged.
R Vehicles with a key:
do not remove the key from the ignition
lock. Do not open the driver's door or front-passenger door when the engine is
switched off. Otherwise, the automatic
transmission selects park position
P
automatically and locks the wheels. You
can prevent this by shifting the auto-
matic transmission to Nbeforehand.
R Vehicles with KEYLESS-GO:
do not open the driver's door or front-
passenger door when the engine is
switched off. Otherwise, the automatic
transmission selects park position P
automatically and locks the wheels.
Observe the following to make sure that the
automatic transmission stays in position N:
X Make sure the vehicle is stationary and the
ignition is switched off.
X Turn the key to position 2(Y page 129) in
the ignition lock.
Use the key instead of the Start/Stop but-
ton on vehicles with KEYLESS-GO.
X Depress and hold the brake pedal.
X Shift the automatic transmission to posi-
tion N.
X Release the brake pedal.
X Release the parking brake.
X Switch off the ignition and leave the key in
the ignition lock.
! Make sure that:
R the side windows and sliding sunroof are
closed completely.
R the blower for the ventilation/heating is
switched off (OFF button is depressed).
R the windscreen wiper switch is at posi-
tion 0.
The vehicle could otherwise be damaged.
After using an automatic car wash, wipe off
wax from the windscreen and the wiper
blades. This will prevent smears and reduce
wiping noises caused by residue on the wind-
screen. Care
271Maintenance and care Z
Page 276 of 337
Always have paintwork repairs performed
at a qualified specialis tworkshop, e.g. a
Mercedes-Benz Service Centre.
! Do not use wash programs with a hot wax
treatment under any circumstances.
i Use only insect remover and car shampoo
from the range of recommended and
approved Mercedes-Benz care products.
Cleaning the windows G
Risk of injury
Switch off the windscreen wipers and remove
the key from the ignition lock before cleaning
the windscreen or the wiper blades. On vehi-
cles with KEYLESS-GO, press the Start/Stop
button repeatedly until all indicator lamps in
the instrument cluster have gone off. The
windscreen wipers could otherwise move and
injure you.
X Clean the inside and outside of the win-
dows with a damp cloth and a cleaning
agent that is recommended and approved
by Mercedes-Benz.
! Do not use dry cloths, abrasive products,
solvents or cleaning agents containing sol-
vents to clean the inside of the windows.
Do not use hard object sto clean the insides
of the windows, e.g. an ice scraper or ring.
There is otherwise a risk of damaging the
windows.
! Clean the water drainage channels of the
windscreen and the rear window at regular
intervals. Deposits such as leaves, petals
and pollen may under certain circumstan-
ces prevent water from draining away.T his
can lead to corrosion damage and damage
to electronic components.
Cleaning the wiper blades G
Risk of injury
Switch off the windscreen wipers and remove
the key from the ignition lock before cleaning
the windscreen or the wiper blades. On vehi- cles with KEYLESS-GO, press the Start/Stop
button repeatedly until all indicator lamps in
the instrument cluster have gone off. The
windscreen wipers could otherwise move and
injure you.
! Do not pull on the wiper blade. Otherwise,
the wiper blade could be damaged.
! Do not clean wiper blades too often and
do not rub them too hard. Otherwise, the
graphite coating could be damaged. This
could cause wiper noise.
X Fold the wiper arms away from the wind-
screen.
X Cleant he wiper blades carefully using a
damp cloth.
X Fold the windscreen wipers back again
before switching on the ignition.
! Hold the wiper arm securely when folding
back. The windscreen could be damaged if
the wiper arm hits against it suddenly.
Cleaning the exterior lighting X
Cleant he plastic lenses of the exterior
lighting using a wet sponge and a mild
cleaning agent, e.g. Mercedes-Ben zcar
shampoo or cleaning cloths.
! Only use cleaning agents or cleaning
cloths that are suitable for plastic lenses.
Unsuitable cleaning agents or cleaning
cloths could scratch or damage the plastic
lenses of the exterior lighting. Care
273Maintenance and care Z