Page 95 of 371
Knowing your vehicle
86
3
1
2
3
4
5
6
7
8
9
Outside rearview mirror heater
(if equipped)
The outside rearview mirror heater is
actuated in connection with the rear
window defroster. To heat the outside
rearview mirror glass, push the but-
ton for the rear window defroster.
The rearview mirror heater (and rear
window defroster) will not operate
unless the engine is running.
The outside rearview mirror glass will
be heated for defrosting or defogging
and will give you improved rear
vision in inclement weather condi-
tions. Push the button again to turn
the heater off. The outside rearview
mirror heater automatically turns off
after 20 minutes.
Inside rearview mirror
Adjust the rearview mirror to center
on the view through the rear window.
Make this adjustment before you
start driving.
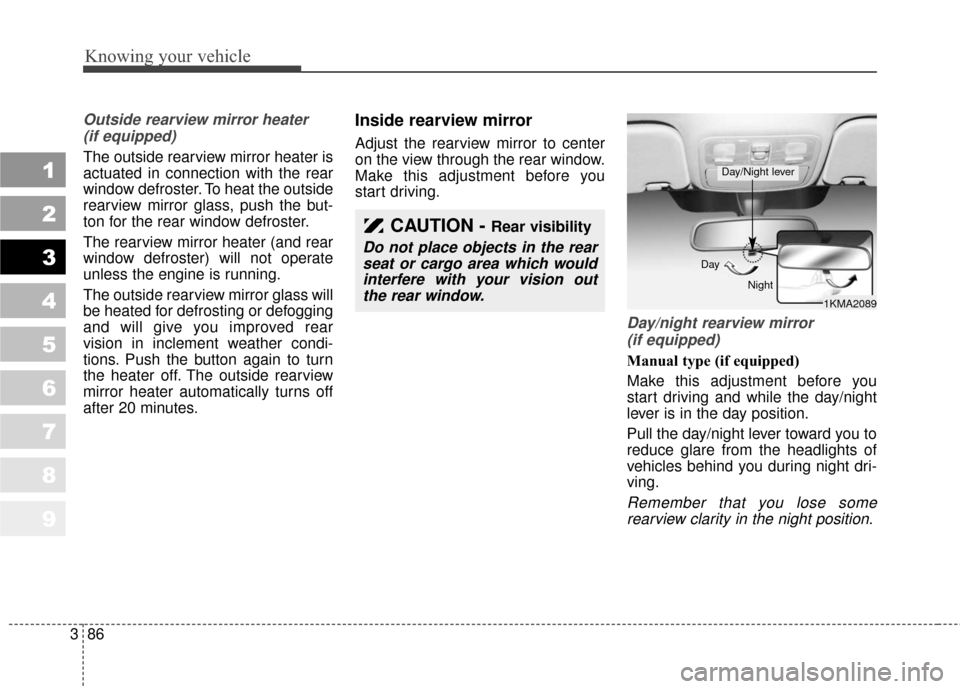
Day/night rearview mirror (if equipped)
Manual type (if equipped)
Make this adjustment before you
start driving and while the day/night
lever is in the day position.
Pull the day/night lever toward you to
reduce glare from the headlights of
vehicles behind you during night dri-
ving.
Remember that you lose somerearview clarity in the night position.
CAUTION - Rear visibility
Do not place objects in the rearseat or cargo area which wouldinterfere with your vision outthe rear window.
1KMA2089
Day
Night
Day/Night lever
Page 96 of 371

387
1
2
3
4
5
6
7
8
9
Knowing your vehicle
Electric type (if equipped)
The electric day/night rearview mir-
ror automatically controls the glare
from the headlights of the car behind
you in nighttime or low light driving
conditions. The sensor mounted in
the mirror senses the light level
around the vehicle, and through a
chemical reaction, automatically
controls the headlight glare from
vehicles behind you.
When the engine is running, the
glare is automatically controlled by
the sensor mounted in the rearview
mirror.
Whenever the shift lever is shifted
into reverse (R), the mirror will auto-
matically go to the brightest setting in
order to improve the drivers view
behind the vehicle.
✽ ✽NOTICE
When cleaning the mirror, use a
paper towel or similar material
dampened with glass cleaner. Do not
spray glass cleaner directly on the
mirror as that may cause the liquid
cleaner to enter the mirror housing.
Type A (with compass)
To operate the electric rearview mir-
ror:
Press and hold the ON/OFF button
(
➀) for 3~6 seconds to turn the auto-
matic- dimming function on. The mir-
ror indicator light will illuminate.
Press and hold the ON/OFF button
(
➀) for 3~6 seconds once again to
turn the automatic- dimming function
off. The mirror indicator light will turn
off. Type B (with homelink wireless
control system)
To operate the electric rearview mir-
ror:
Press the “I” button (
➀) to turn the
automatic- dimming function on. The
mirror indicator light will illuminate.
Press the “O” button (
➁) to turn the
automatic- dimming function off. The
mirror indicator light will turn off.
2GHN3310➀➁1KMA3084A➀
Page 186 of 371
439
Driving your vehicle
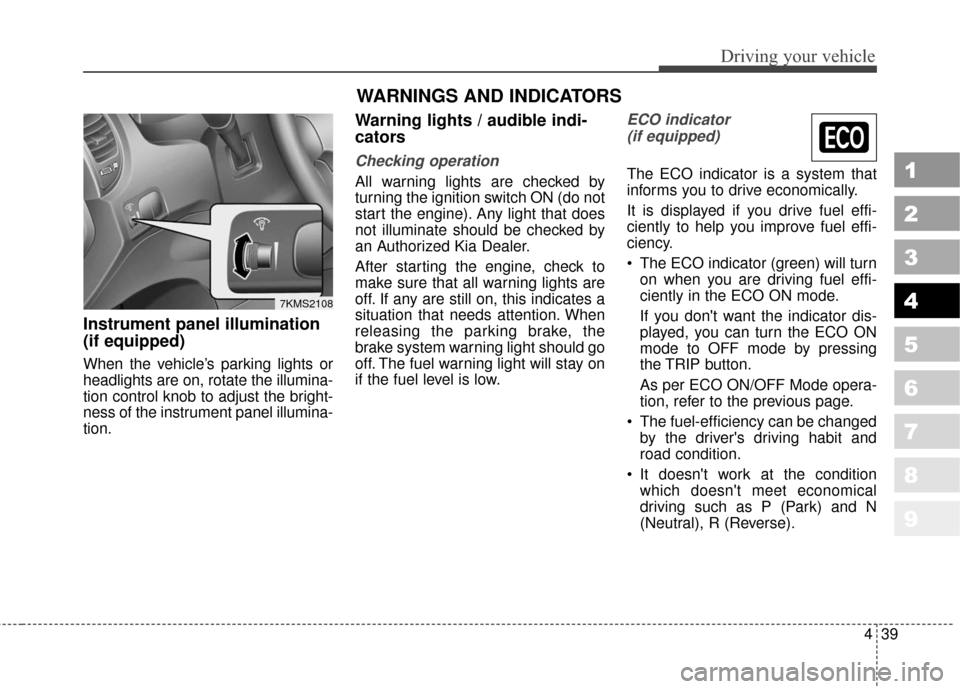
Instrument panel illumination
(if equipped)
When the vehicle’s parking lights or
headlights are on, rotate the illumina-
tion control knob to adjust the bright-
ness of the instrument panel illumina-
tion.
Warning lights / audible indi-
cators
Checking operation
All warning lights are checked by
turning the ignition switch ON (do not
start the engine). Any light that does
not illuminate should be checked by
an Authorized Kia Dealer.
After starting the engine, check to
make sure that all warning lights are
off. If any are still on, this indicates a
situation that needs attention. When
releasing the parking brake, the
brake system warning light should go
off. The fuel warning light will stay on
if the fuel level is low.
ECO indicator (if equipped)
The ECO indicator is a system that
informs you to drive economically.
It is displayed if you drive fuel effi-
ciently to help you improve fuel effi-
ciency.
The ECO indicator (green) will turn on when you are driving fuel effi-
ciently in the ECO ON mode.
If you don't want the indicator dis-
played, you can turn the ECO ON
mode to OFF mode by pressing
the TRIP button.
As per ECO ON/OFF Mode opera-
tion, refer to the previous page.
The fuel-efficiency can be changed by the driver's driving habit and
road condition.
It doesn't work at the condition which doesn't meet economical
driving such as P (Park) and N
(Neutral), R (Reverse).1
2
3
4
5
6
7
8
9
7KMS2108
WARNINGS AND INDICATORS
Page 190 of 371
443
Driving your vehicle
1
2
3
4
5
6
7
8
9
2. With the engine stopped, checkthe brake fluid level immediately
and add fluid as required. Then
check all brake components for
fluid leaks.
3. Do not drive the vehicle if leaks are found, the warning light
remains on or the brakes do not
operate properly. Have it towed to
any Authorized Kia Dealer for a
brake system inspection and nec-
essary repairs.
To check bulb operation, check
whether the parking brake and brake
fluid warning light illuminates when
the ignition switch is in the ON posi-
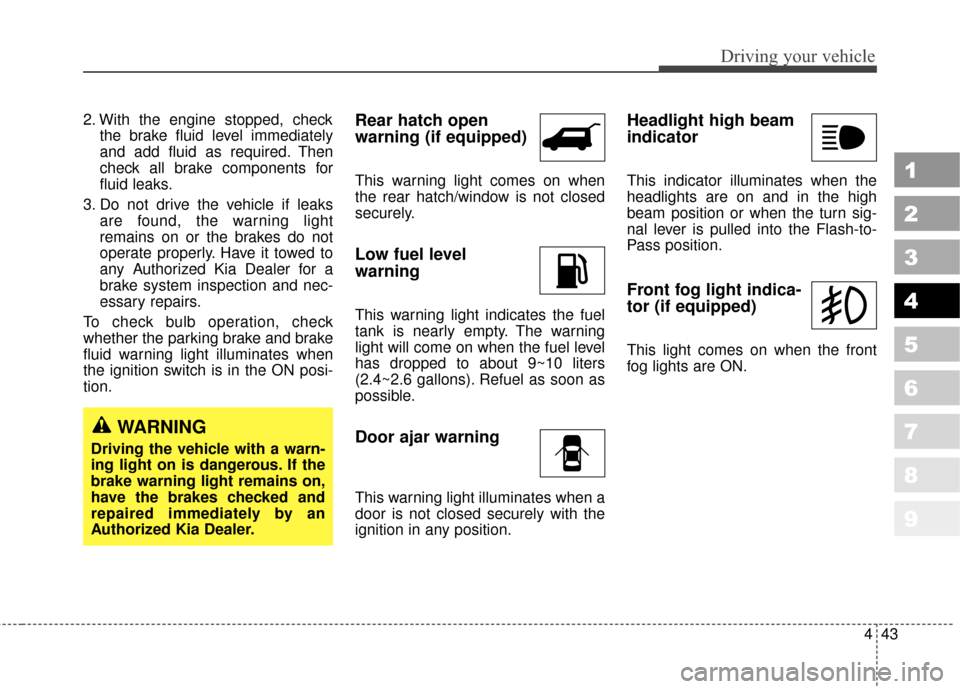
tion.Rear hatch open
warning (if equipped)
This warning light comes on when
the rear hatch/window is not closed
securely.
Low fuel level
warning
This warning light indicates the fuel
tank is nearly empty. The warning
light will come on when the fuel level
has dropped to about 9~10 liters
(2.4~2.6 gallons). Refuel as soon as
possible.
Door ajar warning
This warning light illuminates when a
door is not closed securely with the
ignition in any position.
Headlight high beam
indicator
This indicator illuminates when the
headlights are on and in the high
beam position or when the turn sig-
nal lever is pulled into the Flash-to-
Pass position.
Front fog light indica-
tor (if equipped)
This light comes on when the front
fog lights are ON.
WARNING
Driving the vehicle with a warn-
ing light on is dangerous. If the
brake warning light remains on,
have the brakes checked and
repaired immediately by an
Authorized Kia Dealer.
Page 201 of 371
Driving your vehicle
54
4
1
2
3
4
5
6
7
8
9
Battery saver function
The purpose of this feature is to
prevent the battery from being dis-
charged. The system automatically
turns off the headlights and park-
ing lights when the driver removes
the ignition key and opens the dri-
ver- side door.
With this feature, the parklight will be turned off automatically if the
driver parks on the side of road at
night.
If necessary, to keep the lights on
when the ignition key is removed,
perform the following :
1) Open the driver-side door.
2) Turn the parklights OFF and ON again using the light switch on the
steering column.
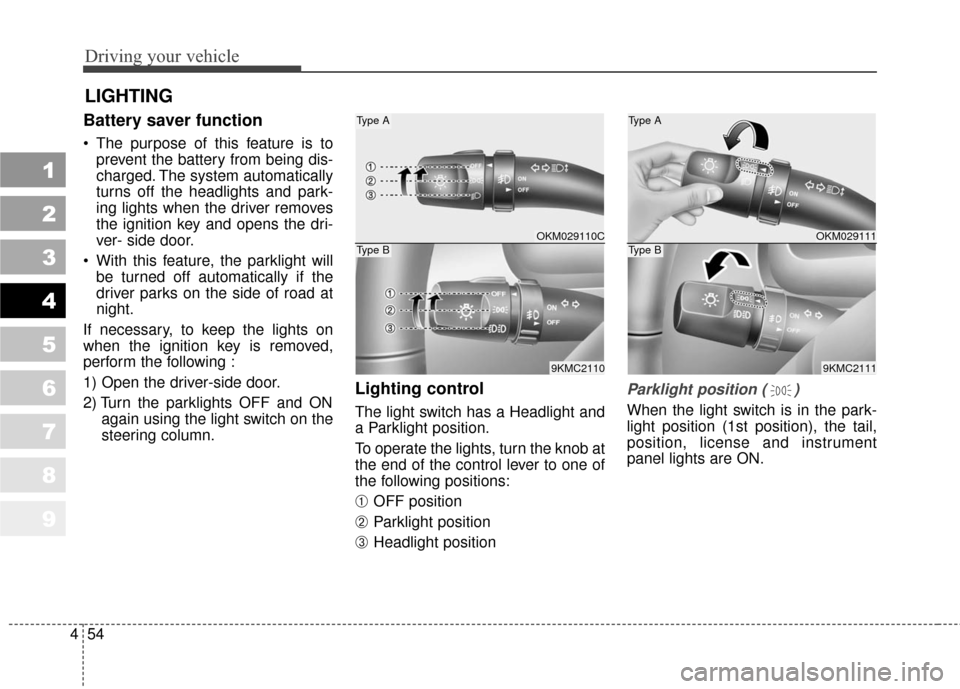
Lighting control
The light switch has a Headlight and
a Parklight position.
To operate the lights, turn the knob at
the end of the control lever to one of
the following positions:
➀ OFF position
➁ Parklight position
➂ Headlight position
Parklight position ( )
When the light switch is in the park-
light position (1st position), the tail,
position, license and instrument
panel lights are ON.
LIGHTING
OKM029111
9KMC2111
Type A
Type BOKM029110C
9KMC2110
Type A
Type B
Page 202 of 371
455
Driving your vehicle
1
2
3
4
5
6
7
8
9
Headlight position
When the light switch is in the head-
light position (2nd position) the head,
tail, position, license and instrument
panel lights are ON.
High - beam operation
To turn on the high beam headlights,
push the lever forward.
The high-beam indicator will light
when the headlight high beams are
switched on.
To prevent the battery from being
discharged, do not leave the lights
on for a prolonged time while the
engine is not running.
Flashing headlights
To flash the headlights, pull the lever
towards you. It will return to the nor-
mal (low-beam) position when
released. The headlight switch does
not need to be on to use this flashing
feature.
OKM029112
9KMC2112
Type A
Type BOKM029115
9KMC2115
Type A
Type BOKM029114
9KMC2114
Type A
Type B
Page 204 of 371
457
Driving your vehicle
1
2
3
4
5
6
7
8
9
✽ ✽
NOTICE
When in operation, the fog lights
consume large amounts of vehicle
electrical power. Only use the fog
lights when visibility is poor.
Unnecessary battery and generator
drain could occur if the fog lights
are used excessively.
Daytime running light
(if equipped)
Daytime Running Lights (DRL) can
make it easier for others to see the
front of your vehicle during the day.
DRL can be helpful in many different
driving conditions, and it is especial-
ly helpful after dawn and before sun-
set.
The DRL system will make your
high-beam headlights turn OFF
when:
1. The head light switch is ON.
2. The parking brake engaged.
3. Engine stops.
Page 241 of 371
59
Driving tips
1
2
3
4
5
6
7
8
9
Driving at night
Because night driving presents more
hazards than driving in the daylight,
here are some important tips to
remember:
Slow down and keep more dis-tance between you and other vehi-
cles, as it may be more difficult to
see at night, especially in areas
where there may not be any street
lights.
Adjust your mirrors to reduce the glare from other driver's head-
lights. Keep your headlights clean and
properly aimed on vehicles not
equipped with the automatic head-
light aiming feature. Dirty or
improperly aimed headlights will
make it much more difficult to see
at night.
Avoid staring directly at the head- lights of oncoming vehicles. You
could be temporarily blinded, and it
will take several seconds for your
eyes to readjust to the darkness.WARNING- Spinning tires
Do not spin the wheels, espe-
cially at speeds more than 56
km/h (35 mph). Spinning the
wheels at high speeds when the
vehicle is stationary could
cause a tire to overheat, explode
and injure bystanders.