2010 KIA Sportage warning light
[x] Cancel search: warning lightPage 191 of 371
Driving your vehicle
44
4
1
2
3
4
5
6
7
8
9
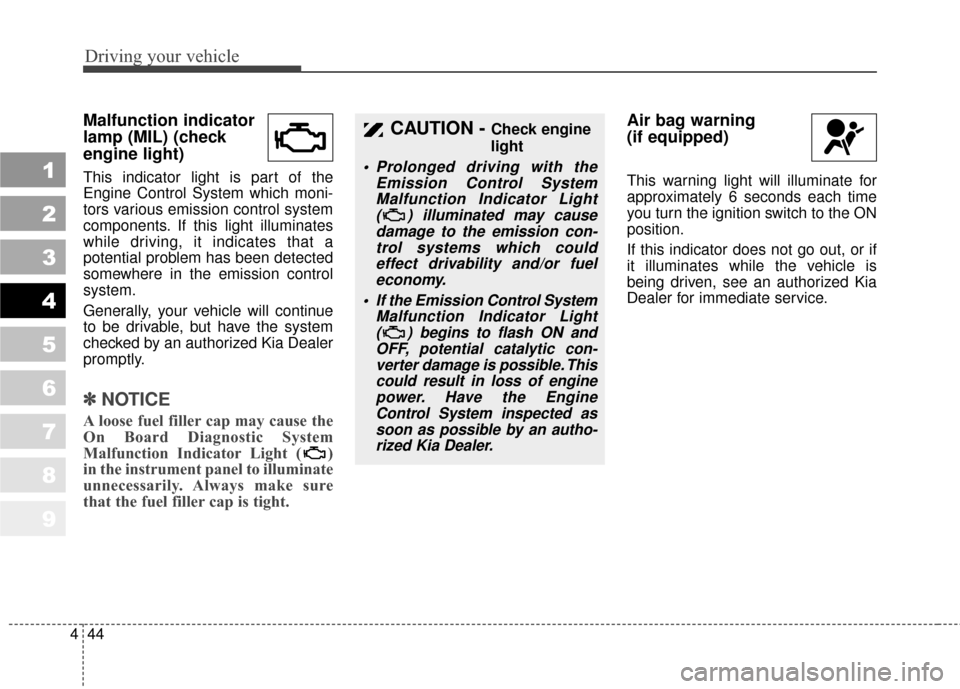
Malfunction indicator
lamp (MIL) (check
engine light)
This indicator light is part of the
Engine Control System which moni-
tors various emission control system
components. If this light illuminates
while driving, it indicates that a
potential problem has been detected
somewhere in the emission control
system.
Generally, your vehicle will continue
to be drivable, but have the system
checked by an authorized Kia Dealer
promptly.
✽ ✽
NOTICE
A loose fuel filler cap may cause the
On Board Diagnostic System
Malfunction Indicator Light ( )
in the instrument panel to illuminate
unnecessarily. Always make sure
that the fuel filler cap is tight.
Air bag warning
(if equipped)
This warning light will illuminate for
approximately 6 seconds each time
you turn the ignition switch to the ON
position.
If this indicator does not go out, or if
it illuminates while the vehicle is
being driven, see an authorized Kia
Dealer for immediate service.
CAUTION - Check engine
light
Prolonged driving with the
Emission Control SystemMalfunction Indicator Light ( ) illuminated may causedamage to the emission con-trol systems which couldeffect drivability and/or fueleconomy.
If the EmissionControl System
Malfunction Indicator Light ( ) begins to flash ON andOFF, potential catalytic con-verter damage is possible. Thiscould result in loss of enginepower. Have the EngineControl System inspected assoon as possible by an autho-rized Kia Dealer.
Page 193 of 371

Driving your vehicle
46
4
1
2
3
4
5
6
7
8
9
Low washer fluid level
warning indicator
(If equipped)
This warning light indicates the
washer fluid reservoir is near empty.
Refill the washer fluid as soon as
possible.
4WD system warning
(if equipped)
When the key is turned to the “ON”
position, the 4WD system warning
light will come on and then go off in a
few seconds.
4WD LOCK indicator
light (if equipped)
4WD LOCK indicator light is illumi-
nated when the 4WD LOCK button is
pushed. The purpose of this 4WD
LOCK mode is to increase the drive
power when driving on dry road sur-
face, wet pavement, snow-covered
roads and/or off-road. 4WD LOCK
indicator light is turned off by push-
ing the button once again
CAUTION
If the 4WD system warning light
() blinks, this indicates that
there is a malfunction in the 4WD system. If this occurs, haveyour vehicle checked by anAuthorized Kia Dealer as soonas possible.
4WD
LOCK
CAUTION
Do not use 4WD LOCK mode on
dry paved roads or highway, itcan cause noise, vibration ordamage of 4WD related parts.
Page 206 of 371
459
Driving your vehicle
1
2
3
4
5
6
7
8
9
Windshield wipers
Operates as follows when the igni-
tion switch is turned ON.: For a single wiping cycle,push the lever forward and
release it with the lever in
the OFF position. The wipers
will operate continuously if
the lever is pushed upward
and held.
OFF : Wiper is not in operation
INT : Wiper operates intermittently at the same wiping intervals.
Use this mode in a light rain or
mist. To vary the speed set-
ting, turn the speed control
knob. (if equipped)
LO : Normal wiper speed
HI : Fast wiper speed
✽ ✽ NOTICE
Before using the windshield wipers
when there is a heavy accumulation
of snow or ice on the windshield,
defrost the windshield for about 10
minutes, or until the snow or ice is
removed. This will help ensure prop-
er windshield wiper operation.
Windshield washers
In the OFF position, pull the lever
gently toward you to spray washer
fluid on the windshield and to run the
wipers 2-3 cycles.
Use this function when the wind-
shield is dirty.
The spray and wiper operation will
continue until you release the lever.
If the washer does not work, check
the washer fluid level. If the fluid level
is not sufficient, you will need to add
appropriate non-abrasive windshield
washer fluid to the washer reservoir.
The reservoir filler neck is located in
the front of the engine compartment
on the passenger side.
✽ ✽NOTICE
To prevent possible damage to the
washer pump, do not operate the
washer when the fluid reservoir is
empty.
/ MIST
CAUTION
To prevent possible damage
to the wipers or windshield,do not operate the wiperswhen the windshield is dry.
To prevent damage to the wiper blades, do not use gaso-line, kerosene, paint thinner,or other solvents on or nearthem.
To prevent damage to the wiper arms and other compo-nents, do not attempt to movethe wipers manually.
WARNING- Windshield
washer
Do not use the washer in freez-
ing temperatures without first
warming the windshield with the
defrosters; the washer solution
could freeze on contact with the
windshield and obscure your
vision.
Page 208 of 371

461
Driving your vehicle
1
2
3
4
5
6
7
8
9
Rear window wiper and wash-
er switch (if equipped)
The rear window wiper and washer
switch is located at the end of the
wiper and washer switch lever. Turn
the switch to desired position to
operate the rear wiper and washer.
If the rear hatch window is open
( ), the rear wiper will not oper-
ate. Check the rear hatch window
warning light in the instrument clus-
ter, and make sure the rear hatch
window is closed completely.- Spraying washer fluid and wip-ing
OFF - Wiper is not in operation
INT - Intermittent wiper operation (if equipped)
ON - Normal wiper opertion - Spraying washer fluid and wip-ing The defroster heats the window to
remove frost, fog and thin ice from
the interior and exterior of the rear
window, while engine is running.
✽ ✽
NOTICE
• To prevent damage to the conduc-
tors bonded to the inside surface
of the rear window, never use
sharp instruments or window
cleaners containing abrasives to
clean the window.
• To prevent the battery from being discharged, the rear window
defroster will only operate when
the engine is running.
• If you want to defrost and defog on the front windshield, refer to
“Windshield Defrosting and
Defogging” in this section.
To activate the rear window
defroster, press the rear window
defroster button located in the center
console switch panel. The indicator
on the rear window defroster button
illuminates when the defroster is ON.
If there is heavy accumulation of
snow on the rear window, brush it off
before operating the rear defroster.
OKM049126 OKM049125
Type A
Type B
DEFROSTER (IF EQUIPPED)
Page 209 of 371
Driving your vehicle
62
4
1
2
3
4
5
6
7
8
9
The rear window defroster automati-
cally turns off after 20 minutes or
when the ignition switch is turned off.
To turn off the defroster, press the
rear window defroster button again.
Outside mirror heater
(if equipped)
There is no control button for the out-
side mirror heater, instead the out-
side mirror heater automatically
turns on when the rear window
defroster is turned on.
Front windshield deicer(if equipped)
There is no control button for the
front windshield deicer, instead the
front windshield deicer automatically
turns on when the rear window
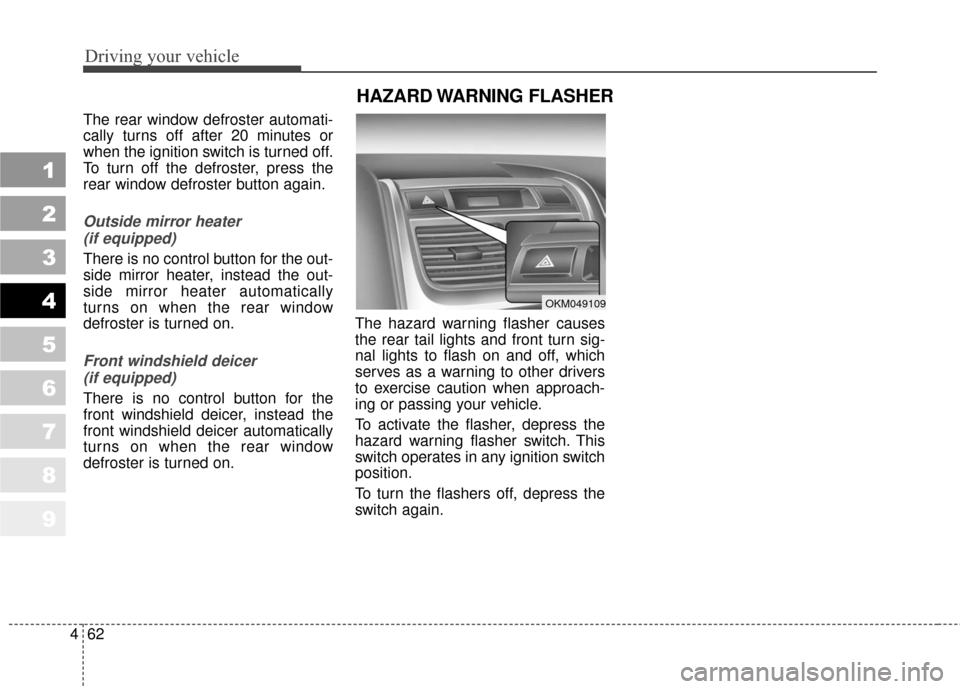
defroster is turned on. The hazard warning flasher causes
the rear tail lights and front turn sig-
nal lights to flash on and off, which
serves as a warning to other drivers
to exercise caution when approach-
ing or passing your vehicle.
To activate the flasher, depress the
hazard warning flasher switch. This
switch operates in any ignition switch
position.
To turn the flashers off, depress the
switch again.
HAZARD WARNING FLASHER
OKM049109
Page 214 of 371
467
Driving your vehicle
1
2
3
4
5
6
7
8
9
It should be noted that prolonged
operation of the heating in recir-
culated air position will cause fog-
ging of the windshield and side
windows and the air within the
passenger compartment will
become stale.
In addition, prolonged use of the
air conditioning with the “recircu-
lated air position” selected, will
result in excessively dry air in the
passenger compartment.
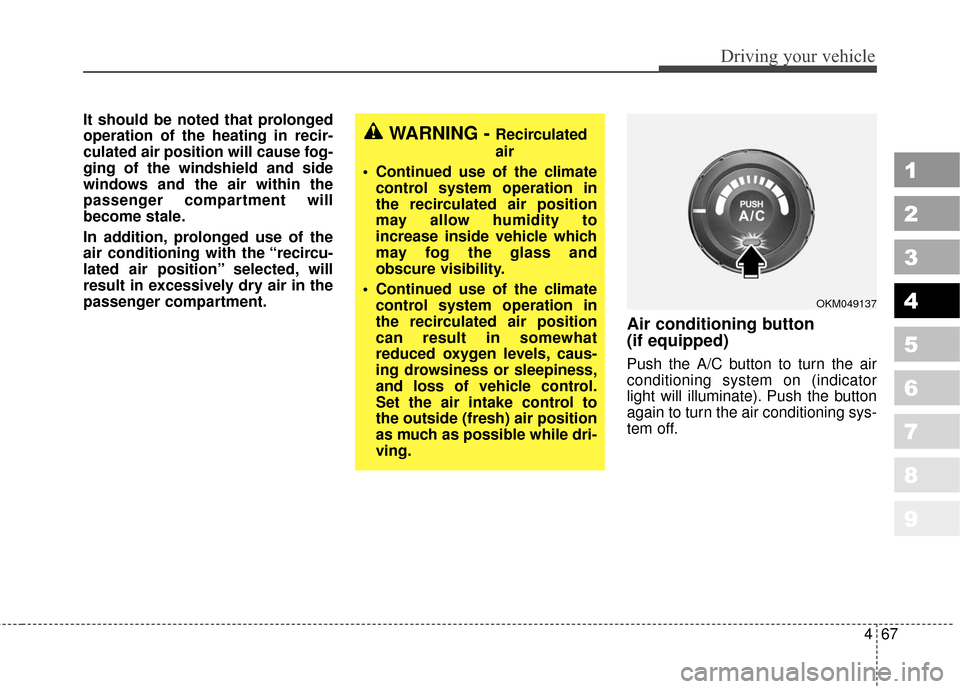
Air conditioning button
(if equipped)
Push the A/C button to turn the air
conditioning system on (indicator
light will illuminate). Push the button
again to turn the air conditioning sys-
tem off.
WARNING - Recirculated
air
Continued use of the climate control system operation in
the recirculated air position
may allow humidity to
increase inside vehicle which
may fog the glass and
obscure visibility.
Continued use of the climate control system operation in
the recirculated air position
can result in somewhat
reduced oxygen levels, caus-
ing drowsiness or sleepiness,
and loss of vehicle control.
Set the air intake control to
the outside (fresh) air position
as much as possible while dri-
ving.
OKM049137
Page 237 of 371

55
Driving tips
BEFORE DRIVING
Before entering vehicle:
Be sure that all windows, outsidemirror(s), and outside lights are
clean.
Check the condition of the tires.
Check under the vehicle for any sign of leaks.
Be sure there are no obstacles behind you if you intend to back up.
Necessary inspections
Fluid levels, such as engine oil,
engine coolant, brake fluid, and
washer fluid should be checked on a
regular basis, with the exact interval
depending on the fluid. Further
details are provided in Section 7,
Maintenance.
Before starting
Close and lock all doors.
Position the seat so that all con-trols are easily reached.
Adjust the inside and outside rearview mirrors.
Be sure that all lights work.
Check all gauges.
Check the operation of warning lights when the ignition switch is
turned to the ON position.
Release the parking brake and make sure the brake warning light
goes out.
For safe operation, be sure you are
familiar with your vehicle and its
equipment.
1
2
3
4
5
6
7
8
9
WARNING- Driving under
the influence of alcohol or
drugs
Drinking and driving is danger-
ous. Drunk driving is the num-
ber one contributor to the high-
way death toll each year. Even a
small amount of alcohol will
affect your reflexes, perceptions
and judgement. Driving while
under the influence of drugs is
as dangerous or more danger-
ous than driving drunk.
You are much more likely to
have a serious accident if you
drink or take drugs and drive.
If you are drinking or taking
drugs, don’t drive. Do not ride
with a driver who has been
drinking or taking drugs.
Choose a designated driver or
call a cab.
Page 240 of 371
Driving tips
85
SPECIAL DRIVING CONDITIONS
Hazardous driving conditions
When hazardous driving conditions
are encountered such as water,
snow, ice, mud, sand, or similar haz-
ards, follow these suggestions:
Drive cautiously and allow extradistance for braking.
Avoid sudden movements in brak- ing or steering.
When braking with non-ABS brakes pump the brake pedal with
a light up-and-down motion until
the vehicle is stopped. If stalled in snow, mud, or sand,
use second gear. Accelerate slow-
ly to avoid spinning the drive
wheels.
Use sand, rock salt, tire chains, or other non-slip material under the
drive wheels to provide traction
when stalled in ice, snow, or mud.
Rocking the vehicle
If it is necessary to rock the vehicle
to free it from snow, sand, or mud,
first turn the steering wheel right and
left to clear the area around your
front wheels. Then, shift back and
forth between 1 (First) and R
(Reverse) in vehicles equipped with
a manual transaxle or R (Reverse)
and any forward gear in vehicles
equipped with an automatic
transaxle. Do not race the engine,
and spin the wheels as little as pos-
sible. If you are still stuck after a few
tries, have the vehicle pulled out by a
tow vehicle to avoid engine overheat-
ing and possible damage to the
transaxle.
✽ ✽ NOTICE
Prolonged rocking may cause engine
over-heating, transaxle damage or
failure, and tire damage.
1
2
3
4
5
6
7
8
9
WARNING - Downshifting
Downshifting with an automatic
transaxle, while driving on slip-
pery surfaces can cause an
accident. The sudden change in
tire speed could cause the tires
to skid. Be careful when down-
shifting on slippery surfaces.
CAUTION - ABS
Do not pump the brake pedal on a vehicle equipped with ABS.