2010 KIA Sportage stop start
[x] Cancel search: stop startPage 6 of 371
13
1
2
3
4
5
6
7
8
9
Introduction
VEHICLE HANDLING
INSTRUCTIONS
As with other vehicles of this type,
failure to operate this vehicle correct-
ly may result in loss of control, an
accident or vehicle rollover.
Specific design characteristics (high-
er ground clearance, track, etc.) give
this vehicle a higher center of gravity
than other types of vehicles. In other
words they are not designed for cor-
nering at the same speeds as con-
ventional 2-wheel drive vehicles.
Avoid sharp turns or abrupt maneu-
vers. Again, failure to operate this
vehicle correctly may result in loss of
control, an accident or vehicle
rollover.Be sure to read the “on-
pavement” and “off-road” driving
guidelines, in section 5 of this
manual.
VEHICLE BREAK-IN
PROCESS
No special break-in period is needed.
By following a few simple precautions
for the first 1,000 km (600 miles) you
may add to the performance, econo-
my and life of your vehicle.
Do not race the engine.
Do not maintain a single speed for long periods of time, either fast or
slow. Varying engine speed is
needed to properly break-in the
engine.
Avoid hard stops, except in emer- gencies, to allow the brakes to seat
properly.
Avoid full-throttle starts.
Page 14 of 371
35
Knowing your vehicle
1
2
3
4
5
6
7
8
9
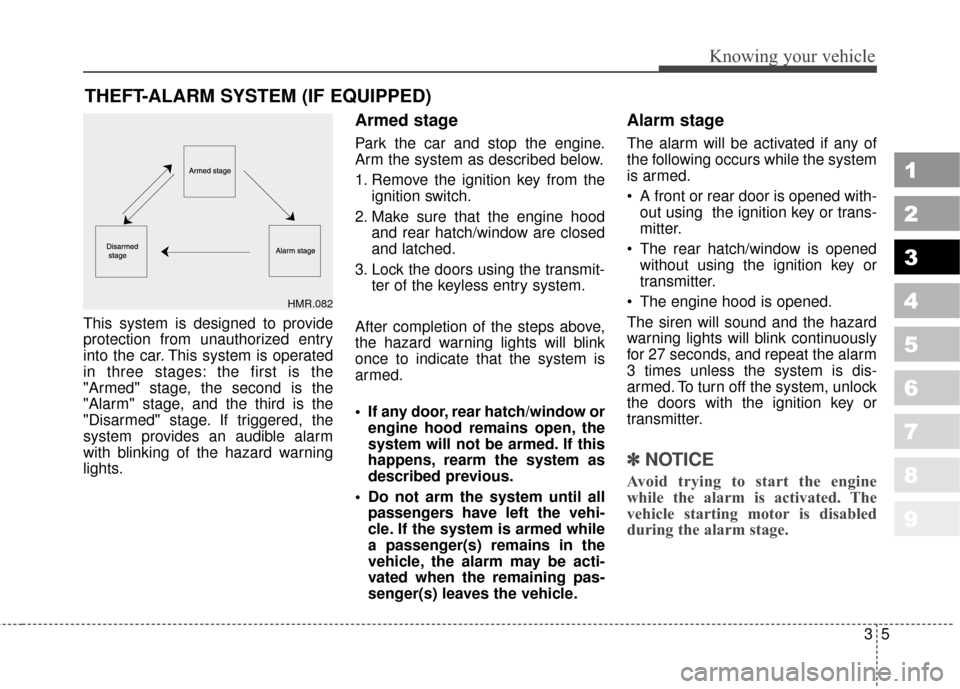
This system is designed to provide
protection from unauthorized entry
into the car. This system is operated
in three stages: the first is the
"Armed" stage, the second is the
"Alarm" stage, and the third is the
"Disarmed" stage. If triggered, the
system provides an audible alarm
with blinking of the hazard warning
lights.
Armed stage
Park the car and stop the engine.
Arm the system as described below.
1. Remove the ignition key from theignition switch.
2. Make sure that the engine hood and rear hatch/window are closed
and latched.
3. Lock the doors using the transmit- ter of the keyless entry system.
After completion of the steps above,
the hazard warning lights will blink
once to indicate that the system is
armed.
• If any door, rear hatch/window or engine hood remains open, the
system will not be armed. If this
happens, rearm the system as
described previous.
Do not arm the system until all passengers have left the vehi-
cle. If the system is armed while
a passenger(s) remains in the
vehicle, the alarm may be acti-
vated when the remaining pas-
senger(s) leaves the vehicle.
Alarm stage
The alarm will be activated if any of
the following occurs while the system
is armed.
A front or rear door is opened with-out using the ignition key or trans-
mitter.
The rear hatch/window is opened without using the ignition key or
transmitter.
The engine hood is opened.
The siren will sound and the hazard
warning lights will blink continuously
for 27 seconds, and repeat the alarm
3 times unless the system is dis-
armed. To turn off the system, unlock
the doors with the ignition key or
transmitter.
✽ ✽ NOTICE
Avoid trying to start the engine
while the alarm is activated. The
vehicle starting motor is disabled
during the alarm stage.
THEFT-ALARM SYSTEM (IF EQUIPPED)
HMR.082
Page 16 of 371
37
Knowing your vehicle
1
2
3
4
5
6
7
8
9
To deactivate the immobilizer sys-
tem:
Insert the ignition key into the key
cylinder and turn it to the ON posi-
tion.
To activate the immobilizer sys-
tem:
Turn the ignition key to the OFF posi-
tion. The immobilizer system acti-
vates automatically. Without a valid
ignition key for your vehicle, the
engine will not start.✽ ✽NOTICE
When starting the engine, do not use
the key with other immobilizer keys
around. Otherwise the engine may
not start or may stop soon after it
starts. Keep each key separately not
to have any malfunction after you
receive your new vehicle.
Limp home (override) proce-
dure
When you turn the ignition key to the
ON position, if the IMMO indicator
goes off after blinking 5 times, your
transponder equipped in the ignition
key is out of order. You cannot start
the engine without the lime home pro-
cedure. To start the engine, you have
to input your password by using the
ignition switch.
The following procedure is how to
input your password of “2345” as an
example.
1. Turn the ignition key to the ON posi-
tion. The IMMO indicator ( ) will
blink 5 times and go off indicating
the beginning of the limp home pro-
cedure.
2. Turn the ignition key to the ACC position.
3. To enter the first digit (in this example “2”), turn the ignition key
to the ON and ACC position twice.
Perform the same procedure for
the next digits between 3 seconds
and 10 seconds (for example, for
“3”, turn the ignition ON and ACC
3 times).
CAUTION
Do not put metal accessoriesnear the key or ignition switch.
The engine may not start for themetal accessories may interruptthe transponder signal fromnormally transmitting.
WARNING
In order to prevent theft of your
vehicle, do not leave spare keys
anywhere in your vehicle. Your
Immobilizer password is a cus-
tomer unique password and
should be kept confidential. Do
not leave this number anywhere
in your vehicle.
Page 127 of 371
Knowing your vehicle
118
3
1
2
3
4
5
6
7
8
9
6. RANDOM Playback Button
Press the button for less than 0.8
second to start or stop the random
playback of the songs in the current
folder.
Press the button for more than 0.8
second to randomly play the entire
songs in the USB device.
Press the button again to cancel the
mode.
7. REPEAT Selection Button
Press the button for less than 0.8
second to repeat the song currently
played.
Press the button for more than 0.8
second to repeat the entire songs in
the USB device.
8. SCAN Selection Button
Plays 10 seconds of each song in the
USB device.
Press the button once again to can-
cel scanning.
Page 139 of 371
Knowing your vehicle
130
3
1
2
3
4
5
6
7
8
9
In case USB is connected to the mul-
tiple terminal inside the console on
the right hand side of the driver’s
seat. When USB is connected, the
‘USB’ icon will be displayed on the
top right corner of the display screen.
1. AUX Selection Button
If USB is not connected, it switches
to the USB mode from the Radio and
CD mode to play the song files
stored in the USB.
If AUX is not connected, it is invalid
key.
2. Track Moving Button
Press the [SEEK ] button for
less than 0.8 second to play from
the beginning of the song currently
played.
Press the button for less than 0.8
second and press it again within 1
second to move to and play the pre-
vious track.
Press the button for 0.8 second or
longer to play the song in reverse
direction in fast speed. Press the [SEEK ] button for
less
than 0.8 second to move to the
next track.
Press the button for 0.8 second or
longer to play the song in forward
direction in fast speed.
3. INFO Selection Button
Displays the information of the file
currently played in the order of FILE
NAME
➟TITLE➟ARTIST➟ALBUM➟
FOLDER➟TOTAL FILE➟FILE NAME
➟… (Displays no information if the
file has no song information.)
4. Folder moving Button
Moves [FLDR ] button child fold- er of the current folder and displays
the first song in the folder. Press
TUNE/ENTER button to move to
the folder displayed. It will play the
first song in the folder.
Moves [FLDR ] button parent folder and displays the first song in
the folder. Press TUNE/ENTER
button to move to the folder dis-
played. It will play the first song in
the folder.
5. TUNE/ENTER Button
Turn this button clockwise to display
the songs next to the currently
played song.
Turn the button counterclockwise to
display the songs before the current-
ly played song.
Press the button to skip to and play
the selected song.
6. RANDOM Playback Button
Press the button for less than 0.8
second to start or stop the random
playback of the songs in the current
folder.
Press the button for more than 0.8
second to randomly play the entire
songs in the USB device.
Press the button again to cancel the
mode.
Page 146 of 371
3137
Knowing your vehicle
1
2
3
4
5
6
7
8
9
How to Use SIRIUS Satellite
Radio
Your vehicle is equipped with a 3
month complimentary period of SIR-
IUS Satellite Radio so you have
access to over 130 channels of
music, information, and entertain-
ment programming.
Activation
In order to extend or reactivate your
subscription to SIRIUS Satellite
Radio, you will need to contact SIR-
IUS Customer Care at 888-539-
7474. Have your 12 digit SID
(Sirius Identification Number)/ESN
(Electronic Serial Number) ready. To
retrieve the SID/ESN, turn on the
radio, press the “SAT” button, and
tune to channel zero. Please note
that the vehicle will need to be turned
on, in Sirius mode, and have an
unobstructed view of the sky in order
for the radio to receive the activation
signal.
1. SATELLITE RADIO Selectionbutton (SIRIUS Satellite
Radio)
Press the [SAT] button to switch to
SIRIUS Satellite Radio. It cycles
through the different bands as noted
below.
SAT1➝SAT2➝SAT3➝SAT1
2. Channel Selection Button
When the [SEEK ] button is
pressed, it decreases automatically
select channel.
When the [SEEK ] button is pressed, it increases automatically
select channel.
3. Power ON/OFF button and Volume knob
Turns on/off the radio when the IGNI-
TION SWITCH is on ACC or ON. If
the knob is turned to the right, it
increases the volume; if it is turned to
the left, it decreases the volume.
4. SCAN Selection Button
When the button is pressed, it auto-
matically only scans the radio sta-
tions upwards. The sound hearing for
10 seconds per all searched station
preset.
The SCAN feature steps through
each channel, starting from the initial
channel, for ten seconds.
Press the [SCAN] button again to
stop the scan feature and to listen to
the currently selected channel.
5. MUTE Selection Button
When the [MUTE] key is pressed,
the display will say "AUDIO MUTE"
and the audio will be muted.
Page 150 of 371

43
Driving your vehicle
1
2
3
4
5
6
7
8
9
START
Turn the ignition key to the START
position to start the engine. The
engine will crank until you release
the key; then it returns to the ON
position. The brake warning lamp
can be checked in this position.
✽ ✽NOTICE
If difficulty is experienced turning
the ignition switch to the ACC posi-
tion, turn the key while turning the
steering wheel right and left to
release the tension.
Automatic transaxle
When turning the ignition switch to
the LOCK position, the shift lever
must be in the P (Park) position.
WARNING - Ignition key
• Never turn the ignition switch to LOCK or ACC while the
vehicle is moving. This would
result in loss of directional
control and braking function,
which could cause an immedi-
ate accident.
Before leaving the driver’s seat, always make sure the
shift lever is engaged in 1
st
gear for manual transaxle or P
(Park) for automatic transaxle,
set the parking brake fully and
shut the engine off.
Unexpected and sudden vehi-
cle movement may occur if
these precautions are not
taken.
(Continued)
(Continued)
Never reach for the ignitionswitch, or any other controls
through the steering wheel
while the vehicle is in motion.
The presence of your hand or
arm in this area could cause a
loss of vehicle control, an
accident and serious bodily
injury or death.
Do not place any movable objects around the driver’s
seat as they may move while
driving, interfere with the dri-
ver and lead to an accident.
WARNING
When you intend to park or stop
the vehicle with the engine on,
be careful not to depress the
accelerator pedal for a long
period of time. It may overheat
the engine or exhaust system
and cause fire.
Page 152 of 371
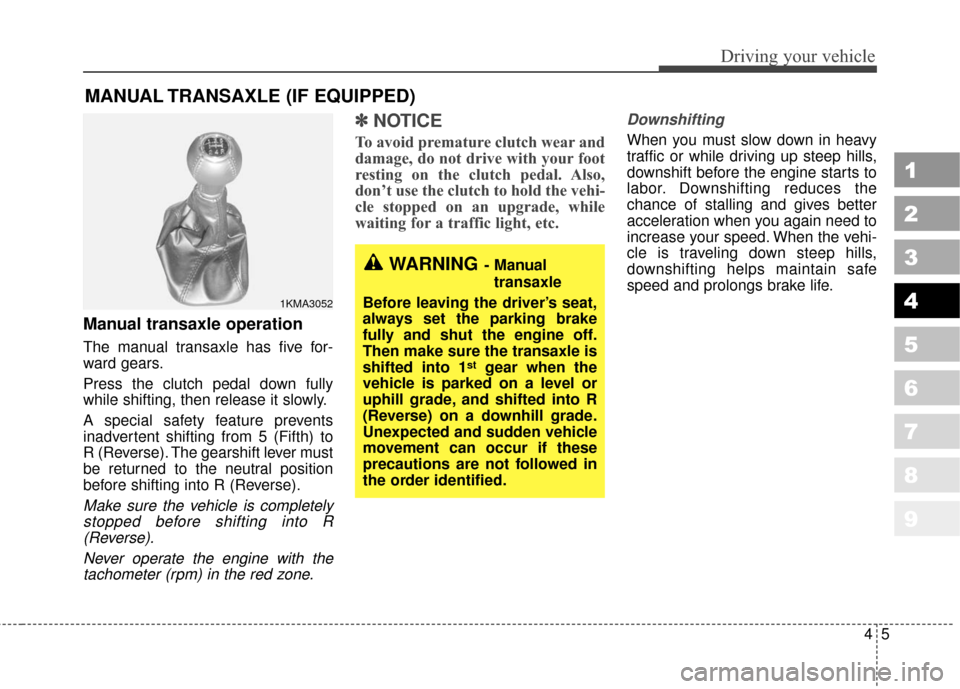
Manual transaxle operation
The manual transaxle has five for-
ward gears.
Press the clutch pedal down fully
while shifting, then release it slowly.
A special safety feature prevents
inadvertent shifting from 5 (Fifth) to
R (Reverse). The gearshift lever must
be returned to the neutral position
before shifting into R (Reverse).
Make sure the vehicle is completelystopped before shifting into R(Reverse).
Never operate the engine with thetachometer (rpm) in the red zone.
✽ ✽ NOTICE
To avoid premature clutch wear and
damage, do not drive with your foot
resting on the clutch pedal. Also,
don’t use the clutch to hold the vehi-
cle stopped on an upgrade, while
waiting for a traffic light, etc.
Downshifting
When you must slow down in heavy
traffic or while driving up steep hills,
downshift before the engine starts to
labor. Downshifting reduces the
chance of stalling and gives better
acceleration when you again need to
increase your speed. When the vehi-
cle is traveling down steep hills,
downshifting helps maintain safe
speed and prolongs brake life.
MANUAL TRANSAXLE (IF EQUIPPED)
1KMA3052
WARNING- Manual
transaxle
Before leaving the driver’s seat,
always set the parking brake
fully and shut the engine off.
Then make sure the transaxle is
shifted into 1
stgear when the
vehicle is parked on a level or
uphill grade, and shifted into R
(Reverse) on a downhill grade.
Unexpected and sudden vehicle
movement can occur if these
precautions are not followed in
the order identified.
45
Driving your vehicle
1
2
3
4
5
6
7
8
9