Page 103 of 371
Knowing your vehicle
94
3
1
2
3
4
5
6
7
8
9
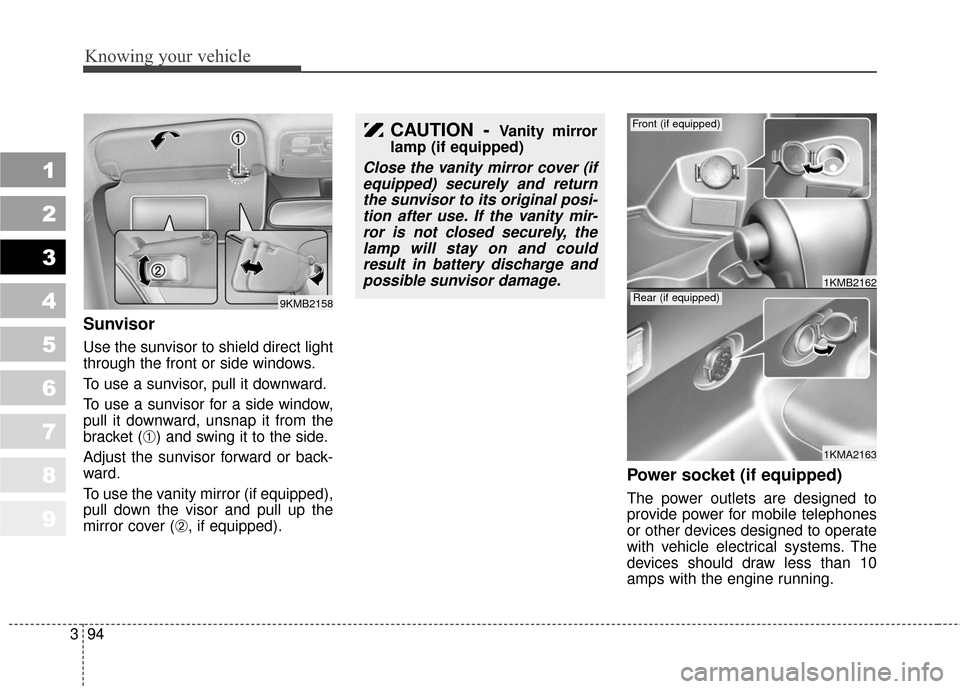
Sunvisor
Use the sunvisor to shield direct light
through the front or side windows.
To use a sunvisor, pull it downward.
To use a sunvisor for a side window,
pull it downward, unsnap it from the
bracket (
➀) and swing it to the side.
Adjust the sunvisor forward or back-
ward.
To use the vanity mirror (if equipped),
pull down the visor and pull up the
mirror cover (
➁, if equipped).
Power socket (if equipped)
The power outlets are designed to
provide power for mobile telephones
or other devices designed to operate
with vehicle electrical systems. The
devices should draw less than 10
amps with the engine running.
9KMB2158
1KMA2163
1KMB2162
Front (if equipped)
Rear (if equipped)
CAUTION - Vanity mirror
lamp (if equipped)
Close the vanity mirror cover (if equipped) securely and returnthe sunvisor to its original posi-tion after use. If the vanity mir-ror is not closed securely, thelamp will stay on and couldresult in battery discharge andpossible sunvisor damage.
Page 117 of 371
Knowing your vehicle
108
3
1
2
3
4
5
6
7
8
9
Care of disc (if equipped)
If the temperature inside the car is
too high, open the car windows for
ventilation before using your car
audio.
It is illegal to copy and use MP3/WMA/AAC/WAVE files without
permission. Use CDs that are creat-
ed only by lawful means.
Do not apply volatile agents such as benzene and thinner, normal clean-
ers and magnetic sprays made for
analogue disc onto CDs.
To prevent the disc surface from getting damaged. Hold and carry
CDs by the edges or the edges of
the center hole only.
Clean the disc surface with a piece of soft cloth before playback (wipe it
from the center to the outside
edge.)
Do not damage the disc surface or attach pieces of sticky tape or paper
onto it.
Make sure on undesirable matter other than CDs are inserted into the
CD player (Do not insert more than
one CD at a time). Keep CDs in their cases after use
to protect them from scratches or
dirt.
Depending on the type of CD- R/CD-RW CDs, certain CDs may
not operate normally according to
manufacturing companies or mak-
ing and recording methods. In such
circumstances, if you still continue
to use those CDs, they may cause
the malfunction of your car audio
system.
✽ ✽ NOTICE - Playing an
Incompatible Copy-Protected
Audio CD
Some copy-protected CDs, which do
not comply with the international
audio CD standards (Red Book),
may not play on your car audio.
Please note that if you try to play
copyprotected CDs and the CD
player of your car audio is not per-
forming to your expectation, this
may be caused by those CDs and not
a defect in the device itself. Please
replace those CDs.
Page 190 of 371
443
Driving your vehicle
1
2
3
4
5
6
7
8
9
2. With the engine stopped, checkthe brake fluid level immediately
and add fluid as required. Then
check all brake components for
fluid leaks.
3. Do not drive the vehicle if leaks are found, the warning light
remains on or the brakes do not
operate properly. Have it towed to
any Authorized Kia Dealer for a
brake system inspection and nec-
essary repairs.
To check bulb operation, check
whether the parking brake and brake
fluid warning light illuminates when
the ignition switch is in the ON posi-
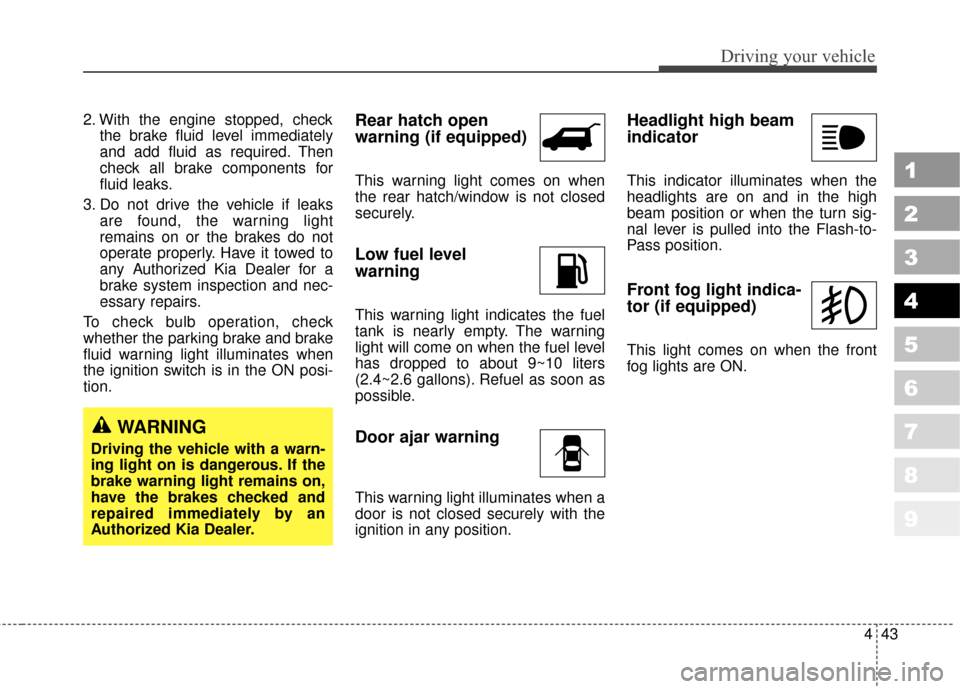
tion.Rear hatch open
warning (if equipped)
This warning light comes on when
the rear hatch/window is not closed
securely.
Low fuel level
warning
This warning light indicates the fuel
tank is nearly empty. The warning
light will come on when the fuel level
has dropped to about 9~10 liters
(2.4~2.6 gallons). Refuel as soon as
possible.
Door ajar warning
This warning light illuminates when a
door is not closed securely with the
ignition in any position.
Headlight high beam
indicator
This indicator illuminates when the
headlights are on and in the high
beam position or when the turn sig-
nal lever is pulled into the Flash-to-
Pass position.
Front fog light indica-
tor (if equipped)
This light comes on when the front
fog lights are ON.
WARNING
Driving the vehicle with a warn-
ing light on is dangerous. If the
brake warning light remains on,
have the brakes checked and
repaired immediately by an
Authorized Kia Dealer.
Page 207 of 371
Driving your vehicle
60
4
1
2
3
4
5
6
7
8
9
D : Rear wiper/washer control
· – Spraying washer fluid
· ON – Continuous wipe
· INT – Intermittent wipe (if equipped)
· OFF – Off
· – Wash with
brief wipes
Type A
Type B
Type C
OKM040901N/OKM048120N/OBL048441N
Rear window wiper/washer (if equipped)
Page 208 of 371

461
Driving your vehicle
1
2
3
4
5
6
7
8
9
Rear window wiper and wash-
er switch (if equipped)
The rear window wiper and washer
switch is located at the end of the
wiper and washer switch lever. Turn
the switch to desired position to
operate the rear wiper and washer.
If the rear hatch window is open
( ), the rear wiper will not oper-
ate. Check the rear hatch window
warning light in the instrument clus-
ter, and make sure the rear hatch
window is closed completely.- Spraying washer fluid and wip-ing
OFF - Wiper is not in operation
INT - Intermittent wiper operation (if equipped)
ON - Normal wiper opertion - Spraying washer fluid and wip-ing The defroster heats the window to
remove frost, fog and thin ice from
the interior and exterior of the rear
window, while engine is running.
✽ ✽
NOTICE
• To prevent damage to the conduc-
tors bonded to the inside surface
of the rear window, never use
sharp instruments or window
cleaners containing abrasives to
clean the window.
• To prevent the battery from being discharged, the rear window
defroster will only operate when
the engine is running.
• If you want to defrost and defog on the front windshield, refer to
“Windshield Defrosting and
Defogging” in this section.
To activate the rear window
defroster, press the rear window
defroster button located in the center
console switch panel. The indicator
on the rear window defroster button
illuminates when the defroster is ON.
If there is heavy accumulation of
snow on the rear window, brush it off
before operating the rear defroster.
OKM049126 OKM049125
Type A
Type B
DEFROSTER (IF EQUIPPED)
Page 209 of 371
Driving your vehicle
62
4
1
2
3
4
5
6
7
8
9
The rear window defroster automati-
cally turns off after 20 minutes or
when the ignition switch is turned off.
To turn off the defroster, press the
rear window defroster button again.
Outside mirror heater
(if equipped)
There is no control button for the out-
side mirror heater, instead the out-
side mirror heater automatically
turns on when the rear window
defroster is turned on.
Front windshield deicer(if equipped)
There is no control button for the
front windshield deicer, instead the
front windshield deicer automatically
turns on when the rear window
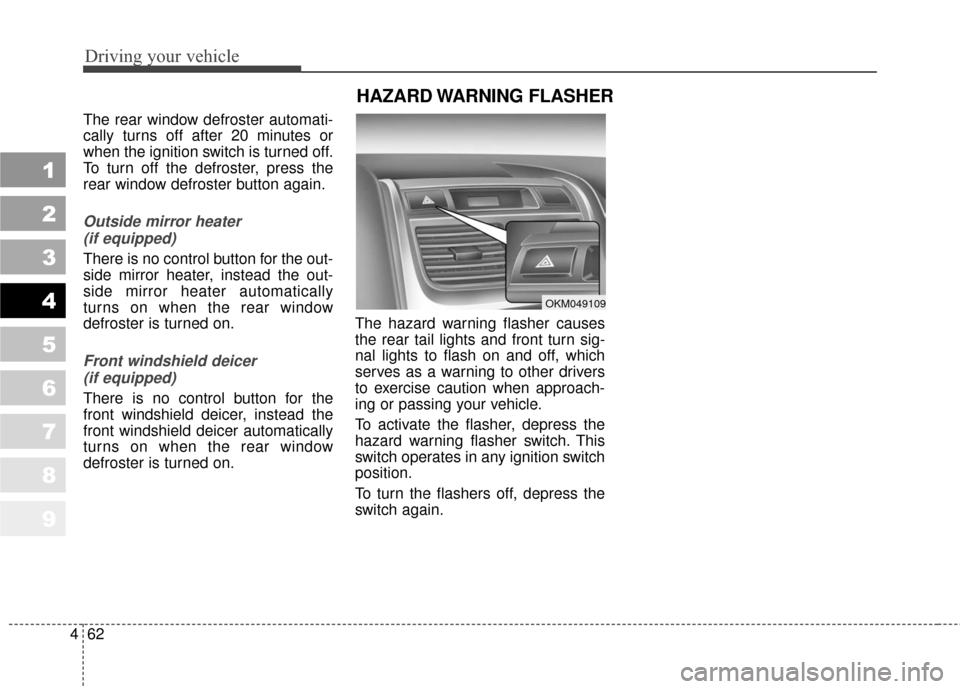
defroster is turned on. The hazard warning flasher causes
the rear tail lights and front turn sig-
nal lights to flash on and off, which
serves as a warning to other drivers
to exercise caution when approach-
ing or passing your vehicle.
To activate the flasher, depress the
hazard warning flasher switch. This
switch operates in any ignition switch
position.
To turn the flashers off, depress the
switch again.
HAZARD WARNING FLASHER
OKM049109
Page 210 of 371
463
Driving your vehicle
1
2
3
4
5
6
7
8
9
1. Fan speed control knob
2. Mode selection knob
3. Temperature control knob
4. Air conditioning button (if equipped)
5. Air intake control button
6. Rear window defroster button (if equipped)Fan speed control knob
The ignition switch must be in the ON
position for fan operation.
The fan speed control knob allows
you to control the fan speed of the air
flowing from the ventilation system.
To change the fan speed, turn the
knob to the right for higher speed or
left for lower speed.
Setting the mode selection knob to
the “0” position turns off the fan.
Temperature control knob
The temperature control knob allows
you to control the temperature of the
air flowing from the ventilation sys-
tem. To change the air temperature in
the passenger compartment, turn
the knob to the right for warm and
hot air or left for cooler air.
MANUAL CLIMATE CONTROL SYSTEM (IF EQUIPPED)
OKM049136OKM049134OKM029130
Page 212 of 371
465
Driving your vehicle
1
2
3
4
5
6
7
8
9
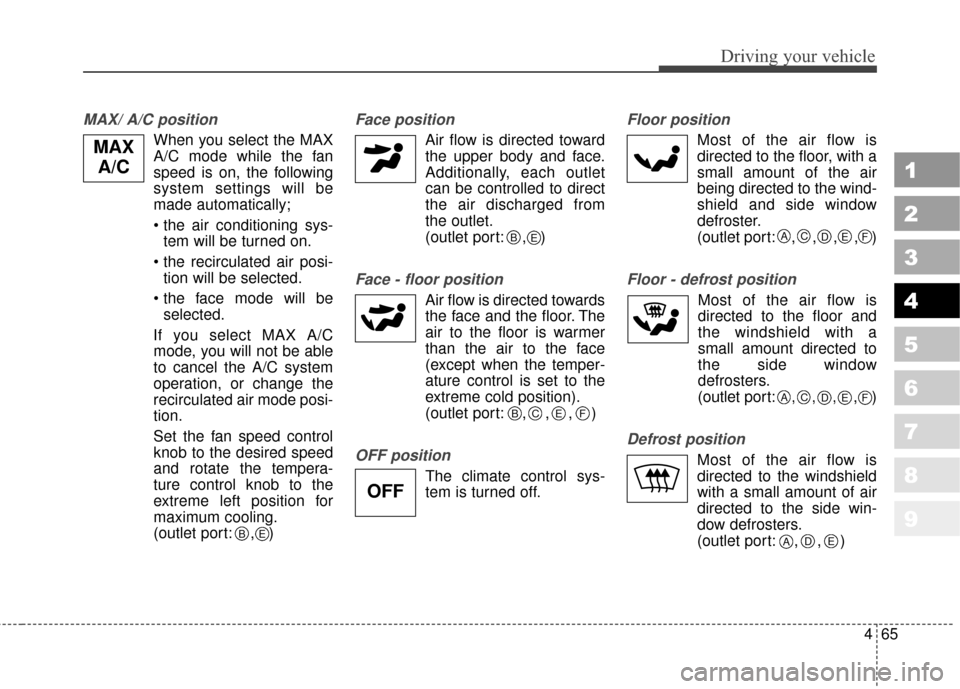
MAX/ A/C position
When you select the MAX
A/C mode while the fan
speed is on, the following
system settings will be
made automatically;
tem will be turned on.
tion will be selected.
selected.
If you select MAX A/C mode, you will not be able
to cancel the A/C system
operation, or change the
recirculated air mode posi-
tion.
Set the fan speed control knob to the desired speed
and rotate the tempera-
ture control knob to the
extreme left position for
maximum cooling.
(outlet port: , )
Face position
Air flow is directed towardthe upper body and face.
Additionally, each outlet
can be controlled to direct
the air discharged from
the outlet.
(outlet port: , )
Face - floor position
Air flow is directed towardsthe face and the floor. The
air to the floor is warmer
than the air to the face
(except when the temper-
ature control is set to the
extreme cold position).
(outlet port: , , , )
OFF position
The climate control sys-
tem is turned off.
Floor position
Most of the air flow is
directed to the floor, with a
small amount of the air
being directed to the wind-
shield and side window
defroster.
(outlet port: , , , , )
Floor - defrost position
Most of the air flow is
directed to the floor and
the windshield with a
small amount directed to
the side window
defrosters.
(outlet port:
, , , ,)
Defrost position
Most of the air flow is
directed to the windshield
with a small amount of air
directed to the side win-
dow defrosters.
(outlet port: , , )
B
BCEF
CADEF
CADEF
E
ADE
OFF
BE
MAX
A/C