2010 KIA Sportage ECO mode
[x] Cancel search: ECO modePage 2 of 371
i
Thank you for choosing a Kia vehicle.
When you require service, remember that your dealer
knows your vehicle best. Your Kia dealer has factory-
trained technicians, recommended special tools, genuine
Kia replacement parts and is dedicated to your complete
satisfaction.
Because subsequent owners require this important infor-
mation as well, this publication should remain with the
vehicle if it is sold.
This manual will familiarize you with operational, main-
tenance and safety information about your new vehicle. It
is supplemented by a Warranty and Consumer
Information manual that provides important information
on all warranties regarding your vehicle. We urge you to
read these publications carefully and follow the recom-
mendations to help assure enjoyable and safe operation
of your new vehicle.
Kia offers a great variety of options, components and fea-
tures for its various models.
Therefore, the equipment described in this manual, along
with the various illustrations, may not all be applicable to
your particular vehicle. The information and specifications provided in this man-
ual were accurate at the time of printing. Kia reserves the
right to discontinue or change specifications or design at
any time without notice and without incurring any oblig-
ation. If you have questions, always check with your Kia
Dealer.
We assure you of our continuing interest in your motor-
ing pleasure and satisfaction in your Kia vehicle.
© 2009 Kia Canada Inc.
All rights reserved. Reproduction by any means, elec-
tronic or mechanical, including photocopying, recording,
or by any information storage and retrieval system or
translation in whole or part is not permitted without writ-
ten authorization from Kia Canada Inc..
Printed in Korea
Foreword
Page 12 of 371
33
Knowing your vehicle
1
2
3
4
5
6
7
8
9
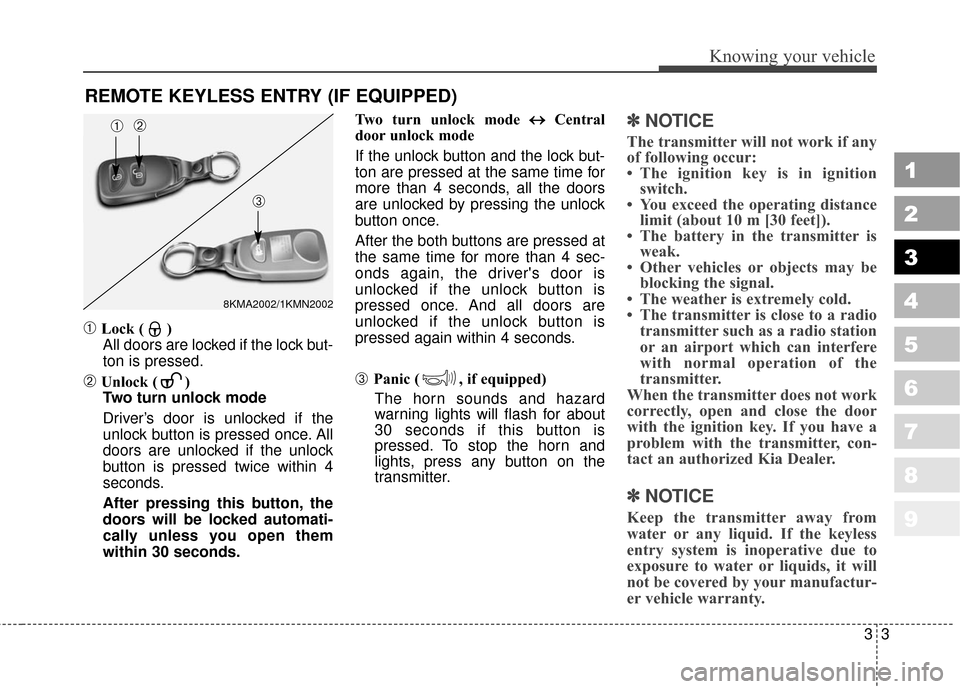
➀Lock ( )All doors are locked if the lock but-
ton is pressed.
➁Unlock ( ) Two turn unlock mode
Driver’s door is unlocked if the
unlock button is pressed once. All
doors are unlocked if the unlock
button is pressed twice within 4
seconds.
After pressing this button, the
doors will be locked automati-
cally unless you open them
within 30 seconds. Two turn unlock mode
↔ ↔
Central
door unlock mode
If the unlock button and the lock but-
ton are pressed at the same time for
more than 4 seconds, all the doors
are unlocked by pressing the unlock
button once.
After the both buttons are pressed at
the same time for more than 4 sec-
onds again, the driver's door is
unlocked if the unlock button is
pressed once. And all doors are
unlocked if the unlock button is
pressed again within 4 seconds.➂ Panic ( , if equipped)
The horn sounds and hazard
warning lights will flash for about
30 seconds if this button is
pressed. To stop the horn and
lights, press any button on the
transmitter.
✽ ✽ NOTICE
The transmitter will not work if any
of following occur:
• The ignition key is in ignition
switch.
• You exceed the operating distance limit (about 10 m [30 feet]).
• The battery in the transmitter is weak.
• Other vehicles or objects may be blocking the signal.
• The weather is extremely cold.
• The transmitter is close to a radio transmitter such as a radio station
or an airport which can interfere
with normal operation of the
transmitter.
When the transmitter does not work
correctly, open and close the door
with the ignition key. If you have a
problem with the transmitter, con-
tact an authorized Kia Dealer.
✽ ✽ NOTICE
Keep the transmitter away from
water or any liquid. If the keyless
entry system is inoperative due to
exposure to water or liquids, it will
not be covered by your manufactur-
er vehicle warranty.
REMOTE KEYLESS ENTRY (IF EQUIPPED)
8KMA2002/1KMN2002
➀➁
➂
Page 18 of 371
39
Knowing your vehicle
1
2
3
4
5
6
7
8
9
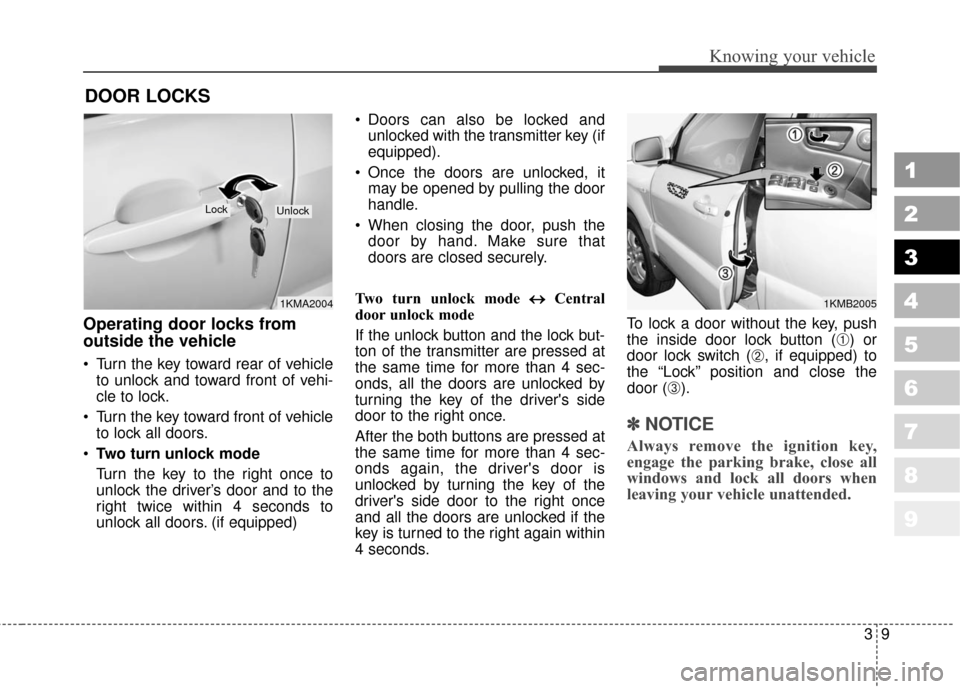
Operating door locks from
outside the vehicle
Turn the key toward rear of vehicleto unlock and toward front of vehi-
cle to lock.
Turn the key toward front of vehicle to lock all doors.
Two turn unlock mode
Turn the key to the right once to
unlock the driver’s door and to the
right twice within 4 seconds to
unlock all doors. (if equipped) Doors can also be locked and
unlocked with the transmitter key (if
equipped).
Once the doors are unlocked, it may be opened by pulling the door
handle.
When closing the door, push the door by hand. Make sure that
doors are closed securely.
Two turn unlock mode ↔ ↔
Central
door unlock mode
If the unlock button and the lock but-
ton of the transmitter are pressed at
the same time for more than 4 sec-
onds, all the doors are unlocked by
turning the key of the driver's side
door to the right once.
After the both buttons are pressed at
the same time for more than 4 sec-
onds again, the driver's door is
unlocked by turning the key of the
driver's side door to the right once
and all the doors are unlocked if the
key is turned to the right again within
4 seconds. To lock a door without the key, push
the inside door lock button (
➀) or
door lock switch (
➁, if equipped) to
the “Lock” position and close the
door (
➂).
✽ ✽ NOTICE
Always remove the ignition key,
engage the parking brake, close all
windows and lock all doors when
leaving your vehicle unattended.
DOOR LOCKS
1KMA2004
LockUnlock
1KMB2005
Page 57 of 371

Knowing your vehicle
48
3
1
2
3
4
5
6
7
8
9
Installing a child restraint system
For safety reasons, we recommend
that the child restraint system be
used in the rear seats.
Never place a rear-facing child
restraint in the front passenger
seat, because of the danger that
an inflating passenger side air bag
could impact the rear-facing child
restraint and kill the child.
Since all passenger safety belts
move freely under normal conditions
and only lock under extreme or
emergency conditions (emergency
lock mode), you must manually
change these safety belts to the auto
lock mode to secure a child restraint.(Continued)
Never allow a child to stand up
or kneel while the vehicle is
moving.
Never use an infant carrier or child seat that "hooks" over a
seatback. It will not provide
adequate protection in an
accident.
Never allow a child to be held while they are in a moving
vehicle, as this could result in
serious injury to the child in
the event of an accident or a
sudden stop. Holding a child
in a moving vehicle does not
provide the child with any pro-
tection during an accident,
even if the person holding the
child is wearing a seat belt.WARNING- Child seat
installation
Before installing the child restraint system, read the
instructions supplied by the
child restraint system manu-
facturer.
If the safety belt does not operate as described in this
section, have the system
checked immediately by your
authorized Kia dealer.
Failure to observe this manu- al's instructions regarding
child restraint system and the
instructions provided with the
child restraint system could
increase the chance and/or
severity of injury in an acci-
dent.
Page 119 of 371
Knowing your vehicle
110
3
1
2
3
4
5
6
7
8
9
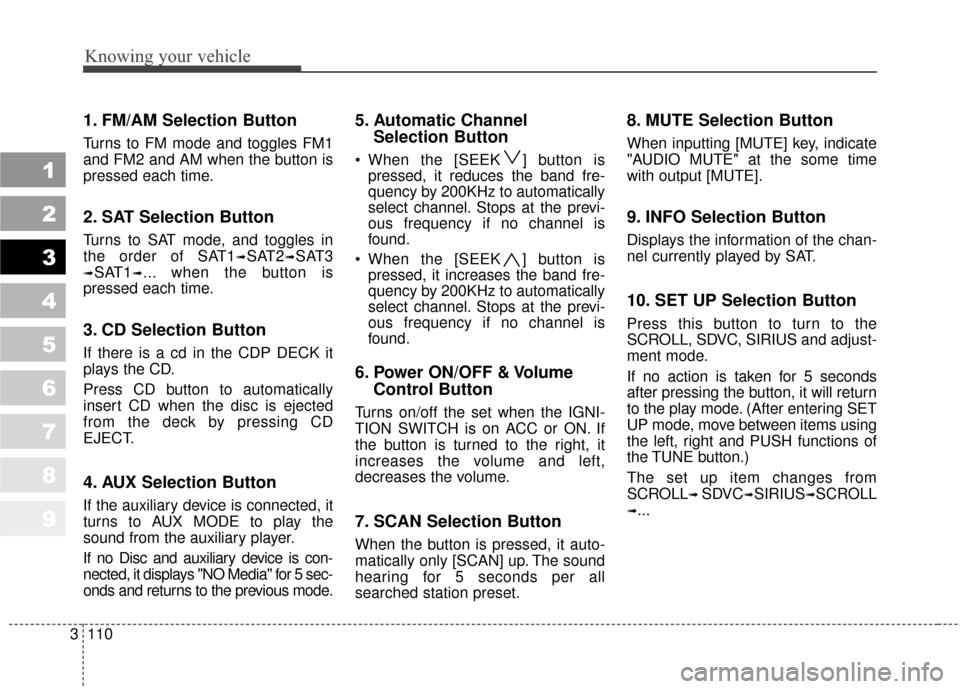
1. FM/AM Selection Button
Turns to FM mode and toggles FM1
and FM2 and AM when the button is
pressed each time.
2. SAT Selection Button
Turns to SAT mode, and toggles in
the order of SAT1
➟SAT2➟SAT3
➟SAT1➟... when the button is
pressed each time.
3. CD Selection Button
If there is a cd in the CDP DECK it
plays the CD.
Press CD button to automatically
insert CD when the disc is ejected
from the deck by pressing CD
EJECT.
4. AUX Selection Button
If the auxiliary device is connected, it
turns to AUX MODE to play the
sound from the auxiliary player.
If no Disc and auxiliary device is con-
nected, it displays "NO Media" for 5 sec-
onds and returns to the previous mode.
5. Automatic Channel Selection Button
When the [SEEK ] button is
pressed, it reduces the band fre-
quency by 200KHz to automatically
select channel. Stops at the previ-
ous frequency if no channel is
found.
When the [SEEK ] button is pressed, it increases the band fre-
quency by 200KHz to automatically
select channel. Stops at the previ-
ous frequency if no channel is
found.
6. Power ON/OFF & Volume Control Button
Turns on/off the set when the IGNI-
TION SWITCH is on ACC or ON. If
the button is turned to the right, it
increases the volume and left,
decreases the volume.
7. SCAN Selection Button
When the button is pressed, it auto-
matically only [SCAN] up. The sound
hearing for 5 seconds per all
searched station preset.
8. MUTE Selection Button
When inputting [MUTE] key, indicate
"AUDIO MUTE" at the some time
with output [MUTE].
9. INFO Selection Button
Displays the information of the chan-
nel currently played by SAT.
10. SET UP Selection Button
Press this button to turn to the
SCROLL, SDVC, SIRIUS and adjust-
ment mode.
If no action is taken for 5 seconds
after pressing the button, it will return
to the play mode. (After entering SET
UP mode, move between items using
the left, right and PUSH functions of
the TUNE button.)
The set up item changes from
SCROLL
➟ SDVC➟SIRIUS➟SCROLL
➟...
Page 122 of 371
3113
Knowing your vehicle
1
2
3
4
5
6
7
8
9
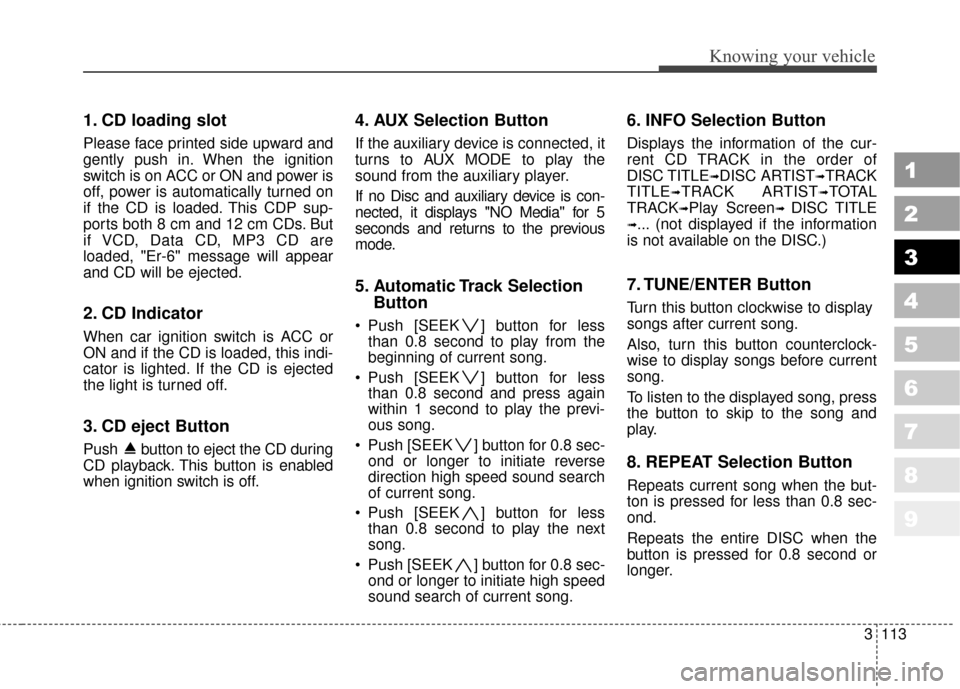
1. CD loading slot
Please face printed side upward and
gently push in. When the ignition
switch is on ACC or ON and power is
off, power is automatically turned on
if the CD is loaded. This CDP sup-
ports both 8 cm and 12 cm CDs. But
if VCD, Data CD, MP3 CD are
loaded, "Er-6" message will appear
and CD will be ejected.
2. CD Indicator
When car ignition switch is ACC or
ON and if the CD is loaded, this indi-
cator is lighted. If the CD is ejected
the light is turned off.
3. CD eject Button
Push button to eject the CD during
CD playback. This button is enabled
when ignition switch is off.
4. AUX Selection Button
If the auxiliary device is connected, it
turns to AUX MODE to play the
sound from the auxiliary player.
If no Disc and auxiliary device is con-
nected, it displays "NO Media" for 5
seconds and returns to the previous
mode.
5. Automatic Track SelectionButton
Push [SEEK ] button for less
than 0.8 second to play from the
beginning of current song.
Push [SEEK ] button for less than 0.8 second and press again
within 1 second to play the previ-
ous song.
Push [SEEK ] button for 0.8 sec- ond or longer to initiate reverse
direction high speed sound search
of current song.
Push [SEEK ] button for less than 0.8 second to play the next
song.
Push [SEEK ] button for 0.8 sec- ond or longer to initiate high speed
sound search of current song.
6. INFO Selection Button
Displays the information of the cur-
rent CD TRACK in the order of
DISC TITLE
➟DISC ARTIST➟TRACK
TITLE
➟TRACK ARTIST➟TOTAL
TRACK
➟Play Screen➟ DISC TITLE
➟... (not displayed if the information
is not available on the DISC.)
7. TUNE/ENTER Button
Turn this button clockwise to display
songs after current song.
Also, turn this button counterclock-
wise to display songs before current
song.
To listen to the displayed song, press
the button to skip to the song and
play.
8. REPEAT Selection Button
Repeats current song when the but-
ton is pressed for less than 0.8 sec-
ond.
Repeats the entire DISC when the
button is pressed for 0.8 second or
longer.
Page 123 of 371
Knowing your vehicle
114
3
1
2
3
4
5
6
7
8
9
9. RANDOM Selection Button
Turns on/off the randomization of the
play list of files in the currently played
DISC.
To cancel the mode, press the key
once again.
10. SCAN Selection Button
Plays first 10 seconds of each song
in the DISC.
To cancel the mode, press the key
once again.
CAUTION- Using USB
device
• To use the external USB device, make sure the deviceis not mounted when startingup the vehicle and mount thedevice after starting up.
If you start the vehicle when the USB device is mounted, itmay damage the USB device.(USB is not ESA)
If the vehicle is started up or turned off while the externalUSB device is connected, theexternal USB device may notwork.
It may not play inauthentic MP3 or WMA files.
1) It can only play MP3 files with the compression ratebetween 8Kbps~320Kbps.
2) It can only play WMA music files with the compressionrate between 8Kbps~320Kbps.
(Continued)
(Continued)
Take cautions for static elec- tricity when mounting or dis-mounting the external USBdevice.
Encoded MP3 PLAYER is not recognizable.
Depending on the condition of the external USB device, theconnected external USBdevice can be unrecognizable.
When the formatted byte/sec- tor setting of External USBdevices is not either 512BYTEor 2048BYTE, then the devicewill not be recognized.
Only the USB device format- ted to FAT 12/16/32.
USB device without USB IF authentication may not be rec-ognizable.
Make sure the USB connection terminal does not come incontact with human body orany object.
(Continued)
Page 124 of 371
3115
Knowing your vehicle
1
2
3
4
5
6
7
8
9
(Continued) If you repeat mounting or dis- mounting USB device in ashort period of time, it maybreak the device.
You might hear strange noise when mounting or dismount-ing a USB device.
If you dismount the external USB device during playback inUSB mode, the external USBdevice can be damaged or mal-function. Therefore, mount theexternal USB device when theengine is turned off or inanother mode.
Depending on the type and capacity of the external USBdevice or the type of the filesstored in the device, there is adifference in the time taken forrecognition of the device, butthis is not a trouble and youonly have to wait.
(Continued)(Continued) Do not use the USB device for other purposes than playingmusic files.
Use of USB accessories such as the recharger or heaterusing USB I/F may lower theperformance or cause trouble.
If you use devices such as the USB hub you purchased sepa-rately, the vehicle’s audio sys-tem may not recognize theUSB device. Connect the USBdevice directly to the multime-dia terminal of the vehicle.