2010 JAGUAR XFR front brake pad
[x] Cancel search: front brake padPage 7 of 3039

Diagnosis and TestingBrake SystemGeneral ProceduresBrake Disc Runout Check
Brake System Bleeding (70.25.03)
Front Brake Disc Runout Check - With Wheel On - Vehicles With: High Performance Brakes
Rear Brake Disc Runout Check - With Wheel On206-03B: Front Disc Brake - TDV6 3.0L Diesel /V8 5.0L Petrol/V8 S/C 5.0L PetrolSpecificationDescription and OperationComponent Location
Overview
System Operation and Component DescriptionRemoval and InstallationBrake Caliper - Vehicles With: High Performance Brakes
Brake Disc - Vehicles With: High Performance Brakes
Brake Pads - Vehicles With: High Performance Brakes
Brake Disc Shield (70.10.18) - Vehicles With: High Performance Brakes206-04B: Rear Disc Brake - TDV6 3.0L Diesel /V8 5.0L Petrol/V8 S/C 5.0L PetrolSpecificationDescription and OperationComponent Location
Overview
System Operation and Component DescriptionRemoval and InstallationBrake Caliper - Vehicles With: High Performance Brakes
Brake Disc - Vehicles With: High Performance Brakes
Brake Pads - Vehicles With: High Performance Brakes
Brake Disc Shield (70.10.19)206-05: Parking Brake and ActuationSpecificationDescription and OperationComponent Location
Overview
System Operation and Component DescriptionDiagnosis and TestingParking BrakeGeneral ProceduresParking Brake Cable Tension ReleaseRemoval and InstallationParking Brake Cable LH - TDV6 3.0L Diesel /V8 5.0L Petrol/V8 S/C 5.0L Petrol
Parking Brake Cable RH - TDV6 3.0L Diesel /V8 5.0L Petrol/V8 S/C 5.0L Petrol
Page 324 of 3039

Published: 14-Feb-2012
Suspension System - General Information - Front Wheel Bearing and Wheel Hub Runout Check Vehicles With: High Performance Brakes
General Procedures
NOTES:
Some variation in the illustrations may occur, but the essential information is always correct.
RH illustration shown, LH similar.
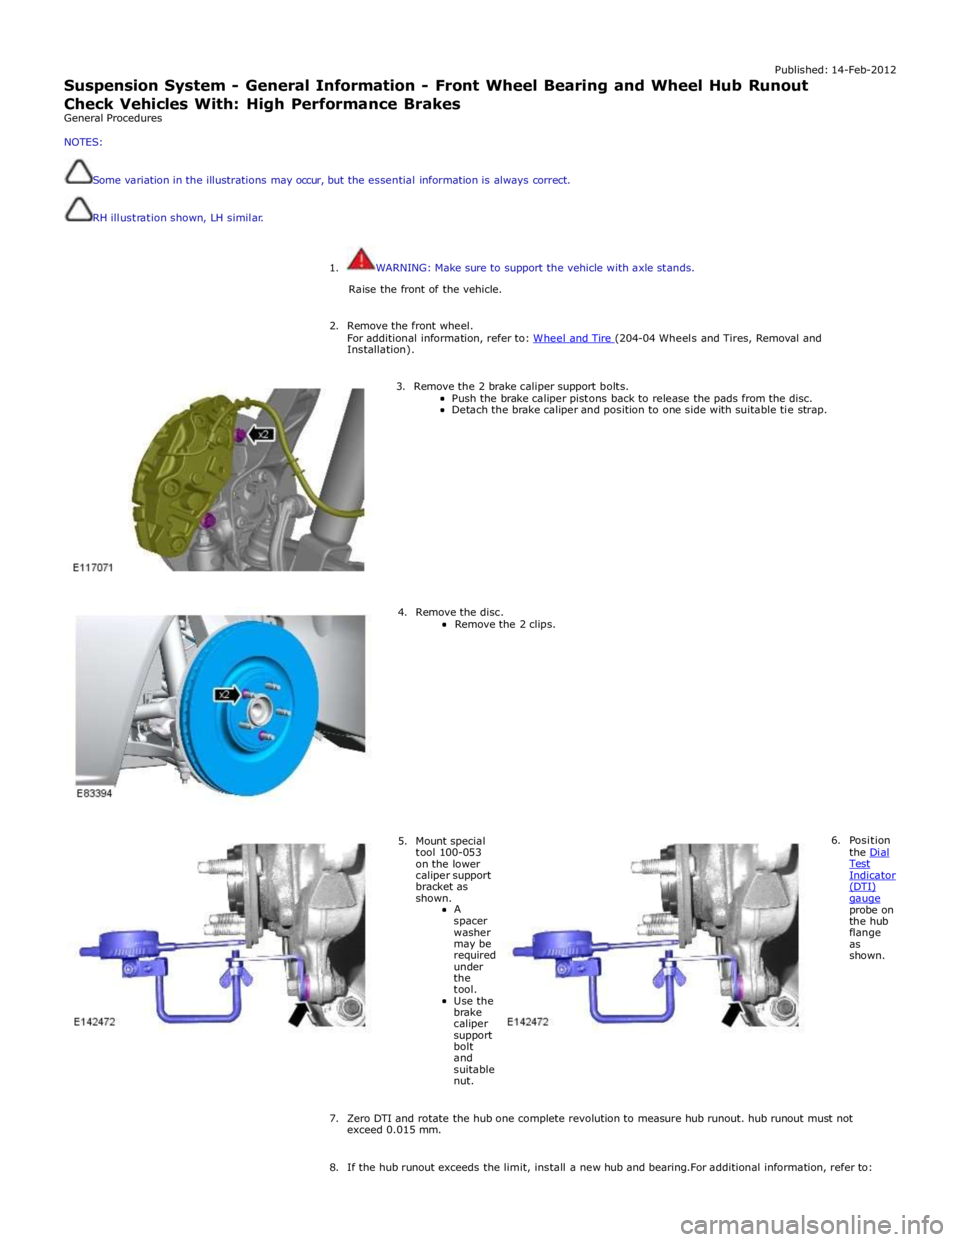
1. WARNING: Make sure to support the vehicle with axle stands.
Raise the front of the vehicle.
2. Remove the front wheel.
For additional information, refer to: Wheel and Tire (204-04 Wheels and Tires, Removal and Installation).
3. Remove the 2 brake caliper support bolts.
Push the brake caliper pistons back to release the pads from the disc. Detach the brake caliper and position to one side with suitable tie strap.
4. Remove the disc.
Remove the 2 clips.
5. Mount special tool 100-053 on the lower caliper support bracket as shown.
A
spacer washer may be required under the tool.
Use the brake caliper support bolt and suitable nut. 6. Position
the Dial Test Indicator (DTI) gauge probe on the hub flange as shown.
7. Zero DTI and rotate the hub one complete revolution to measure hub runout. hub runout must not exceed 0.015 mm.
8. If the hub runout exceeds the limit, install a new hub and bearing.For additional information, refer to:
Page 581 of 3039

Brake System - General Information -
Lubricants, Fluids, Sealers and Adhesives Published: 19-Jun-2014
CAUTION: Do not use brake fluid ITT Super Dot 4 on 2006my vehicles onwards. Failure to follow this instruction may
result in damage to the vehicle.
NOTE: Brake fluid ITT Super Dot 4 has now been superseded by Shell ESL Super Dot 4 which is the Jaguar recommended
brake fluid. Shell ESL Super Dot 4 can be used on all model years.
Item Specification Brake fluid Shell ESL Dot 4 Brake Lining and Disc Specifications
Item Specification Front brake pad material nominal thickness 13 mm (0.51 in) Front brake pad material minimum thickness 2 mm (0.08 in) Rear brake pad material nominal thickness 10.8 mm (0.43 in) Rear brake pad material minimum thickness 2 mm (0.08 in) Front brake disc diameter - 3.0L petrol, 3.0L diesel and 4.2L 326 mm (12.8 in) Front brake disc diameter - 3.0L diesel and 5.0L naturally aspirated 355 mm (14.0 in) Front brake disc diameter - 5.0L supercharged 380 mm (15.0 in) New front brake disc nominal thickness - 3.0L petrol 3.0L diesel and 4.2L 30 mm (1.18 in) New front brake disc nominal thickness - 3.0L diesel and 5.0L naturally aspirated 32 mm (1.26 in) New front brake disc nominal thickness - 5.0L supercharged 36 mm (1.42 in) Worn front brake disc minimum thickness - 3.0L petrol and 4.2L 28 mm (1.14 in) Worn front brake disc minimum thickness - 3.0L diesel and 5.0L naturally aspirated 30 mm (1.18 in) Worn front brake disc minimum thickness - 5.0L supercharged 34 mm (1.34 in) Rear brake disc diameter - all vehicles except 5.0L supercharged 326 mm (12.8 in) Rear brake disc diameter - 5.0L supercharged 376 mm (14.8 in) New rear brake disc nominal thickness - all vehicles except 5.0L supercharged 20 mm (0.79 in) New rear brake disc nominal thickness - 5.0L supercharged 26 mm (1.02 in) Worn rear brake disc minimum thickness - all vehicles except 5.0L supercharged 18 mm (0.72 in) Worn rear brake disc minimum thickness - 5.0L supercharged 24 mm (0.94 in) Maximum front brake disc runout (installed) 0.075 mm ( 0.003 in) Maximum rear brake disc runout (installed) 0.09 mm ( 0.004 in) Maximum front hub face runout (installed) 0.015 mm ( 0.0006 in) Maximum rear hub face runout (installed) 0.025 mm ( 0.0009 in) Front brake caliper piston diameter - all vehicles except 5.0L supercharged 60 mm (2.36 in) Front brake sliding caliper double piston diameter - 5.0L supercharged 42 mm (1.66 in) Rear brake caliper piston diameter 45 mm (1.77 in) Front brake caliper bleed screw - 3.0L petrol and 4.2L 8 Nm (6 lb-ft) Front brake caliper bleed screw - 3.0L diesel and 5.0L 14 Nm (10 lb-ft) Rear brake caliper bleed screw 14 Nm (10 lb-ft)
Page 582 of 3039

Brake System - General Information - Brake System
Diagnosis and Testing
Principle of Operation Published: 11-May-2011
For a detailed description of the brake system, refer to the relevant Description and Operation sections in the workshop
manual. REFER to:
Front Disc Brake (206-03, Description and Operation),
Front Disc Brake (206-03, Description and Operation),
Front Disc Brake (206-03, Description and Operation),
Rear Disc Brake (206-04, Description and Operation),
Rear Disc Brake (206-04, Description and Operation),
Rear Disc Brake (206-04, Description and Operation),
Parking Brake (206-05 Parking Brake and Actuation, Description and Operation), Parking Brake (206-05 Parking Brake and Actuation, Description and Operation), Parking Brake (206-05 Parking Brake and Actuation, Description and Operation), Hydraulic Brake Actuation (206-06 Hydraulic Brake Actuation, Description and Operation), Hydraulic Brake Actuation (206-06 Hydraulic Brake Actuation, Description and Operation), Hydraulic Brake Actuation (206-06 Hydraulic Brake Actuation, Description and Operation), Brake Booster (206-07 Power Brake Actuation, Description and Operation), Brake Booster (206-07 Power Brake Actuation, Description and Operation), Brake Booster (206-07, Description and Operation).
Inspection and Verification
Visually examine the front and rear wheel and tire assemblies for damage such as uneven wear patterns, tread worn out or
sidewall damage. Verify the tires are the same size, type and, where possible, same manufacturer. Replace the damaged
wheel or excessively worn tire.
Wheels and tires must be cleared of any foreign matter and tire pressures adjusted to the correct specification.
If the tires exhibit uneven wear or feathering, the cause must be corrected. Check the steering and suspension components for
damage or wear and, if necessary, check and adjust front wheel alignment. REFER to: (204-00 Suspension System - General
Information)
Specifications (Specifications), Front Toe Adjustment (General Procedures).
Visual Inspection
Mechanical Electrical
Brake master cylinder
Brake caliper piston(s)
Brake discs
Wheel bearings
Brake pads
Power brake booster
Brake pedal linkage
Brake booster vacuum hose
Tires
Debris
Parking brake actuator
Parking brake module
Parking brake switch
Damaged or corroded wiring harness
Brake master cylinder fluid level switch Road Test
Carry out a road test to compare actual vehicle braking performance with the performance standards expected by the driver.
The ability of the test driver to make valid comparisons and detect performance deficiencies will depend on experience.
The driver should have a thorough knowledge of brake system operation and accepted general performance guidelines to make
good comparisons and detect performance concerns.
An experienced brake technician will always establish a route that will be used for all brake diagnosis road tests. The roads
selected will be reasonably smooth and level. Gravel or bumpy roads are not suitable because the surface does not allow the
tires to grip the road equally. Crowned roads should be avoided because of the large amount of weight shifted to the low set
of wheels on this type of road. Once the route is established and consistently used, the road surface variable can be
eliminated from the test results.
Before a road test, obtain a complete description of the customer concerns or suspected condition. From the description, the
technician's experience will allow the technician to match possible causes with symptoms. Certain components will be tagged
as possible suspects while others will be eliminated by the evidence. More importantly, the customer description can reveal
unsafe conditions which should be checked or corrected before the road test. The description will also help form the basic
approach to the road test by narrowing the concern to specific components, vehicle speed or conditions.
Begin the road test with a general brake performance check. Keeping the description of the concern in mind, test the brakes at
different vehicle speeds using both light and heavy pedal pressure. To determine if the concern is in the front or rear braking
system, use the brake pedal and then use the parking brake control. If the condition (pull, vibration, pulsation) occurs only
with the parking brake, the concern is in the rear brake system.
Page 584 of 3039

Symptom Possible Cause Action Electrical circuit
For parking brake control and circuit tests.
REFER to: Parking Brake (206-05, Diagnosis and Testing). Slow or incomplete brake
pedal return
Brake pedal binding
Brake booster/master cylinder GO to Pinpoint Test K. Pinpoint Tests
PINPOINT TEST A : BRAKES NOISY TEST
CONDITIONS DETAILS/RESULTS/ACTIONS A1: INSPECT BRAKE PADS 1 Inspect the condition of the front and rear brake pads. Check for damage to any anti-squeal shims. Are the brake pads OK? Yes
GO to A2. No
Clean/install new front and rear brake pads as required. REFER to:
Brake Pads - Vehicles With: Standard Brakes (206-03A Front Disc Brake - V6 3.0L Petrol, Removal and Installation),
Brake Pads - Vehicles With: High Performance Brakes (206-03A Front Disc Brake - V6 3.0L Petrol, Removal and Installation),
Brake Pads (206-04A Rear Disc Brake - V6 3.0L Petrol, Removal and Installation), Brake Pads - Vehicles With: High Performance Brakes (206-04, Removal and Installation).
Re-test vehicle for brake noise. A2: INSPECT BRAKE DISCS 1 Inspect the brake discs for excessive corrosion, wear or disc thickness variation. Does excessive corrosion, wear or disc thickness variation exist? Yes
Install new front and rear brake discs and brake pads as required. REFER to:
Brake Pads - Vehicles With: Standard Brakes (206-03A Front Disc Brake - V6 3.0L Petrol, Removal and Installation),
Brake Pads - Vehicles With: High Performance Brakes (206-03A Front Disc Brake - V6 3.0L Petrol, Removal and Installation),
Brake Pads (206-04A Rear Disc Brake - V6 3.0L Petrol, Removal and Installation), Brake Pads - Vehicles With: High Performance Brakes (206-04, Removal and Installation),
Brake Disc - Vehicles With: Standard Brakes (206-03A Front Disc Brake - V6 3.0L Petrol, Removal and Installation),
Brake Disc - Vehicles With: High Performance Brakes (206-03A Front Disc Brake - V6 3.0L Petrol, Removal and Installation),
Brake Disc (206-04A Rear Disc Brake - V6 3.0L Petrol, Removal and Installation), Brake Disc - Vehicles With: High Performance Brakes (206-04, Removal and Installation).
Re-test vehicle for brake noise.
No
No action required, vehicle is OK.
PINPOINT TEST B : VIBRATION WHEN BRAKES ARE APPLIED TEST
CONDITIONS DETAILS/RESULTS/ACTIONS B1: ROAD TEST VEHICLE 1 Road test the vehicle between 40-80 km/h (25-50 mph) without applying brakes. Is the vibration present?
Yes
For noise vibration and harshness tests.
REFER to: Noise, Vibration and Harshness (NVH) (100-04 Noise, Vibration and Harshness, Diagnosis and Testing).
No
GO to B2. B2: CHECK FOR BRAKE VIBRATION 1 Road test the vehicle between 40-80 km/h (25-50 mph) with light and medium application on the brake pedal. Is a vibration present?
Yes
Check the brake caliper mounting bolts and wheel hub nuts and tighten to specification as required. Check
the balance of all road wheels and tires and repair as required. Check the brake discs for excessive wear,
runout, thickness variation or cracks. Install new brake discs and brake pads as required. GO to B3. No
No action required, vehicle is OK. B3: IS VIBRATION STILL PRESENT UNDER BRAKE APPLICATION? 1 Road test the vehicle between 40-80 km/h (25-50 mph) with light and medium application on the brake pedal.
Page 585 of 3039

TEST
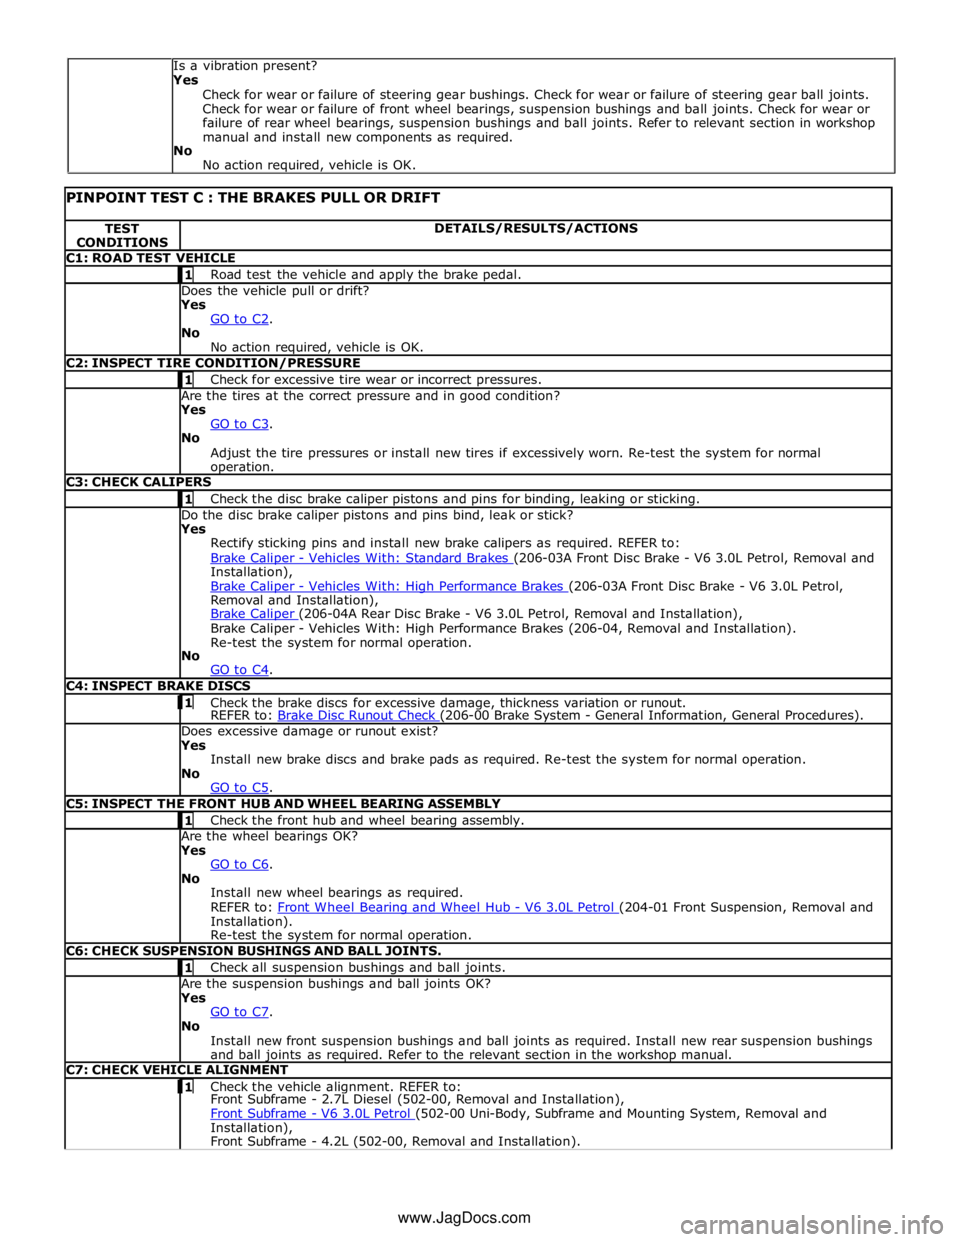
CONDITIONS DETAILS/RESULTS/ACTIONS C1: ROAD TEST VEHICLE 1 Road test the vehicle and apply the brake pedal. Does the vehicle pull or drift?
Yes
GO to C2. No
No action required, vehicle is OK. C2: INSPECT TIRE CONDITION/PRESSURE 1 Check for excessive tire wear or incorrect pressures. Are the tires at the correct pressure and in good condition?
Yes
GO to C3. No
Adjust the tire pressures or install new tires if excessively worn. Re-test the system for normal operation. C3: CHECK CALIPERS 1 Check the disc brake caliper pistons and pins for binding, leaking or sticking. Do the disc brake caliper pistons and pins bind, leak or stick?
Yes
Rectify sticking pins and install new brake calipers as required. REFER to:
Brake Caliper - Vehicles With: Standard Brakes (206-03A Front Disc Brake - V6 3.0L Petrol, Removal and Installation),
Brake Caliper - Vehicles With: High Performance Brakes (206-03A Front Disc Brake - V6 3.0L Petrol, Removal and Installation),
Brake Caliper (206-04A Rear Disc Brake - V6 3.0L Petrol, Removal and Installation), Brake Caliper - Vehicles With: High Performance Brakes (206-04, Removal and Installation).
Re-test the system for normal operation.
No
GO to C4. C4: INSPECT BRAKE DISCS 1 Check the brake discs for excessive damage, thickness variation or runout. REFER to: Brake Disc Runout Check (206-00 Brake System - General Information, General Procedures). Does excessive damage or runout exist?
Yes
Install new brake discs and brake pads as required. Re-test the system for normal operation.
No
GO to C5. C5: INSPECT THE FRONT HUB AND WHEEL BEARING ASSEMBLY 1 Check the front hub and wheel bearing assembly. Are the wheel bearings OK?
Yes
GO to C6. No
Install new wheel bearings as required.
REFER to: Front Wheel Bearing and Wheel Hub - V6 3.0L Petrol (204-01 Front Suspension, Removal and Installation).
Re-test the system for normal operation. C6: CHECK SUSPENSION BUSHINGS AND BALL JOINTS. 1 Check all suspension bushings and ball joints. Are the suspension bushings and ball joints OK?
Yes
GO to C7. No
Install new front suspension bushings and ball joints as required. Install new rear suspension bushings
and ball joints as required. Refer to the relevant section in the workshop manual. C7: CHECK VEHICLE ALIGNMENT 1 Check the vehicle alignment. REFER to: Front Subframe - 2.7L Diesel (502-00, Removal and Installation),
Front Subframe - V6 3.0L Petrol (502-00 Uni-Body, Subframe and Mounting System, Removal and Installation),
Front Subframe - 4.2L (502-00, Removal and Installation). Is a vibration present?
Yes
Check for wear or failure of steering gear bushings. Check for wear or failure of steering gear ball joints.
Check for wear or failure of front wheel bearings, suspension bushings and ball joints. Check for wear or
failure of rear wheel bearings, suspension bushings and ball joints. Refer to relevant section in workshop
manual and install new components as required.
No
No action required, vehicle is OK.
www.JagDocs.com
Page 587 of 3039

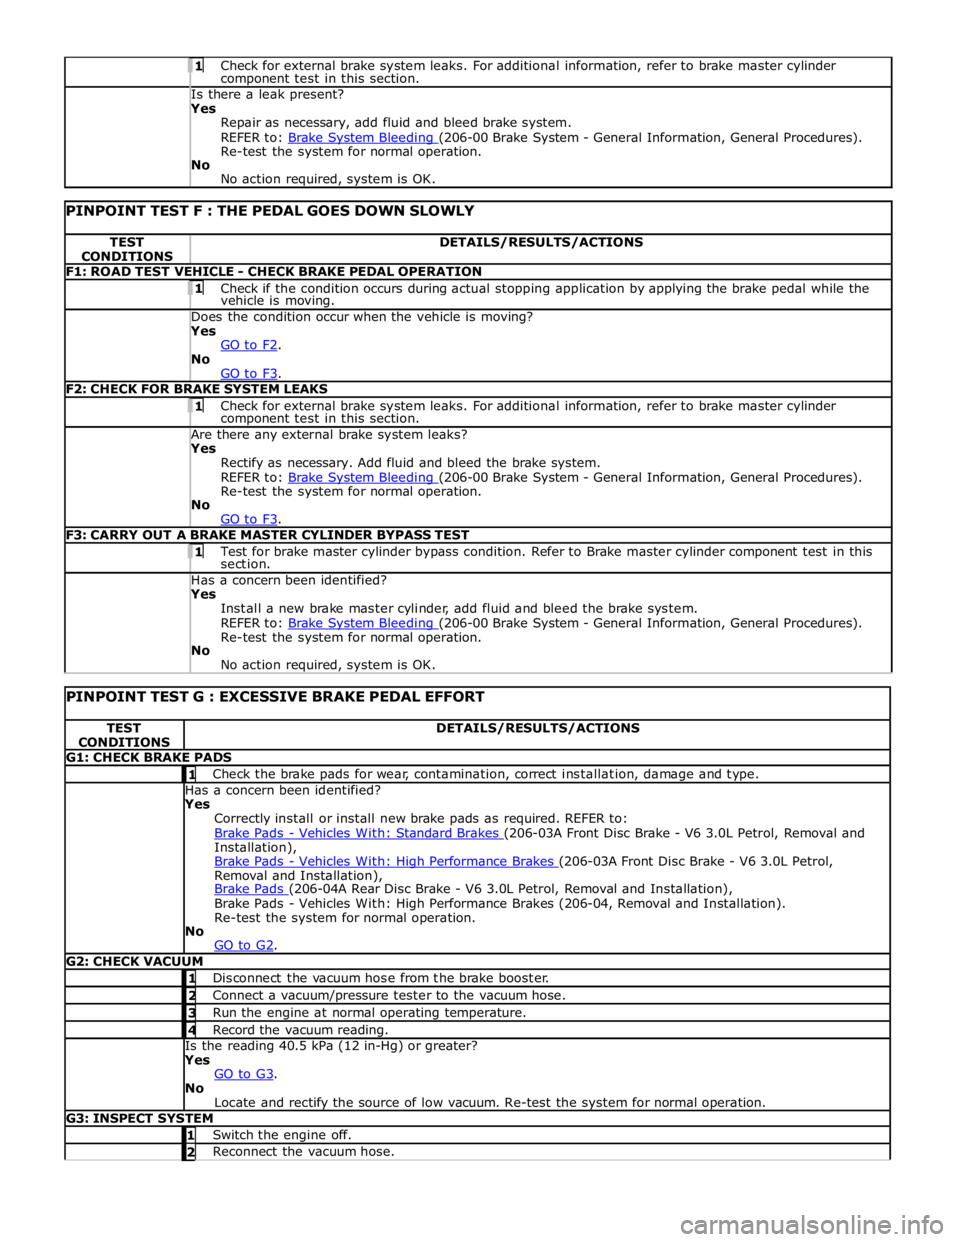
Check for external brake system leaks. For additional information, refer to brake master cylinder component test in this section. Is there a leak present? Yes
Repair as necessary, add fluid and bleed brake system.
REFER to: Brake System Bleeding (206-00 Brake System - General Information, General Procedures). Re-test the system for normal operation.
No
No action required, system is OK.
PINPOINT TEST F : THE PEDAL GOES DOWN SLOWLY TEST
CONDITIONS DETAILS/RESULTS/ACTIONS F1: ROAD TEST VEHICLE - CHECK BRAKE PEDAL OPERATION 1 Check if the condition occurs during actual stopping application by applying the brake pedal while the vehicle is moving. Does the condition occur when the vehicle is moving? Yes
GO to F2. No
GO to F3. F2: CHECK FOR BRAKE SYSTEM LEAKS 1 Check for external brake system leaks. For additional information, refer to brake master cylinder component test in this section. Are there any external brake system leaks? Yes
Rectify as necessary. Add fluid and bleed the brake system.
REFER to: Brake System Bleeding (206-00 Brake System - General Information, General Procedures). Re-test the system for normal operation.
No
GO to F3. F3: CARRY OUT A BRAKE MASTER CYLINDER BYPASS TEST 1 Test for brake master cylinder bypass condition. Refer to Brake master cylinder component test in this section. Has a concern been identified? Yes
Install a new brake master cylinder, add fluid and bleed the brake system.
REFER to: Brake System Bleeding (206-00 Brake System - General Information, General Procedures). Re-test the system for normal operation.
No
No action required, system is OK.
PINPOINT TEST G : EXCESSIVE BRAKE PEDAL EFFORT TEST
CONDITIONS DETAILS/RESULTS/ACTIONS G1: CHECK BRAKE PADS 1 Check the brake pads for wear, contamination, correct installation, damage and type. Has a concern been identified?
Yes
Correctly install or install new brake pads as required. REFER to:
Brake Pads - Vehicles With: Standard Brakes (206-03A Front Disc Brake - V6 3.0L Petrol, Removal and Installation),
Brake Pads - Vehicles With: High Performance Brakes (206-03A Front Disc Brake - V6 3.0L Petrol, Removal and Installation),
Brake Pads (206-04A Rear Disc Brake - V6 3.0L Petrol, Removal and Installation), Brake Pads - Vehicles With: High Performance Brakes (206-04, Removal and Installation).
Re-test the system for normal operation.
No
GO to G2. G2: CHECK VACUUM 1 Disconnect the vacuum hose from the brake booster. 2 Connect a vacuum/pressure tester to the vacuum hose. 3 Run the engine at normal operating temperature. 4 Record the vacuum reading. Is the reading 40.5 kPa (12 in-Hg) or greater?
Yes
GO to G3. No
Locate and rectify the source of low vacuum. Re-test the system for normal operation. G3: INSPECT SYSTEM 1 Switch the engine off. 2 Reconnect the vacuum hose.
Page 588 of 3039

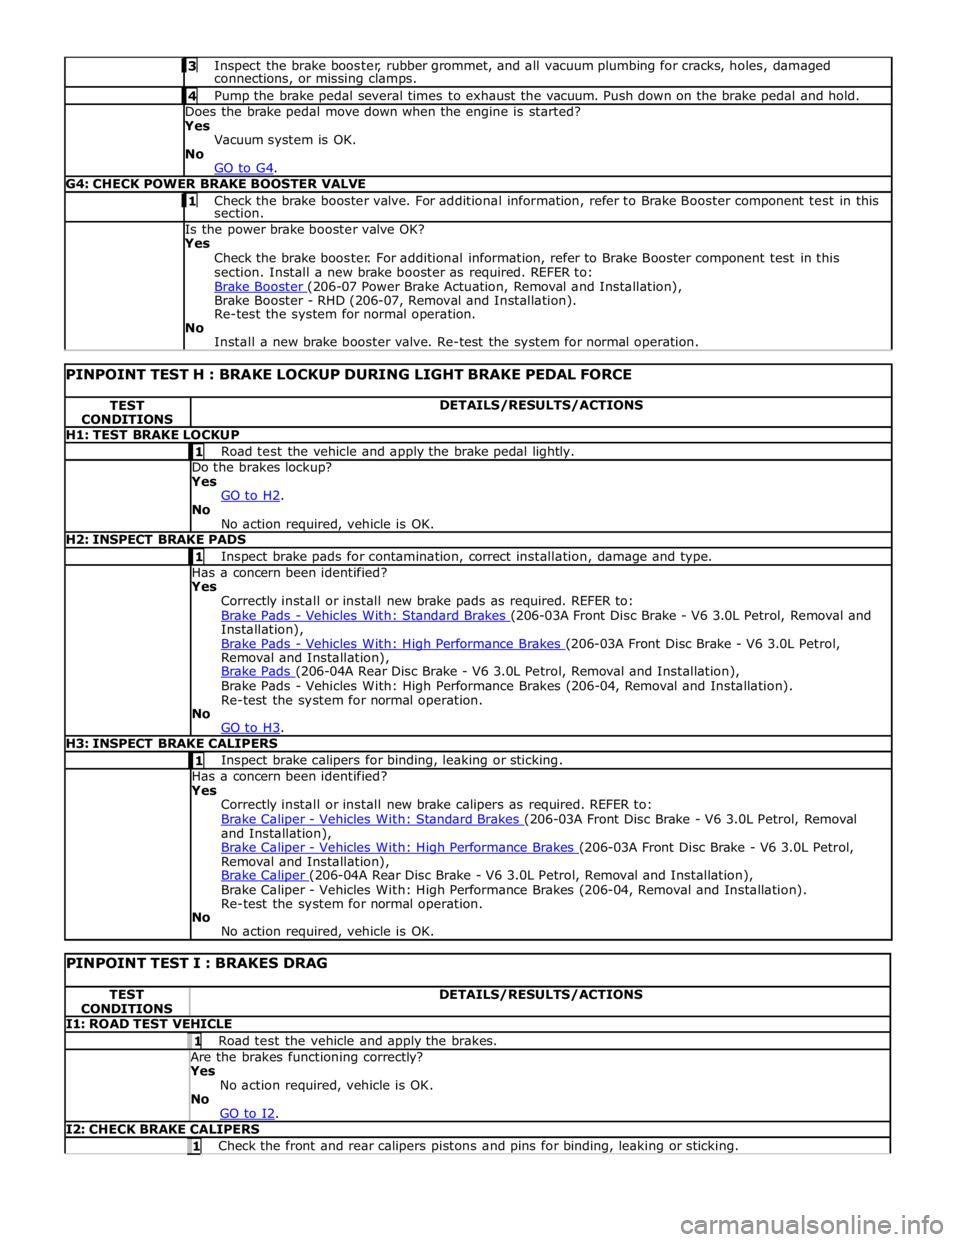
Inspect the brake booster, rubber grommet, and all vacuum plumbing for cracks, holes, damaged connections, or missing clamps. 4 Pump the brake pedal several times to exhaust the vacuum. Push down on the brake pedal and hold. Does the brake pedal move down when the engine is started?
Yes
Vacuum system is OK.
No
GO to G4. G4: CHECK POWER BRAKE BOOSTER VALVE 1 Check the brake booster valve. For additional information, refer to Brake Booster component test in this section. Is the power brake booster valve OK?
Yes
Check the brake booster. For additional information, refer to Brake Booster component test in this
section. Install a new brake booster as required. REFER to:
Brake Booster (206-07 Power Brake Actuation, Removal and Installation), Brake Booster - RHD (206-07, Removal and Installation).
Re-test the system for normal operation.
No
Install a new brake booster valve. Re-test the system for normal operation.
PINPOINT TEST H : BRAKE LOCKUP DURING LIGHT BRAKE PEDAL FORCE TEST
CONDITIONS DETAILS/RESULTS/ACTIONS H1: TEST BRAKE LOCKUP 1 Road test the vehicle and apply the brake pedal lightly. Do the brakes lockup?
Yes
GO to H2. No
No action required, vehicle is OK. H2: INSPECT BRAKE PADS 1 Inspect brake pads for contamination, correct installation, damage and type. Has a concern been identified?
Yes
Correctly install or install new brake pads as required. REFER to:
Brake Pads - Vehicles With: Standard Brakes (206-03A Front Disc Brake - V6 3.0L Petrol, Removal and Installation),
Brake Pads - Vehicles With: High Performance Brakes (206-03A Front Disc Brake - V6 3.0L Petrol, Removal and Installation),
Brake Pads (206-04A Rear Disc Brake - V6 3.0L Petrol, Removal and Installation), Brake Pads - Vehicles With: High Performance Brakes (206-04, Removal and Installation).
Re-test the system for normal operation.
No
GO to H3. H3: INSPECT BRAKE CALIPERS 1 Inspect brake calipers for binding, leaking or sticking. Has a concern been identified?
Yes
Correctly install or install new brake calipers as required. REFER to:
Brake Caliper - Vehicles With: Standard Brakes (206-03A Front Disc Brake - V6 3.0L Petrol, Removal and Installation),
Brake Caliper - Vehicles With: High Performance Brakes (206-03A Front Disc Brake - V6 3.0L Petrol, Removal and Installation),
Brake Caliper (206-04A Rear Disc Brake - V6 3.0L Petrol, Removal and Installation), Brake Caliper - Vehicles With: High Performance Brakes (206-04, Removal and Installation).
Re-test the system for normal operation.
No
No action required, vehicle is OK.
PINPOINT TEST I : BRAKES DRAG TEST
CONDITIONS DETAILS/RESULTS/ACTIONS I1: ROAD TEST VEHICLE 1 Road test the vehicle and apply the brakes. Are the brakes functioning correctly? Yes
No action required, vehicle is OK.
No
GO to I2. I2: CHECK BRAKE CALIPERS 1 Check the front and rear calipers pistons and pins for binding, leaking or sticking.