2010 Hyundai H-100 Truck check engine
[x] Cancel search: check enginePage 170 of 207
6 DO-IT-YOURSELF MAINTENANCE
12CHANGING THE AIR CLEANER FILTER
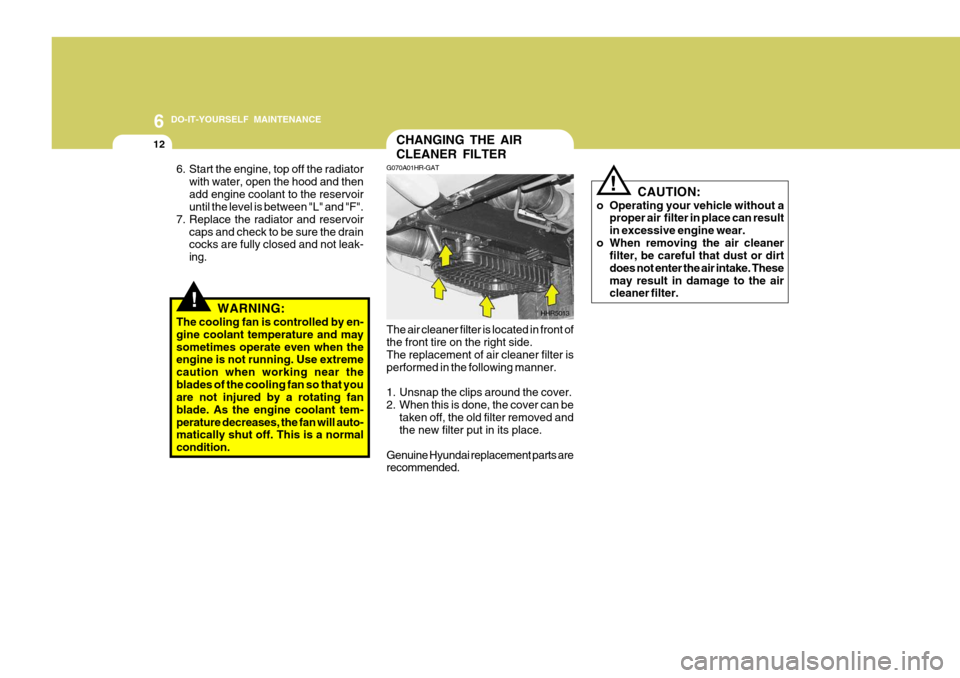
G070A01HR-GAT
The air cleaner filter is located in front of the front tire on the right side. The replacement of air cleaner filter is performed in the following manner.
1. Unsnap the clips around the cover.
2. When this is done, the cover can be taken off, the old filter removed and the new filter put in its place.
Genuine Hyundai replacement parts arerecommended. CAUTION:
o Operating your vehicle without a proper air filter in place can result in excessive engine wear.
o When removing the air cleaner filter, be careful that dust or dirtdoes not enter the air intake. Thesemay result in damage to the air cleaner filter.
!
HHR5013
!WARNING:
The cooling fan is controlled by en- gine coolant temperature and may sometimes operate even when the engine is not running. Use extreme caution when working near theblades of the cooling fan so that you are not injured by a rotating fan blade. As the engine coolant tem-perature decreases, the fan will auto- matically shut off. This is a normal condition.
6. Start the engine, top off the radiator
with water, open the hood and thenadd engine coolant to the reservoir until the level is between "L" and "F".
7. Replace the radiator and reservoir
caps and check to be sure the draincocks are fully closed and not leak- ing.
Page 173 of 207

6
DO-IT-YOURSELF MAINTENANCE
15
CAUTION:
o Radiator antifreeze (engine cool- ant) should not be used in the washer system because it will damage the car's finish.
o The washer should not be oper- ated if the washer reservoir isempty. This can damage thewasher fluid pump.!
CHECKING THE TRANSMISSION OIL (MANUAL)
G100A03HR-GAT
G100A01HR
Transmission lubricant in the manual transmission should be checked at those intervals specified in the vehiclemaintenance schedule in Section 5. Recommended Oil Use only HYUNDAI GENUINE PARTS MTF 75W/85 (API GL-4) in the manualtransmission. Manual Transmission Oil Capac- ity The oil capacity of the manual trans- mission is 2.4 liters (2.6 N/A)/1.95 liters(2.5 TCI).
Drain plug Filler plug
!WARNING:
o Windshield washer fluid agents contain some amounts of alcohol and can be flammable under cer- tain circumstances. Do not allow sparks or flame to contact thewasher fluid or the washer fluid reservoir. Damage to the vehicle or its occupants could occur.
o Windshield washer fluid is poi- sonous to humans and animals.Do not drink windshield washerfluid. Serious injury or death could occur.
!
G100B01HP-GAT To Check the Maunal Transmis- sion Fluid Level
G100B01L
WARNING:
It is always better to check the trans- mission oil level when the engine is cool or cold. If the engine is hot, you should exercise great caution toavoid burning yourself on hot en- gine or exhaust parts.
Page 174 of 207
6 DO-IT-YOURSELF MAINTENANCE
16CHECKING THE REAR AXLE OIL
!
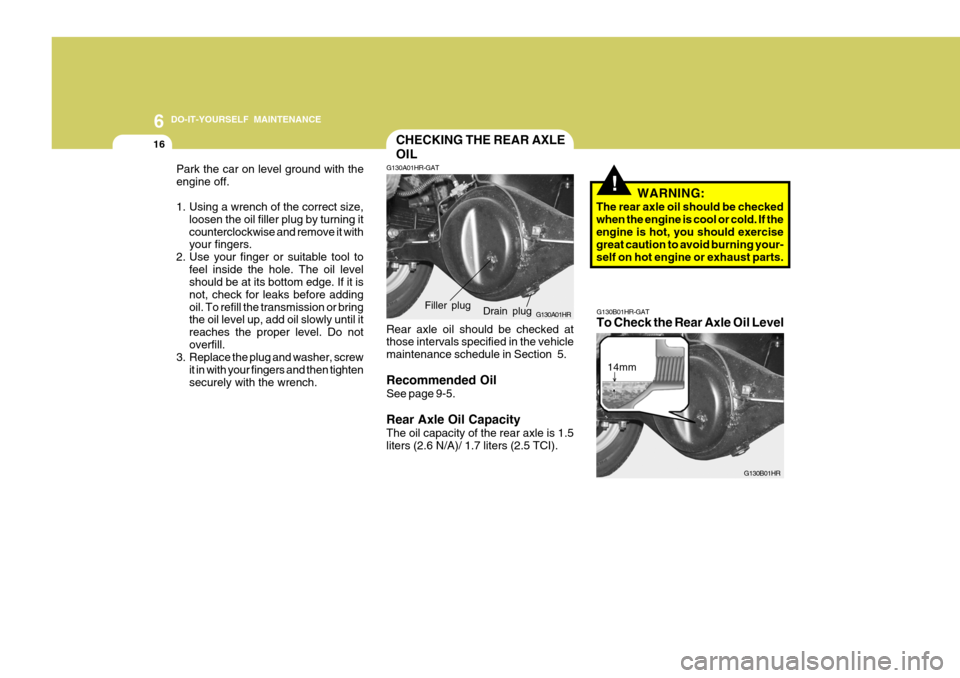
Park the car on level ground with the engine off.
1. Using a wrench of the correct size,
loosen the oil filler plug by turning it counterclockwise and remove it with your fingers.
2. Use your finger or suitable tool to
feel inside the hole. The oil levelshould be at its bottom edge. If it is not, check for leaks before addingoil. To refill the transmission or bring the oil level up, add oil slowly until it reaches the proper level. Do notoverfill.
3. Replace the plug and washer, screw
it in with your fingers and then tightensecurely with the wrench. G130A01HR-GAT
G130A01HR
Rear axle oil should be checked at those intervals specified in the vehicle maintenance schedule in Section 5. Recommended Oil See page 9-5. Rear Axle Oil Capacity The oil capacity of the rear axle is 1.5 liters (2.6 N/A)/ 1.7 liters (2.5 TCI). WARNING:
The rear axle oil should be checkedwhen the engine is cool or cold. If the engine is hot, you should exercise great caution to avoid burning your-self on hot engine or exhaust parts.
Drain plug
Filler plug
G130B01HR-GAT To Check the Rear Axle Oil Level
G130B01HR
14mm
Page 175 of 207
6
DO-IT-YOURSELF MAINTENANCE
17
Park the car on level ground with the engine off.
1. Using a wrench of the correct size, loosen the oil filler plug by turning it counterclockwise and remove it with your fingers.
2. Use a suitable tool to feel inside the
hole. The oil level should be within 14mm from its bottom edge. If it is not, check for leaks before adding oil. Torefill the rear axle or bring the oil level up,add oil slowly until it reaches the proper level. Do not overfill.
3. Replace the plug and washer, screw it in with your fingers and then tightensecurely with the wrench.
NOTE: It is recommended that the rear axle oil should be checked by an autho- rized Hyundai dealer.
!
CHECKING THE BRAKES
G120A01A-AAT
G120B01A-AAT Checking the Brake Fluid Level
! CAUTION:
Because brakes are essential to the safe operation of the car, it is sug- gested that they be checked andinspected by your Hyundai dealer. The brakes should be checked and inspected for wear at those inter-vals specified in the vehicle mainte- nance schedule in Section 5.
WARNING:
Use caution when handling brake fluid. It can damage your vision if it gets into your eyes. It will also dam- age your vehicle's paint if spilledon it and not removed immediately.
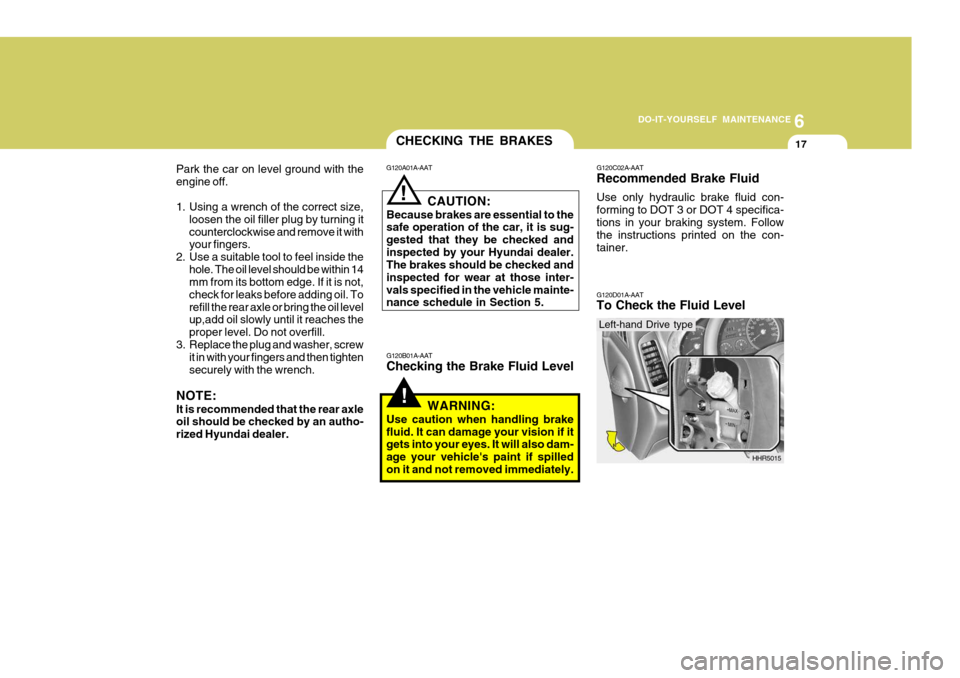
G120C02A-AAT Recommended Brake Fluid Use only hydraulic brake fluid con- forming to DOT 3 or DOT 4 specifica-tions in your braking system. Follow the instructions printed on the con- tainer. G120D01A-AAT To Check the Fluid Level
HHR5015
Left-hand Drive type
Page 176 of 207
6 DO-IT-YOURSELF MAINTENANCE
18
!
G120E01HR-GAT Adding Brake Fluid
WARNING:
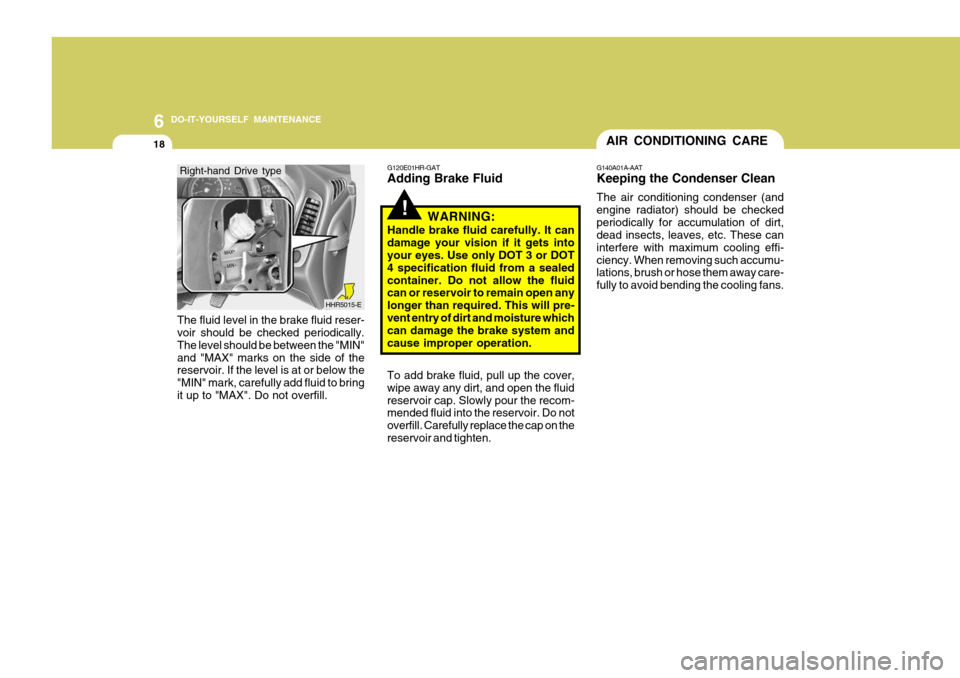
Handle brake fluid carefully. It can damage your vision if it gets into your eyes. Use only DOT 3 or DOT 4 specification fluid from a sealedcontainer. Do not allow the fluid can or reservoir to remain open any longer than required. This will pre-vent entry of dirt and moisture which can damage the brake system and cause improper operation. To add brake fluid, pull up the cover, wipe away any dirt, and open the fluidreservoir cap. Slowly pour the recom- mended fluid into the reservoir. Do not overfill. Carefully replace the cap on thereservoir and tighten.
The fluid level in the brake fluid reser- voir should be checked periodically. The level should be between the "MIN"and "MAX" marks on the side of the reservoir. If the level is at or below the "MIN" mark, carefully add fluid to bringit up to "MAX". Do not overfill.
HHR5015-E
Right-hand Drive type
AIR CONDITIONING CARE
G140A01A-AAT Keeping the Condenser Clean The air conditioning condenser (and engine radiator) should be checkedperiodically for accumulation of dirt, dead insects, leaves, etc. These can interfere with maximum cooling effi-ciency. When removing such accumu- lations, brush or hose them away care- fully to avoid bending the cooling fans.
Page 177 of 207
6
DO-IT-YOURSELF MAINTENANCE
19
G140B01A-AAT Checking the Air Conditioning Operation
1. Start the engine and let it run at a
fast idle for several minutes with the air conditioning set at the maximum cold setting.
2. If the air coming out of the in-dash vents is not cold, have the air condi-tioning system inspected by yourHyundai dealer.
G140C01A-AAT Lubrication To lubricate the compressor and the seals in the system, the air conditioning should be run for at least 10 minuteseach week. This is particularly important during cool weather when the air condi- tioning system is not otherwise in use.
! CAUTION:
Running the air conditioning sys- tem for extended periods of time with a low refrigerant level may damage the compressor. Crankshaft pulley
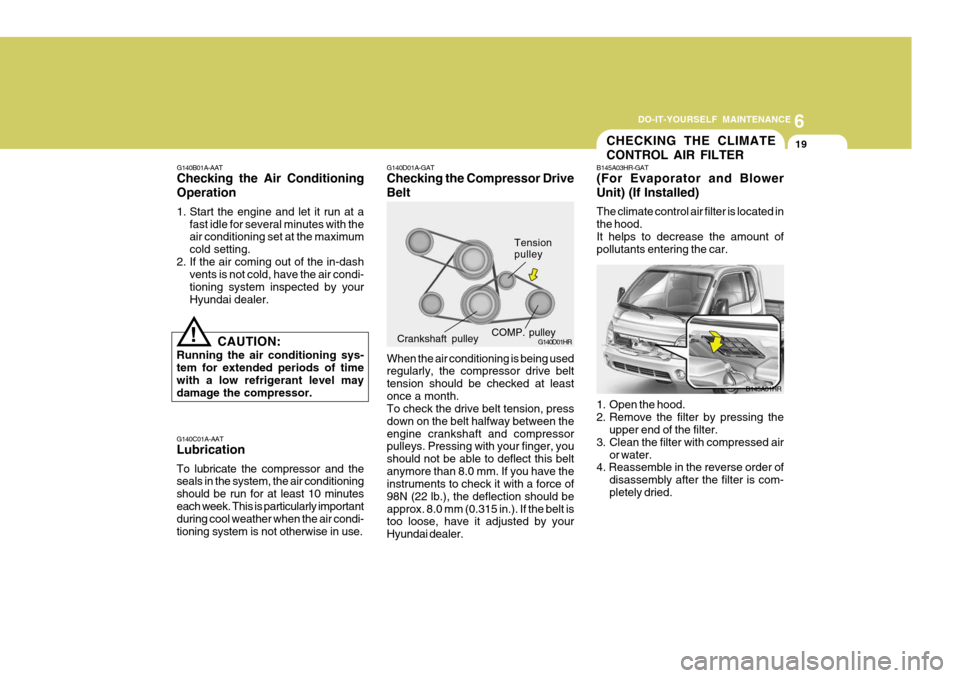
G140D01A-GAT Checking the Compressor Drive Belt
When the air conditioning is being used regularly, the compressor drive belt tension should be checked at leastonce a month. To check the drive belt tension, press down on the belt halfway between theengine crankshaft and compressor pulleys. Pressing with your finger, you should not be able to deflect this beltanymore than 8.0 mm. If you have the instruments to check it with a force of 98N (22 lb.), the deflection should beapprox. 8.0 mm (0.315 in.). If the belt is too loose, have it adjusted by your Hyundai dealer. G140D01HRCOMP. pulley
Tension pulley
CHECKING THE CLIMATE CONTROL AIR FILTER
B145A03HR-GAT
(For Evaporator and Blower Unit) (If Installed) The climate control air filter is located in the hood.It helps to decrease the amount of pollutants entering the car.
B145A01HR
1. Open the hood.
2. Remove the filter by pressing the upper end of the filter.
3. Clean the filter with compressed air
or water.
4. Reassemble in the reverse order of
disassembly after the filter is com-pletely dried.
Page 178 of 207
6 DO-IT-YOURSELF MAINTENANCE
20
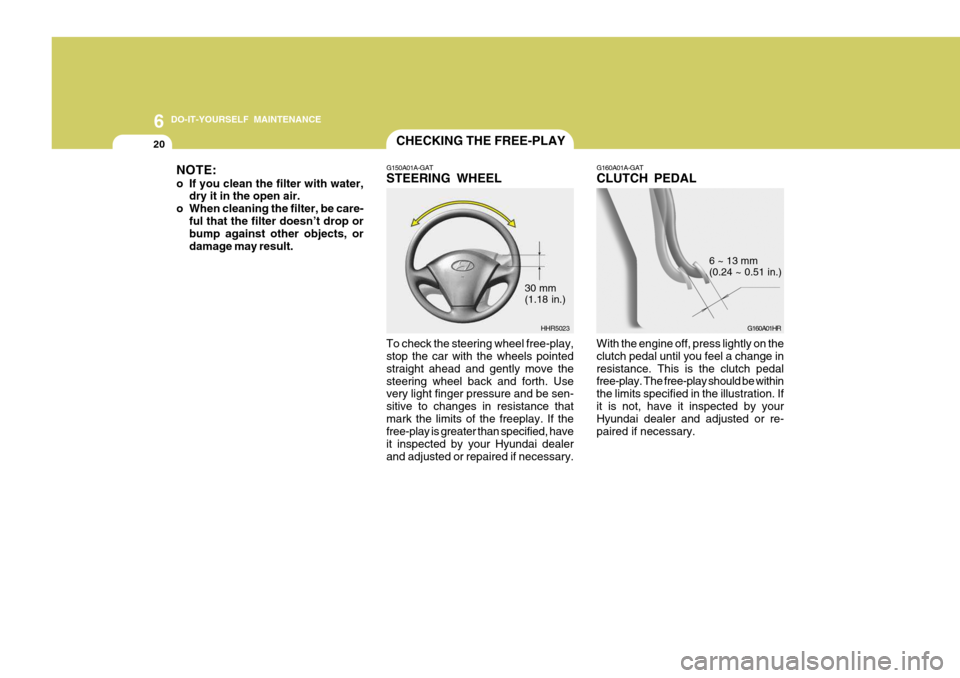
G160A01A-GAT CLUTCH PEDAL
G160A01HR
6 ~ 13 mm (0.24 ~ 0.51 in.)
With the engine off, press lightly on the clutch pedal until you feel a change inresistance. This is the clutch pedal free-play. The free-play should be within the limits specified in the illustration. Ifit is not, have it inspected by your Hyundai dealer and adjusted or re- paired if necessary.
CHECKING THE FREE-PLAY
G150A01A-GAT STEERING WHEEL To check the steering wheel free-play, stop the car with the wheels pointed straight ahead and gently move thesteering wheel back and forth. Use very light finger pressure and be sen- sitive to changes in resistance thatmark the limits of the freeplay. If the free-play is greater than specified, have it inspected by your Hyundai dealerand adjusted or repaired if necessary. HHR5023
30 mm (1.18 in.)
NOTE:
o If you clean the filter with water,
dry it in the open air.
o When cleaning the filter, be care- ful that the filter doesn’t drop or bump against other objects, or damage may result.
Page 179 of 207
6
DO-IT-YOURSELF MAINTENANCE
21
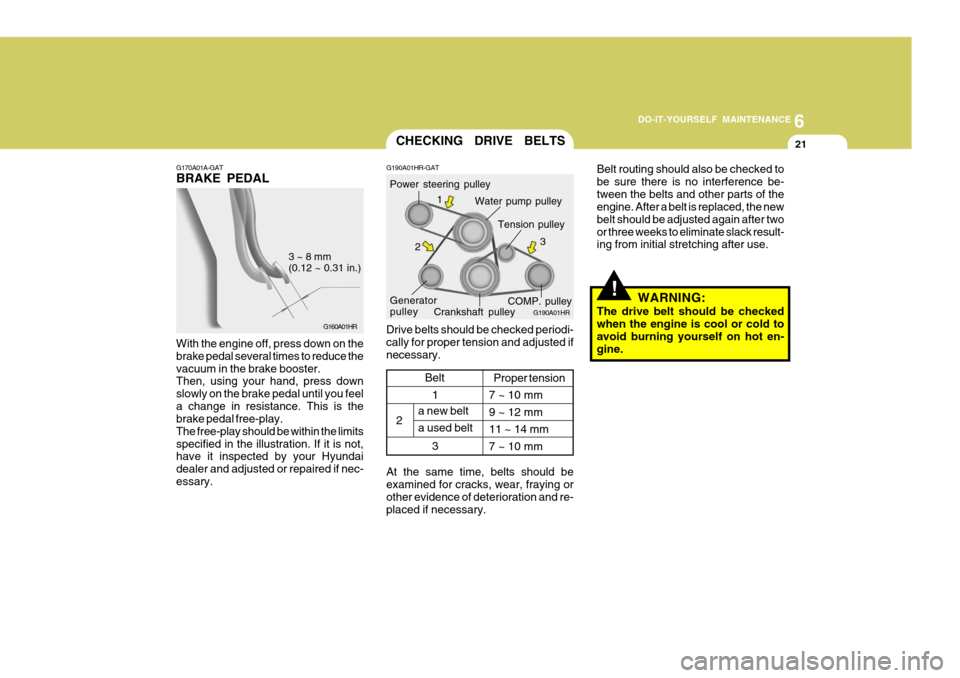
G170A01A-GAT BRAKE PEDAL
G160A01HR
3 ~ 8 mm (0.12 ~ 0.31 in.)
With the engine off, press down on the brake pedal several times to reduce thevacuum in the brake booster. Then, using your hand, press down slowly on the brake pedal until you feela change in resistance. This is the brake pedal free-play. The free-play should be within the limitsspecified in the illustration. If it is not, have it inspected by your Hyundai dealer and adjusted or repaired if nec-essary.
1
2
3
CHECKING DRIVE BELTS
Water pump pulley
G190A01HR-GAT
G190A01HR
Drive belts should be checked periodi- cally for proper tension and adjusted ifnecessary. Power steering pulley
Crankshaft pulley
Generator pulley Tension pulley
COMP. pulley
1
2 3
a new belt a used beltProper tension
7 ~ 10 mm9 ~ 12 mm11 ~ 14 mm7 ~ 10 mm
Belt
At the same time, belts should be examined for cracks, wear, fraying or other evidence of deterioration and re-placed if necessary.
!
Belt routing should also be checked to be sure there is no interference be-tween the belts and other parts of the engine. After a belt is replaced, the new belt should be adjusted again after twoor three weeks to eliminate slack result- ing from initial stretching after use. WARNING:
The drive belt should be checked when the engine is cool or cold to avoid burning yourself on hot en- gine.