2010 Hyundai H-100 Truck check engine
[x] Cancel search: check enginePage 157 of 207

5
VEHICLE MAINTENANCE REQUIREMENTS
11
F070F01A-AAT
o Brake Hoses and Lines
Visually check for proper installation, chafing, cracks, deterioration and any leakage. Replace any deteriorated or damaged parts immediately. F070G02A-GAT
o Brake Fluid
Check brake fluid level in the brake fluid reservoir. The level should be between "MIN" and "MAX" marks on the side of the reservoir. Use only hydraulic brake fluid conforming to DOT3 or DOT 4.
F070L01A-AAT
o Suspension Mounting Bolts
Check the suspension connections for
looseness or damage. Retighten to thespecified torque. F070M01A-AAT
o Steering Gear Box, Linkage &
Boots/Lower arm Ball Joint
With the vehicle stopped and engine off, check for excessive free-play in the steering wheel. Check the linkage for bends or damage. Check the dustboots and ball joints for deterioration, cracks, or damage. Replace any dam- aged parts. F070N01A-AAT
o Power Steering Pump, Belt and Hoses
Check the power steering pump and hoses for leakage and damage. Re-place any damaged or leaking parts immediately. Inspect the power steer- ing belt for evidence of cuts, cracks,excessive wear, oiliness and proper tension. Replace or adjust it if neces- sary.
F070J01A-AAT
o Brake Pads, Calipers and
Rotors
Check the pads for excessive wear,
discs for run out and wear, and cali- pers for fluid leakage.
F070K01A-AAT
o Exhaust Pipe and Muffler
Visually inspect the exhaust pipes,
muffler and hangers for cracks, dete-rioration, or damage. Start the engine and listen carefully for any exhaustgas leakage. Tighten connections or replace parts as necessary.
F070H01A-AAT
o Rear Brake Drums/Linings
Parking Brake
Check the rear brake drums and lin-
ings for scoring, burning, leaking fluid, broken parts, and excessive wear. Inspect the parking brake system in- cluding the parking brake lever andcables. For detailed service proce- dures, refer to the Shop Manual.
Page 159 of 207

Front Open Service Panel ............................................ 6-2
Engine Compartment .................................................... 6-3
General Checks ........................................................... 6-5
Checking the Engine Oil ............................................... 6-6
Changing the Oil and Filter ........................................... 6-8
Checking and Changing the Engine Coolant ...............6-10
Changing the Air Cleaner Filte r ....................................6-12
Checking the Transmission Oil (Manual) ....................6-15
Checking the Rear Axle Oil......................................... 6-16
Checking the B rakes ................................................... 6-17
Air Conditioning Care ................................................... 6-18
Checking the Climate Control Air Filter
(For Evaporator and Blower U nit) .............................6-19
Checking Drive Belts................................................... 6-21
Checking and Replacing Fuses .................................. 6-22
Checking the Battery ................................................... 6-24
Power Steering Fluid Level .......................................... 6-26
Fuel Fil ter ..................................................................... 6-27
Replacement of Light Bulbs ......................................... 6-30
Bulb Wattages ............................................................. 6-37
Fuse Panel Description ............................................... 6-38
DO-IT-YOURSELF MAINTENANCE
6
6
Page 163 of 207
6
DO-IT-YOURSELF MAINTENANCE
5
G020A01HR-GAT Engine Compartment The following should be checked regu- larly:
o Engine oil level and condition
o Transmission fluid level and condi-
tion
o Brake fluid level
o Engine coolant level
o Windshield washer fluid level
o Accessory drive belt condition
o Engine coolant hose condition
o Fluid leaks (on or below compo- nents)
o Power steering fluid level
o Battery condition
o Air filter condition G020C01HR-GAT Vehicle Interior The following should be checked each time when the vehicle is driven:
o Lights operation
o Windshield wiper operation
o Horn operation
o Defroster, heater system operation
(and air conditioning, if installed)
o Steering operation and condition
o Mirror condition and operation
o Turn signal operation
o Accelerator pedal operation
o Brake operation, including parking
brake
o Manual transmission operation, in- cluding clutch operation
o Seat control condition and operation
o Seat belt condition and operation
o Sunvisor operation If you notice anything that does not operate correctly or appears to be functioning incorrectly, inspect it care-fully and seek assistance from your Hyundai dealer if service is needed.
G020B01A-AAT Vehicle Exterior The following should be checked monthly:
o Overall appearance and condition
o Wheel condition and wheel nut torque
o Exhaust system condition
o Light condition and operation
o Windshield glass condition
o Wiper blade condition
o Paint condition and body corrosion
o Fluid leaks
o Door and hood lock condition
o Tire pressure and condition
(including spare tire)
GENERAL CHECKS
Page 164 of 207
6 DO-IT-YOURSELF MAINTENANCE
6
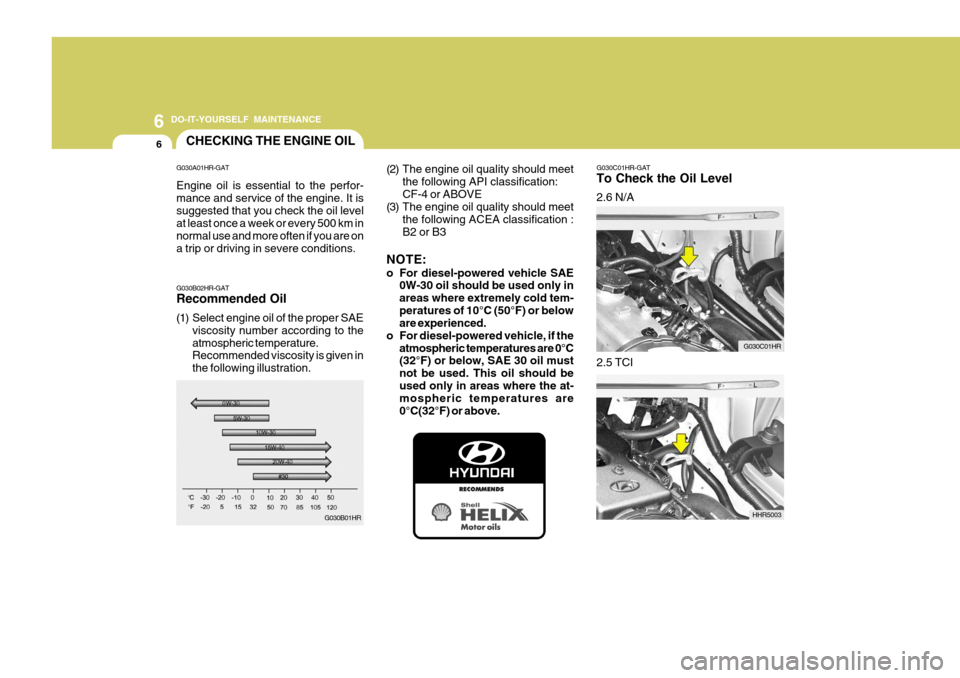
G030C01HR-GAT To Check the Oil Level 2.6 N/A
HHR5003
2.5 TCI
CHECKING THE ENGINE OIL
G030B01HR
G030B02HR-GAT Recommended Oil
(1) Select engine oil of the proper SAE
viscosity number according to the atmospheric temperature. Recommended viscosity is given in the following illustration. (2) The engine oil quality should meet
the following API classification:CF-4 or ABOVE
(3) The engine oil quality should meet
the following ACEA classification :B2 or B3
NOTE:
o For diesel-powered vehicle SAE 0W-30 oil should be used only in areas where extremely cold tem-peratures of 10°C (50°F) or below are experienced.
o For diesel-powered vehicle, if the
atmospheric temperatures are 0°C(32°F) or below, SAE 30 oil must not be used. This oil should beused only in areas where the at- mospheric temperatures are 0°C(32°F) or above. G030C01HR
G030A01HR-GAT Engine oil is essential to the perfor- mance and service of the engine. It issuggested that you check the oil level at least once a week or every 500 km in normal use and more often if you are ona trip or driving in severe conditions.
Page 165 of 207
6
DO-IT-YOURSELF MAINTENANCE
7
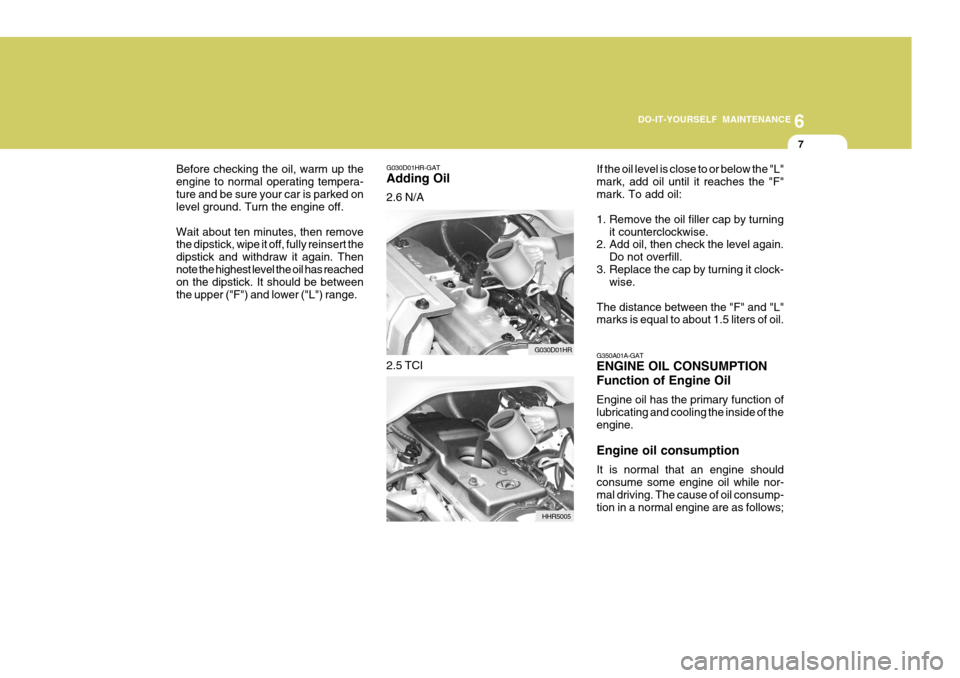
G030D01HR-GAT Adding Oil 2.6 N/A
Before checking the oil, warm up the engine to normal operating tempera-ture and be sure your car is parked on level ground. Turn the engine off. Wait about ten minutes, then remove the dipstick, wipe it off, fully reinsert the dipstick and withdraw it again. Thennote the highest level the oil has reached on the dipstick. It should be between the upper ("F") and lower ("L") range.
G030D01HR
2.5 TCI
HHR5005If the oil level is close to or below the "L"mark, add oil until it reaches the "F"mark. To add oil:
1. Remove the oil filler cap by turning
it counterclockwise.
2. Add oil, then check the level again.
Do not overfill.
3. Replace the cap by turning it clock- wise.
The distance between the "F" and "L" marks is equal to about 1.5 liters of oil. G350A01A-GAT ENGINE OIL CONSUMPTION Function of Engine Oil Engine oil has the primary function of
lubricating and cooling the inside of theengine. Engine oil consumption It is normal that an engine should consume some engine oil while nor- mal driving. The cause of oil consump- tion in a normal engine are as follows;
Page 167 of 207
6
DO-IT-YOURSELF MAINTENANCE
9
!WARNING:
Be very careful when draining the engine oil as it may be hot enough to burn you!
4. When the oil has stopped draining, replace the drain plug using a new gasket and retighten by turning it clockwise.
Tightening torque : 3.5 ~ 4.5 kgf.m
5. Remove the oil filter by turning it counterclockwise with a oil filter wrench of the proper size. A certainamount of oil will come out when you remove the filter. So be sure to have your drain pan in place underneathit.
6. Install a new oil filter in accordance
with the instructions on the carton oron the filter itself. Do not over-tighten.
Tightening torque: 2.3 ~ 2.5 kgf.m Be sure that the mounting surfaceon the engine is clean and that theold gasket is removed completely. Lubricate the new gasket on the filter with clean engine oil beforeinstallation.!
7. Remove the engine oil level dipstick.
8. Refill the crankcase with the recom- mended engine oil slowly. Refer to the specification in chapter 9 for engine oil capacity.
CAUTION:
Slowly pour the recommended oilby using a funnel. Do not overfill not to damage the engine.
9. Start the engine and check to be sure no oil is leaking from the drain plug or oil filter.
10. Shut off the engine and recheck the
oil level.
NOTE: Always dispose of used engine oil in an environmentally acceptable man-ner. It is suggested that it be placed in a sealed container and taken to a service station for reclamation. Donot pour the oil on the ground or put it into the household trash. WARNING:
Used motor oil may cause irritation or cancer of the skin if left in contact with the skin for prolonged periods of time. Wash your hands thoroughlywith soap and warm water as soon as possible after handling used oil.
!
Page 168 of 207
6 DO-IT-YOURSELF MAINTENANCE
10
G050B01A-AAT Recommended Engine Coolant Use a high quality ethylene-glycol cool- ant in a 50/50 mix with water. Theengine coolant should be compatible with aluminum engine parts. Additional corrosion inhibitors or additives shouldnot be used. The cooling system must be maintained with the correct con- centration and type of engine coolantto prevent freezing and corrosion. Never allow the concentration of anti- freeze to exceed the 60% level or gobelow the 35% level, or damage to the cooling system may result. For proper concentration when adding or replacingthe engine coolant, refer to the following table.
Water
65% 60% 50% 40%
Antifreeze
solution 35% 40% 50%60%
Ambient
temperature
°C ( °F)
-15 (5)
-25 (-13)-35 (-31) -45 (-49) Engine coolant
concentration HHR4010
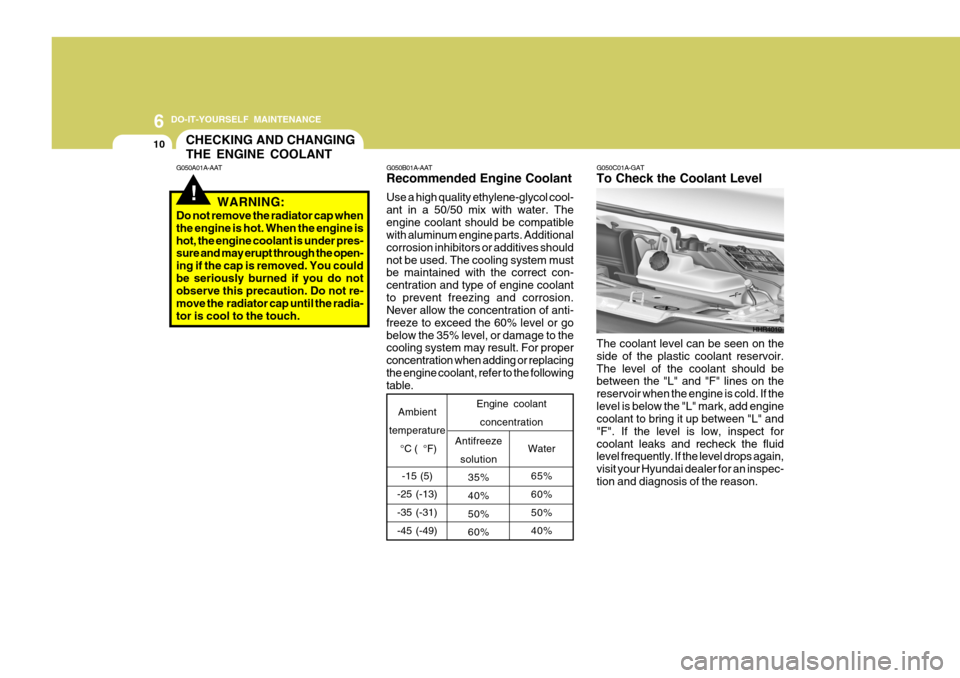
G050C01A-GAT To Check the Coolant Level The coolant level can be seen on the side of the plastic coolant reservoir.The level of the coolant should be between the "L" and "F" lines on the reservoir when the engine is cold. If thelevel is below the "L" mark, add engine coolant to bring it up between "L" and "F". If the level is low, inspect forcoolant leaks and recheck the fluid level frequently. If the level drops again, visit your Hyundai dealer for an inspec-tion and diagnosis of the reason.
!
CHECKING AND CHANGING THE ENGINE COOLANT
G050A01A-AAT
WARNING:
Do not remove the radiator cap when the engine is hot. When the engine ishot, the engine coolant is under pres- sure and may erupt through the open- ing if the cap is removed. You couldbe seriously burned if you do not observe this precaution. Do not re- move the radiator cap until the radia-tor is cool to the touch.
Page 169 of 207
6
DO-IT-YOURSELF MAINTENANCE
11
!
G050D01HR
G050D01HR-GAT To Change the Coolant The coolant should be changed at those intervals specified in the vehiclemaintenance schedule in Section 5.
CAUTION:
Engine coolant can damage the fin-ish of your car. If you spill enginecoolant on the car, wash it off thor- oughly with clean water.
!
1. Park the car on level ground, set the parking brake and lift up the front passenger's seat. (Refer to "To in- spect the Engine Compartment Un- der the Front Passenger's Seat" onpage 1-13). 2. Turn the radiator cap counterclock-
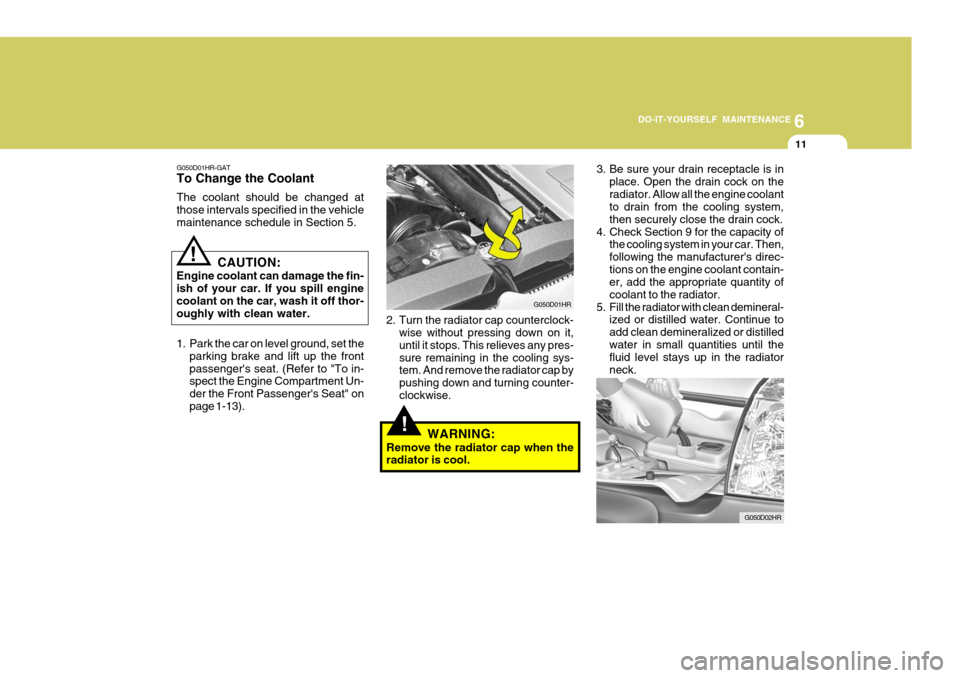
wise without pressing down on it,until it stops. This relieves any pres-sure remaining in the cooling sys- tem. And remove the radiator cap by pushing down and turning counter-clockwise.
WARNING:
Remove the radiator cap when the radiator is cool. 3. Be sure your drain receptacle is in
place. Open the drain cock on the radiator. Allow all the engine coolant to drain from the cooling system, then securely close the drain cock.
4. Check Section 9 for the capacity of the cooling system in your car. Then,following the manufacturer's direc-tions on the engine coolant contain- er, add the appropriate quantity of coolant to the radiator.
5. Fill the radiator with clean demineral- ized or distilled water. Continue toadd clean demineralized or distilledwater in small quantities until the fluid level stays up in the radiator neck.
G050D02HR