Page 190 of 526

Press the UNLOCK button a
second time, and hold it. The
passenger’s doors unlock, and all
f our windows start to open. To
stop the windows, release the
button.
To open the windows f urther,
press the button again (within 10
seconds of step 1) and hold it. If
the windows stop bef ore the
desired position, repeat steps 1
and 2.
If your vehicle’s battery is
disconnected or goes dead, or the
driver’s window f use is removed, the
AUTO f unction may be disabled. If
the AUTO f unction is disabled, the
power window system will need to be
reset af ter reconnecting the battery
or installing the f use.
If the power windows do not operate
properly af ter resetting, have your
vehicle checked by your dealer.
Pull and hold the driver’s window
switch to close the window
completely, then hold the switch
f or about 2 seconds. Start the engine. Push down and
hold the driver’s window switch
until the window is f ully open.
You cannot close the windows with
the remote transmitter.
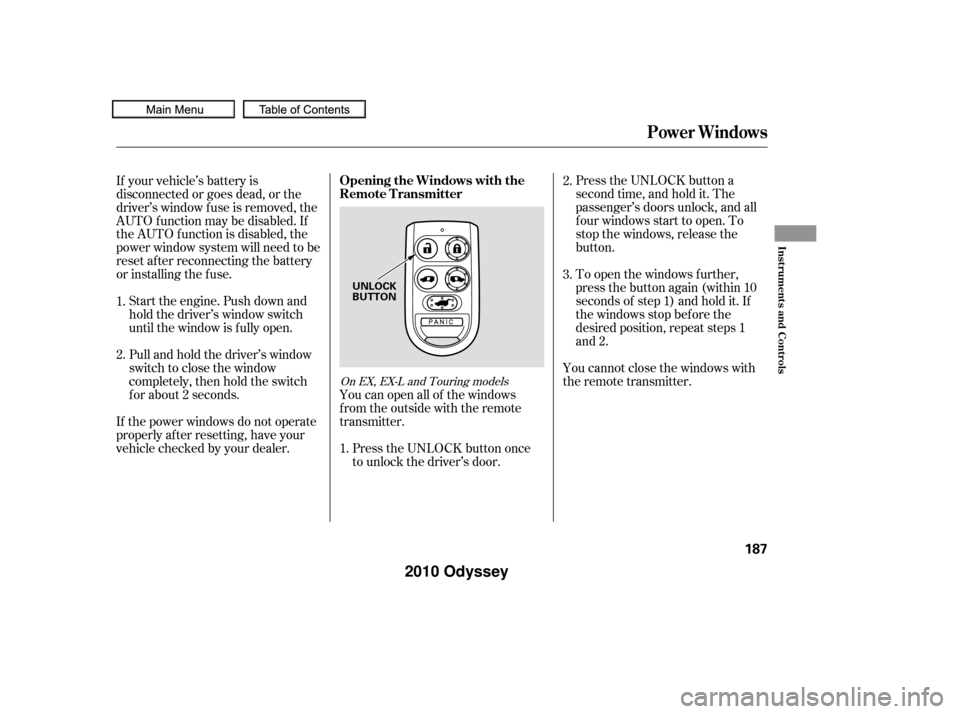
You can open all of the windows
from the outside with the remote
transmitter.
Press the UNLOCK button once
to unlock the driver’s door.
1.
2.
3.
1. 2.
On EX, EX-L and Touring models
Opening the Windows with the
Remote Transmitter
Power Windows
Inst rument s and Cont rols
187
UNLOCK
BUTTON
�����—�����—�
���y�
�����������
�y���
�(�����������y���
�����y
2010 Odyssey
Page 191 of 526
Turnthekeyclockwiseagain,and
hold it. All f our windows start to
open. To stop the windows,
release the key.
To close: Insert the key in the driver’s door
lock.
Turn the key counterclockwise,
then release it.
Turn the key counterclockwise
again, and hold it. All four
windowsstarttoclose.Tostopthe
windows, release the key. To open the windows further, turn
andholdthekeyagain(within
10 seconds of step 2).
To close the windows further, turn
andholdthekeyagain(within
10 seconds of step 2). If the windows stop bef ore
the desired position, repeat steps 2
and 3.
You can open and close the windows
with the key in the driver’s door lock.
To open: Insert the key in the driver’s door
lock.
Turn the key clockwise, then
release it. 1.
2. 3.
4.
1.
2. 3.
4.
On EX, EX-L and Touring models
Opening/Closing the Windows
with the Key
Power Windows
188
NOTE:
Open
Close
�����—�����—�
���y�
�������������y���
�(�����������y���
�����y
2010 Odyssey
Page 204 of 526
Open the lower glove box by pulling
the bottom of the handle. Close it
with a f irm push. Lock or unlock the
glove box with the master key.Open the upper glove box by
pressing the button. The lid will
swing open. Close it with a f irm push.Keep the glove boxes closed while
driving. If either are open, a
passenger could be injured during a
crash or sudden stop.
Glove Boxes
Interior Convenience Items
Inst rument s and Cont rols
201
An open glove box can cause
serious injury to your passenger
inacrash,evenifthe
passenger is wearing the seat
belt.
Always keep the glove boxes
closed while driving.
�����—�����—�
���y�
�������������y���
�(�����������y���������y
2010 Odyssey
Page 206 of 526
There is a 115 volt AC power outlet
in the rear compartment on the
driver’s side. To use the AC power
outlet, open the rear compartment
lid and open the outlet cover. Insert
the plug into the receptacle slightly,
turn it 90° clockwise, then push in
the plug all the way.
There are two accessory power
sockets in your vehicle. One
accessory power socket is above the
center pocket and another is on the
cargo area sidewall on the driver’s
side.
Each socket is intended to supply
power f or 12 volt DC accessories
that are rated 120 watts or less (10
amps).
None of the sockets will power an
automotive type cigarette lighter
element.
Always run the engine when you use
the AC power outlet.
If equipped
CONT INUED
AC Power Outlet
A ccessory Power Sockets
Interior Convenience Items
Inst rument s and Cont rols
203
�����—�����—�
���y�
�������������y���
�(�����������y���������y
2010 Odyssey
Page 209 of 526
Turn on the f ront and rear individual
map lights by pushing the lens of
each light. Push the lens again to
turn it of f . You can also operate
these lights with the light control
switch (see page ).
After all doors are closed tightly, the
light(s) dims slightly, then f ades out
in about 30 seconds.
With the light control switch in the
door activated position, all the
individual map lights come on when
you unlock the door with the remote
transmitter (see page ).
With any door lef t open, the lights
stay on about 3 minutes, then go out.
All the individual map lights come
onandstayonaslongasthe
switch remains in the ON position.
You can change the ‘‘INTERIOR
LIGHT DIMMING TIME’’ setting on
the multi-information display (see
page ).147
205
118
When the switch is in the ON position:
On Touring modelsIndividual Map L ights
Interior Lights
206
Front
�����—�����—�
���y�
�������������y���
�(�����������y�����
�
�y
2010 Odyssey
Page 212 of 526

The heating and air conditioning
system in your vehicle provides a
comf ortable driving environment in
all weather conditions.
The standard audio system has
many f eatures. This section
describes those f eatures and how to
use them. (If you have an optional
audio system, ref er to the operating
instructions that came with it.)
Your vehicle has an anti-theft audio
system that requires a code number
to enable it.
The security system helps to
discourage vandalism and thef t of
your vehicle.
Theclimatecontrolsystemandthe
audio system have a voice control
feature. Refer to the navigation
system manual f or more inf ormation..............
Vents, Heating, and A/C . 210
Using Automatic Climate ...................................
Control .215
.........
Using the Rear A/C Unit . 216
..............
Climate Control Sensors . 220
................................
Audio System .221
..........
Playing the AM/FM Radio . 222
................................
Playing a Disc .226
.......
Disc Player Error Messages . 233
..........
Playing the AM/FM Radio . 234
................
Playing the XM
Radio . 238
.................................
Playing Discs .244
...
Disc Changer Error Messages . 251
..........
Playing the AM/FM Radio . 252
................
Playing the XM
Radio . 257
.................................
Playing Discs .263
...
Disc Changer Error Messages . 271
..................
Protecting Your Discs . 272
............
AM/FM Radio Reception . 275
...............................
Playing a Tape .277
..........................
Setting the Clock .281
................
Remote Audio Controls . 282......................
Auxiliary Input Jack .283
.................
Radio Thef t Protection . 284
........
Rear Entertainment System . 285
............................
Security System .318
...............................
Cruise Control .319
HomeLink
Universal ................................
Transceiver .322
........
HandsFreeLink. 325
................
Parking Sensor System . 361
....
Reaview Camera and Monitor . 365
LX and Canadian DX models
EX and EX-L models without navigat ion
system
Models with navigation system Bluetooth
On vehicles with navigation system
Features
Features
209
�����—�����—�
���y�
�������������y���
�(�����������y�����
���y
2010 Odyssey
Page 213 of 526
Vents, Heating, and A/C
210
RECIRCULATION
BUTTONREAR WINDOW
DEFOGGER BUTTON
MODE
CONTROL
DIAL
AUTO
BUTTON
RECIRCULATION
BUTTON TEMPERATURE
CONTROL DIAL
REAR
CONTROLLER
DIAL
WINDSHIELD
DEFROSTER BUTTON REAR WINDOW
DEFOGGER
BUTTON
OFF BUTTON MODE
BUTTON
AIR CONDITIONING
(A/C) BUTTON
SYNC BUTTON AIR CONDITIONING (A/C)
BUTTON
FAN CONTROL
DIAL
FAN CONTROL BUTTONS
REAR
ON/OFF
BUTTON
REAR LOCK
BUTTON
DRIVER’S SIDE
TEMPERATURE
CONTROL
SWITCH PASSENGER’S SIDE
TEMPERATURE CONTROL SWITCH
LX and Canadian DX models
REAR TEMPERATURE
CONTROL SWITCH
EX, EX-L and Touring models
�����—�����—�
���y�
�������������y���
�(�����������y�����
���y
2010 Odyssey
Page 214 of 526

�Û
�Ý �Û
�Ý
Turn the dial clockwise to increase
the fan speed and airflow. Turn the
dial counterclockwise to decrease
them.
Press the button to increase
the fan speed and airflow. Press the
button to decrease it.
Turning this dial clockwise increases
the temperature of the airflow.
Your vehicle has two temperature
control switches, one f or the driver,
and one f or the f ront passenger.
When the rear passenger’s zone is
turned on using the REAR ON/OFF
button on the f ront control panel, a second row passenger also can
adjust the temperature, f an speed
and air flow.
The rear passenger compartment
temperature can also be set
separately. Press the top ( ) of the
appropriate temperature control
button to increase the temperature
of airflow. Press the bottom ( ) of
the button to decrease it. Each set
temperature is shown in the display.
When you set the temperature to its
lower limit or its upper limit, it will be
displayed as ‘‘Lo’’ or ‘‘Hi’’.
When you press this button, the
indicator in the button comes on, and
the passenger’s side temperature
and the rear passenger compartment
is synchronized to the driver’s side
set temperature. Changing thepassenger’s side temperature or the
temperature of the rear passenger
compartment makes the indicator go
off, and takes the system out of
SYNC mode.
This button turns the air
conditioning on and of f . On LX and
Canadian DX models, the indicator in
thebuttonisonwhentheA/Cison.
On EX, EX-L, and Touring models,
you will see A/C ON or A/C OFF in
the display.
When the indicator in the button is
on, air f rom the vehicle’s interior is
sent throughout the system again.
When the indicator is off, air is
brought in f rom the outside of the
vehicle (fresh air mode).
CONT INUED
On LX and Canadian DX models
On LX and Canadian DX models
On EX, EX-L and Touring models
On EX, EX-L and Touring modelsOn EX, EX-L and Touring models On EX, EX-L and Touring models
On EX, EX-L and Touring models
Vents, Heating, and A/C
Fan Control
T emperature Control Air Conditioning (A/C) Button
Recirculation Button
SYNC Button
Features
211
�����—�����—�
���y�
���������
���y���
�(�����������y�����
���y
2010 Odyssey