Page 104 of 441

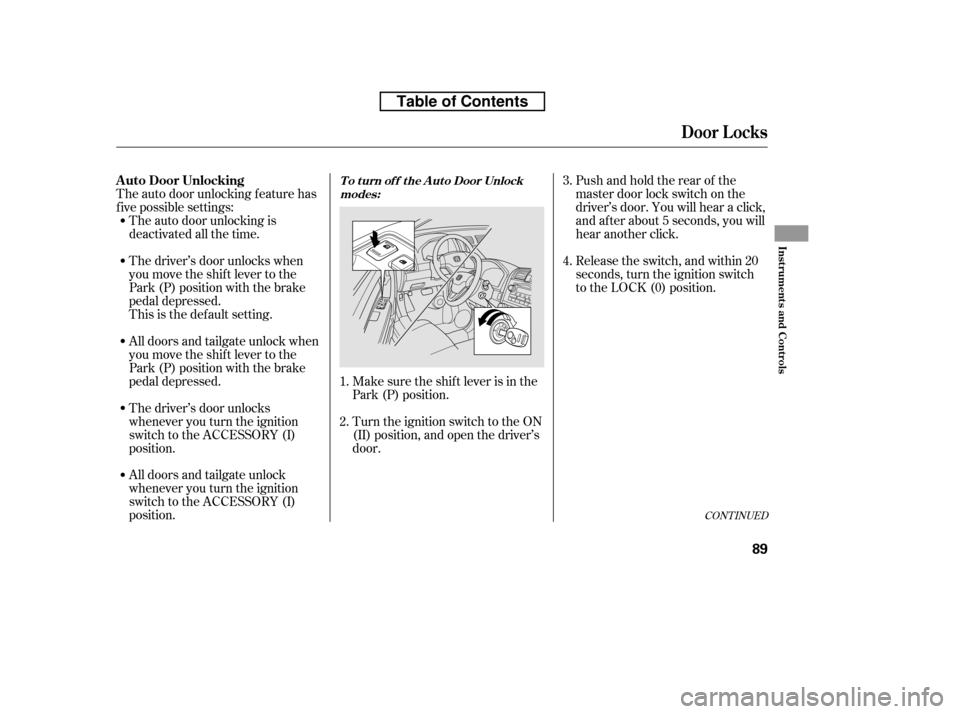
The auto door unlocking f eature has
f ive possible settings:Make sure the shif t lever is in the
Park (P) position.
Turn the ignition switch to the ON
(II) position, and open the driver’s
door.Pushandholdtherearof the
master door lock switch on the
driver’s door. You will hear a click,
and after about 5 seconds, you will
hear another click.
Release the switch, and within 20
seconds, turn the ignition switch
to the LOCK (0) position.
All doors and tailgate unlock when
you move the shif t lever to the
Park (P) position with the brake
pedal depressed.
All doors and tailgate unlock
whenever you turn the ignition
switch to the ACCESSORY (I)
position.
The driver’s door unlocks
whenever you turn the ignition
switch to the ACCESSORY (I)
position.
The auto door unlocking is
deactivated all the time.
The driver’s door unlocks when
you move the shif t lever to the
Park (P) position with the brake
pedal depressed.
This is the def ault setting.
1. 2. 3. 4.
CONT INUED
A uto Door UnlockingT o t urn of f t he A ut o Door Unlock
modes:
Door L ocks
Inst rument s and Cont rols
89
Table of Contents
Page 105 of 441

Unlocks the driver’s door or all doorsand tailgate when the ignition switch is
moved out of the ON (II) position.
driver’s door unlock
feature.
all doors and tailgate
unlock f eature
Unlocks the driver’s door or all doors
and tailgate when the shif t lever is
moved into the Park (P) position withthe brake pedal depressed.
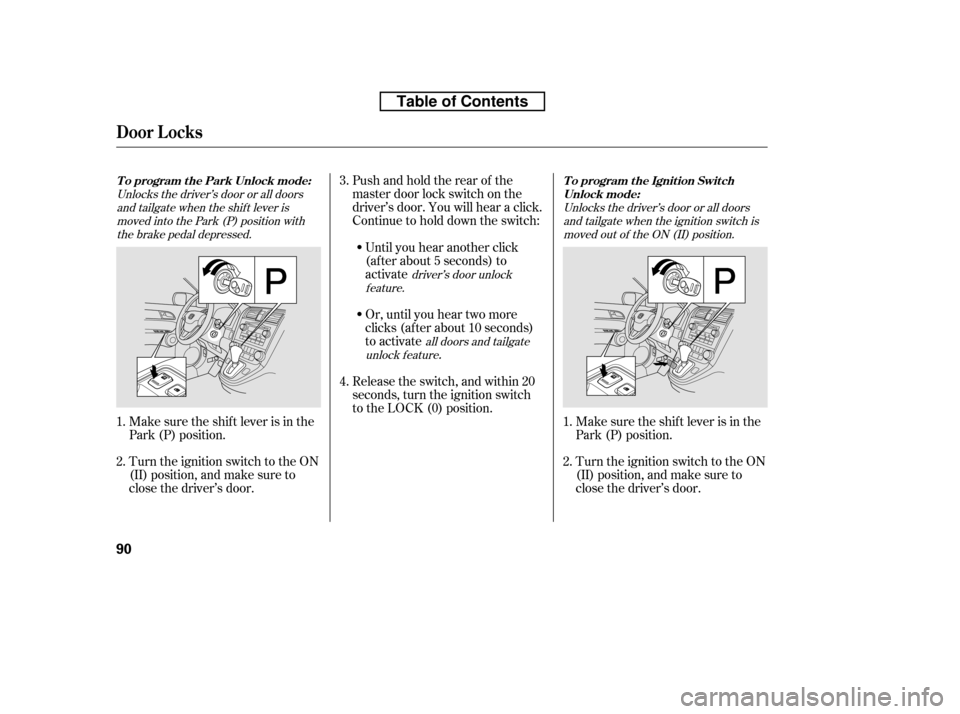
Make sure the shif t lever is in the
Park (P) position.
Turn the ignition switch to the ON
(II) position, and make sure to
close the driver’s door.
Pushandholdtherearof the
master door lock switch on the
driver’s door. You will hear a click.
Continue to hold down the switch:
Until you hear another click
(af ter about 5 seconds) to
activate
Or, until you hear two more
clicks (af ter about 10 seconds)
to activate
.
Release the switch, and within 20
seconds, turn the ignition switch
to the LOCK (0) position.
Turn the ignition switch to the ON
(II) position, and make sure to
close the driver’s door.
Make sure the shif t lever is in the
Park (P) position.
1. 2.
1.2. 3. 4.
T o program t he Ignit ion Swit ch
Unlock mode:
To program the Park Unlock mode:
Door L ocks
90
Table of Contents
Page 106 of 441

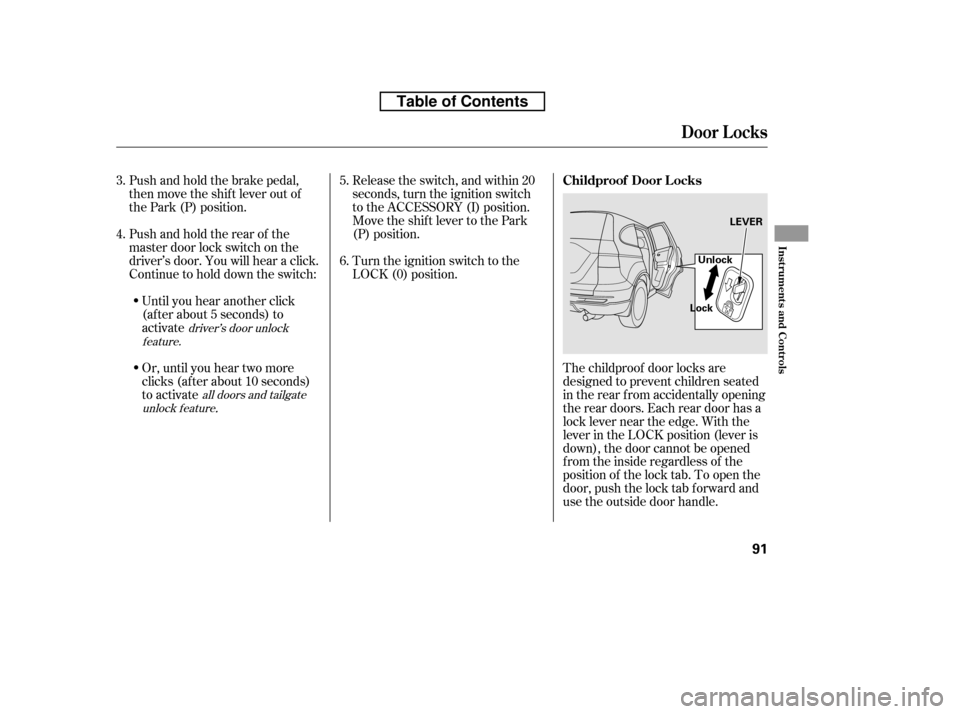
The childproof door locks are
designed to prevent children seated
in the rear f rom accidentally opening
the rear doors. Each rear door has a
lock lever near the edge. With the
lever in the LOCK position (lever is
down), the door cannot be opened
fromtheinsideregardlessof the
position of the lock tab. To open the
door, push the lock tab f orward and
use the outside door handle.
Turn the ignition switch to the
LOCK (0) position.
Push and hold the brake pedal,
then move the shift lever out of
the Park (P) position.
Pushandholdtherearof the
master door lock switch on the
driver’s door. You will hear a click.
Continue to hold down the switch:
Until you hear another click
(af ter about 5 seconds) to
activate
Or, until you hear two more
clicks (af ter about 10 seconds)
to activate
.
Release the switch, and within 20
seconds, turn the ignition switch
to the ACCESSORY (I) position.
Move the shift lever to the Park
(P) position.
3. 4. 5. 6.
driver’s door unlock
feature.
all doors and tailgate
unlock f eature
Childproof Door L ocks
Door L ocks
Inst rument s and Cont rols
91
LEVER
Lock Unlock
Table of Contents
Page 122 of 441
When any seat-back is f olded down,
do not use the dual deck cargo shelf
(if equipped).
Make sure all items in the cargo area
are secured. Loose items can f ly
f orward and cause injury if you have
to brake hard (See
on page ).The lef t and right rear seats can be
f olded up separately to make room
for cargo.
To f old the rear seat f orward:
Remove any items from the seat
beforeyoufolduptheseatcushion.
Pull up the bar under the seat
cushion and slide the rear seat
backward. The rear seat will not
foldforwardunlessitisasfar
back as it will go. Lower the center seat-back bef ore
f olding the passenger’s side seat
forward.
Follow steps 1 through 4 on pages
and f or f olding down the
seat-back.
1. 2.
304 105 106
CONT INUED
Carrying CargoFolding the Rear Seat Forward
Seats
Inst rument s and Cont rols
107
SLIDE BARS
Table of Contents
Page 124 of 441

Make sure that the f olded up right
rear seat does not interf ere with the
f ront passenger’s seat-back. This will
cause the f ront passenger’s weight
sensors and the f ront passenger’s
seat belt reminder indicator to work
improperly (see page ). Also
check the passenger airbag of f
indicator to assure proper operation
of the passenger’s advanced f ront
airbag.
Reverse this procedure to return the
seat to the upright position.
Make sure the seat is securely
latched bef ore driving.
When you are not using the
fastening strap, store the strap into
the slit on the seat-back.Make sure both outer seat belts are
positioned in side of the rear seat-
backs.
Make sure all items in the cargo area
are secured. Loose items can f ly
f orward and cause injury if you have
to brake hard (See
on page ).
Do not use the dual deck cargo shelf
(if equipped) when the seats are
folded down or forward.
The seat belt in the rear center seat
is equipped with a detachable anchor.
This allows the center seat belt to be
unlatched when the rear center seat
back is f olded down or the right side
rear seat is folded forward.
In the center seating position of the
rear seat, be sure the detachable
anchor is latched securely bef ore
using the seat belt (see next column).
33
304
CONT INUED
Carrying CargoDetachable A nchor
Seats
Inst rument s and Cont rols
109
Using the seat belt with the
detachable anchor unlatched
increases the chance of serious
injury or death in a crash.
Before using the seat belt,
make sure the detachable
anchor is correctly latched.
Table of Contents
Page 133 of 441

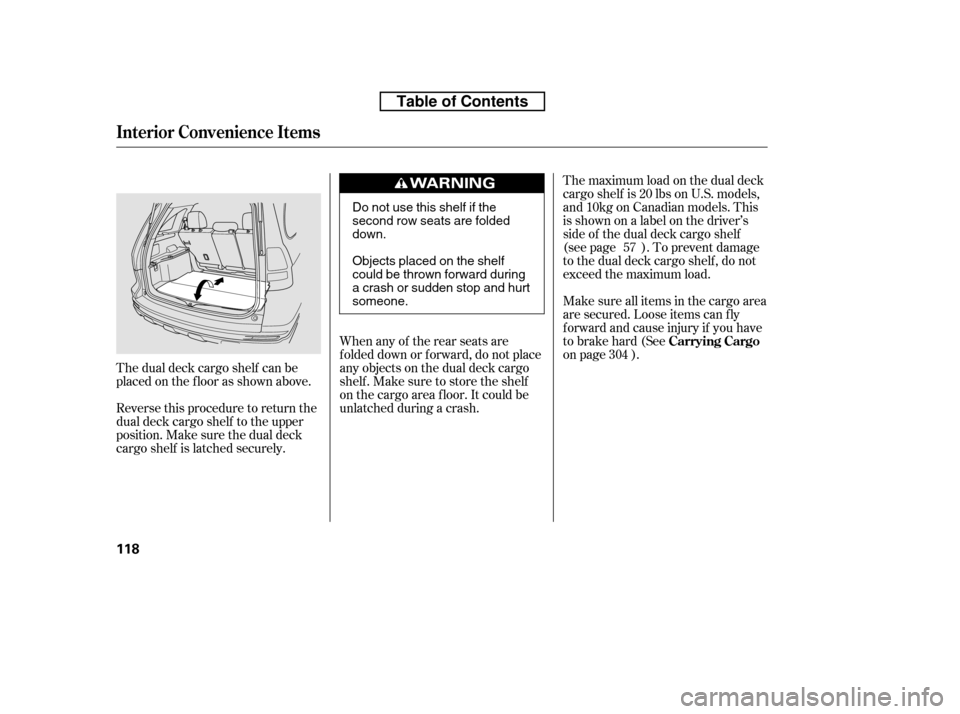
The dual deck cargo shelf can be
placed on the f loor as shown above.
Reverse this procedure to return the
dual deck cargo shelf to the upper
position. Make sure the dual deck
cargo shelf is latched securely.The maximum load on the dual deck
cargo shelf is 20 lbs on U.S. models,
and10kgonCanadianmodels.This
isshownonalabelonthedriver’s
side of the dual deck cargo shelf
(see page ). To prevent damage
to the dual deck cargo shelf , do not
exceed the maximum load.
Make sure all items in the cargo area
are secured. Loose items can f ly
f orward and cause injury if you have
to brake hard (See
on page ).
When any of the rear seats are
f olded down or f orward, do not place
any objects on the dual deck cargo
shelf . Make sure to store the shelf
on the cargo area f loor. It could be
unlatched during a crash. 57
304 Carrying Cargo
Interior Convenience Items
118
Do not use this shelf if the
second row seats are foldeddown.
Objects placed on the shelf
could be thrown forward during
a crash or sudden stop and hurtsomeone.
Table of Contents
Page 135 of 441
Open the lower glove box by pulling
the bottom of the handle. Close it
with a f irm push. Lock or unlock the
glove box with the master key.
The glove box light comes on when
the parking lights are on.
Sitting on or getting under the table,
or putting heavy objects on the table,
may damage or deform it.
Do not put any items on the table
while driving. They may f all down or
f ly around when you go around
corners or brake hard.
To use the center table, pull up the
outside edge of the table until it
latches. To store it, pull the lever and
lower the table.On LX and EX models
Lower Glove Box
Center Table
Interior Convenience Items
120
To lock
Table of Contents
Page 282 of 441

You can increase the set cruising
speed in any of these ways:You can decrease the set cruising
speed in any of these ways:
Press and hold the RES/ACCEL
button. When you reach the
desired cruising speed, release the
button.
To increase the speed in very
small amounts, tap the RES/
ACCEL button. Each time you do
this, your vehicle will speed up
about 1 mph (1.6 km/h).
Cruise control may not hold the set
speed when you are going up and
down hills. If your vehicle speed
increases going down a hill, use the
brakes to slow down. This will cancel
thecruisecontrol.Toresumetheset
speed, press the RES/ACCEL button.
The CRUISE CONTROL indicator
on the instrument panel will come
back on.
To slow down in very small
amounts, tap the SET/DECEL
button. Each time you do this,
your vehicle will slow down about
1 mph (1.6 km/h).
Press and hold the SET/DECEL
button. Release the button when
you reach the desired speed.
If you need to decrease your
speed quickly, use the brakes as you
normally would.
Push on the accelerator pedal.
Accelerate to the desired cruising
speed, then press the SET/
DECEL button.
Tap the brake pedal lightly with
your f oot. The CRUISE
CONTROL indicator on the
instrument panel goes out. When
the vehicle slows to the desired
speed, press the SET/DECEL
button.
CONT INUED
Changing the Set Speed
Cruise Control
Features
267
NOTE:
Table of Contents