2010 GMC SIERRA Section 7
[x] Cancel search: Section 7Page 449 of 630
Section 6 Service and Appearance Care
Appearance Care. . . . . . . . . . . . . . . . . . . . . . . . . . . . . . . . 6-110
Interior Cleaning . . . . . . . . . . . . . . . . . . . . . . . . . . . . . 6-110
Fabric/Carpet . . . . . . . . . . . . . . . . . . . . . . . . . . . . . . . . . 6-111
Leather . . . . . . . . . . . . . . . . . . . . . . . . . . . . . . . . . . . . . . . 6-112
Instrument Panel, Vinyl, and Other Plastic Surfaces . . . . . . . . . . . . . . . . 6-112
Care of Safety Belts . . . . . . . . . . . . . . . . . . . . . . . . . . 6-112
Weatherstrips . . . . . . . . . . . . . . . . . . . . . . . . . . . . . . . . . 6-113
Washing Your Vehicle . . . . . . . . . . . . . . . . . . . . . . . . 6-113
Cleaning Exterior Lamps/Lenses . . . . . . . . . . . . . 6-113
Finish Care . . . . . . . . . . . . . . . . . . . . . . . . . . . . . . . . . . . 6-114
Windshield and Wiper Blades . . . . . . . . . . . . . . . . . 6-114
Aluminum or Chrome-Plated Wheels and Trim . . . . . . . . . . . . . . . . . . . . . . . . . . . . . . . . . . . . 6-115
Tires . . . . . . . . . . . . . . . . . . . . . . . . . . . . . . . . . . . . . . . . . . 6-116
Sheet Metal Damage . . . . . . . . . . . . . . . . . . . . . . . . . 6-116
Finish Damage . . . . . . . . . . . . . . . . . . . . . . . . . . . . . . . 6-116
Underbody Maintenance . . . . . . . . . . . . . . . . . . . . . . 6-116
Chemical Paint Spotting . . . . . . . . . . . . . . . . . . . . . . 6-116 Vehicle Identification
. . . . . . . . . . . . . . . . . . . . . . . . . . . . 6-117
Vehicle Identification Number (VIN) . . . . . . . . . . . 6-117
Service Parts Identification Label . . . . . . . . . . . . . 6-117
Electrical System . . . . . . . . . . . . . . . . . . . . . . . . . . . . . . . . 6-117
Add-On Electrical Equipment . . . . . . . . . . . . . . . . . 6-117
Windshield Wiper Fuses . . . . . . . . . . . . . . . . . . . . . . 6-118
Power Windows and Other Power Options . . . 6-118
Fuses and Circuit Breakers . . . . . . . . . . . . . . . . . . . 6-118
Instrument Panel Fuse Block . . . . . . . . . . . . . . . . . 6-119
Center Instrument Panel Fuse Block . . . . . . . . . 6-121
Underhood Fuse Block . . . . . . . . . . . . . . . . . . . . . . . 6-122
Capacities and Specifications . . . . . . . . . . . . . . . . . .6-126
6-3
Page 462 of 630
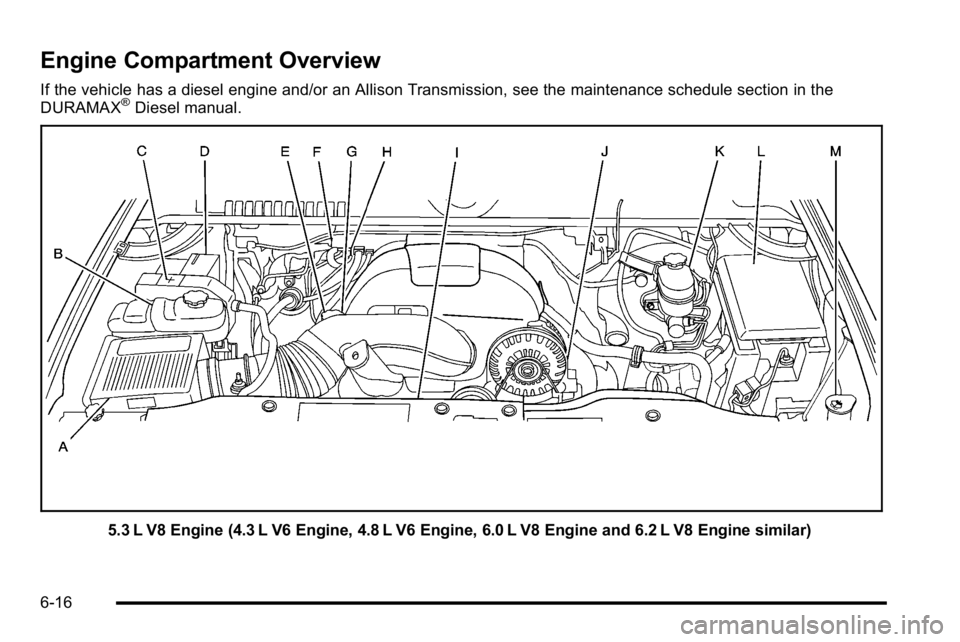
Engine Compartment Overview
If the vehicle has a diesel engine and/or an Allison Transmission, see the maintenance schedule section in the
DURAMAX®Diesel manual.
5.3 L V8 Engine (4.3 L V6 Engine, 4.8 L V6 Engine, 6.0 L V8 Engine and 6.2 L V8 Engine similar)
6-16
Page 464 of 630
Engine Oil
For diesel engine vehicles, see“Engine Oil”in the
DURAMAX®Diesel manual.
Checking Engine Oil
It is a good idea to check the engine oil level at each
fuel fill. In order to get an accurate reading, the oil must
be warm and the vehicle must be on level ground.
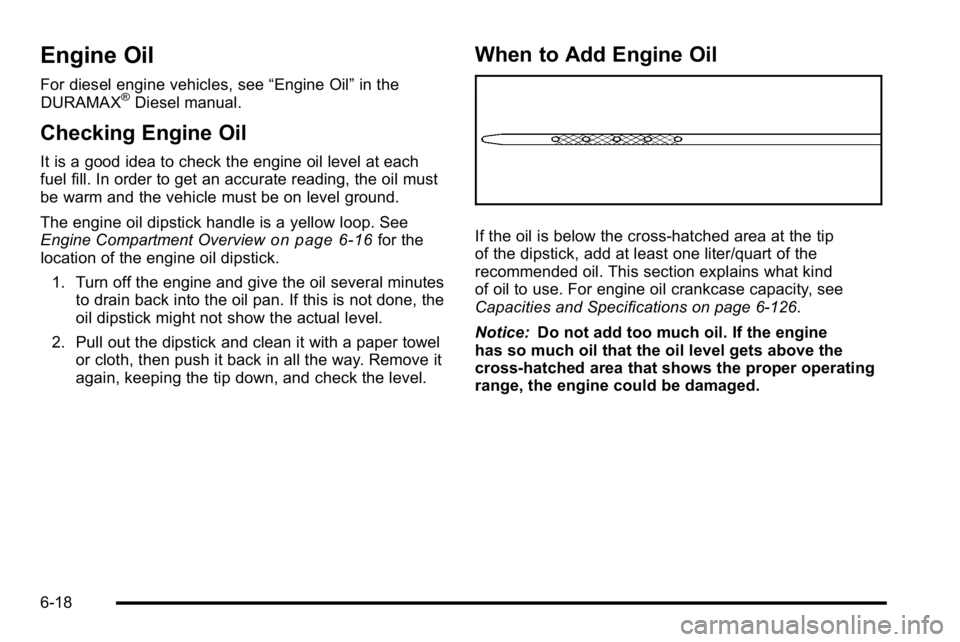
The engine oil dipstick handle is a yellow loop. See
Engine Compartment Overview
on page 6‑16for the
location of the engine oil dipstick.
1. Turn off the engine and give the oil several minutes to drain back into the oil pan. If this is not done, the
oil dipstick might not show the actual level.
2. Pull out the dipstick and clean it with a paper towel or cloth, then push it back in all the way. Remove it
again, keeping the tip down, and check the level.
When to Add Engine Oil
If the oil is below the cross-hatched area at the tip
of the dipstick, add at least one liter/quart of the
recommended oil. This section explains what kind
of oil to use. For engine oil crankcase capacity, see
Capacities and Specifications on page 6‑126.
Notice: Do not add too much oil. If the engine
has so much oil that the oil level gets above the
cross-hatched area that shows the proper operating
range, the engine could be damaged.
6-18
Page 472 of 630
How to Add Automatic Transmission
Fluid
Refer to the Maintenance Schedule to determine what
kind of transmission fluid to use. SeeRecommended
Fluids and Lubricants on page 7‑12.
Using a funnel, add fluid down the transmission dipstick
tube only after checking the transmission fluid while it is
hot. A cold check is used only as a reference. If the fluid
level is low, add only enough of the proper fluid to bring
the level up to the HOT area for a hot check. It does
not take much fluid, generally less than 0.5 Liter (1 Pint).
Do not overfill.
Notice: Use of the incorrect automatic transmission
fluid may damage the vehicle, and the damages may
not be covered by the vehicle's warranty. Always
use the automatic transmission fluid listed in
Recommended Fluids and Lubricants on page 7‑12.
.After adding fluid, recheck the fluid level as
described under “How to Check Automatic
Transmission Fluid,” earlier in this section.
.When the correct fluid level is obtained, push the
dipstick back in all the way; then flip the handle
down to lock the dipstick in place.
Automatic Transmission Fluid
(6-Speed Transmission)
When to Check and Change Automatic
Transmission Fluid
It is usually not necessary to check the transmission
fluid level. The only reason for fluid loss is a
transmission leak or overheating the transmission.
If you suspect a small leak, then use the following
checking procedures to check the fluid level. However,
if there is a large leak, then it may be necessary to have
the vehicle towed to a dealer/retailer service department
and have it repaired before driving the vehicle further.
Notice:Use of the incorrect automatic transmission
fluid may damage the vehicle, and the damages may
not be covered by the vehicle's warranty. Always
use the automatic transmission fluid listed in
Recommended Fluids and Lubricants on page 7‑12.
Change the fluid and filter at the intervals listed in the
Maintenance Schedule. See Scheduled Maintenance
on page 7‑3. Be sure to use the transmission fluid
listed in Recommended Fluids and Lubricantson
page 7‑12.
6-26
Page 482 of 630
If No Steam Is Coming From The
Engine Compartment
The ENGINE OVERHEATED STOP ENGINE or the
ENGINE OVERHEATED IDLE ENGINE message, along
with a low coolant condition, can indicate a serious
problem.
If you get an engine overheat warning, but see or hear
no steam, the problem may not be too serious.
Sometimes the engine can get a little too hot when you:
.Climb a long hill on a hot day.
.Stop after high-speed driving.
.Idle for long periods in traffic.
.Tow a trailer. SeeTowing a Trailer on page 5‑50.
If you get the ENGINE OVERHEATED STOP ENGINE
or the ENGINE OVERHEATED IDLE ENGINE message
with no sign of steam, try this for a minute or so: 1. Turn the air conditioning off.
2. Turn the heater on to the highest temperature and to the highest fan speed. Open the windows as
necessary.
3. If you are stopped in a traffic jam, apply the brake, shift to N (Neutral); otherwise, shift to the highest
gear while driving —D (Drive) or 3 (Third). If the temperature overheat gage is no longer in the
overheat zone or an overheat warning no longer
displays, the vehicle can be driven. Continue to drive
the vehicle slow for about 10 minutes. Keep a safe
vehicle distance from the car in front of you. If the
warning does not come back on, continue to drive
normally.
If the warning continues, pull over, stop, and park the
vehicle right away.
If there is no sign of steam, idle the engine for
five minutes while parked. If the warning is still
displayed, turn off the engine until it cools down. Also,
see
“Overheated Engine Protection Operating Mode”
later in this section.
Overheated Engine Protection
Operating Mode
If an overheated engine condition exists and the
REDUCED ENGINE POWER message is displayed, an
overheat protection mode which alternates firing groups
of cylinders helps prevent engine damage. In this mode,
you will notice a loss in power and engine performance.
This operating mode allows the vehicle to be driven to a
safe place in an emergency. Driving extended
miles (km) and/or towing a trailer in the overheat
protection mode should be avoided.
6-36
Page 486 of 630

Do not top off the brake fluid. Adding fluid does not
correct a leak. If fluid is added when the linings are
worn, there will be too much fluid when new brake
linings are installed. Add or remove brake fluid, as
necessary, only when work is done on the brake
hydraulic system.
{WARNING:
If too much brake fluid is added, it can spill on the
engine and burn, if the engine is hot enough. You
or others could be burned, and the vehicle could
be damaged. Add brake fluid only when work is
done on the brake hydraulic system. See
“Checking Brake Fluid”in this section.
Refer to the Maintenance Schedule to determine when
to check the brake fluid. See Scheduled Maintenance
on page 7‑3.
Checking Brake Fluid
Check brake fluid by looking at the brake fluid reservoir.
SeeEngine Compartment Overview on page 6‑16.
The fluid level should be
above MIN. If it is not,
have the brake hydraulic
system checked to see if
there is a leak.
After work is done on the brake hydraulic system, make
sure the level is above the MIN but not over the
MAX mark.
What to Add
Use only new DOT 3 brake fluid from a sealed
container. See Recommended Fluids and Lubricantson
page 7‑12.
Always clean the brake fluid reservoir cap and the area
around the cap before removing it. This helps keep dirt
from entering the reservoir.
6-40
Page 496 of 630

.For all 6.0L and 6.2L 2500HD Series applications,
the proper level is from 0 to 0.5 inches (0 mm to
13 mm) below the bottom of the filler plug hole,
located on the rear axle. Add only enough fluid to
reach the proper level.
.For all 6.6L DURAMAX DIESEL 2500HD Series
applications and all 3500 Series applications, the
proper level is from 0.6 inches to 0.8 inches
(17 mm to 21 mm) below the bottom of the filler
plug hole, located on the rear axle. Add only
enough fluid to reach the proper level.
What to Use
Refer to the Maintenance Schedule to determine what
kind of lubricant to use. SeeRecommended Fluids and
Lubricants on page 7‑12.
Four-Wheel Drive
Lubricant checks in this section also apply to these
vehicles.
Transfer Case
When to Check Lubricant
It is not necessary to regularly check transfer case fluid
unless you suspect there is a leak, or you hear an
unusual noise. A fluid loss could indicate a problem.
Have it inspected and repaired.
How to Check Lubricant
Electric Shift Transfer Case
A. Fill Plug
B. Drain Plug
6-50
Page 503 of 630

9. Make sure that the light from the headlamp ispositioned at the bottom edge of the horizontal
tape line. The lamp on the left (A) shows the
correct headlamp aim. The lamp on the right (B)
shows the incorrect headlamp aim.
10. Repeat Steps 7 through 9 for the opposite headlamp.
Bulb Replacement
For the proper type of replacement bulbs, see
Replacement Bulbs on page 6‑62.
For any bulb changing procedure not listed in this
section, contact your dealer/retailer.
Halogen Bulbs
{WARNING:
Halogen bulbs have pressurized gas inside and
can burst if you drop or scratch the bulb. You or
others could be injured. Be sure to read and
follow the instructions on the bulb package.
Headlamps
To replace one of these bulbs:
1. Open the hood. See Hood Release
on page 6‑15for more information.
2. If you are replacing the bulb on the passenger side remove the Engine Air Cleaner cover. See Engine
Air Cleaner/Filter
on page 6‑21for more
information.
3. Reach in and access the bulb sockets from inside the engine compartment.
6-57