2010 GMC SIERRA Section 7
[x] Cancel search: Section 7Page 419 of 630
Pulling A Trailer
Here are some important points:
.There are many different laws, including speed
limit restrictions, having to do with trailering.
Make sure the rig will be legal, not only where
you live but also where you will be driving.
A good source for this information can be
state or provincial police.
.Consider using a sway control. See“Hitches”later
in this section.
.Do not tow a trailer at all during the first 500 miles
(800 km) the new vehicle is driven. The engine,
axle or other parts could be damaged.
.During the first 500 miles (800 km) that a trailer
is towed, do not drive over 50 mph (80 km/h) and
do not make starts at full throttle. This helps the
engine and other parts of the vehicle wear in
at the heavier loads.
.Vehicles can tow in D (Drive). Shift the
transmission to a lower gear if the transmission
shifts too often under heavy loads and/or hilly
conditions. Important considerations that have to do with weight:
.The weight of the trailer
.The weight of the trailer tongue
.The weight on the vehicle's tires
.And the weight of the trailering combination
Weight of the Trailer
How heavy can a trailer safely be?
It depends on how the rig is used. Speed, altitude, road
grades, outside temperature and how much the vehicle
is used to pull a trailer are all important. It can depend
on any special equipment on the vehicle, and the
amount of tongue weight the vehicle can carry. See
“Weight of the Trailer Tongue”
later in this section for
more information.
Trailer weight rating (TWR) is calculated assuming the
tow vehicle has only the driver but all required trailering
equipment. Weight of additional optional equipment,
passengers and cargo in the tow vehicle must be
subtracted from the trailer weight rating.
Use the following chart to determine how much the
vehicle can weigh, based upon the vehicle model
and options.
Weights listed apply for conventional trailers and
fifth-wheel trailers unless otherwise noted.
5-51
Page 429 of 630
Trailering may be limited by the vehicle's ability to carry
tongue weight. Tongue or kingpin weight cannot cause
the vehicle to exceed the GVWR (Gross Vehicle Weight
Rating) or the RGAWR (Rear Gross Axle Weight
Rating). See“Total Weight on the Vehicle's Tires” later
in this section for more information.
After loading the trailer, weigh the trailer and then the
tongue, separately, to see if the weights are proper.
If they are not, adjustments might be made by moving
some items around in the trailer.
Total Weight on the Vehicle's Tires
Be sure the vehicle's tires are inflated to the inflation
pressures found on the Certification label on the drivers
door or see Loading the Vehicle
on page 5‑30for more
information. Make sure not to exceed the GVWR limit
for the vehicle, or the RGAWR, with the tow vehicle and
trailer fully loaded for the trip including the weight of the
trailer tongue. If using a weight distributing hitch, make
sure not to exceed the RGAWR before applying the
weight distribution spring bars.
Weight of the Trailering Combination
It is important that the combination of the tow
vehicle and trailer does not exceed any of its weight
ratings —GCWR, GVWR, RGAWR, Trailer Weight
Rating or Tongue Weight. The only way to be sure it is
not exceeding any of these ratings is to weigh the tow
vehicle and trailer combination, fully loaded for the trip,
getting individual weights for each of these items.
Hitches
The correct hitch equipment helps maintain combination
control. Most small-to-medium trailers can be towed
with a weight carrying hitch which simply features a
coupler latched to the hitch ball. Larger trailers may
require a weight distributing hitch that uses spring bars
to distribute the trailer tongue weight among the two
vehicle and trailer axles. Fifth wheel and gooseneck
hitches may also be used. See “Weight of the Trailer
Tongue” earlier in this section for rating limits with
various hitch types.
If a step-bumper hitch will be used, the bumper could
be damaged in sharp turns. Make sure there is ample
room when turning to avoid contact between the trailer
and the bumper.
Consider using sway controls with any trailer. Ask a
trailering professional about sway controls or refer to
the trailer manufacturer's recommendations and
instructions.
5-61
Page 430 of 630
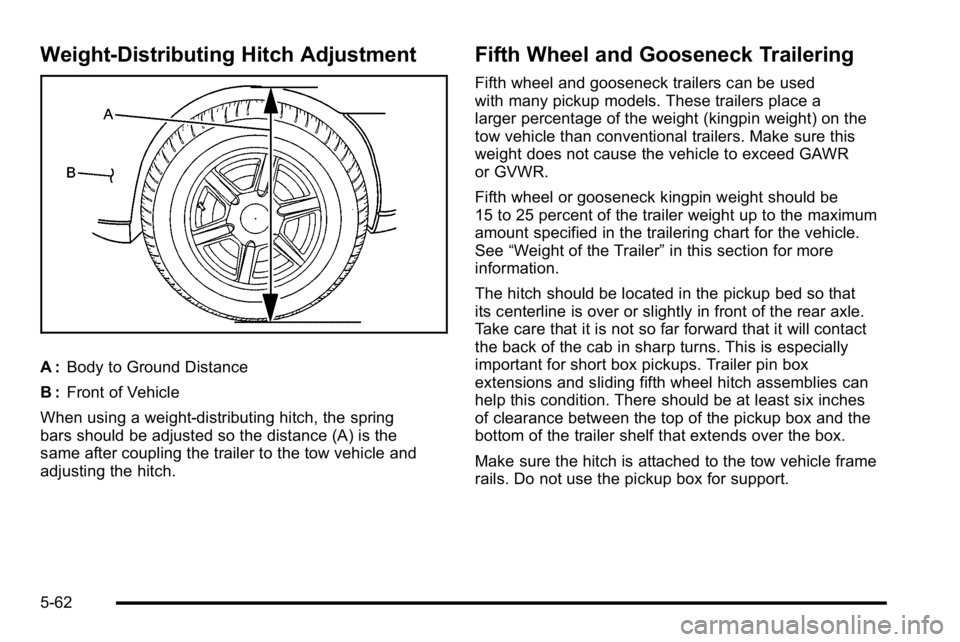
Weight‐Distributing Hitch Adjustment
A :Body to Ground Distance
B : Front of Vehicle
When using a weight-distributing hitch, the spring
bars should be adjusted so the distance (A) is the
same after coupling the trailer to the tow vehicle and
adjusting the hitch.
Fifth Wheel and Gooseneck Trailering
Fifth wheel and gooseneck trailers can be used
with many pickup models. These trailers place a
larger percentage of the weight (kingpin weight) on the
tow vehicle than conventional trailers. Make sure this
weight does not cause the vehicle to exceed GAWR
or GVWR.
Fifth wheel or gooseneck kingpin weight should be
15 to 25 percent of the trailer weight up to the maximum
amount specified in the trailering chart for the vehicle.
See “Weight of the Trailer” in this section for more
information.
The hitch should be located in the pickup bed so that
its centerline is over or slightly in front of the rear axle.
Take care that it is not so far forward that it will contact
the back of the cab in sharp turns. This is especially
important for short box pickups. Trailer pin box
extensions and sliding fifth wheel hitch assemblies can
help this condition. There should be at least six inches
of clearance between the top of the pickup box and the
bottom of the trailer shelf that extends over the box.
Make sure the hitch is attached to the tow vehicle frame
rails. Do not use the pickup box for support.
5-62
Page 431 of 630
Safety Chains
Always attach chains between the vehicle and the
trailer. Cross the safety chains under the tongue of the
trailer to help prevent the tongue from contacting the
road if it becomes separated from the hitch. Instructions
about safety chains may be provided by the hitch
manufacturer or by the trailer manufacturer. If the trailer
being towed weighs up to 5,000 lbs (2 271 kg) with a
factory-installed step bumper, safety chains may be
attached to the attaching points on the bumper,
otherwise, safety chains should be attached to holes on
the trailer hitch platform. Always leave just enough
slack so the combination can turn. Never allow safety
chains to drag on the ground.
Tow/Haul Mode
Pressing this button
at the end of the shift
lever turns on and off
the tow/haul mode.
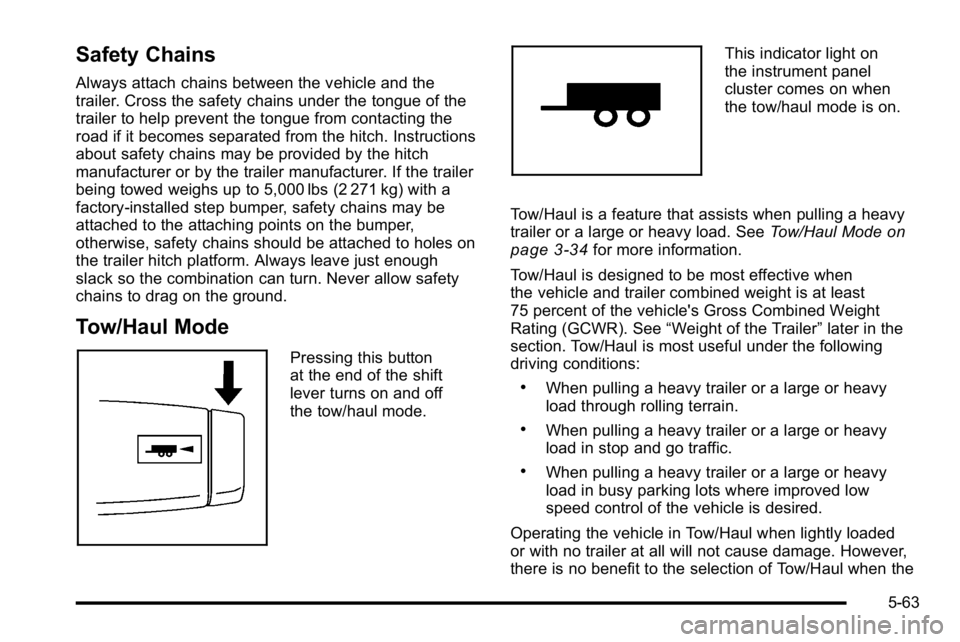
This indicator light on
the instrument panel
cluster comes on when
the tow/haul mode is on.
Tow/Haul is a feature that assists when pulling a heavy
trailer or a large or heavy load. See Tow/Haul Mode
on
page 3‑34for more information.
Tow/Haul is designed to be most effective when
the vehicle and trailer combined weight is at least
75 percent of the vehicle's Gross Combined Weight
Rating (GCWR). See “Weight of the Trailer” later in the
section. Tow/Haul is most useful under the following
driving conditions:
.When pulling a heavy trailer or a large or heavy
load through rolling terrain.
.When pulling a heavy trailer or a large or heavy
load in stop and go traffic.
.When pulling a heavy trailer or a large or heavy
load in busy parking lots where improved low
speed control of the vehicle is desired.
Operating the vehicle in Tow/Haul when lightly loaded
or with no trailer at all will not cause damage. However,
there is no benefit to the selection of Tow/Haul when the
5-63
Page 435 of 630
All DIC warning and service messages must first
be acknowledged by the driver by pressing the
odometer trip stem or the DIC Vehicle Information
button (if equipped) before the Trailer Brake Display
Page can be displayed and Trailer Gain can be
adjusted.
TRAILER GAIN–This setting is displayed anytime the
Trailer Brake Display Page is active. This setting can be
adjusted from 0.0 to 10.0 with either a trailer connected
or disconnected. To adjust the Trailer Gain, press one of
the Trailer Gain adjustment buttons located on the
Trailer Brake Control Panel. Press and hold a gain
button to cause the Trailer Gain to continuously adjust.
To turn the output to the trailer off, adjust the Trailer
Gain setting to 0.0 (zero).
0.0 (zero) gain is the factory default setting. To properly
adjust trailer gain, see the Trailer Gain Adjustment
Procedure later in this section. TRAILER OUTPUT
–This is displayed any time a trailer
with electric brakes is connected. Output to the electric
brakes is based on the amount of vehicle braking
present and relative to the Trailer Gain setting. Output is
displayed from 0 to 10 bars for each gain setting.
The Trailer Output will indicate “- - - - - -“on the Trailer
Brake Display Page whenever the following occur:
.No trailer is connected.
.A trailer without electric brakes is connected
(no DIC message is displayed).
.A trailer with electric brakes has become
disconnected (a CHECK TRAILER WIRING
message will also be displayed on the DIC).
.There is a fault present in the wiring to the electric
trailer brakes (a CHECK TRAILER WIRING
message will also be displayed on the DIC).
.There is a fault in the ITBC system (a SERVICE
TRAILER BRAKE SYSTEM message will also be
displayed in the DIC).
5-67
Page 444 of 630
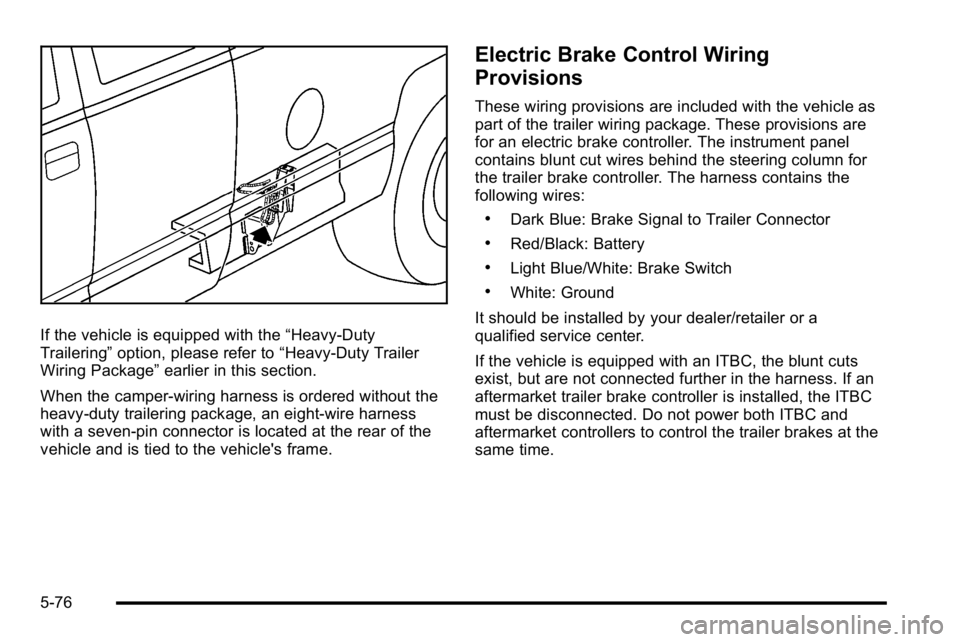
If the vehicle is equipped with the“Heavy-Duty
Trailering” option, please refer to “Heavy-Duty Trailer
Wiring Package” earlier in this section.
When the camper-wiring harness is ordered without the
heavy-duty trailering package, an eight-wire harness
with a seven-pin connector is located at the rear of the
vehicle and is tied to the vehicle's frame.
Electric Brake Control Wiring
Provisions
These wiring provisions are included with the vehicle as
part of the trailer wiring package. These provisions are
for an electric brake controller. The instrument panel
contains blunt cut wires behind the steering column for
the trailer brake controller. The harness contains the
following wires:
.Dark Blue: Brake Signal to Trailer Connector
.Red/Black: Battery
.Light Blue/White: Brake Switch
.White: Ground
It should be installed by your dealer/retailer or a
qualified service center.
If the vehicle is equipped with an ITBC, the blunt cuts
exist, but are not connected further in the harness. If an
aftermarket trailer brake controller is installed, the ITBC
must be disconnected. Do not power both ITBC and
aftermarket controllers to control the trailer brakes at the
same time.
5-76
Page 447 of 630
Section 6 Service and Appearance Care
Service. . . . . . . . . . . . . . . . . . . . . . . . . . . . . . . . . . . . . . . . . . . . . 6-4
Accessories and Modifications . . . . . . . . . . . . . . . . . . 6-4
California Proposition 65 Warning . . . . . . . . . . . . . . . 6-5
California Perchlorate Materials Requirements . . . . . . . . . . . . . . . . . . . . . . . . . . . . . . . . . 6-5
Doing Your Own Service Work . . . . . . . . . . . . . . . . . . 6-5
Adding Equipment to the Outside of the Vehicle . . . . . . . . . . . . . . . . . . . . . . . . . . . . . . . . . 6-6
Fuel . . . . . . . . . . . . . . . . . . . . . . . . . . . . . . . . . . . . . . . . . . . . . . . . . 6-6
Gasoline Octane . . . . . . . . . . . . . . . . . . . . . . . . . . . . . . . . 6-7
Gasoline Specifications . . . . . . . . . . . . . . . . . . . . . . . . . 6-7
California Fuel . . . . . . . . . . . . . . . . . . . . . . . . . . . . . . . . . . 6-8
Additives . . . . . . . . . . . . . . . . . . . . . . . . . . . . . . . . . . . . . . . . 6-8
Fuel E85 (85% Ethanol) . . . . . . . . . . . . . . . . . . . . . . . . . 6-9
Fuels in Foreign Countries . . . . . . . . . . . . . . . . . . . . . 6-11
Filling the Tank . . . . . . . . . . . . . . . . . . . . . . . . . . . . . . . . . 6-11
Filling a Portable Fuel Container . . . . . . . . . . . . . . . 6-13 Checking Things Under the Hood
. . . . . . . . . . . . . . .6-14
Hood Release . . . . . . . . . . . . . . . . . . . . . . . . . . . . . . . . . 6-15
Engine Compartment Overview . . . . . . . . . . . . . . . . 6-16
Engine Oil . . . . . . . . . . . . . . . . . . . . . . . . . . . . . . . . . . . . . 6-18
Engine Oil Life System . . . . . . . . . . . . . . . . . . . . . . . . 6-20
Engine Air Cleaner/Filter . . . . . . . . . . . . . . . . . . . . . . . 6-21
Automatic Transmission Fluid (4-Speed Transmission) . . . . . . . . . . . . . . . . . . . . . 6-23
Automatic Transmission Fluid (6-Speed Transmission) . . . . . . . . . . . . . . . . . . . . . 6-26
Cooling System . . . . . . . . . . . . . . . . . . . . . . . . . . . . . . . . 6-30
Engine Coolant . . . . . . . . . . . . . . . . . . . . . . . . . . . . . . . . 6-31
Engine Overheating . . . . . . . . . . . . . . . . . . . . . . . . . . . 6-34
Overheated Engine Protection Operating Mode . . . . . . . . . . . . . . . . . . . . . . . . . . . . . 6-36
Engine Fan Noise . . . . . . . . . . . . . . . . . . . . . . . . . . . . . 6-37
Power Steering Fluid . . . . . . . . . . . . . . . . . . . . . . . . . . 6-37
Windshield Washer Fluid . . . . . . . . . . . . . . . . . . . . . . 6-38
Brakes . . . . . . . . . . . . . . . . . . . . . . . . . . . . . . . . . . . . . . . . . 6-39
Battery . . . . . . . . . . . . . . . . . . . . . . . . . . . . . . . . . . . . . . . . . 6-43
Jump Starting . . . . . . . . . . . . . . . . . . . . . . . . . . . . . . . . . . 6-44
6-1
Page 448 of 630

Section 6 Service and Appearance Care
Rear Axle. . . . . . . . . . . . . . . . . . . . . . . . . . . . . . . . . . . . . . . . . 6-48
Four-Wheel Drive . . . . . . . . . . . . . . . . . . . . . . . . . . . . . . . . . 6-50
Front Axle . . . . . . . . . . . . . . . . . . . . . . . . . . . . . . . . . . . . . . . . . 6-52
Noise Control System . . . . . . . . . . . . . . . . . . . . . . . . . . . . 6-53
Tampering with Noise Control
System Prohibited . . . . . . . . . . . . . . . . . . . . . . . . . . 6-53
Headlamp Aiming . . . . . . . . . . . . . . . . . . . . . . . . . . . . . . . . 6-54
Bulb Replacement . . . . . . . . . . . . . . . . . . . . . . . . . . . . . . . . 6-57
Halogen Bulbs . . . . . . . . . . . . . . . . . . . . . . . . . . . . . . . . . 6-57
Headlamps . . . . . . . . . . . . . . . . . . . . . . . . . . . . . . . . . . . . 6-57
Center High-Mounted Stoplamp (CHMSL) and Cargo Lamp . . . . . . . . . . . . . . . . . . . . . . . . . . . . . 6-58
Pickup Box Identification and Fender Marker Lamps . . . . . . . . . . . . . . . . . . 6-59
Taillamps, Turn Signal, Stoplamps and Back-up Lamps . . . . . . . . . . . . . . . . . . . . . . . . 6-60
License Plate Lamp . . . . . . . . . . . . . . . . . . . . . . . . . . . . 6-62
Replacement Bulbs . . . . . . . . . . . . . . . . . . . . . . . . . . . . 6-62
Windshield Wiper Blade Replacement . . . . . . . . . . .6-63Tires
. . . . . . . . . . . . . . . . . . . . . . . . . . . . . . . . . . . . . . . . . . . . . . . 6-64
Tire Sidewall Labeling . . . . . . . . . . . . . . . . . . . . . . . . . 6-65
Tire Terminology and Definitions . . . . . . . . . . . . . . . 6-70
Inflation - Tire Pressure . . . . . . . . . . . . . . . . . . . . . . . . 6-72
High-Speed Operation . . . . . . . . . . . . . . . . . . . . . . . . . 6-74
Dual Tire Operation . . . . . . . . . . . . . . . . . . . . . . . . . . . . 6-74
Tire Pressure Monitor System . . . . . . . . . . . . . . . . . 6-75
Tire Pressure Monitor Operation . . . . . . . . . . . . . . . 6-76
Tire Inspection and Rotation . . . . . . . . . . . . . . . . . . . 6-80
When It Is Time for New Tires . . . . . . . . . . . . . . . . . 6-82
Buying New Tires . . . . . . . . . . . . . . . . . . . . . . . . . . . . . . 6-83
Different Size Tires and Wheels . . . . . . . . . . . . . . . 6-85
Uniform Tire Quality Grading . . . . . . . . . . . . . . . . . . . 6-85
Wheel Alignment and Tire Balance . . . . . . . . . . . . 6-87
Wheel Replacement . . . . . . . . . . . . . . . . . . . . . . . . . . . 6-87
Tire Chains . . . . . . . . . . . . . . . . . . . . . . . . . . . . . . . . . . . . 6-89
If a Tire Goes Flat . . . . . . . . . . . . . . . . . . . . . . . . . . . . . 6-89
Changing a Flat Tire . . . . . . . . . . . . . . . . . . . . . . . . . . . 6-90
Removing the Spare Tire and Tools . . . . . . . . . . . . 6-92
Removing the Flat Tire and Installing the Spare Tire . . . . . . . . . . . . . . . . . . . . . . . . . . . . . . . . . . . 6-97
Secondary Latch System . . . . . . . . . . . . . . . . . . . . . 6-103
Storing a Flat or Spare Tire and Tools . . . . . . . . 6-106
Spare Tire . . . . . . . . . . . . . . . . . . . . . . . . . . . . . . . . . . . . 6-109
6-2