2010 GMC SIERRA torque
[x] Cancel search: torquePage 164 of 630
Automatic Transmission Operation
If the vehicle is a Two-mode Hybrid, see the Two-mode
Hybrid manual for more information.
Vehicles with an automatic transmission have an
electronic shift position indicator within the instrument
panel cluster. This display comes on when the ignition
key is turned to the ON/RUN position.
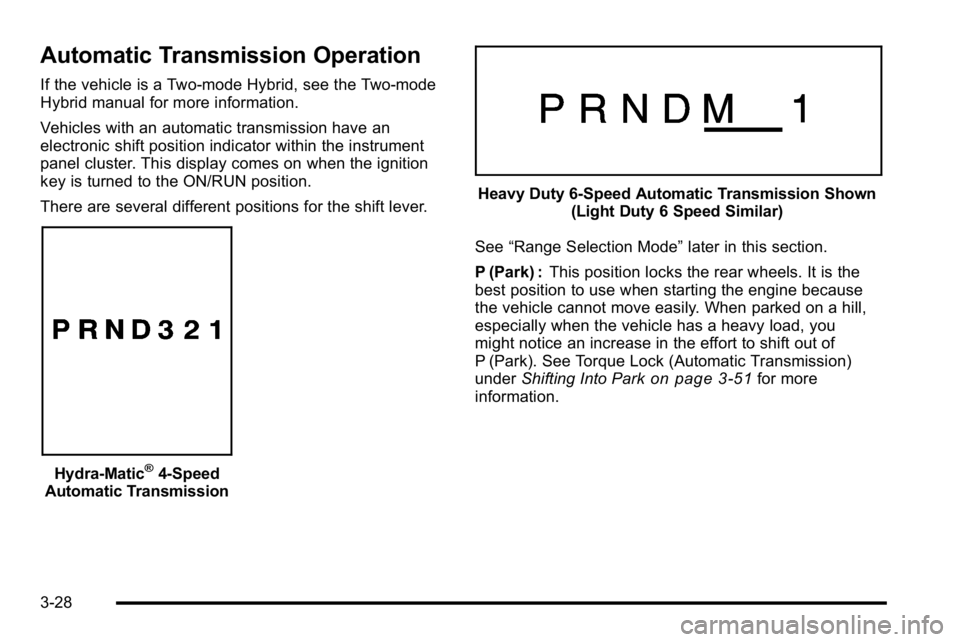
There are several different positions for the shift lever.
Hydra-Matic®4-Speed
Automatic Transmission
Heavy Duty 6-Speed Automatic Transmission Shown (Light Duty 6 Speed Similar)
See “Range Selection Mode” later in this section.
P (Park) : This position locks the rear wheels. It is the
best position to use when starting the engine because
the vehicle cannot move easily. When parked on a hill,
especially when the vehicle has a heavy load, you
might notice an increase in the effort to shift out of
P (Park). See Torque Lock (Automatic Transmission)
under Shifting Into Park
on page 3‑51for more
information.
3-28
Page 169 of 630
To use this feature, do the following:1. Move the shift lever to M (Manual Mode).
2. Press the plus/minus buttons, located on the steering column shift lever, to select the desired
range of gears for current driving conditions.
When M (Manual Mode) is selected a number displays
next to the M, indicating the current gear.
This number is the highest gear that can be used.
However, the vehicle can automatically shift to lower
gears as it adjusts to driving conditions. This means
that all gears below that number are available. When
5 (Fifth) is selected, 1 (First) through 5 (Fifth) gears are
automatically shifted by the vehicle, but 6 (Sixth) cannot
be used until the plus/minus button located on the
steering column lever is used to change to the gear.
Grade Braking is not available when Range Selection
Mode is active. See Tow/Haul Mode on page 3‑34.
While using Range Selection Mode, cruise control and
the Tow/Haul mode can be used. Notice:
Spinning the tires or holding the vehicle in
one place on a hill using only the accelerator pedal
may damage the transmission. The repair will not be
covered by the vehicle warranty. If you are stuck, do
not spin the tires. When stopping on a hill, use the
brakes to hold the vehicle in place.
Low Traction Mode
If your vehicle has the Allison Transmission®, or the
Hydra-Matic®6-Speed Automatic Transmission,
it has a Low Traction Mode that can assist in vehicle
acceleration when road conditions are slippery, such as
with ice or snow. While the vehicle is at a stop, select
the second gear range using Range Selection Mode.
This will limit torque to the wheels after it detects wheel
slip, preventing the tires from spinning.
3-33
Page 171 of 630
Turn the tow/haul mode on and off by pressing the
button, located on the end of the shift lever. When the
tow/haul is on, a light on the instrument panel cluster
will come on.
SeeTow/Haul Mode Light
on page 4‑49for more
information.
Also see “Tow Haul Mode” underTowing a Trailer
on
page 5‑50for more information.
Grade Braking (Allison Transmission®
or Hydra-Matic®6-Speed Automatic
Transmission)
The Grade Braking shift modes can be activated by
pressing the button on the end of the shift control lever.
While in Range Selection Mode , Grade Braking is
deactivated allowing the driver to select a desired range
of gears.
Grade Braking is only active while the Tow/Haul Mode
is selected and you are not in the Range Selection
Mode. See “Tow/Haul Mode listed previously and
Automatic Transmission Operation
on page 3‑28for
more information on the Range Selection Mode. Grade
Braking assists in maintaining desired vehicle speeds
when driving on downhill grades by automatically
implementing a shift schedule that utilizes the engine
and transmission to slow the vehicle. This reduces wear
on the braking system and increases control of the vehicle. Grade Braking monitors vehicle speed,
acceleration, engine torque and brake pedal usage.
Using this information, it detects when the truck is on a
downhill grade and the driver desires to slow the vehicle
by pressing the brake.
Also see
Towing a Trailer
on page 5‑50for more
information.
Cruise Grade Braking (Allison
Transmission®or Hydra-Matic®
6-Speed Automatic Transmission)
Cruise Grade Braking assists when driving on a
downhill grade. It maintains vehicle speed by
automatically implementing a shift schedule that uses
the engine and the transmission to slow the vehicle.
Cruise Grade Braking operates while Cruise Control is
engaged in Tow/Haul mode to assist in maintaining
vehicle speed under loaded vehicle conditions.
It utilizes vehicle acceleration and deviation from
desired speed to determine the correct gear for the
operating condition. If vehicle speed is above the
desired speed the transmission will downshift to slow
the vehicle. If vehicle speed is near or below desired
speed the trans will upshift, allowing vehicle speed to
increase.
While in the Range Select Mode (RSM) mode, cruise
grade braking is not available.
See Automatic Transmission Operation on page 3‑28.
3-35
Page 173 of 630
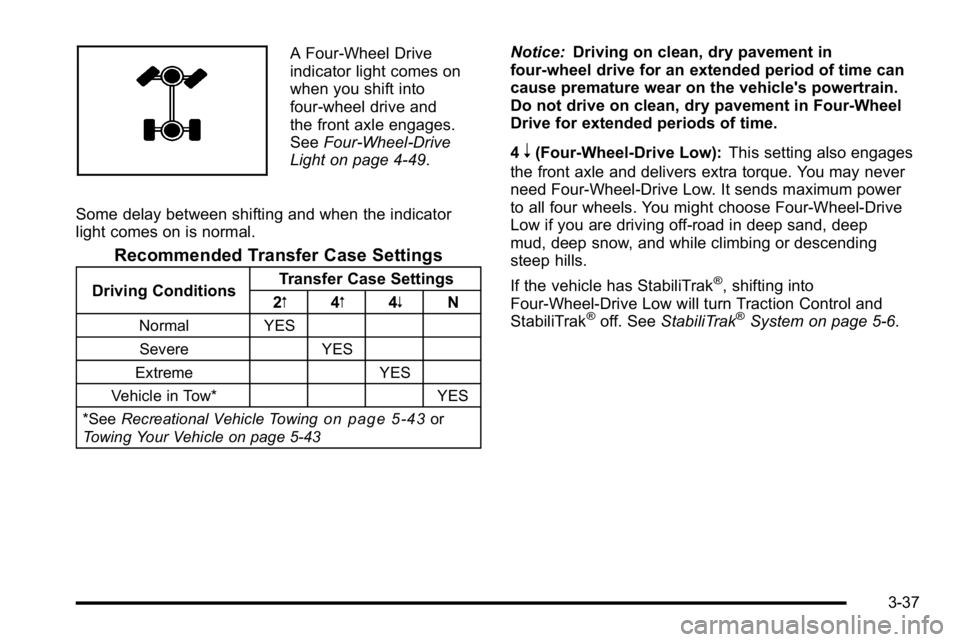
A Four-Wheel Drive
indicator light comes on
when you shift into
four-wheel drive and
the front axle engages.
SeeFour-Wheel-Drive
Light on page 4‑49.
Some delay between shifting and when the indicator
light comes on is normal.
Recommended Transfer Case Settings
Driving Conditions Transfer Case Settings
2m 4m4n N
Normal YES
Severe YES
Extreme YES
Vehicle in Tow* YES
*See Recreational Vehicle Towing
on page 5‑43or
Towing Your Vehicle on page 5‑43
Notice: Driving on clean, dry pavement in
four-wheel drive for an extended period of time can
cause premature wear on the vehicle's powertrain.
Do not drive on clean, dry pavement in Four-Wheel
Drive for extended periods of time.
4
n(Four-Wheel-Drive Low): This setting also engages
the front axle and delivers extra torque. You may never
need Four-Wheel-Drive Low. It sends maximum power
to all four wheels. You might choose Four-Wheel-Drive
Low if you are driving off-road in deep sand, deep
mud, deep snow, and while climbing or descending
steep hills.
If the vehicle has StabiliTrak
®, shifting into
Four-Wheel-Drive Low will turn Traction Control and
StabiliTrak
®off. See StabiliTrak®System on page 5‑6.
3-37
Page 178 of 630
4m(Four-Wheel-Drive High):Use the
Four-Wheel-Drive High position when extra traction is
needed, such as on snowy or icy roads or in most
off-road situations. This setting also engages the front
axle to help drive the vehicle. This is the best setting to
use when plowing snow.
4
n(Four-Wheel-Drive Low): This setting also engages
the front axle and delivers extra torque. You may never
need this setting. It sends maximum power to all four
wheels. You might choose Four-Wheel-Drive Low while
driving off-road in deep sand, deep mud, deep snow,
and while climbing or descending steep hills.
If the vehicle has StabiliTrak
®, shifting into
Four-Wheel-Drive Low will turn Traction Control and
StabiliTrak
®off. See StabiliTrak®System on page 5‑6.
{WARNING:
Shifting the transfer case to N (Neutral) can cause
the vehicle to roll even if the transmission is in
P (Park). You or someone else could be seriously
injured. Be sure to set the parking brake before
placing the transfer case in N (Neutral). See
Parking Brake on page 3‑50.
N (Neutral) : Shift the vehicle's transfer case to
N (Neutral) only when towing the vehicle. See
Recreational Vehicle Towing
on page 5‑43or Towing
Your Vehicleon page 5‑43for more information.
If the SERVICE 4–WHEEL DRIVE message stays on,
you should take the vehicle to your dealer/retailer for
service. See “Service 4–Wheel Drive message” under
DIC Warnings and Messages on page 4‑65.
3-42
Page 182 of 630

Automatic Transfer Case
The transfer case knob
is located next to the
steering column.
Use the dial to shift into and out of Four-Wheel Drive.
You can choose among five driving settings:
Indicator lights in the dial show which setting you are in.
The indicator lights will come on briefly when you turn
on the ignition and one will stay on. If the lights do not
come on, you should take the vehicle to your dealer/
retailer for service. An indicator light will flash while
shifting the transfer case. It will remain illuminated when
the shift is complete. If for some reason the transfer
case cannot make a requested shift, it will return to the
last chosen setting. 2
m(Two-Wheel-Drive High):
This setting is used for
driving in most street and highway situations. The front
axle is not engaged in Two-Wheel Drive. This setting
also provides the best fuel economy.
AUTO (Automatic Four-Wheel Drive) : This setting is
ideal for use when road surface traction conditions are
variable. When driving the vehicle in AUTO, the front
axle is engaged, but the vehicle's power is sent only to
the front and rear wheels automatically based on driving
conditions. Driving in this mode results in slightly lower
fuel economy than Two-Wheel-Drive High.
4
m(Four-Wheel-Drive High): Use the
Four-Wheel-Drive High position when extra traction is
needed, such as on snowy or icy roads or in most
off-road situations. This setting also engages the front
axle to help drive the vehicle. This is the best setting to
use when plowing snow.
4
n(Four-Wheel-Drive Low): This setting also engages
the front axle and delivers extra torque. You may never
need this setting. It sends maximum power to all four
wheels. You might choose Four-Wheel-Drive Low if you
are driving off-road in deep sand, deep mud, deep
snow, and while climbing or descending steep hills.
3-46
Page 188 of 630
Leaving the Vehicle With the Engine
Running
{WARNING:
It can be dangerous to leave the vehicle with the
engine running. The vehicle could move suddenly
if the shift lever is not fully in P (Park) with the
parking brake firmly set.
If you have four-wheel drive and the transfer case
is in N (Neutral), the vehicle will be free to roll,
even if the shift lever is in P (Park). So be sure
the transfer case is in a drive gear—not in
N (Neutral).
And, if you leave the vehicle with the engine
running, it could overheat and even catch fire.
You or others could be injured. Do not leave the
vehicle with the engine running unless you
have to. If you have to leave the vehicle with the engine running,
be sure your vehicle is in P (Park) and the parking
brake is firmly set before you leave it. After you move
the shift lever into P (Park), hold the regular brake pedal
down. Then, see if you can move the shift lever away
from P (Park) without first pulling it toward you. If you
can, it means that the shift lever was not fully locked
into P (Park).
Torque Lock
If you are parking on a hill and you do not shift your
transmission into P (Park) properly, the weight of the
vehicle may put too much force on the parking pawl in
the transmission. You may find it difficult to pull the
shift lever out of P (Park). This is called torque lock.
To prevent torque lock, set the parking brake and then
shift into P (Park) properly before you leave the driver
seat. To find out how, see
Shifting Into Park
on
page 3‑51.
When you are ready to drive, move the shift lever out
of P (Park) before you release the parking brake.
If torque lock does occur, you may need to have
another vehicle push yours a little uphill to take some of
the pressure from the parking pawl in the transmission,
then you will be able to pull the shift lever out of
P (Park).
3-52
Page 215 of 630
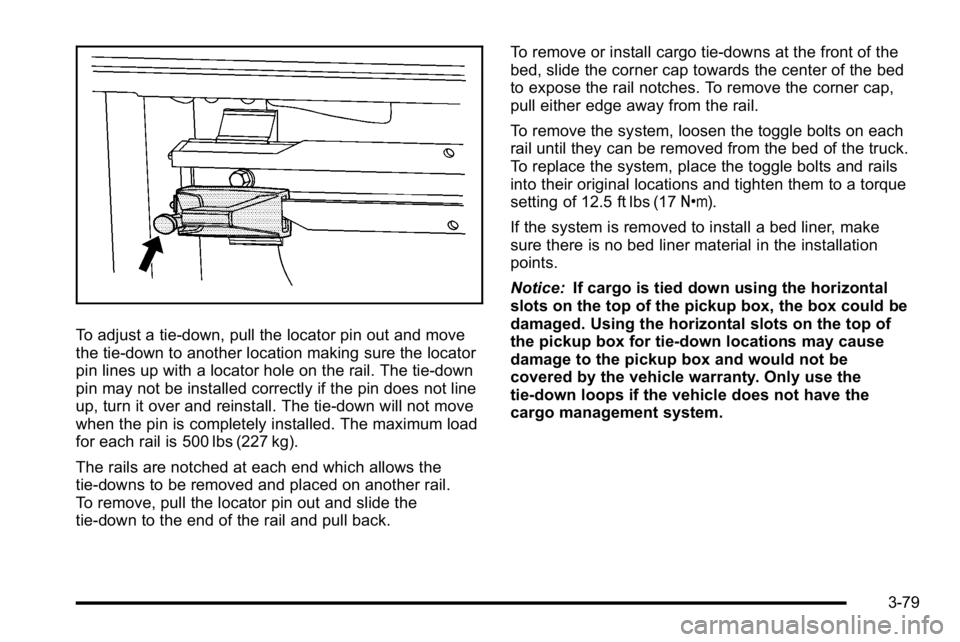
To adjust a tie-down, pull the locator pin out and move
the tie-down to another location making sure the locator
pin lines up with a locator hole on the rail. The tie-down
pin may not be installed correctly if the pin does not line
up, turn it over and reinstall. The tie-down will not move
when the pin is completely installed. The maximum load
for each rail is 500 lbs (227 kg).
The rails are notched at each end which allows the
tie-downs to be removed and placed on another rail.
To remove, pull the locator pin out and slide the
tie-down to the end of the rail and pull back.To remove or install cargo tie-downs at the front of the
bed, slide the corner cap towards the center of the bed
to expose the rail notches. To remove the corner cap,
pull either edge away from the rail.
To remove the system, loosen the toggle bolts on each
rail until they can be removed from the bed of the truck.
To replace the system, place the toggle bolts and rails
into their original locations and tighten them to a torque
setting of 12.5 ft lbs (17
Y).
If the system is removed to install a bed liner, make
sure there is no bed liner material in the installation
points.
Notice: If cargo is tied down using the horizontal
slots on the top of the pickup box, the box could be
damaged. Using the horizontal slots on the top of
the pickup box for tie-down locations may cause
damage to the pickup box and would not be
covered by the vehicle warranty. Only use the
tie-down loops if the vehicle does not have the
cargo management system.
3-79