2010 GMC SIERRA DENALI load capacity
[x] Cancel search: load capacityPage 169 of 550
Roof Rack System
{WARNING:
If something is carried on top of the vehicle that is
longer or wider than the roof rack—like paneling,
plywood, or a mattress— the wind can catch it
while the vehicle is being driven. The item being
carried could be violently torn off, and this could
cause a collision, and damage the vehicle. Never
carry something longer or wider than the roof rack
on top of the vehicle unless using a GM Certified
accessory carrier.
For vehicles with a roof rack, the rack can be used to
load items. For roof racks that do not have crossrails
included, GM Certified crossrails can be purchased as
an accessory. See your dealer/retailer for additional
information.
Notice: Loading cargo on the roof rack that weighs
more than 91 kg (200 lbs) or hangs over the rear or
sides of the vehicle may damage the vehicle. Load
cargo so that it rests evenly between the crossrails,
making sure to fasten cargo securely. To prevent damage or loss of cargo when driving, check
to make sure crossrails and cargo are securely
fastened. Loading cargo on the roof rack will make the
vehicle’s center of gravity higher. Avoid high speeds,
sudden starts, sharp turns, sudden braking or abrupt
maneuvers, otherwise it may result in loss of control.
If driving for a long distance, on rough roads, or at high
speeds, occasionally stop the vehicle to make sure the
cargo remains in its place.
Do not exceed the maximum vehicle capacity when
loading the vehicle. For more information on vehicle
capacity and loading, see
Loading the Vehicle
on
page 5‑31.
.If small heavy objects are placed on the roof, cut a
piece of 3/8 inch plywood to fit inside the crossrails
and siderails to spread the load. Tie the plywood to
the siderail supports.
.Tie the load and secure it to the crossrails or the
siderail supports. Use the crossrails only to keep
the load from sliding. To move a crossrail, lift the
release lever up, on both sides of the rail. Then
slide the crossrail to the desired position balancing
the force side to side. Press the release lever
down on both sides of the rail, down to tighten it.
Try to slide the crossrail back and forth slightly to
make sure it is tight.
3-59
Page 209 of 550

Engine Coolant Temperature Gage
United StatesCanada
This gage shows the engine coolant temperature.
It also provides an indicator of how hard the vehicle is
working. During a majority of the operation, the gage
reads 210°F (100°C) or less. If pulling a load or going
up hills, it is normal for the temperature to fluctuate and
go over the 235°F (113°C) mark. If the gage reaches
the 260°F (125°C) mark, it indicates that the cooling
system is working beyond its capacity.
See Engine Overheating on page 6‑34.
Tire Pressure Light
For vehicles with a tire
pressure monitoring
system, this light comes
on briefly when the engine
is started. It provides
information about tire
pressures and the Tire
Pressure Monitoring
System.
When the Light is On Steady
This indicates that one or more of the tires is
significantly underinflated.
A tire pressure message in the Driver Information
Center (DIC), can accompany the light. See Driver
Information Center (DIC)
on page 4‑44for more
information. Stop and check the tires as soon as it is
safe to do so. If underinflated, inflate to the proper
pressure. See Inflation - Tire Pressure
on page 6‑71for more information.
4-37
Page 343 of 550
Loading the Vehicle
It is very important to know how much weight your
vehicle can carry. This weight is called the vehicle
capacity weight and includes the weight of all
occupants, cargo, and all nonfactory-installed
options. Two labels on your vehicle show how
much weight it was designed to carry, the Tire and
Loading Information label and the Certification/Tire
label.
{WARNING:
Do not load the vehicle any heavier than the
Gross Vehicle Weight Rating (GVWR),
or either the maximum front or rear Gross
Axle Weight Rating (GAWR). If you do, parts
on the vehicle can break, and it can change
the way the vehicle handles. These could
cause you to lose control and crash. Also,
overloading can shorten the life of the
vehicle.
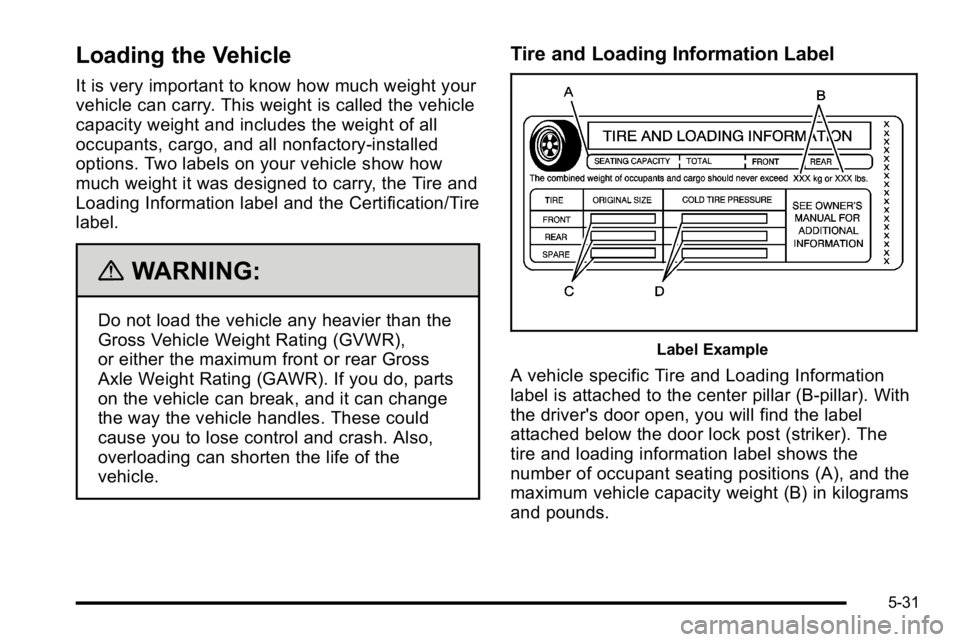
Tire and Loading Information Label
Label Example
A vehicle specific Tire and Loading Information
label is attached to the center pillar (B-pillar). With
the driver's door open, you will find the label
attached below the door lock post (striker). The
tire and loading information label shows the
number of occupant seating positions (A), and the
maximum vehicle capacity weight (B) in kilograms
and pounds.
5-31
Page 344 of 550

The Tire and Loading Information label also
shows the size of the original equipment tires (C)
and the recommended cold tire inflation
pressures (D). For more information on tires and
inflation seeTires
on page 6‑62andInflation - Tire
Pressure
on page 6‑71.
There is also important loading information on the
vehicle Certification/Tire label. It tells you the
Gross Vehicle Weight Rating (GVWR) and the
Gross Axle Weight Rating (GAWR) for the front
and rear axles. See “Certification/Tire Label” later
in this section.
Steps for Determining Correct Load Limit
1.Locate the statement “The combined weight
of occupants and cargo should never exceed
XXX kg or XXX lbs” on your vehicle's placard.
2.Determine the combined weight of the driver
and passengers that will be riding in your
vehicle.
3.Subtract the combined weight of the driver
and passengers from XXX kg or XXX lbs.
4.The resulting figure equals the available
amount of cargo and luggage load capacity.
For example, if the“XXX”amount equals
1400 lbs and there will be five 150 lb
passengers in your vehicle, the amount of
available cargo and luggage load capacity is
650 lbs (1400 −750 (5 x 150) = 650 lbs).
5.Determine the combined weight of luggage
and cargo being loaded on the vehicle. That
weight may not safely exceed the available
cargo and luggage load capacity calculated in
Step 4.
6.If your vehicle will be towing a trailer, the load
from your trailer will be transferred to your
vehicle. Consult this manual to determine
how this reduces the available cargo and
luggage load capacity of your vehicle.
SeeTowing a Trailer
on page 5‑42for
important information on towing a trailer,
towing safety rules and trailering tips.
5-32
Page 346 of 550
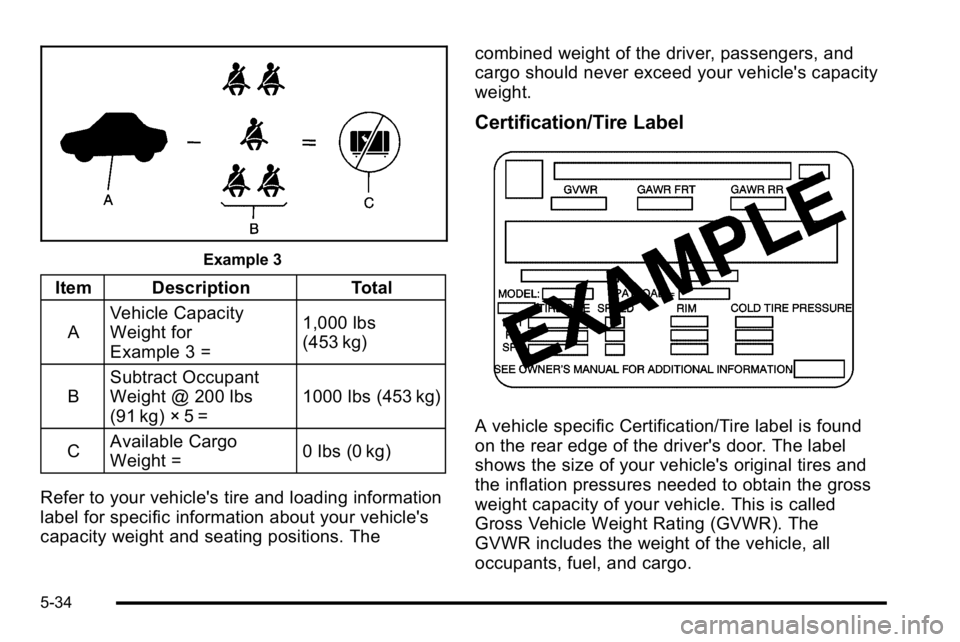
Example 3
Item DescriptionTotal
A Vehicle Capacity
Weight for
Example 3 = 1,000 lbs
(453 kg)
B Subtract Occupant
Weight @ 200 lbs
(91 kg) × 5 = 1000 lbs (453 kg)
C Available Cargo
Weight =
0 lbs (0 kg)
Refer to your vehicle's tire and loading information
label for specific information about your vehicle's
capacity weight and seating positions. The combined weight of the driver, passengers, and
cargo should never exceed your vehicle's capacity
weight.
Certification/Tire Label
A vehicle specific Certification/Tire label is found
on the rear edge of the driver's door. The label
shows the size of your vehicle's original tires and
the inflation pressures needed to obtain the gross
weight capacity of your vehicle. This is called
Gross Vehicle Weight Rating (GVWR). The
GVWR includes the weight of the vehicle, all
occupants, fuel, and cargo.
5-34
Page 347 of 550
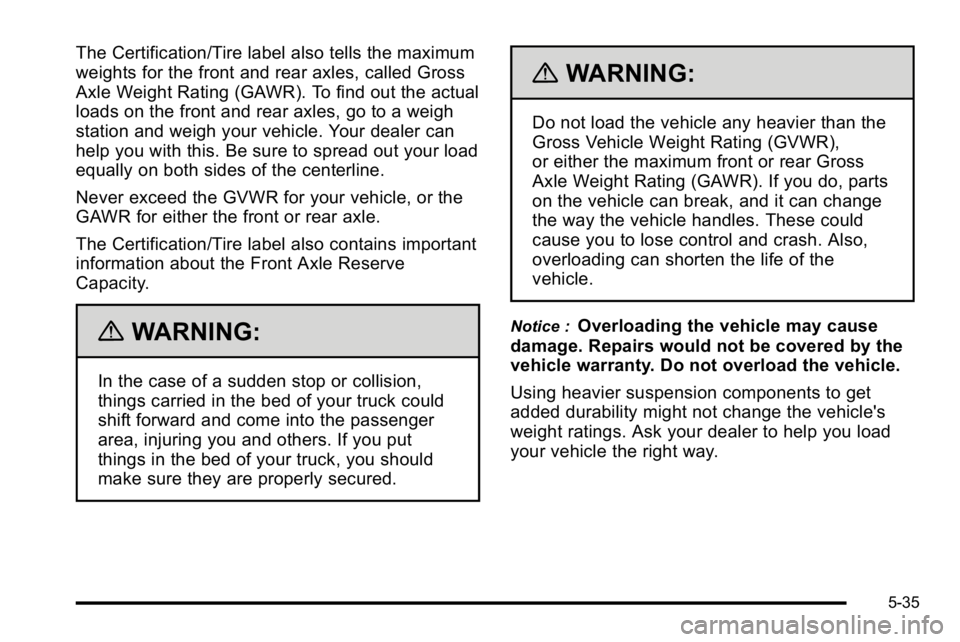
The Certification/Tire label also tells the maximum
weights for the front and rear axles, called Gross
Axle Weight Rating (GAWR). To find out the actual
loads on the front and rear axles, go to a weigh
station and weigh your vehicle. Your dealer can
help you with this. Be sure to spread out your load
equally on both sides of the centerline.
Never exceed the GVWR for your vehicle, or the
GAWR for either the front or rear axle.
The Certification/Tire label also contains important
information about the Front Axle Reserve
Capacity.
{WARNING:
In the case of a sudden stop or collision,
things carried in the bed of your truck could
shift forward and come into the passenger
area, injuring you and others. If you put
things in the bed of your truck, you should
make sure they are properly secured.
{WARNING:
Do not load the vehicle any heavier than the
Gross Vehicle Weight Rating (GVWR),
or either the maximum front or rear Gross
Axle Weight Rating (GAWR). If you do, parts
on the vehicle can break, and it can change
the way the vehicle handles. These could
cause you to lose control and crash. Also,
overloading can shorten the life of the
vehicle.
Notice :Overloading the vehicle may cause
damage. Repairs would not be covered by the
vehicle warranty. Do not overload the vehicle.
Using heavier suspension components to get
added durability might not change the vehicle's
weight ratings. Ask your dealer to help you load
your vehicle the right way.
5-35
Page 357 of 550

Weight of the Trailer Tongue
The tongue load (A) of any trailer is very important
because it is also part of the vehicle weight. The Gross
Vehicle Weight (GVW) includes the curb weight of the
vehicle, any cargo carried in it, and the people who will
be riding in the vehicle as well as trailer tongue weight.
Vehicle options, equipment, passengers and cargo in
the vehicle reduce the amount of tongue weight the
vehicle can carry, which will also reduce the trailer
weight the vehicle can tow. SeeLoading the Vehicle
on
page 5‑31for more information about the vehicle's
maximum load capacity.
Trailer tongue weight (A) should be 10 percent to
15 percent and fifth wheel or gooseneck kingpin weight
should be 15 to 25 percent of the loaded trailer weight
up to the maximums for vehicle series and hitch type
shown below:
Vehicle Series Hitch Type Maximum
Tongue Weight
1500 Weight Carrying 272 kg (600 lbs)
1500 Weight Distributing 499 kg (1,100 lbs)
Do not exceed the maximum allowable tongue weight
for the vehicle. Choose the shortest hitch extension that
will position the hitch ball closest to the vehicle. This will
help reduce the effect of trailer tongue weight on the
rear axle.
5-45
Page 440 of 550
(F) Tire Ply Material:The type of cord and
number of plies in the sidewall and under the
tread.
(G) Single Tire Maximum Load
:Maximum load
that can be carried and the maximum pressure
needed to support that load when used as a
single. For information on recommended tire
pressure see Inflation - Tire Pressure
on page 6‑71
andLoading the Vehicleon page 5‑31.
Tire Size
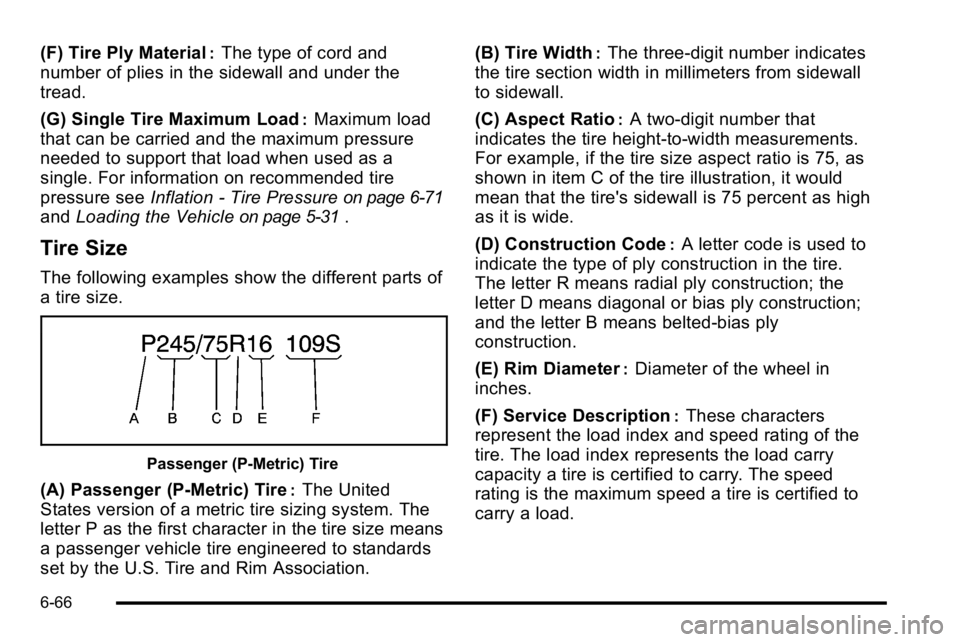
The following examples show the different parts of
a tire size.
Passenger (P‐Metric) Tire
(A) Passenger (P‐Metric) Tire:The United
States version of a metric tire sizing system. The
letter P as the first character in the tire size means
a passenger vehicle tire engineered to standards
set by the U.S. Tire and Rim Association. (B) Tire Width
:The three‐digit number indicates
the tire section width in millimeters from sidewall
to sidewall.
(C) Aspect Ratio
:A two‐digit number that
indicates the tire height‐to‐width measurements.
For example, if the tire size aspect ratio is 75, as
shown in item C of the tire illustration, it would
mean that the tire's sidewall is 75 percent as high
as it is wide.
(D) Construction Code
:A letter code is used to
indicate the type of ply construction in the tire.
The letter R means radial ply construction; the
letter D means diagonal or bias ply construction;
and the letter B means belted‐bias ply
construction.
(E) Rim Diameter
:Diameter of the wheel in
inches.
(F) Service Description
:These characters
represent the load index and speed rating of the
tire. The load index represents the load carry
capacity a tire is certified to carry. The speed
rating is the maximum speed a tire is certified to
carry a load.
6-66