2010 GMC SIERRA DENALI steering
[x] Cancel search: steeringPage 339 of 550
{WARNING:
Coasting downhill in N (Neutral) or with the
ignition off is dangerous. The brakes will have to
do all the work of slowing down and they could
get so hot that they would not work well. You
would then have poor braking or even none going
down a hill. You could crash. Always have the
engine running and the vehicle in gear when
going downhill.
.Stay in your own lane. Do not swing wide or cut
across the center of the road. Drive at speeds that
let you stay in your own lane.
.Top of hills: Be alert—something could be in your
lane (stalled car, accident).
.Pay attention to special road signs (falling rocks
area, winding roads, long grades, passing or
no-passing zones) and take appropriate action.
See Off-Road Driving
on page 5‑12for information
about driving off-road.
Winter Driving
Driving on Snow or Ice
Drive carefully when there is snow or ice between the
tires and the road, creating less traction or grip. Wet ice
can occur at about 0°C (32°F) when freezing rain
begins to fall, resulting in even less traction. Avoid
driving on wet ice or in freezing rain until roads can be
treated with salt or sand.
Drive with caution, whatever the condition. Accelerate
gently so traction is not lost. Accelerating too quickly
causes the wheels to spin and makes the surface under
the tires slick, so there is even less traction.
Try not to break the fragile traction. If you accelerate too
fast, the drive wheels will spin and polish the surface
under the tires even more.
The Antilock Brake System (ABS)
on page 5‑4improves vehicle stability during hard stops on a
slippery roads, but apply the brakes sooner than when
on dry pavement.
Allow greater following distance on any slippery road
and watch for slippery spots. Icy patches can occur on
otherwise clear roads in shaded areas. The surface of a
curve or an overpass can remain icy when the
surrounding roads are clear. Avoid sudden steering
maneuvers and braking while on ice.
Turn off cruise control, if equipped, on slippery surfaces.
5-27
Page 342 of 550
Rocking Your Vehicle to Get It Out
Turn the steering wheel left and right to clear the area
around the front wheels. Turn off any traction or stability
system. Shift back and forth between R (Reverse) and a
forward gear, spinning the wheels as little as possible.
To prevent transmission wear, wait until the wheels stop
spinning before shifting gears. Release the accelerator
pedal while shifting, and press lightly on the accelerator
pedal when the transmission is in gear. Slowly spinning
the wheels in the forward and reverse directions causes
a rocking motion that could free the vehicle. If that does
not get the vehicle out after a few tries, it might need to
be towed out. Recovery hooks can be used, if the
vehicle has them. If the vehicle does need to be towed
out, seeTowing Your Vehicle on page 5‑38.
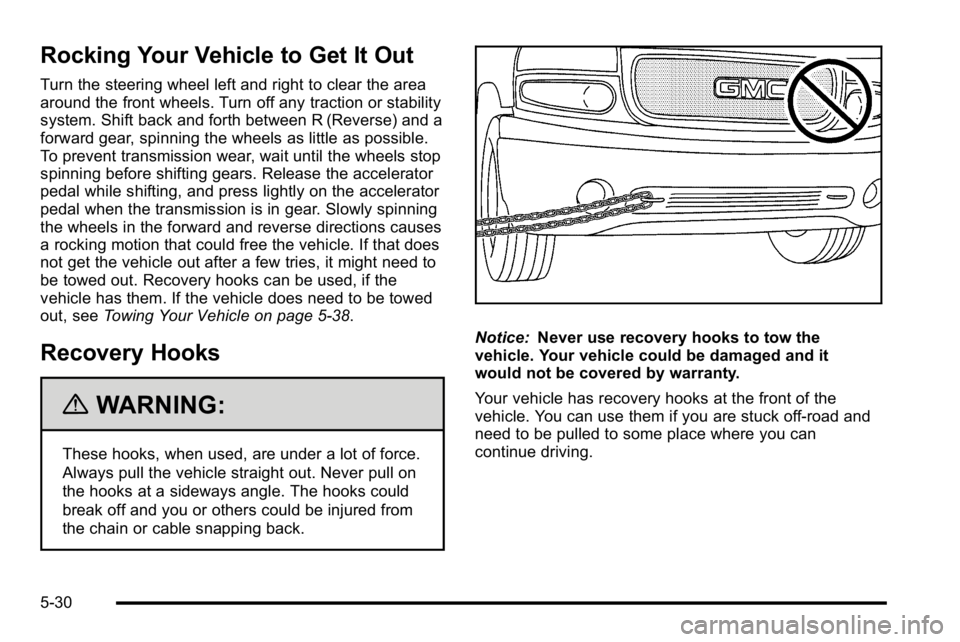
Recovery Hooks
{WARNING:
These hooks, when used, are under a lot of force.
Always pull the vehicle straight out. Never pull on
the hooks at a sideways angle. The hooks could
break off and you or others could be injured from
the chain or cable snapping back.
Notice:Never use recovery hooks to tow the
vehicle. Your vehicle could be damaged and it
would not be covered by warranty.
Your vehicle has recovery hooks at the front of the
vehicle. You can use them if you are stuck off-road and
need to be pulled to some place where you can
continue driving.
5-30
Page 363 of 550
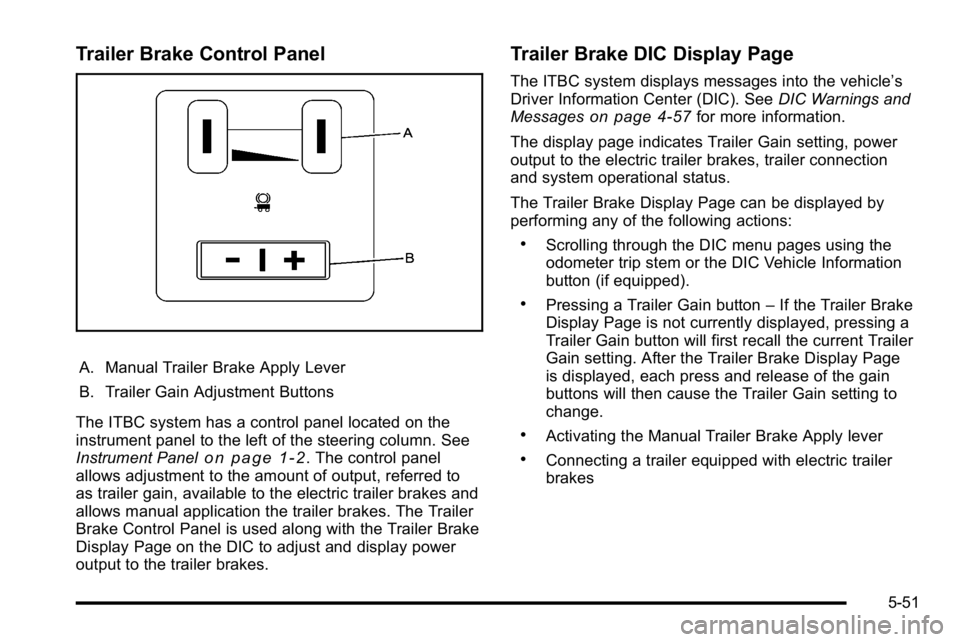
Trailer Brake Control Panel
A. Manual Trailer Brake Apply Lever
B. Trailer Gain Adjustment Buttons
The ITBC system has a control panel located on the
instrument panel to the left of the steering column. See
Instrument Panel
on page 1‑2. The control panel
allows adjustment to the amount of output, referred to
as trailer gain, available to the electric trailer brakes and
allows manual application the trailer brakes. The Trailer
Brake Control Panel is used along with the Trailer Brake
Display Page on the DIC to adjust and display power
output to the trailer brakes.
Trailer Brake DIC Display Page
The ITBC system displays messages into the vehicle’s
Driver Information Center (DIC). See DIC Warnings and
Messages
on page 4‑57for more information.
The display page indicates Trailer Gain setting, power
output to the electric trailer brakes, trailer connection
and system operational status.
The Trailer Brake Display Page can be displayed by
performing any of the following actions:
.Scrolling through the DIC menu pages using the
odometer trip stem or the DIC Vehicle Information
button (if equipped).
.Pressing a Trailer Gain button –If the Trailer Brake
Display Page is not currently displayed, pressing a
Trailer Gain button will first recall the current Trailer
Gain setting. After the Trailer Brake Display Page
is displayed, each press and release of the gain
buttons will then cause the Trailer Gain setting to
change.
.Activating the Manual Trailer Brake Apply lever
.Connecting a trailer equipped with electric trailer
brakes
5-51
Page 369 of 550
Following Distance
Stay at least twice as far behind the vehicle ahead as
you would when driving the vehicle without a trailer.
This can help to avoid heavy braking and sudden turns.
Passing
More passing distance is needed when towing a trailer.
The combination will not accelerate as quickly and is
longer so it is necessary to go much farther beyond the
passed vehicle before returning to the lane.
Backing Up
Hold the bottom of the steering wheel with one hand.
Then, to move the trailer to the left, move that hand to
the left. To move the trailer to the right, move your hand
to the right. Always back up slowly and, if possible,
have someone guide you.
Making Turns
Notice:Making very sharp turns while trailering
could cause the trailer to come in contact with the
vehicle. The vehicle could be damaged. Avoid
making very sharp turns while trailering.
When turning with a trailer, make wider turns than
normal. Do this so the trailer will not strike soft
shoulders, curbs, road signs, trees or other objects.
Avoid jerky or sudden maneuvers. Signal well in
advance.
If the trailer turn signal bulbs burn out, the arrows on the
instrument panel will still flash for turns. It is important to
check occasionally to be sure the trailer bulbs are still
working.
5-57
Page 375 of 550
Section 6 Service and Appearance Care
Service. . . . . . . . . . . . . . . . . . . . . . . . . . . . . . . . . . . . . . . . . . . . . 6-4
Accessories and Modifications . . . . . . . . . . . . . . . . . . 6-4
California Proposition 65 Warning . . . . . . . . . . . . . . . 6-5
California Perchlorate Materials Requirements . . . . . . . . . . . . . . . . . . . . . . . . . . . . . . . . . 6-5
Doing Your Own Service Work . . . . . . . . . . . . . . . . . . 6-5
Adding Equipment to the Outside of the Vehicle . . . . . . . . . . . . . . . . . . . . . . . . . . . . . . . . . . . . . . . . 6-6
Fuel . . . . . . . . . . . . . . . . . . . . . . . . . . . . . . . . . . . . . . . . . . . . . . . . . 6-6
Gasoline Octane . . . . . . . . . . . . . . . . . . . . . . . . . . . . . . . . 6-7
Gasoline Specifications . . . . . . . . . . . . . . . . . . . . . . . . . 6-7
California Fuel . . . . . . . . . . . . . . . . . . . . . . . . . . . . . . . . . . 6-7
Additives . . . . . . . . . . . . . . . . . . . . . . . . . . . . . . . . . . . . . . . . 6-8
Fuel E85 (85% Ethanol) . . . . . . . . . . . . . . . . . . . . . . . . . 6-9
Fuels in Foreign Countries . . . . . . . . . . . . . . . . . . . . . 6-10
Filling the Tank . . . . . . . . . . . . . . . . . . . . . . . . . . . . . . . . 6-10
Filling a Portable Fuel Container . . . . . . . . . . . . . . . 6-13
Checking Things Under the Hood . . . . . . . . . . . . . . .6-14
Hood Release . . . . . . . . . . . . . . . . . . . . . . . . . . . . . . . . . 6-14
Engine Compartment Overview . . . . . . . . . . . . . . . . 6-16
Engine Oil . . . . . . . . . . . . . . . . . . . . . . . . . . . . . . . . . . . . . 6-18
Engine Oil Life System . . . . . . . . . . . . . . . . . . . . . . . . 6-20
Engine Air Cleaner/Filter . . . . . . . . . . . . . . . . . . . . . . . 6-22
Automatic Transmission Fluid . . . . . . . . . . . . . . . . . . 6-24
Cooling System . . . . . . . . . . . . . . . . . . . . . . . . . . . . . . . . 6-28 Engine Coolant . . . . . . . . . . . . . . . . . . . . . . . . . . . . . . . . 6-29
Engine Overheating . . . . . . . . . . . . . . . . . . . . . . . . . . . 6-34
Overheated Engine Protection
Operating Mode . . . . . . . . . . . . . . . . . . . . . . . . . . . . . 6-37
Engine Fan Noise . . . . . . . . . . . . . . . . . . . . . . . . . . . . . 6-37
Power Steering Fluid . . . . . . . . . . . . . . . . . . . . . . . . . . 6-38
Windshield Washer Fluid . . . . . . . . . . . . . . . . . . . . . . 6-39
Brakes . . . . . . . . . . . . . . . . . . . . . . . . . . . . . . . . . . . . . . . . . 6-40
Battery . . . . . . . . . . . . . . . . . . . . . . . . . . . . . . . . . . . . . . . . . 6-43
Jump Starting . . . . . . . . . . . . . . . . . . . . . . . . . . . . . . . . . . 6-44
All-Wheel Drive . . . . . . . . . . . . . . . . . . . . . . . . . . . . . . . . . . . 6-49
Rear Axle . . . . . . . . . . . . . . . . . . . . . . . . . . . . . . . . . . . . . . . . . 6-50
Front Axle . . . . . . . . . . . . . . . . . . . . . . . . . . . . . . . . . . . . . . . . . 6-51
Headlamp Aiming . . . . . . . . . . . . . . . . . . . . . . . . . . . . . . . . 6-52
Bulb Replacement . . . . . . . . . . . . . . . . . . . . . . . . . . . . . . . . 6-55
Halogen Bulbs . . . . . . . . . . . . . . . . . . . . . . . . . . . . . . . . . 6-55
Headlamps . . . . . . . . . . . . . . . . . . . . . . . . . . . . . . . . . . . . 6-55
Center High-Mounted Stoplamp (CHMSL) and Cargo Lamp . . . . . . . . . . . . . . . . . . . . . . . . . . . . . 6-57
Taillamps, Turn Signal, Stoplamps and Back-up Lamps . . . . . . . . . . . . . . . . . . . . . . . . . . . . . . 6-58
License Plate Lamp . . . . . . . . . . . . . . . . . . . . . . . . . . . . 6-60
Replacement Bulbs . . . . . . . . . . . . . . . . . . . . . . . . . . . . 6-60
Windshield Wiper Blade Replacement . . . . . . . . . . .6-61
6-1
Page 391 of 550

A.Engine Air Cleaner/Filter on page 6‑22.
B. Coolant Surge Tank and Pressure Cap. See Cooling System on page 6‑28.
C. Remote Positive (+) Terminal. See Jump Starting
on page 6‑44.
D. Battery on page 6‑43.
E. Engine Oil Fill Cap. See “When to Add Engine Oil”
under Engine Oil on page 6‑18.
F. Automatic Transmission Dipstick (Out of View). See “Checking the Fluid Level” underAutomatic
Transmission Fluid on page 6‑24.
G. Remote Negative (−) Terminal (GND) (Out of View). See Jump Starting on page 6‑44. H. Engine Oil Dipstick (Out of View). See
“Checking
Engine Oil” underEngine Oil on page 6‑18.
I. Engine Cooling Fan (Out of View). See Cooling
System on page 6‑28.
J. Power Steering Fluid Reservoir (Out of View). See Power Steering Fluid on page 6‑38.
K. Brake Master Cylinder Reservoir. See “Brake
Fluid” under Brakes on page 6‑40.
L. Underhood Fuse Block on page 6‑118.
M. Windshield Washer Fluid Reservoir. See “Adding
Washer Fluid” underWindshield Washer Fluid
on
page 6‑39.
6-17
Page 412 of 550
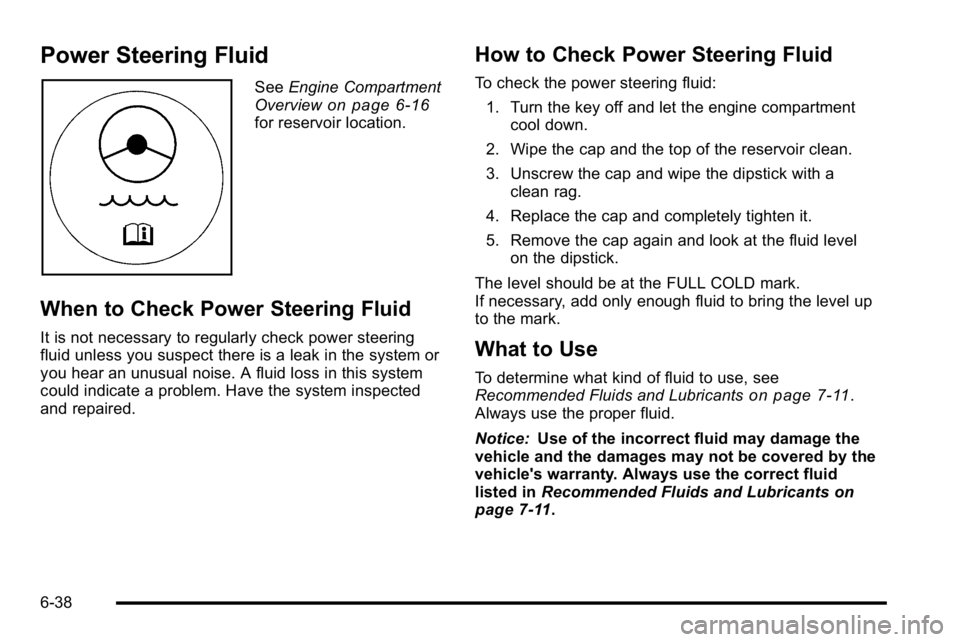
Power Steering Fluid
SeeEngine Compartment
Overviewon page 6‑16for reservoir location.
When to Check Power Steering Fluid
It is not necessary to regularly check power steering
fluid unless you suspect there is a leak in the system or
you hear an unusual noise. A fluid loss in this system
could indicate a problem. Have the system inspected
and repaired.
How to Check Power Steering Fluid
To check the power steering fluid:
1. Turn the key off and let the engine compartment cool down.
2. Wipe the cap and the top of the reservoir clean.
3. Unscrew the cap and wipe the dipstick with a clean rag.
4. Replace the cap and completely tighten it.
5. Remove the cap again and look at the fluid level on the dipstick.
The level should be at the FULL COLD mark.
If necessary, add only enough fluid to bring the level up
to the mark.
What to Use
To determine what kind of fluid to use, see
Recommended Fluids and Lubricantson page 7‑11.
Always use the proper fluid.
Notice: Use of the incorrect fluid may damage the
vehicle and the damages may not be covered by the
vehicle's warranty. Always use the correct fluid
listed in Recommended Fluids and Lubricants
on
page 7‑11.
6-38
Page 442 of 550
Tire Terminology and Definitions
Air Pressure:The amount of air inside the tire
pressing outward on each square inch of the tire.
Air pressure is expressed in pounds per square
inch (psi) or kilopascal (kPa).
Accessory Weight
:This means the combined
weight of optional accessories. Some examples of
optional accessories are, automatic transmission,
power steering, power brakes, power windows,
power seats, and air conditioning.
Aspect Ratio
:The relationship of a tire's height
to its width.
Belt
:A rubber coated layer of cords that is
located between the plies and the tread. Cords
may be made from steel or other reinforcing
materials.
Bead
:The tire bead contains steel wires wrapped
by steel cords that hold the tire onto the rim.
Bias Ply Tire
:A pneumatic tire in which the plies
are laid at alternate angles less than 90 degrees
to the centerline of the tread. Cold Tire Pressure
:The amount of air pressure
in a tire, measured in pounds per square inch (psi)
or kilopascals (kPa) before a tire has built up heat
from driving. See Inflation - Tire Pressure
on
page 6‑71
.
Curb Weight
:The weight of a motor vehicle with
standard and optional equipment including the
maximum capacity of fuel, oil, and coolant, but
without passengers and cargo.
DOT Markings
:A code molded into the sidewall
of a tire signifying that the tire is in compliance
with the U.S. Department of Transportation (DOT)
motor vehicle safety standards. The DOT code
includes the Tire Identification Number (TIN), an
alphanumeric designator which can also identify
the tire manufacturer, production plant, brand, and
date of production.
GVWR
:Gross Vehicle Weight Rating. See
Loading the Vehicle
on page 5‑31.
GAWR FRT
:Gross Axle Weight Rating for the
front axle. See Loading the Vehicle
on page 5‑31.
GAWR RR
:Gross Axle Weight Rating for the rear
axle. See Loading the Vehicle
on page 5‑31.
6-68