Page 176 of 550
Turn Signal/Multifunction Lever
The lever on the left side of the steering column
includes the following:
G:Turn and Lane Change Signals
53 :Headlamp High/Low-Beam Changer
N :Windshield Wipers
L :Windshield Washer
Flash-to-Pass.
Exterior Lamps.
Information for these features is on the pages following.
Turn and Lane-Change Signals
An arrow on the
instrument panel cluster
flashes in the direction of
the turn or lane change.
Move the lever all the way up or down to signal a turn.
Raise or lower the lever until the arrow starts to flash to
signal a lane change. Hold it there until the lane change
is completed.
The lever returns to its starting position whenever it is
released.
If after signaling a turn or lane change the arrows flash
rapidly or do not come on, a signal bulb could be
burned out.
Have the bulbs replaced. If the bulb is not burned out,
check the fuse. See Fuses and Circuit Breakers
on
page 6‑114.
4-4
Page 179 of 550
Cruise Control
{WARNING:
Cruise control can be dangerous where you
cannot drive safely at a steady speed. So, do not
use the cruise control on winding roads or in
heavy traffic.
Cruise control can be dangerous on slippery
roads. On such roads, fast changes in tire traction
can cause excessive wheel slip, and you could
lose control. Do not use cruise control on slippery
roads.
With cruise control, a speed of about 40 km/h (25 mph)
or more can be maintained without keeping your foot on
the accelerator. Cruise control does not work at speeds
below about 40 km/h (25 mph).
When the brakes are applied, the cruise control
turns off.
If your vehicle has the Stabilitrak
®system and begins to
limit wheel spin while you are using cruise control, the
cruise control will automatically disengage. See
StabiliTrak
®Systemon page 5‑6. When road
conditions allow the cruise control to be safely used
again, it can be turned back on.
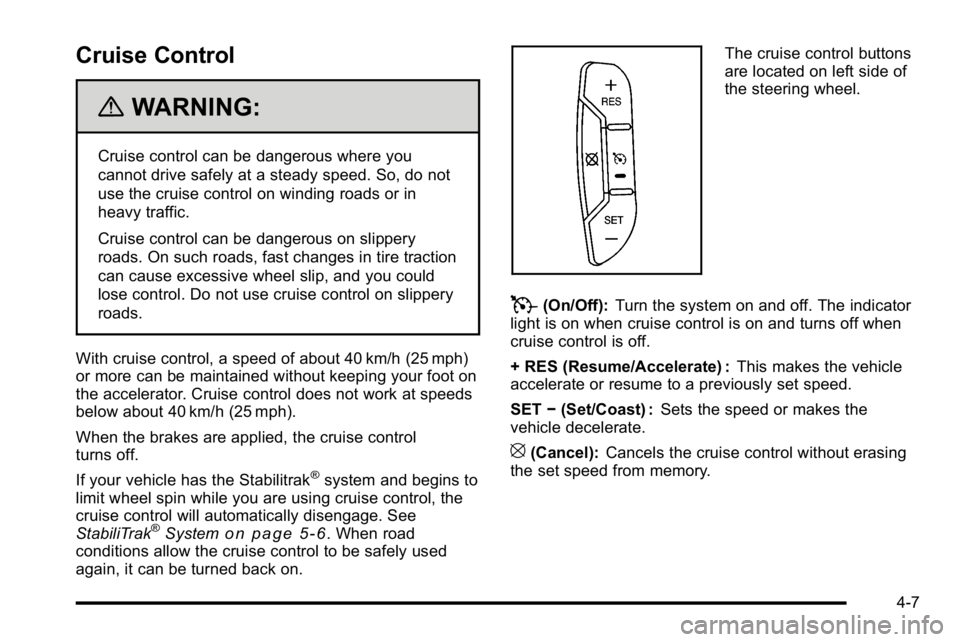
The cruise control buttons
are located on left side of
the steering wheel.
T(On/Off): Turn the system on and off. The indicator
light is on when cruise control is on and turns off when
cruise control is off.
+ RES (Resume/Accelerate) : This makes the vehicle
accelerate or resume to a previously set speed.
SET −(Set/Coast) : Sets the speed or makes the
vehicle decelerate.
[(Cancel): Cancels the cruise control without erasing
the set speed from memory.
4-7
Page 180 of 550
Setting Cruise Control
Cruise control will not work if the parking brake is set,
or if the master cylinder brake fluid level is low.
The cruise control light on the instrument panel cluster
comes on after the cruise control has been set to the
desired speed.
{WARNING:
If you leave your cruise control on when you are
not using cruise, you might hit a button and go
into cruise when you do not want to. You could be
startled and even lose control. Keep the cruise
control switch off until you want to use cruise
control.
1. Press
T.
2. Get up to the desired speed.
3. Press the SET− button located on the steering
wheel and release it.
4. Take your foot off the accelerator.
Resuming a Set Speed
If the brakes are applied while the cruise control is set,
the cruise control is disengaged. But it does not need to
be reset.
Once the vehicle speed reaches about 40 km/h
(25 mph) or more, press the +RES button on the
steering wheel. The vehicle will go back to the previous
set speed and stay there.
Increasing Speed While Using Cruise
Control
To increase the cruise speed while using cruise control:
.Press and hold the +RES button on the steering
wheel until the new desired speed is reached, then
release it.
.To increase vehicle speed in small increments,
press the +RES button. Each time this is done, the
vehicle goes about 1.6 km/h (1 mph) faster.
4-8
Page 181 of 550
Reducing Speed While Using Cruise
Control
To reduce the vehicle speed while using cruise control:
.Press and hold the SET–button on the steering
wheel until the desired lower speed is reached,
then release it.
.To slow down in very small amounts, press the
SET– button on the steering wheel briefly. Each
time this is done, the vehicle goes about 1.6 km/h
(1 mph) slower.
Passing Another Vehicle While Using
Cruise Control
Use the accelerator pedal to increase the vehicle
speed. When you take your foot off the pedal, the
vehicle will slow down to the previous set cruise speed.
Using Cruise Control on Hills
How well the cruise control works on hills depends upon
the vehicle speed, load, and the steepness of the hills.
While going up steep hills, you might have to step on
the accelerator pedal to maintain the vehicle's speed.
While going downhill, you might have to brake or shift to
a lower gear to keep the vehicle's speed down. When
the brakes are applied the cruise control turns off.
Ending Cruise Control
There are three ways to end cruise control:
.Step lightly on the brake pedal.
.Press[on the steering wheel.
.PressTon the steering wheel.
Erasing Speed Memory
The cruise control set speed memory is erased when
the cruise control or the ignition is turned off.
4-9
Page 182 of 550
Exterior Lamps
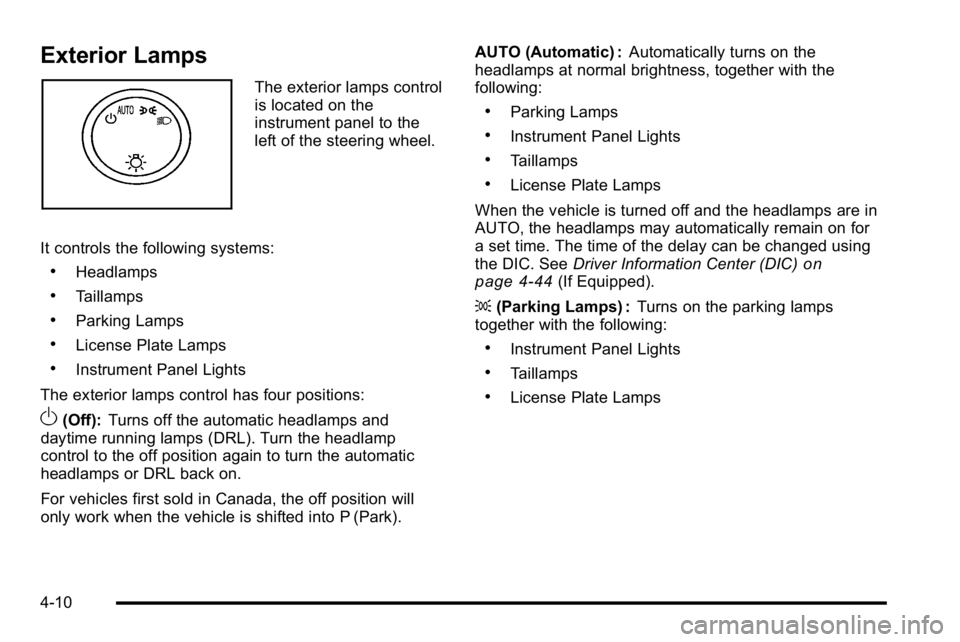
The exterior lamps control
is located on the
instrument panel to the
left of the steering wheel.
It controls the following systems:
.Headlamps
.Taillamps
.Parking Lamps
.License Plate Lamps
.Instrument Panel Lights
The exterior lamps control has four positions:
O(Off): Turns off the automatic headlamps and
daytime running lamps (DRL). Turn the headlamp
control to the off position again to turn the automatic
headlamps or DRL back on.
For vehicles first sold in Canada, the off position will
only work when the vehicle is shifted into P (Park). AUTO (Automatic) :
Automatically turns on the
headlamps at normal brightness, together with the
following:
.Parking Lamps
.Instrument Panel Lights
.Taillamps
.License Plate Lamps
When the vehicle is turned off and the headlamps are in
AUTO, the headlamps may automatically remain on for
a set time. The time of the delay can be changed using
the DIC. See Driver Information Center (DIC)
on
page 4‑44(If Equipped).
; (Parking Lamps) : Turns on the parking lamps
together with the following:
.Instrument Panel Lights
.Taillamps
.License Plate Lamps
4-10
Page 185 of 550
Puddle Lamps
If the vehicle has puddle lamps, they come on when the
unlock button on the Remote Keyless Entry (RKE)
Transmitter is pressed. The lamps time out or turn off
once the engine is started.
Fog Lamps
Fog lamps provide better visibility in foggy or misty
conditions.
The fog lamp button is located on the left side of the
instrument panel.
The parking lamps and/or low-beam headlamps must
be on for the fog lamps to work.
#:Press to turn the fog lamps on or off. An indicator
light comes on when the fog lamps are in use.
The fog lamps go off whenever the high-beam
headlamps come on. When the high beams turn off, the
fog lamps come on again.
The fog lamps are cancelled after the ignition is turned
off. If you still want to use the fog lamps after the
vehicle is restarted, press the fog lamp button again.
Some localities have laws that require the headlamps to
be on along with the fog lamps.
Instrument Panel Brightness
D (Instrument Panel Brightness) : This feature
controls the brightness of the instrument panel lights
and is located next to the exterior lamp control.
Push the knob to extend out and then it can be turned.
Turn the knob clockwise or counterclockwise to brighten
or dim the instrument panel lights. Turning the knob to
the farthest clockwise position turns on the dome lamps.
Dome Lamps
The dome lamps come on when any door is opened.
They turn off after all the doors are closed.
The dome lamps can also be turned on by turning the
instrument panel brightness knob, located on the
instrument panel to the left of the steering column,
clockwise to the farthest position. In this position, the
dome lamps remain on whether a door is opened or
closed.
4-13
Page 220 of 550
DIC Operation and Displays
(Using DIC Buttons)
The DIC has different displays which can be accessed
by pressing the DIC buttons located on the instrument
panel, next to the steering wheel.
The DIC displays trip, fuel, and vehicle system
information, and warning messages if a system problem
is detected.
The DIC also allows some features to be customized.
SeeDIC Vehicle Customization (With DIC Buttons)
on
page 4‑67for more information.
If the vehicle has DIC buttons, you can also use the trip
odometer reset stem to view some of the DIC displays.
See “Trip Odometer Reset Stem Menu Items” later in
this section.
DIC Buttons
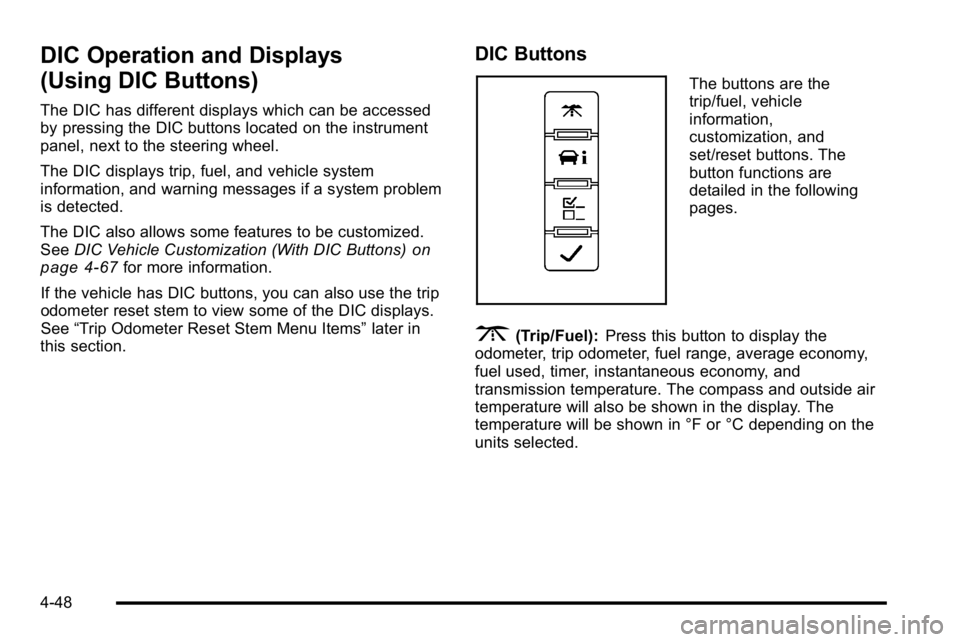
The buttons are the
trip/fuel, vehicle
information,
customization, and
set/reset buttons. The
button functions are
detailed in the following
pages.
3(Trip/Fuel): Press this button to display the
odometer, trip odometer, fuel range, average economy,
fuel used, timer, instantaneous economy, and
transmission temperature. The compass and outside air
temperature will also be shown in the display. The
temperature will be shown in °F or °C depending on the
units selected.
4-48
Page 254 of 550
4(Information) (XM Satellite Radio Service, MP3, and
RDS Features): Press to switch the display between
the radio station frequency and the time. When the
ignition is in the OFF position, press
4to display the
time. For vehicles with XM, MP3, WMA or RDS
features, press
4to display additional text information
related to the current FM-RDS or XM station; or CD,
MP3 or WMA song. If information is available during
XM, CD, MP3 or WMA playback, the song title
information displays on the top line of the display and
artist information displays on the bottom line. When
information is not available, “NO INFO”displays.
Setting Preset Stations
If the radio does not have a FAV button, up to
18 stations (six FM1, six FM2, and six AM), can be
programmed on the six numbered pushbuttons. To
program presets:
1. Turn the radio on.
2. Press BAND to select FM1, FM2, or AM.
3. Tune in the desired station.
4. Press and hold one of the six numbered pushbuttons for three seconds until a beep sounds.
Whenever that pushbutton is pressed and
released, the station that was set, returns.
5. Repeat the Steps 2 through 4 for each pushbutton.
Storing a Radio Station as a Favorite
Radios that have a FAV button store radio stations as
favorites.
Drivers are encouraged to set up their radio station
favorites while the vehicle is parked. Tune to favorite
stations using the presets, favorites button, and steering
wheel controls, if the vehicle has this feature. See
Defensive Driving on page 5‑2.
FAV (Favorites) : If the vehicle has a FAV button, a
maximum of 36 stations can be programmed as
favorites using the six softkeys below the radio station
frequency tabs and by using the FAV button. Press the
FAV button to go through up to six pages of favorites,
each having six favorite stations available per page.
Each page of favorites can contain any combination of
AM, FM, or XM, if equipped, stations.
4-82