Page 209 of 448

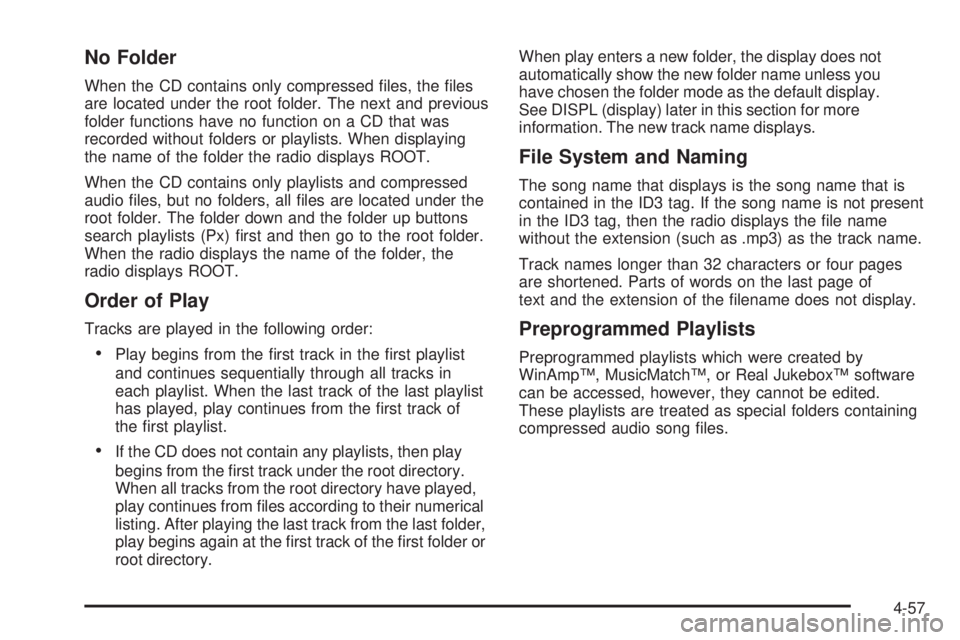
No Folder
When the CD contains only compressed files, the files
are located under the root folder. The next and previous
folder functions have no function on a CD that was
recorded without folders or playlists. When displaying
the name of the folder the radio displays ROOT.
When the CD contains only playlists and compressed
audio files, but no folders, all files are located under the
root folder. The folder down and the folder up buttons
search playlists (Px) first and then go to the root folder.
When the radio displays the name of the folder, the
radio displays ROOT.
Order of Play
Tracks are played in the following order:
•Play begins from the first track in the first playlist
and continues sequentially through all tracks in
each playlist. When the last track of the last playlist
has played, play continues from the first track of
the first playlist.
•If the CD does not contain any playlists, then play
begins from the first track under the root directory.
When all tracks from the root directory have played,
play continues from files according to their numerical
listing. After playing the last track from the last folder,
play begins again at the first track of the first folder or
root directory.When play enters a new folder, the display does not
automatically show the new folder name unless you
have chosen the folder mode as the default display.
See DISPL (display) later in this section for more
information. The new track name displays.
File System and Naming
The song name that displays is the song name that is
contained in the ID3 tag. If the song name is not present
in the ID3 tag, then the radio displays the file name
without the extension (such as .mp3) as the track name.
Track names longer than 32 characters or four pages
are shortened. Parts of words on the last page of
text and the extension of the filename does not display.
Preprogrammed Playlists
Preprogrammed playlists which were created by
WinAmp™, MusicMatch™, or Real Jukebox™ software
can be accessed, however, they cannot be edited.
These playlists are treated as special folders containing
compressed audio song files.
4-57
Page 210 of 448

Playing an MP3/WMA
Insert a CD partway into the slot, label side up. The
player pulls it in, and READING displays. The CD should
begin playing and the CD symbol displays. If you want to
insert a CD with the ignition off, first press the
Zbutton
or the DISPL knob.
If the ignition or radio is turned off with a CD in the
player it stays in the player. When the ignition or radio
is turned on, the CD starts to play where it stopped,
if it was the last selected audio source.
As each new track starts to play, the track number
displays.
1 FLD
x(Previous Folder):Press this button to go to
the first track in the previous folder. Pressing this button
while in folder random mode takes you to the previous
folder and plays the tracks in random order in that folder.
2 FLD
w(Next Folder):Press this button to go to the
first track in the next folder. Pressing this button while in
folder random mode takes the CD to the next folder and
plays the tracks in random order in that folder.3 REV (Reverse):Press and hold this button to
reverse quickly within a track. Press and hold this
button for less than two seconds to reverse at 10 times
the normal playing speed. Press and hold it for more
than two seconds to reverse at 20 times the normal
playing speed. Release this button to play the passage.
REV and the elapsed time of the track displays.
4 FWD (Forward):Press and hold this button to
advance quickly within a track. Press and hold this
button for less than two seconds to advance at 10 times
the normal playing speed. Press and hold it for more
than two seconds to advance at 20 times the normal
playing speed. Release this button to play the passage.
FWD and the elapsed time of the track displays.
6 RDM (Random):To play the tracks in random order
in the current folder or playlist, press and release this
button. FLDR RDM (folder random) displays. Once all of
the tracks in the current folder or playlist have played, the
system moves to the next folder or playlist and plays all of
the tracks in random order.
4-58
Page 211 of 448

To play all the tracks in random order on the CD, press
and hold this button for two seconds. A beep sounds and
DISC RDM (disc random) displays. This feature does not
work with playlists.
When in random, pressing and releasing either SEEK
arrow takes the CD to the previous or to the next
random track.
Press and release this button again to turn off random
play. NO RDM (no random) displays.
qSEEKr:Press the left SEEK arrow to go to the
start of the previous track. Press the right SEEK arrow to
go to the start of the next track. Pressing either SEEK
arrow for more than two seconds searches the previous
or next tracks at two tracks per second. Release the
button to stop searching and to play the track.
oTUNEp:Turning this knob fast tracks reverse or
advances through the tracks in all folders or playlists.
The track number and file name displays for each track.
Turning this knob while in random fast tracks reverse
or advances the tracks in sequential order.DISPL (Display):Press this knob to switch between
track mode, folder/playlist mode, and time of day mode.
The display shows only eight characters, but there can
be up to four pages of text. If there are more than eight
characters in the song, folder, or playlist name, pressing
this knob within two seconds takes you to the next page
of text. If there are no other pages to be shown, pressing
this knob within two seconds takes you to the next
display mode.
•Track mode displays the current track number and
the ID3 tag song name.
•Folder/playlist mode displays the current folder or
playlist number and the folder/playlist name.
•Time of day mode displays the time of day and the
ID3 tag song name.
To change the default on the display, press the DISPL
knob until you see the desired display, then press
and hold this knob for two seconds. The radio produces
one beep and the selected display is now the default.
INFO (Information):INFO displays when a current
track has ID3 tag information. Press this button to
display the artist name and album contained in the tag.
INFO disappears from the display when the information
in the ID3 tag has finished being read.
4-59
Page 212 of 448

BAND:Press this button to listen to the radio when a
CD is playing. The inactive CD remains inside the radio
for future listening.
CD AUX (Auxiliary):Press this button to play a CD
when listening to the radio. The CD symbol illuminates
on the display when a CD is loaded.
Z(Eject):Press this button to eject a CD. Eject can
activate while either the ignition or radio is off. CDs can
be loaded with the ignition and radio off if this button is
pressed first.
XM Radio Messages
XL (Explicit Language Channels):These channels,
or any others, can be blocked at a customer’s request,
by calling 1-800-852-XMXM (9696).
Updating:The encryption code in the receiver is being
updated, and no action is required. This process
should take no longer than 30 seconds.
No Signl:The system is functioning correctly, but the
vehicle is in a location that is blocking the XM signal.
When the vehicle is moved into an open area, the signal
should return.Loading:The radio system is acquiring and processing
audio and text data. No action is needed. This message
should disappear shortly.
Off Air:This channel is not currently in service.
Tune to another channel.
CH Unavl:This previously assigned channel is no
longer assigned. Tune to another station. If this station
was one of the presets, choose another station for
that preset button.
Unauth:This channel is blocked or cannot be received
with your XM Subscription package.
No Info:No artist, song title, category, or text
information is available at this time on this channel.
The system is working properly.
NotFound:No artist, song title, category, or text
information is available at this time on this channel.
The system is working properly.
XM Lock:The XM receiver in your vehicle could
have previously been in another vehicle. For security
purposes, XM receivers cannot be swapped between
vehicles. If this message is received after having your
vehicle serviced, check with your dealer/retailer.
4-60
Page 213 of 448

Radio ID:If this message is received when tuned to
channel 0, there could be a receiver fault. Consult with
your dealer/retailer.
Unknown:If this message is received when tuned to
channel 0, there could be a receiver fault. Consult
with your dealer/retailer.
Check XM:If this message does not clear within
a short period of time, the receiver could have a fault.
Consult with your dealer/retailer.
Theft-Deterrent Feature
Non-RDS Radios
THEFTLOCK®is designed to discourage theft of your
vehicle’s radio. The feature works automatically by
learning a portion of the Vehicle Identification
Number (VIN). If the radio is moved to a different
vehicle, it does not operate and LOC displays.
With THEFTLOCK
®activated, the radio does not
operate if stolen.
RDS Radios
THEFTLOCK®is designed to discourage theft of your
vehicle’s radio. The feature works automatically by
learning a portion of the Vehicle Identification
Number (VIN). If the radio is moved to a different
vehicle, it does not operate and LOCKED displays.
When the radio and vehicle are turned off, the blinking
red light indicates that THEFTLOCK
®is armed.
With THEFTLOCK
®activated, the radio does not
operate if stolen.
Radio Reception
Frequency interference and static can occur during
normal radio reception if items such as cell phone
chargers, vehicle convenience accessories, and external
electronic devices are plugged into the accessory power
outlet. If there is interference or static, unplug the item
from the accessory power outlet.
4-61
Page 214 of 448

AM
The range for most AM stations is greater than for FM,
especially at night. The longer range can cause station
frequencies to interfere with each other. For better radio
reception, most AM radio stations boost the power levels
during the day, and then reduce these levels during the
night. Static can also occur when things like storms and
power lines interfere with radio reception. When this
happens, try reducing the treble on the radio.
FM Stereo
FM signals only reach about 10 to 40 miles
(16 to 65 km). Although the radio has a built-in
electronic circuit that automatically works to reduce
interference, some static can occur, especially around
tall buildings or hills, causing the sound to fade in
and out.
XM™ Satellite Radio Service
XM Satellite Radio Service gives digital radio reception
from coast-to-coast in the 48 contiguous United States,
and in Canada. Just as with FM, tall buildings or hills can
interfere with satellite radio signals, causing the sound to
fade in and out. In addition, traveling or standing under
heavy foliage, bridges, garages, or tunnels may cause
loss of the XM signal for a period of time.
Cellular Phone Usage
Cellular phone usage may cause interference with the
vehicle’s radio. This interference may occur when making
or receiving phone calls, charging the phone’s battery,
or simply having the phone on. This interference causes
an increased level of static while listening to the radio.
If static is received while listening to the radio, unplug
the cellular phone and turn it off.
4-62
Page 215 of 448

Fixed Mast Antenna
The fixed mast antenna can withstand most car washes
without being damaged as long as it is securely attached
to the base. If the mast becomes slightly bent, straighten
it out by hand. If the mast is badly bent, replace it.
Occasionally check to make sure the antenna is
tightened to its base. If tightening is required, tighten
by hand until fully seated plus one quarter turn.
XM™ Satellite Radio Antenna
System
The XM Satellite Radio antenna is located on the roof of
the vehicle. Keep the antenna clear of obstructions for
clear radio reception.
If the vehicle has a sunroof, the performance of the
XM system may be affected if the sunroof is open.
Chime Level Adjustment
The radio is used to adjust the vehicle’s chime level.
To change the volume level of the chime, press and
hold pushbutton 6 with the ignition on and the radio
power off. The volume level will change from the normal
level to loud, and LOUD will appear on the radio display.
To change back to the default or normal setting, press
and hold pushbutton 6 again. The volume level will
change from the loud level to normal, and NORMAL will
appear on the radio display. Each time the chime volume
is changed, three chimes will sound to indicate the new
volume selected. Removing the radio and not replacing it
with a factory radio or chime module will disable vehicle
chimes.
4-63
Page 216 of 448