Page 57 of 419

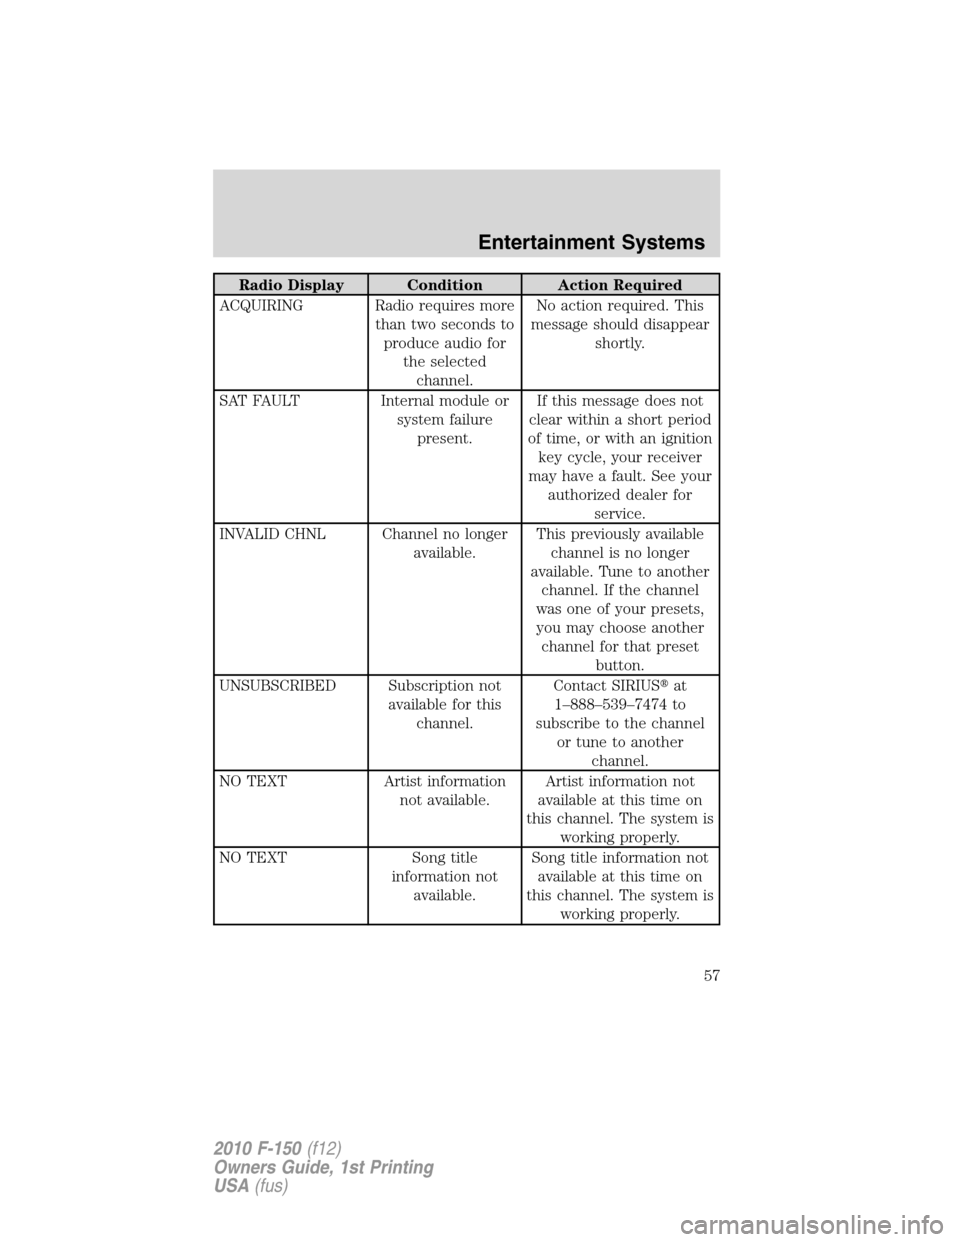
Radio Display Condition Action Required
ACQUIRING Radio requires more
than two seconds to
produce audio for
the selected
channel.No action required. This
message should disappear
shortly.
SAT FAULT Internal module or
system failure
present.If this message does not
clear within a short period
of time, or with an ignition
key cycle, your receiver
may have a fault. See your
authorized dealer for
service.
INVALID CHNL Channel no longer
available.This previously available
channel is no longer
available. Tune to another
channel. If the channel
was one of your presets,
you may choose another
channel for that preset
button.
UNSUBSCRIBED Subscription not
available for this
channel.Contact SIRIUS�at
1–888–539–7474 to
subscribe to the channel
or tune to another
channel.
NO TEXT Artist information
not available.Artist information not
available at this time on
this channel. The system is
working properly.
NO TEXT Song title
information not
available.Song title information not
available at this time on
this channel. The system is
working properly.
Entertainment Systems
57
2010 F-150(f12)
Owners Guide, 1st Printing
USA(fus)
Page 74 of 419

Daytime running lamps (DRL) (if equipped)
Turns the headlamps on with a reduced output.
In order for the DRLs to function:
•the ignition must be in the on position and
•the headlamp control is in the
, parking lamp or autolamp position.
WARNING:Always remember to turn on your headlamps at
dusk or during inclement weather. The Daytime Running Lamp
(DRL) system does not activate the tail lamps and generally may not
provide adequate lighting during these conditions. Failure to activate
your headlamps under these conditions may result in a collision.
PANEL DIMMER CONTROL
Use to adjust the brightness of the
instrument panel when exterior
lights are on.
•Rotate the thumbwheel from left
to right to brighten the
instrument panel.
•Rotate the thumbwheel from right
to left to dim the instrument
panel.
•Rotate fully to the right (past detent) to turn on interior lamps.
•Rotate to the left position (past detent) to turn off the interior lamps
and to disable the illuminated entry feature. When the control is in the
far left position, it acts as a dome lamp defeat/override.
Note:If the battery is disconnected, discharged, or a new battery is
installed, the dimmer switch requires re-calibration. Rotate the dimmer
switch from the full dim position to the full dome/on position to reset.
This will ensure that your displays are visible under all lighting
conditions.
AIMING THE HEADLAMPS
The headlamps on your vehicle are properly aimed at the assembly plant.
If your vehicle has been in an accident, the alignment of your headlamps
should be checked by your authorized dealer.
Lights
74
2010 F-150(f12)
Owners Guide, 1st Printing
USA(fus)
Page 87 of 419

On vehicles with memory feature, to prevent damage to the steering
column, the steering column is designed to set a stopping position just
short of the end of the column position. If the steering column
encounters an object while moving up or down, a new stopping position
will be set. To reset the steering column to its normal stopping position:
•After encountering the new stopping position, press the steering
column control again to override.
•Continue pressing the control until it reaches the end of the column
position.
•A new soft stop will be automatically set. The next time the steering
column is tilted it will stop just short of the end of the column
position.
ILLUMINATED VISOR MIRROR (IF EQUIPPED)
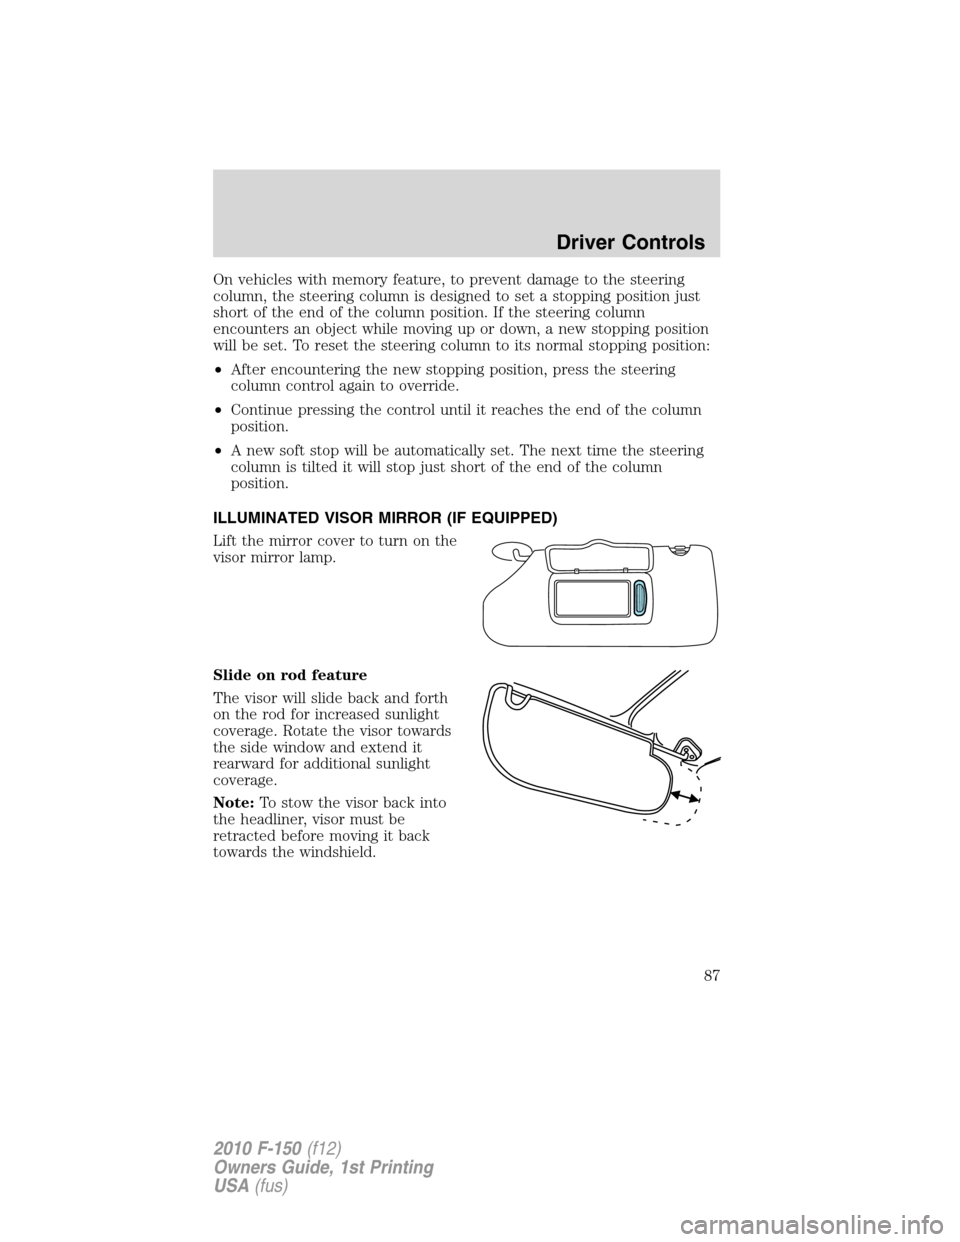
Lift the mirror cover to turn on the
visor mirror lamp.
Slide on rod feature
The visor will slide back and forth
on the rod for increased sunlight
coverage. Rotate the visor towards
the side window and extend it
rearward for additional sunlight
coverage.
Note:To stow the visor back into
the headliner, visor must be
retracted before moving it back
towards the windshield.
Driver Controls
87
2010 F-150(f12)
Owners Guide, 1st Printing
USA(fus)
Page 89 of 419
Compass zone adjustment
1. Determine which magnetic zone
you are in for your geographic
location by referring to the zone
map.
2. Turn ignition to the on position.
3. Press and hold the 7 and 9 radio
preset buttons together for
approximately five seconds until
ZONE XX appears in the CID.
4. Press and release the 7 and 9
radio preset buttons together,
repeatedly until ZONE XX changes
to the correct zone (1–15) in the
CID.
5. The direction will display after
the buttons are released. The zone
is now updated.
Compass calibration adjustment
Perform compass calibration in an open area free from steel structures
and high voltage lines. For optimum calibration, turn off all electrical
accessories (heater/air conditioning, wipers, etc.) and make sure all
vehicle doors are shut.
1. Start the vehicle.
1 2 3
4
5
6 7 8 9 101112 13 14 15
Driver Controls
89
2010 F-150(f12)
Owners Guide, 1st Printing
USA(fus)
Page 90 of 419

2. To calibrate, press and hold the 7
and 9 radio preset buttons together
for approximately 10 seconds until
CAL appears. Release the buttons.
3. Slowly drive the vehicle in a
circle (less than 3 mph [5 km/h])
until the CAL display changes to the
direction value (N, S, E, W, etc.). It
may take up to five circles to
complete calibration.
4. The compass is now calibrated.
AUXILIARY POWER POINT (12VDC)
Power outlets are designed for accessory plugs only. Do not insert
any other object in the power outlet as this will damage the
outlet and blow the fuse. Do not hang any type of accessory or
accessory bracket from the plug. Improper use of the power
outlet can cause damage not covered by your warranty.
Auxiliary power points can be found in the following locations:
•On the instrument panel
•Inside the center console storage area (if equipped)
•On the rear of the center console (if equipped) accessible from the
rear seat
Always keep the power point caps closed when not being used.
Do not use the power point for operating the cigarette lighter element (if
equipped).
To prevent the fuse from being blown, do not use the power point(s)
over the vehicle capacity of 12 VDC/180W. If the power point or cigar
lighter socket is not working, a fuse may have blown. Refer toFuses and
relaysin theRoadside Emergencieschapter for information on
checking and replacing fuses.
To have full capacity usage of your power point, the engine is required to
be running to avoid unintentional discharge of the battery. To prevent
the battery from being discharged:
•do not use the power point longer than necessary when the engine is
not running,
Driver Controls
90
2010 F-150(f12)
Owners Guide, 1st Printing
USA(fus)
Page 95 of 419

Fold-away mirrors
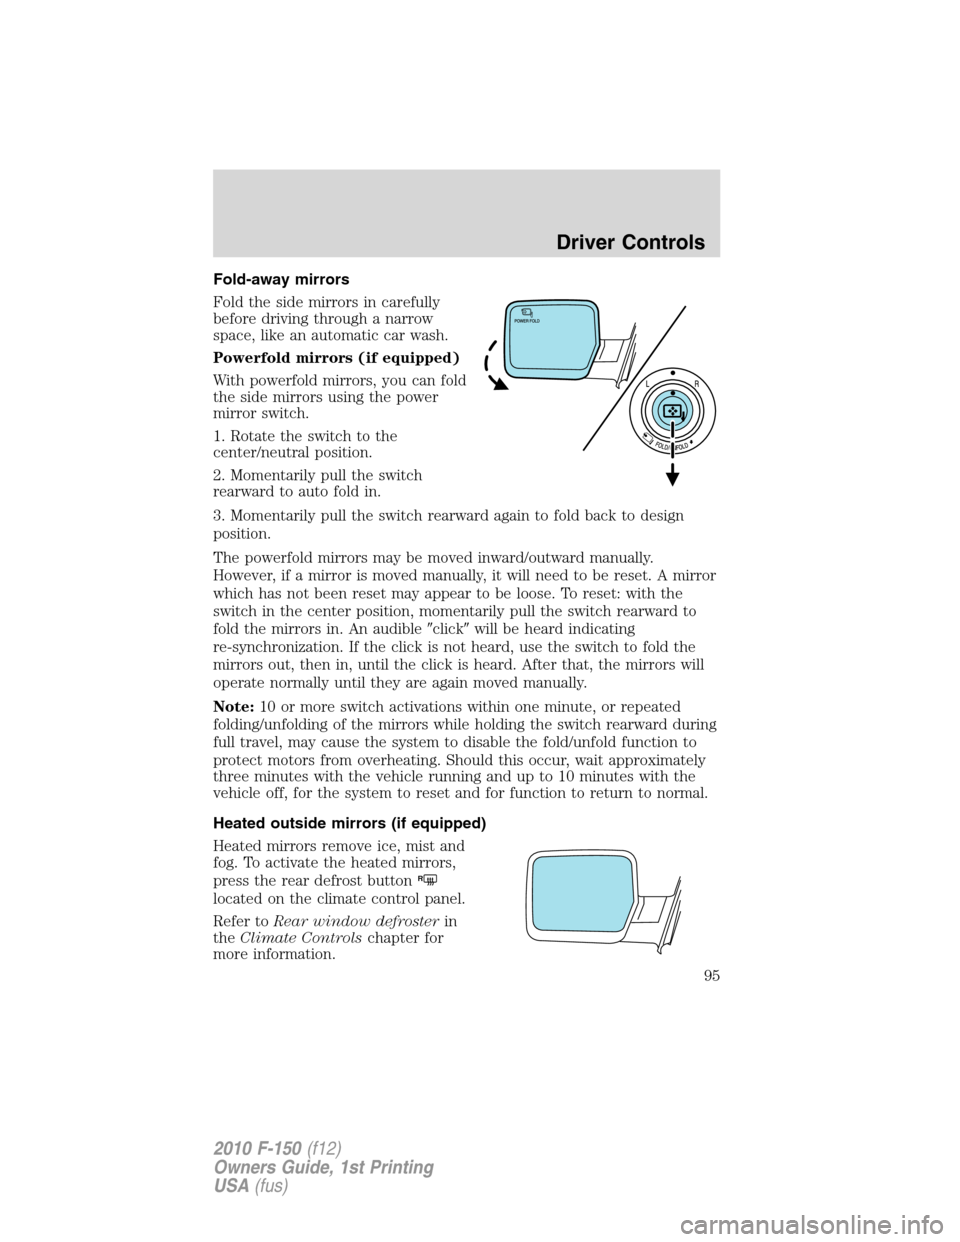
Fold the side mirrors in carefully
before driving through a narrow
space, like an automatic car wash.
Powerfold mirrors (if equipped)
With powerfold mirrors, you can fold
the side mirrors using the power
mirror switch.
1. Rotate the switch to the
center/neutral position.
2. Momentarily pull the switch
rearward to auto fold in.
3. Momentarily pull the switch rearward again to fold back to design
position.
The powerfold mirrors may be moved inward/outward manually.
However, if a mirror is moved manually, it will need to be reset. A mirror
which has not been reset may appear to be loose. To reset: with the
switch in the center position, momentarily pull the switch rearward to
fold the mirrors in. An audible�click�will be heard indicating
re-synchronization. If the click is not heard, use the switch to fold the
mirrors out, then in, until the click is heard. After that, the mirrors will
operate normally until they are again moved manually.
Note:10 or more switch activations within one minute, or repeated
folding/unfolding of the mirrors while holding the switch rearward during
full travel, may cause the system to disable the fold/unfold function to
protect motors from overheating. Should this occur, wait approximately
three minutes with the vehicle running and up to 10 minutes with the
vehicle off, for the system to reset and for function to return to normal.
Heated outside mirrors (if equipped)
Heated mirrors remove ice, mist and
fog. To activate the heated mirrors,
press the rear defrost button
R
located on the climate control panel.
Refer toRear window defrosterin
theClimate Controlschapter for
more information.
Driver Controls
95
2010 F-150(f12)
Owners Guide, 1st Printing
USA(fus)
Page 101 of 419
Turning off speed control
There are two ways to turn off the speed control:
•Depress the brake pedal or the
clutch pedal (if equipped). This
will not erase your vehicle’s
previously set speed.
•Press the speed control OFF
control.
Note:When you turn off the speed
control or the ignition, your speed
control set speed memory is erased.
STEERING WHEEL CONTROLS (IF EQUIPPED)
Radio control features
Press MEDIA to select:
•AM, FM1, FM2, or CD
•SAT1, SAT2 or SAT3 (Satellite
Radio mode).
•LINE IN (auxiliary input jack)
In radio mode:
•Press
to access the
next/previous preset station.
In CD mode:
•Press
to listen to the
next track on the disc.
In satellite radio mode:
•Press
to advance
through preset channels.
Driver Controls
101
2010 F-150(f12)
Owners Guide, 1st Printing
USA(fus)
Page 142 of 419

Create a MyKey™
To program MyKey™ on one of the keys programmed to the vehicle,
insert the key that you want to make a MyKey™ into the ignition. Turn
the ignition on. Use the message center buttons to do the following:
1. Press SETUP until PRESS RESET TO CREATE MYKEY is displayed.
2. Press and release the RESET button. HOLD RESET TO CONFIRM
MYKEY will be displayed.
3. Press and hold the RESET button for two seconds until MARK THIS
AS RESTRICTED is displayed.
4. Wait until KEY RESTRICTED AT NEXT START is displayed.
MyKey™ is successfully programmed. Make sure you label it so you can
distinguish it from the Admin keys.Note:To program the optional
settings go to step 2 in theProgramming MyKey™ Optional Settings
section. If your vehicle is equipped with remote start, see theUsing
MyKey™ with Remote Start Systemssection.
Note:The MyKey™ can be cleared within the same key cycle that it was
created, otherwise a standard key (Administrator key) is required to
disable the MyKey™ programming. To clear all MyKeys™ go to step 2 in
theDisable MyKey™section.
Programming MyKey™ Optional Settings
Turn the ignition on using an Admin key. To program the optional
settings, use the message center buttons to do the following:
1. Press SETUP until RESET FOR MYKEY SETUP is displayed.
2. Press and release the RESET button to display MyKey™ setup menus.
The first menu shown is:
MYKEY MAX MPH <80 MPH> OFF
3. If you don’t want to change the maximum speed setting, press the
SETUP button to display the next menu. The remaining menus appear as
follows with the default settings shown:
MYKEY MPH TONES 45 55 65
MYKEY VOLUME LIMIT OFF
MYKEY ADVTRAC CTRL ON .
4. On any of the menus press RESET to highlight your choice with the
<…>.
5. Press SETUP to enter your choice. The next optional setting will be
displayed.
6. Repeat steps 4 and 5 until you are done changing the optional
settings.
Locks and Security
142
2010 F-150(f12)
Owners Guide, 1st Printing
USA(fus)