Page 2 of 404
Locks and Security 150
Keys 150
Locks 150
Anti-theft system 156
Seating and Safety Restraints 166
Seating 166
Safety restraints 184
Airbags 199
Child restraints 214
Tires, Wheels and Loading 233
Tire information 235
Tire inflation 238
Tire Pressure Monitoring System (TPMS) 250
Vehicle loading 255
Trailer towing 263
Recreational towing 268
Driving 270
Starting 270
Brakes 275
AdvanceTrac�278
Transmission operation 286
Reverse sensing system 291
Roadside Emergencies 305
Getting roadside assistance 305
Hazard flasher control 306
Fuel pump shut-off switch 307
Fuses and relays 308
Changing tires 315
Wheel lug nut torque 324
Jump starting 325
Wrecker towing 331
Table of Contents
2
2010 Explorer(exp)
Owners Guide(own2002), 1st Printing
USA(fus)
Page 6 of 404

Do not add friction modifier compounds or special break-in oils since
these additives may prevent piston ring seating. SeeEngine oilin the
Maintenance and Specificationschapter for more information on oil
usage.
SPECIAL NOTICES
New Vehicle Limited Warranty
For a detailed description of what is covered and what is not covered by
your vehicle’s New Vehicle Limited Warranty, refer to theWarranty
Guide/Customer Information Guidethat is provided to you along with
your Owner’s Guide.
Special instructions
For your added safety, your vehicle is fitted with sophisticated electronic
controls.
WARNING:Please read the sectionAirbag Supplemental
Restraint System (SRS)in theSeating and Safety Restraints
chapter. Failure to follow the specific warnings and instructions could
result in personal injury.
WARNING:Front seat mounted rear-facing child or infant seats
shouldNEVERbe placed in front of an active passenger airbag.
Notice to owners of pickup trucks and utility type vehicles
WARNING:Utility vehicles have a significantly higher rollover
rate than other types of vehicles.
Before you drive your vehicle, please read this Owner’s Guide carefully.
Your vehicle is not a passenger car. As with other vehicles of this type,
failure to operate this vehicle correctly may result in loss of vehicle
control, vehicle rollover, personal injury or death.
Using your vehicle with a snowplow
Do not use this vehicle for snowplowing.
Your vehicle is not equipped with a snowplowing package.
Using your vehicle as an ambulance
Do not use this vehicle as an ambulance.
Introduction
6
2010 Explorer(exp)
Owners Guide(own2002), 1st Printing
USA(fus)
Page 10 of 404
These are some of the symbols you may see on your vehicle.
Vehicle Symbol Glossary
Safety Alert
See Owner’s Guide
Fasten Safety BeltAirbag - Front
Airbag - SideChild Seat Lower
Anchor
Child Seat Tether
AnchorBrake System
Anti-Lock Brake SystemParking Brake System
Brake Fluid -
Non-Petroleum BasedParking Aid System
Stability Control SystemSpeed Control
Master Lighting SwitchHazard Warning Flasher
Fog Lamps-FrontFuse Compartment
Fuel Pump ResetWindshield Wash/Wipe
Windshield
Defrost/DemistRear Window
Defrost/Demist
Introduction
10
2010 Explorer(exp)
Owners Guide(own2002), 1st Printing
USA(fus)
Page 82 of 404

Wired headphones
WARNING:Do not leave children unattended in the vehicle and
do not let children operate the system while unsupervised. If
wired headphones or auxiliary systems are used, children may become
entangled in the cords and seriously injure themselves.
WARNING:The driver should never use the headphones while
driving the vehicle. Using headphones may prevent the driver
from hearing audible warnings such as horns or emergency sirens,
which could result in a crash causing serious injury. Give your full
attention to driving and to the road.
You may purchase wired headphones for your FES (Family
Entertainment System). Plug them into the 3.5 mm headphone jack(s)
located on the left and right sides of the system. (Channel A is located
on the left side and Channel B is located on the right side.) These
headphones will be active when in Dual Play mode.
To listen to the audio on wired headphones (not included), connect the
wired headphones into the headphone jacks on the sides of the DVD
system. The wired headphone jack for Channel A is located on the left
side of the FES and is labeled
A. Headphones plugged into this
headphone jack will hear audio from the audio source selected to be the
Channel A source. The wired headphone jack for Channel B is located on
the right side of the FES and is labeled
B. Headphones plugged into
this headphone jack will hear audio from the audio source selected to be
the Channel B source.
Adjust the headphone volume using
the volume control on the DVD
system.
Operation
Single play/Dual play
Your DVD and audio system work together with the infrared headphones
and wired headphones (not included) to allow the rear seat passengers
to listen to the radio (and other media sources) over the headphones.
This enables the front and rear seat passengers to listen to a variety of
sources a variety of ways.
Entertainment Systems
82
2010 Explorer(exp)
Owners Guide(own2002), 1st Printing
USA(fus)
Page 95 of 404

Safety information
WARNING:Driving while distracted can result in loss of vehicle
control, accident and injury. Ford strongly recommends that
drivers use extreme caution when using any device that may take their
focus off the road. The driver’s primary responsibility is the safe
operation of their vehicle. Only use cell phones and other devices not
essential to the driving task when it is safe to do so.
Read all of the safety and operating instructions before operating the
system and retain for future reference.
Do not attempt to service, repair or modify the Family Entertainment
System (FES). See your dealer.
Do not insert foreign objects into the DVD compartment.
WARNING:Do not leave children unattended in the vehicle and
do not let children operate the system while unsupervised. If
wired headphones or auxiliary systems are used, children may become
entangled in the cords and seriously injure themselves.
WARNING:The front glass on the liquid crystal display (LCD)
flip-down screen may break when hit with a hard surface. If the
glass breaks, do not touch the liquid crystalline material. In case of
contact with skin, wash immediately with soap and water.
WARNING:The driver should not attempt to operate any
function of the DVD system while the vehicle is in motion. Give
full attention to driving and to the road. Pull off the road in a safe
place before inserting or extracting DVDs from the system. A remote
control is included in the system to allow the rear seat occupants to
operate the FES functions without distracting the driver.
Do not expose the liquid crystal display (LCD) flip-down screen
to direct sunlight or intensive ultraviolet rays for extensive
periods of time. Ultraviolet rays deteriorate the liquid crystal.
Be sure to review User Manuals for video games and video game
equipment when used as auxiliary inputs for your Family Entertainment
System (FES).
Entertainment Systems
95
2010 Explorer(exp)
Owners Guide(own2002), 1st Printing
USA(fus)
Page 171 of 404
WARNING:To reduce the risk of possible serious injury: Do not
hang objects off seat back or stow objects in the seatback map
pocket (if equipped) when a child is in the front passenger seat. Do
not place objects underneath the front passenger seat or between the
seat and the center console (if equipped). Check the “passenger airbag
off” or “pass airbag off” indicator lamp for proper airbag status. Refer
toFront passenger sensing systemsection for additional details.
Failure to follow these instructions may interfere with the front
passenger seat sensing system.
The control is located on the outboard side of the seat cushion.
Press front to raise or lower the
front portion of the seat cushion.
Press rear to raise or lower the rear
portion of the seat cushion.
Press the control to move the seat
forward, backward, up or down.
Seating and Safety Restraints
171
2010 Explorer(exp)
Owners Guide(own2002), 1st Printing
USA(fus)
Page 175 of 404

The heated seat control is located in the lower center of the instrument
panel.
To operate the heated seats:
•Push control to activate.
•Push again to deactivate.
REAR SEATS
To have an unobstructed rear view, you can fold down the second and
third row head restraints. Refer to theFolding down the 2nd row
60/40 seats and bucket seatsand3rd row folding seat (if equipped)
sections later in this chapter.
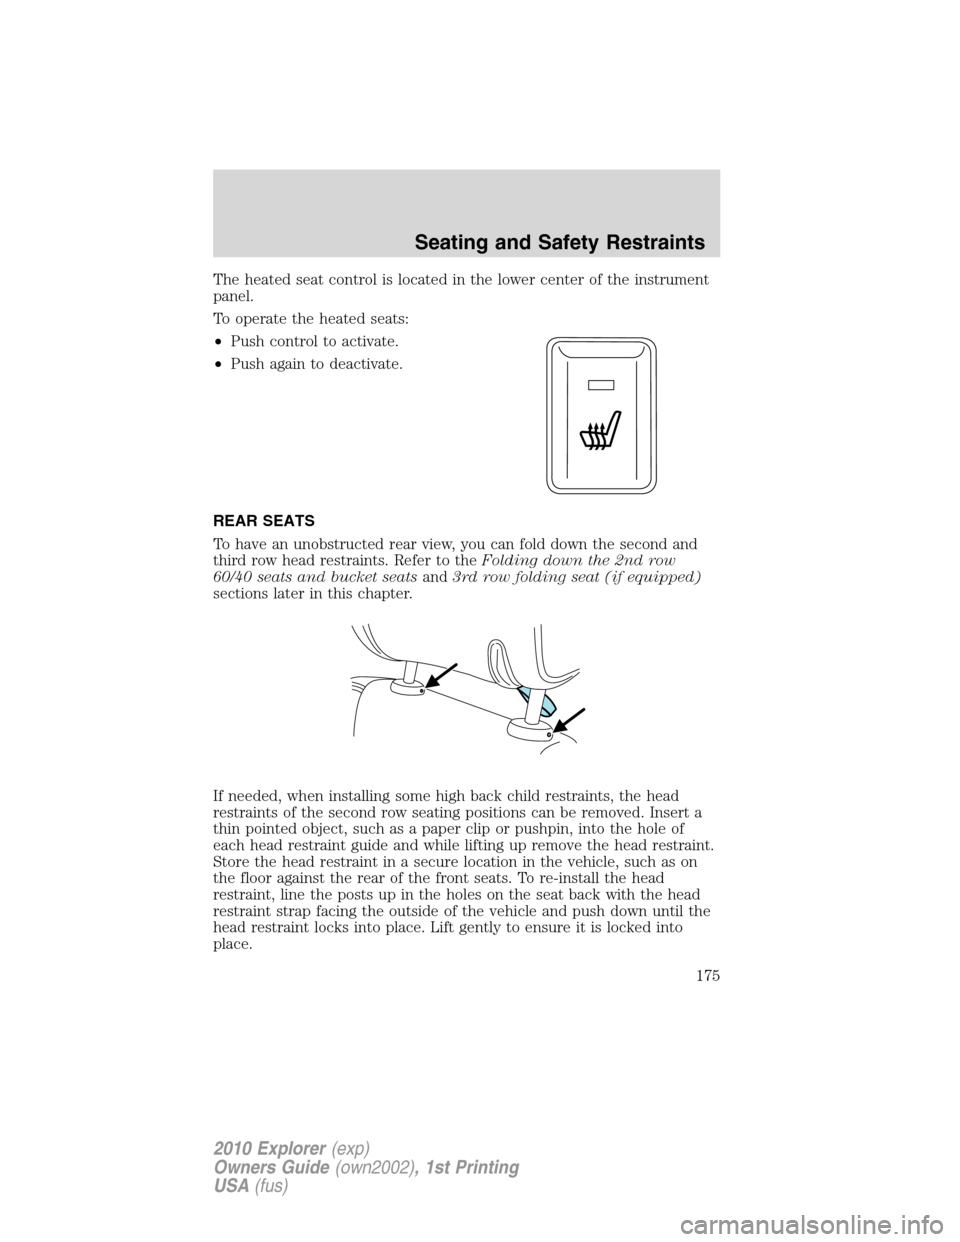
If needed, when installing some high back child restraints, the head
restraints of the second row seating positions can be removed. Insert a
thin pointed object, such as a paper clip or pushpin, into the hole of
each head restraint guide and while lifting up remove the head restraint.
Store the head restraint in a secure location in the vehicle, such as on
the floor against the rear of the front seats. To re-install the head
restraint, line the posts up in the holes on the seat back with the head
restraint strap facing the outside of the vehicle and push down until the
head restraint locks into place. Lift gently to ensure it is locked into
place.
Seating and Safety Restraints
175
2010 Explorer(exp)
Owners Guide(own2002), 1st Printing
USA(fus)
Page 176 of 404
Refer toSafety seats for childrenlater in this chapter.
WARNING:If the head restraint has been removed from a
seating position to accommodate a high back child restraint, the
head restraint must be re-installed prior to use of the seat by any other
occupant in order to reduce the risk of personal injury in the event of
a collision.
Folding down the 2nd row 60/40 seats and bucket seats
Ensure that the head restraint is in the down position and no objects
such as books, purses or briefcases are on the floor in front of the
second row seats before folding them down.
1. Lower the head restraints by
pulling on the strap.
2. Locate the recline handle situated
on the side of the seat cushion by
the door.
3. Pull up on the handle and push
the seatback forward toward the
front of the vehicle.
Seating and Safety Restraints
176
2010 Explorer(exp)
Owners Guide(own2002), 1st Printing
USA(fus)