Page 134 of 450
Cargo Light — If Equipped
The cargo lights are turned on by pressing on cargo
button. The cargo lights will also turn on for 30 seconds
when the Remote Keyless Entry (RKE) transmitter UN-
LOCK button is pressed, as part of the Illuminated Entry
feature.
Multifunction Lever
The multifunction lever is located on the left side of the
steering column.
Turn Signals
Move the multifunction lever up or down and the arrows
on each side of the instrument cluster flash to show
proper operation of the front and rear turn signal lights.
Cargo Light SwitchSignaling Turns
3
UNDERSTANDING THE FEATURES OF YOUR VEHICLE 133
Page 138 of 450
TILT STEERING COLUMN
This feature allows you to tilt the steering column
upward or downward. The tilt lever is located on the
steering column, below the turn signal lever.
Pull the lever toward the steering wheel to unlock the
steering column. With one hand firmly on the steering
wheel, move the steering column up or down, as desired.
Push the lever away from the steering wheel to lock the
column firmly in place.
Tilt Steering Column Lever
3
UNDERSTANDING THE FEATURES OF YOUR VEHICLE 137
Page 139 of 450
WARNING!
Do not adjust the steering column while driving.
Adjusting the steering column while driving or driv-
ing with the steering column unlocked, could cause
the driver to lose control of the vehicle. Be sure the
steering column is locked before driving your ve-
hicle. Failure to follow this warning may result in
serious injury or death.
ELECTRONIC SPEED CONTROL — IF EQUIPPED
The control buttons for the Electronic Speed Control are
located on the steering wheel. When engaged, the Elec-
tronic Speed Control takes over the accelerator operation
at speeds greater than 25 mph (40 km/h).NOTE:In order to ensure proper operation, the Elec-
tronic Speed Control System has been designed to shut
down if multiple Speed Control functions are operatedElectronic Speed Control Buttons
1 — Resume 4 — Set
2 — Cancel 5 — On/Off
3 — Decel
138 UNDERSTANDING THE FEATURES OF YOUR VEHICLE
Page 141 of 450

Tapping the ACCEL button once will result in a speed
increase of 1 mph (2 km/h). Each time the button is
tapped, speed increases so that tapping the button three
times will increase speed by 3 mph (4.8 km/h).
Tapping the DECEL button once will result in a speed
decrease of 1 mph (2 km/h). Each time the button is
tapped, speed will decrease. For example, tapping the
button three times will decrease the speed by 3 mph
(4.8 km/h).
To decrease the speed while the Electronic Speed Control
is on, press and hold the DECEL button. Release the
button when the desired speed is reached, and the new
speed will be set.To Accelerate for Passing
Press the accelerator as you would normally. When the
pedal is released, the vehicle will return to the set speed.
NOTE:When driving uphill, at elevations above 2,000 ft
(610 m), or when the vehicle is heavily loaded (especially
when towing) the vehicle may slow below the SET speed.
If the vehicle speed drops below 25 mph (40 km/h), the
Electronic Speed Control will automatically disengage. If
this happens, you can push down on the accelerator
pedal to maintain the desired speed.
Vehicles equipped with an automatic transmission may
exhibit several downshifts under the above conditions.
To reduce the frequency of the downshifts and to im-
prove vehicle performance, it is advisable to lock out
OVERDRIVE by pressing the TOW/HAUL button lo-
cated at the end of the shift lever.
140 UNDERSTANDING THE FEATURES OF YOUR VEHICLE
Page 143 of 450

Courtesy/Reading Lights
Near the front of the console are two courtesy/reading
lights.
Both lights illuminate as courtesy lights when a door is
opened, when the dimmer control is rotated to the
courtesy light position (fully upward position), or when
the UNLOCK button is pressed on the Remote Keyless
Entry (RKE) transmitter, if equipped. These lights are also
operated individually as reading lights by pressing the
recessed area of the corresponding lens.
NOTE:The courtesy/reading lights will remain on until
the switch is pressed a second time, so be sure they have
been turned off before leaving the vehicle. If the interior
lights are left on after the vehicle is turned OFF, they will
extinguish after approximately 10 minutes.
COMPASS/TEMPERATURE MINI-TRIP COMPUTER
This feature allows you to choose between a compass/
temperature display and one of four trip conditions being
monitored.
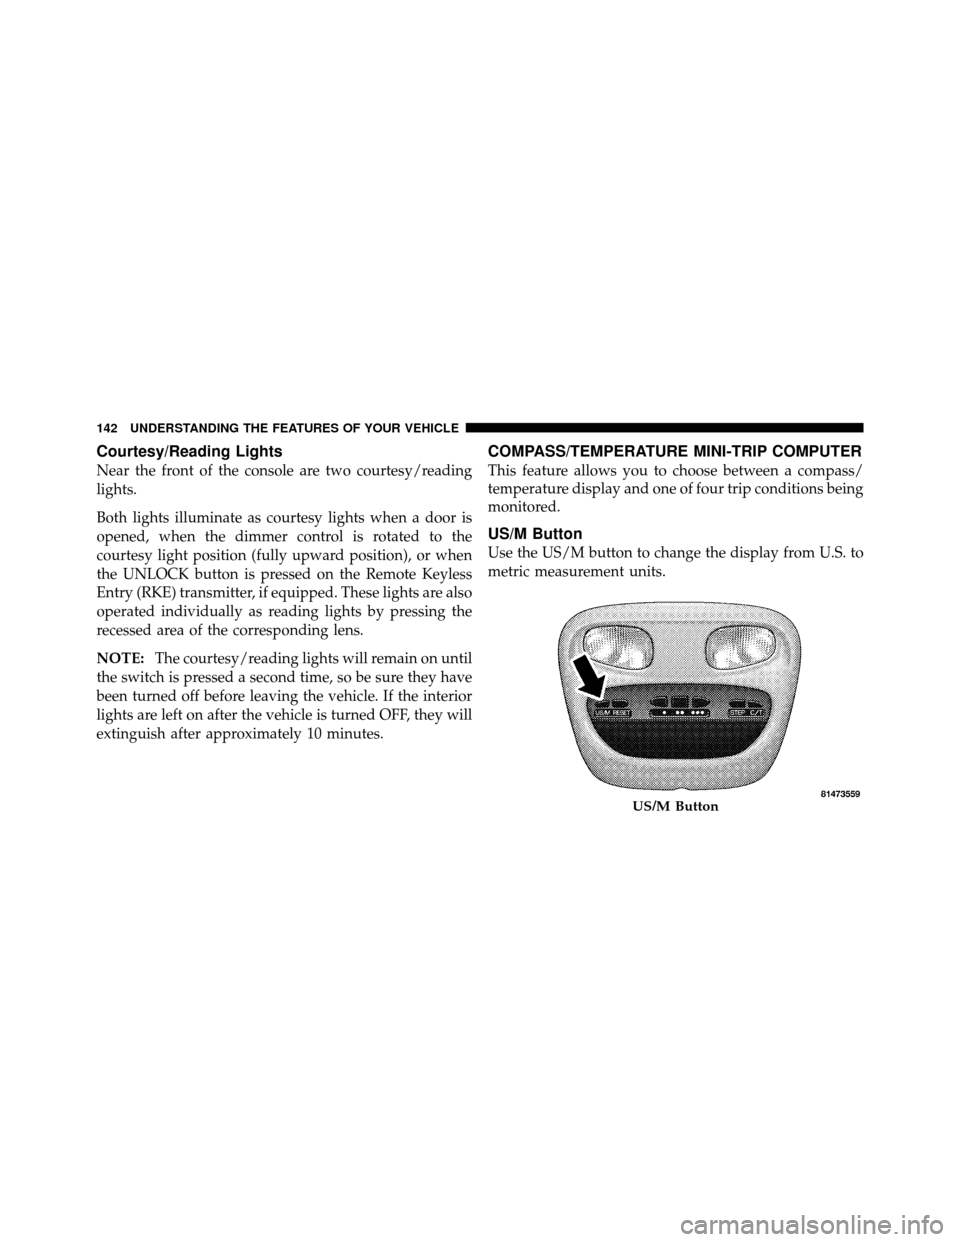
US/M Button
Use the US/M button to change the display from U.S. to
metric measurement units.
US/M Button
142 UNDERSTANDING THE FEATURES OF YOUR VEHICLE
Page 153 of 450

Gate Operator/Canadian Programming
Canadian radio-frequency laws require transmitter sig-
nals to “time-out” (or quit) after several seconds of
transmission – which may not be long enough for
HomeLink�to pick up the signal during programming.
Similar to this Canadian law, some U.S. gate operators are
designed to “time-out” in the same manner.
It may be helpful to unplug the device during the cycling
process to prevent possible overheating of the garage
door or gate motor.
If you are having difficulties programming a garage door
opener or a gate operator, replace “Programming
HomeLink,” Step 3, with the following:
3. Continue to press and hold the HomeLink� button,
while you press and release (“cycle”), your handheld
transmitter every two seconds until HomeLink� hassuccessfully accepted the frequency signal. The indica-
tor(s) will change from a slow flash to a rapid flash
when trained.
If you unplugged the device for training, plug it back in
at this time.
Then proceed with Step 4 under, “Programming
HomeLink�,” earlier in this section.
Using HomeLink�
To operate, press and release the programmed
HomeLink�
button. Activation will now occur for the
trained device (i.e., garage door opener, gate operator,
security system, entry door lock, home/office lighting,
etc.,). The handheld transmitter of the device may also be
used at any time.
152 UNDERSTANDING THE FEATURES OF YOUR VEHICLE
Page 162 of 450
CARGO AREA FEATURES
Rear Cargo Area Utility Rails — If Equipped
CAUTION!
The maximum load per cleat should not exceed
320 lbs (145 kg) and the angle of the load on each
cleat should not exceed 60 degrees above horizontal,
or damage to the cleat or cleat rail may occur.
There are four adjustable cleats that can be used to assist
in securing cargo. Each cleat must be located and tight-
ened down in one of the detent’s, along either rail, in
order to keep cargo properly secure.
To move the cleat to any position on the rail, turn the nut
counterclockwise, approximately three turns. Then pull
out on the cleat and slide it to the detent nearest the
desired location. Make sure the cleat is seated in the
detent and tighten the nut.
1 — Utility Rail Cleat
2 — Cleat Retainer Nut
3 — Utility Rail Detent
3
UNDERSTANDING THE FEATURES OF YOUR VEHICLE 161
Page 163 of 450
To remove the cleats from the utility rail, remove the end
cap by pushing up on the locking tab, located on the
bottom of the end cap. Slide the cleat off the end of the
rail.REAR WINDOW FEATURES
Rear Window Defroster — If Equipped
The rear window defroster button is located on the
right-side of the Air Conditioning and Heater
Control, below the A/C (snowflake) button. Press this
button to turn on the rear window defroster and the
heated outside mirrors (if equipped). An indicator in the
button will illuminate when the rear window defroster is
on. The rear window defroster automatically turns off
after approximately 10 minutes. For an additional five
minutes of operation, press the button a second time.
NOTE: To prevent excessive battery drain, use the rear
window defroster only when the engine is operating.
Utility Rail End Cap
162 UNDERSTANDING THE FEATURES OF YOUR VEHICLE