Page 198 of 484

3. Press the SCROLL button until “Compass Variance”
message and the last variance zone number displays in
the EVIC.
4. Press and release FUNCTION SELECT button until
the proper variance zone is selected according to the
map.
5. Press and release the HOME button to exit.
Navigation — If Equipped
Navigation Display Control
Press and release the MENU button until Navigation
displays in the EVIC. When the Navigation System is On,
the steering wheel buttons can be used to select the Map
or Menu display on the Navigation Unit. When the Menu
display is active, the SCROLL button can be used to scroll
through the list, the FUNCTION SELECT button can be
used to select an item, and the AUDIO MODE button can
be used to return to the previous menu. When the Mapdisplay is active, pressing the FUNCTION SELECT but-
ton will change the Navigation Unit Display to the Menu.
Turn-by-Turn Directions
The EVIC displays turn-by-turn directions to a pro-
grammed destination when Turn-by-Turn Navigation is
enabled through Personal Settings. When enabled, the
EVIC displays the name of the approaching road at the
top of the screen, followed by an arrow to indicate the
direction to turn the vehicle, and a count down to
indicate the distance to the turn.
NOTE:
Refer to your “Navigation User’s Manual” for
detailed operating instructions.
Personal Settings (Customer-Programmable
Features)
Personal Settings allows the driver to set and recall
features when the transmission is in PARK.
4
UNDERSTANDING YOUR INSTRUMENT PANEL 197
Page 201 of 484
when exiting the vehicle. To make your selection, press
and release the FUNCTION SELECT button until “0,”
“30,” “60,” or “90” appears.
“Turn Headlights On with Remote Key Unlock”
When this feature is selected, the headlights will activate
and remain on for up to 90 seconds when the doors are
unlocked with the RKE transmitter. To make your selec-
tion, press and release the FUNCTION SELECT button
until “OFF,” “30 sec.,” “60 sec.,” or “90 sec.” appears.
“Delay Power Off to Accessories Until Exit”
When this feature is selected, the power WINDOW
switches, radio, hands-free system (if equipped), DVD
video system (if equipped), power sunroof (if equipped),
and power outlets will remain active for up to 60 minutes
after the ignition switch is turned OFF. Opening a vehicle
door will cancel this feature. To make your selection,press and release the FUNCTION SELECT button until
“Off,” “45 sec.,” “5 min.,” “10 min.,” “30 min.,” or “60
min.” appears.
“AWD System Displays”
When in this display you may select “ON” or “OFF”.
When ON is selected, the EVIC displays the current
mode of the transfer-case. A five second display appears
any time the transfer-case changes from All Wheel Drive
(AWD) to Rear Wheel Drive (RWD) or from RWD to
AWD. The EVIC also displays the current mode of the
transfer-case when you shift into drive or reverse. To
make your selection, press and release the FUNCTION
SELECT button until “ON” or “OFF” appears.
200 UNDERSTANDING YOUR INSTRUMENT PANEL
Page 235 of 484
•RNDbutton (available on sales code RES radio only):
Pressing this button toggles between Shuffle ON and
Shuffle OFF modes for the iPod�.IftheRND icon is
showing on the radio display, then the shuffle mode is
ON.
List Or Browse Mode
During Play mode, pressing any of the buttons described
below, will bring up List mode. List mode enables
scrolling through the list of menus and tracks on the
iPod�.
•TUNE control knob: The TUNEcontrol knob functions
in a similar manner as the scroll wheel on the iPod�.
•Turning it clockwise (forward) and counterclock-
wise (backward) scrolls through the lists, displaying
the track detail on the radio display. Once the track
to be played is highlighted on the radio display,
press the TUNEcontrol knob to select and start
playing the track. Turning the TUNEcontrol knob fast will scroll through the list faster. During fast
scroll, a slight delay in updating the information on
the radio display may be noticed.
•During all List modes, the iPod�
displays all lists in
“wrap-around” mode. So if the track is at the
bottom of the list, just turn the wheel backwards
(counter-clockwise) to get to the track faster.
•In List mode, the radio PRESETbuttons are used as
shortcuts to the following lists on the iPod�.
•Preset 1 – Playlists
•Preset 2 – Artists
•Preset 3 – Albums
•Preset 4 – Genres
•Preset 5 – Audiobooks
•Preset 6 – Podcasts
234 UNDERSTANDING YOUR INSTRUMENT PANEL
Page 245 of 484
•Two wireless infrared headsets allow rear seat passen-
gers to listen to the same or individual audio sources.Audio/Video RCA Jacks (AUX Jacks)
on the rear of the center console enable
the monitor to display video directly
from a video camera, connect video
games for display on the screen, or
play music directly from an MP3
player.
1. Video in (yellow)
2. Left audio in (white)
3. Right audio in (red)
NOTE: Refer to the “Uconnect™ Multimedia” section of
Uconnect™ User Manual located on the DVD for further
details.REMOTE SOUND SYSTEM CONTROLS
The remote sound system controls are located on the
surface of the steering wheel at the three and nine o’clock
positions.
Vehicles equipped with steering wheel-mounted buttons
are also equipped with the Electronic Vehicle Information
Remote Sound System Controls
244 UNDERSTANDING YOUR INSTRUMENT PANEL
Page 261 of 484
▫Gear Ranges ........................ 276
� AutoStick� — If Equipped ............... 280
▫ Operation ......................... 280
� All-Wheel Drive (AWD) — If Equipped ...... 281
� Driving On Slippery Surfaces ............. 282
▫ Acceleration ........................ 282
▫ Traction ........................... 283
� Driving Through Water ................. 283
▫ Flowing/Rising Water ................. 284
▫ Shallow Standing Water ............... 284
� Power Steering ....................... 286
▫ Power Steering Fluid Check ............. 286�
Multi-Displacement System (MDS) (If
Equipped) – 5.7L Engine Only ............. 287
� Parking Brake ........................ 287
� Anti-Lock Brake System ................. 290
� Electronic Brake Control System ........... 292
▫ Anti-Lock Brake System (ABS) ........... 292
▫ Traction Control System (TCS) ........... 292
▫ Brake Assist System (BAS) .............. 293
▫ Electronic Stability Program (ESP) ........ 293
▫ Synchronizing ESP ................... 295
▫ ESP/BAS Malfunction Indicator Light And
ESP/TCS Indicator Light ............... 296
� Tire Safety Information ................. 297
▫ Tire Markings ....................... 297
260 STARTING AND OPERATING
Page 263 of 484
▫E85 Usage In Non-Flex Fuel Vehicles ...... 327
▫ MMT In Gasoline .................... 328
▫ Materials Added To Fuel ............... 329
▫ Fuel System Cautions ................. 329
▫ Carbon Monoxide Warnings ............ 330
� Adding Fuel ......................... 330
▫ Fuel Filler Cap (Gas Cap) .............. 330
▫ Loose Fuel Filler Cap Message ........... 332
� Vehicle Loading ...................... 333
▫ Vehicle Certification Label .............. 333
▫ Gross Vehicle Weight Rating (GVWR) ...... 334
▫ Gross Axle Weight Rating (GAWR) ........ 334▫
Overloading ........................ 334
▫ Loading ........................... 335
� Trailer Towing ........................ 335
▫ Common Towing Definitions ............ 335
▫ Trailer Hitch Classification .............. 338
▫ Trailer Towing Weights (Maximum Trailer
Weight Ratings) ..................... 339
▫ Trailer And Tongue Weight ............. 340
▫ Towing Requirements ................. 341
▫ Towing Tips ........................ 346
�
Recreational Towing (Behind Motorhome, Etc.). . 348
▫ Two-Wheel Drive And All-Wheel Drive .... 348
262 STARTING AND OPERATING
Page 272 of 484
Gear Ranges
PARK
This range supplements the parking brake by locking the
transmission. The engine can be started in this range.
Never use PARK while the vehicle is in motion. Apply
the parking brake when leaving the vehicle in this range.When parking on a flat surface, place the shift lever in the
PARK position first, and then apply the parking brake.
When parking on a hill, it is important to set the parking
brake before placing the shift lever in PARK, otherwise
the load on the transmission locking mechanism may
make it difficult to move the shift lever out of PARK. As
an added precaution, turn the front wheels toward the
curb on a downhill grade and away from the curb on an
uphill grade.
WARNING!
Never use the PARK position as a substitute for the
parking brake. Always apply the parking brake fully
when parked to guard against vehicle movement and
possible injury or damage.Shift Lever
5
STARTING AND OPERATING 271
Page 277 of 484
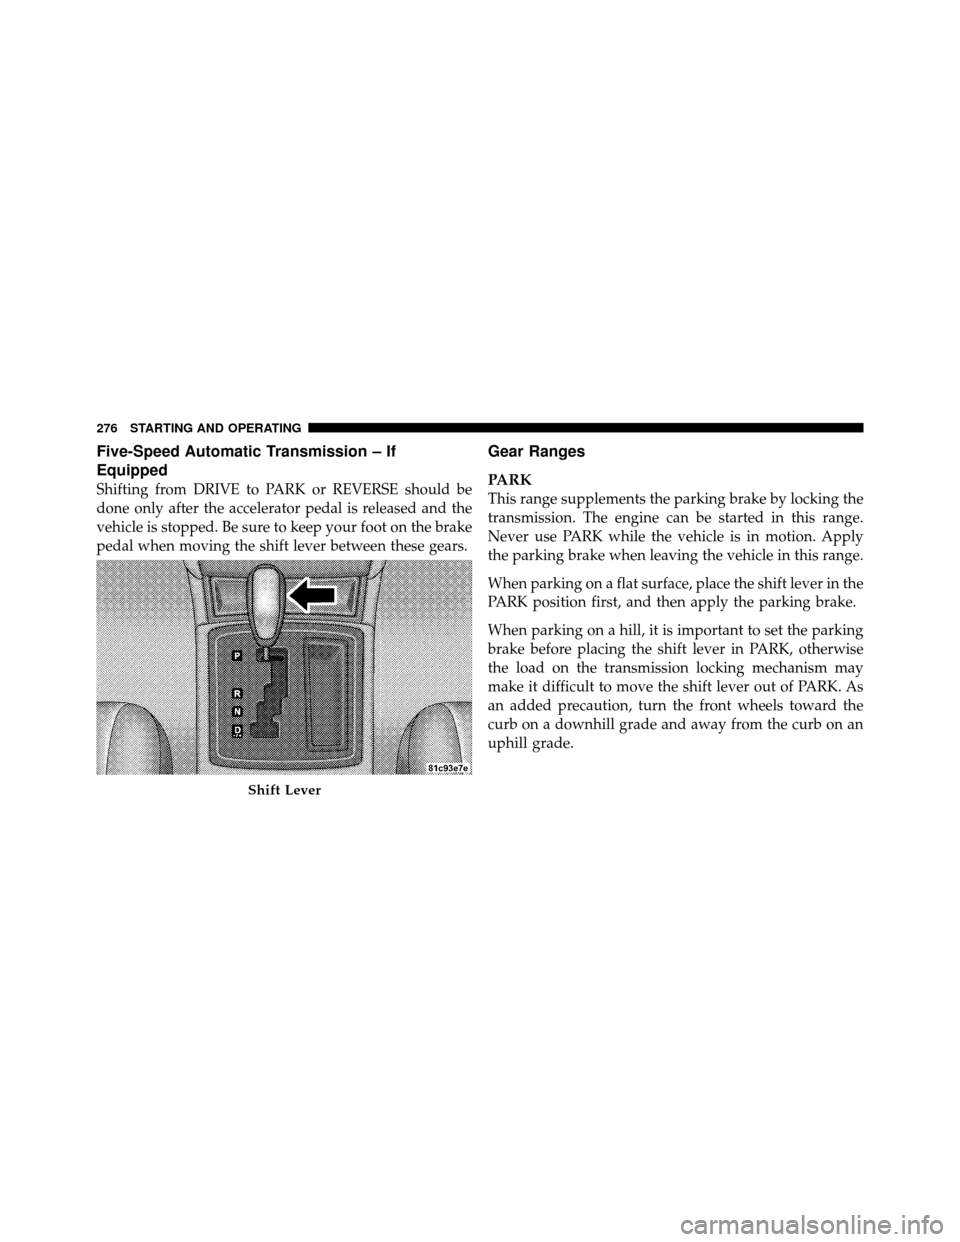
Five-Speed Automatic Transmission – If
Equipped
Shifting from DRIVE to PARK or REVERSE should be
done only after the accelerator pedal is released and the
vehicle is stopped. Be sure to keep your foot on the brake
pedal when moving the shift lever between these gears.
Gear Ranges
PARK
This range supplements the parking brake by locking the
transmission. The engine can be started in this range.
Never use PARK while the vehicle is in motion. Apply
the parking brake when leaving the vehicle in this range.
When parking on a flat surface, place the shift lever in the
PARK position first, and then apply the parking brake.
When parking on a hill, it is important to set the parking
brake before placing the shift lever in PARK, otherwise
the load on the transmission locking mechanism may
make it difficult to move the shift lever out of PARK. As
an added precaution, turn the front wheels toward the
curb on a downhill grade and away from the curb on an
uphill grade.
Shift Lever
276 STARTING AND OPERATING