2010 CHEVROLET SILVERADO seat adjustment
[x] Cancel search: seat adjustmentPage 7 of 626

Section 1 In Brief
Instrument Panel. . . . . . . . . . . . . . . . . . . . . . . . . . . . . . . . . . . 1-2
Instrument Panel (Base/Uplevel Version) . . . . . . . . 1-2
Instrument Panel (Premium Version) . . . . . . . . . . . . 1-4
Initial Drive Information . . . . . . . . . . . . . . . . . . . . . . . . . . . 1-6
Remote Keyless Entry (RKE) System . . . . . . . . . . . 1-6
Remote Vehicle Start . . . . . . . . . . . . . . . . . . . . . . . . . . . 1-6
Door Locks . . . . . . . . . . . . . . . . . . . . . . . . . . . . . . . . . . . . . 1-7
Windows . . . . . . . . . . . . . . . . . . . . . . . . . . . . . . . . . . . . . . . . 1-7
Seat Adjustment . . . . . . . . . . . . . . . . . . . . . . . . . . . . . . . . 1-9
Heated Seats . . . . . . . . . . . . . . . . . . . . . . . . . . . . . . . . . . 1-12
Head Restraint Adjustment . . . . . . . . . . . . . . . . . . . . 1-12
Safety Belt . . . . . . . . . . . . . . . . . . . . . . . . . . . . . . . . . . . . . 1-13
Sensing System for Passenger Airbag . . . . . . . . . 1-13
Mirror Adjustment . . . . . . . . . . . . . . . . . . . . . . . . . . . . . . 1-14
Steering Wheel Adjustment . . . . . . . . . . . . . . . . . . . . 1-16
Throttle and Brake Pedal Adjustment . . . . . . . . . . 1-16
Interior Lighting . . . . . . . . . . . . . . . . . . . . . . . . . . . . . . . . 1-17
Exterior Lighting . . . . . . . . . . . . . . . . . . . . . . . . . . . . . . . 1-18
Windshield Wiper/Washer . . . . . . . . . . . . . . . . . . . . . . 1-18
Climate Controls . . . . . . . . . . . . . . . . . . . . . . . . . . . . . . . 1-19
Transmission . . . . . . . . . . . . . . . . . . . . . . . . . . . . . . . . . . 1-21
Four-Wheel Drive . . . . . . . . . . . . . . . . . . . . . . . . . . . . . . 1-21 Vehicle Features
. . . . . . . . . . . . . . . . . . . . . . . . . . . . . . . . . . 1-24
Radio(s) . . . . . . . . . . . . . . . . . . . . . . . . . . . . . . . . . . . . . . . 1-24
Satellite Radio . . . . . . . . . . . . . . . . . . . . . . . . . . . . . . . . . 1-25
Portable Audio Devices . . . . . . . . . . . . . . . . . . . . . . . . 1-25
Steering Wheel Controls . . . . . . . . . . . . . . . . . . . . . . . 1-26
Bluetooth
®. . . . . . . . . . . . . . . . . . . . . . . . . . . . . . . . . . . . . 1-26
Navigation System . . . . . . . . . . . . . . . . . . . . . . . . . . . . . 1-26
Driver Information Center (DIC) . . . . . . . . . . . . . . . . 1-27
Cruise Control . . . . . . . . . . . . . . . . . . . . . . . . . . . . . . . . . 1-28
Rear Vision Camera (RVC) . . . . . . . . . . . . . . . . . . . . 1-28
Ultrasonic Parking Assist . . . . . . . . . . . . . . . . . . . . . . 1-28
Power Outlets . . . . . . . . . . . . . . . . . . . . . . . . . . . . . . . . . 1-29
Universal Remote System . . . . . . . . . . . . . . . . . . . . . 1-29
Sunroof . . . . . . . . . . . . . . . . . . . . . . . . . . . . . . . . . . . . . . . . 1-30
Performance and Maintenance . . . . . . . . . . . . . . . . . .1-31
StabiliTrak
®. . . . . . . . . . . . . . . . . . . . . . . . . . . . . . . . . . . . 1-31
Tire Pressure Monitor . . . . . . . . . . . . . . . . . . . . . . . . . . 1-32
Engine Oil Life System . . . . . . . . . . . . . . . . . . . . . . . . 1-32
Fuel E85 (85% Ethanol) . . . . . . . . . . . . . . . . . . . . . . . 1-33
Driving for Better Fuel Economy . . . . . . . . . . . . . . . 1-33
Roadside Assistance Program . . . . . . . . . . . . . . . . . 1-34
OnStar
®. . . . . . . . . . . . . . . . . . . . . . . . . . . . . . . . . . . . . . . 1-34
1-1
Page 15 of 626
Seat Adjustment
Front Seats
Manual Seats
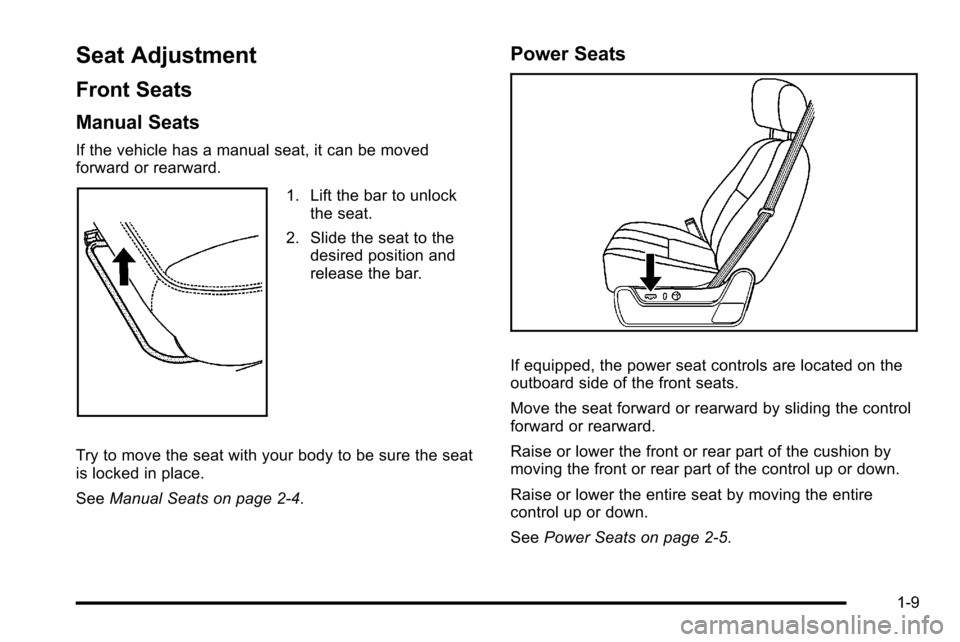
If the vehicle has a manual seat, it can be moved
forward or rearward.
1. Lift the bar to unlockthe seat.
2. Slide the seat to the desired position and
release the bar.
Try to move the seat with your body to be sure the seat
is locked in place.
See Manual Seats on page 2‑4.
Power Seats
If equipped, the power seat controls are located on the
outboard side of the front seats.
Move the seat forward or rearward by sliding the control
forward or rearward.
Raise or lower the front or rear part of the cushion by
moving the front or rear part of the control up or down.
Raise or lower the entire seat by moving the entire
control up or down.
SeePower Seats on page 2‑5.
1-9
Page 18 of 626
To recline the seatback, tilt the top of the control
rearward.
To bring the seatback forward, tilt the top of the control
forward.
SeeReclining Seatbacks on page 2‑10.
Memory Features
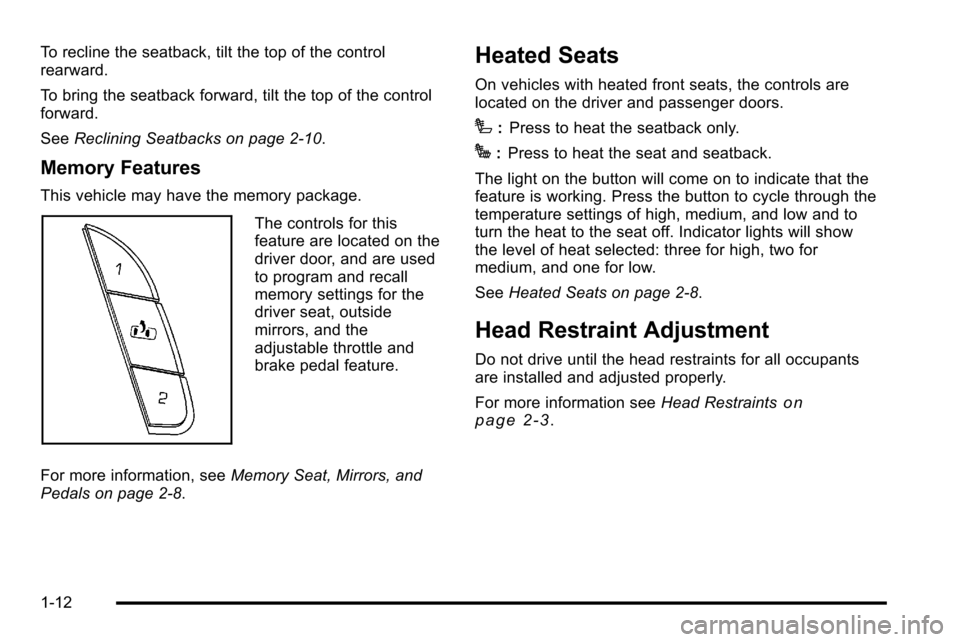
This vehicle may have the memory package.
The controls for this
feature are located on the
driver door, and are used
to program and recall
memory settings for the
driver seat, outside
mirrors, and the
adjustable throttle and
brake pedal feature.
For more information, see Memory Seat, Mirrors, and
Pedals on page 2‑8.
Heated Seats
On vehicles with heated front seats, the controls are
located on the driver and passenger doors.
I: Press to heat the seatback only.
J:Press to heat the seat and seatback.
The light on the button will come on to indicate that the
feature is working. Press the button to cycle through the
temperature settings of high, medium, and low and to
turn the heat to the seat off. Indicator lights will show
the level of heat selected: three for high, two for
medium, and one for low.
See Heated Seats on page 2‑8.
Head Restraint Adjustment
Do not drive until the head restraints for all occupants
are installed and adjusted properly.
For more information see Head Restraints
on
page 2‑3.
1-12
Page 164 of 626
Adjustable Throttle and Brake Pedal
On vehicles with this feature, you can change the
position of the throttle and brake pedals.
No adjustment to the pedals can be made when the
vehicle is in R (Reverse) or while using the cruise
control.
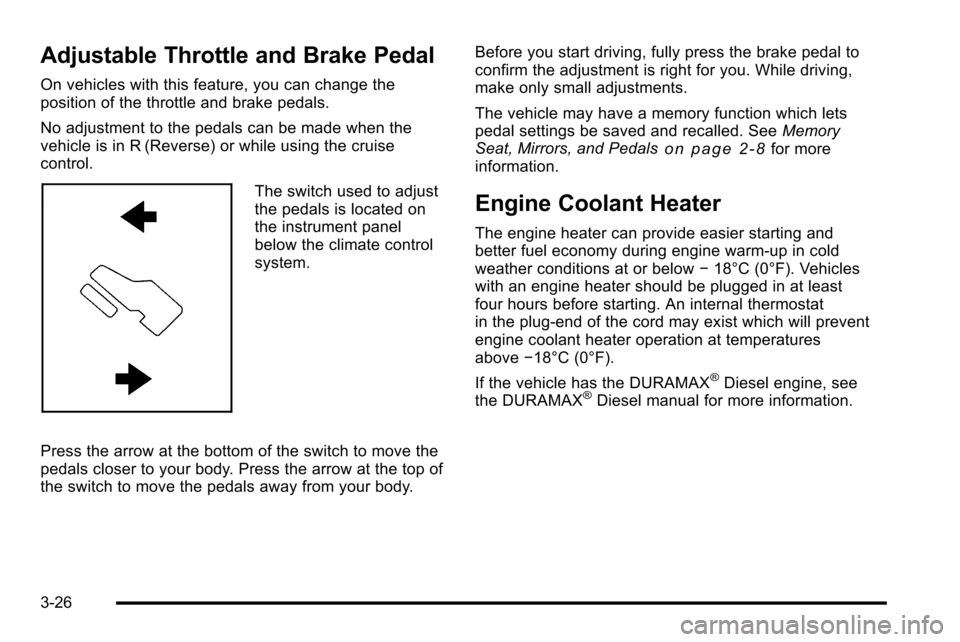
The switch used to adjust
the pedals is located on
the instrument panel
below the climate control
system.
Press the arrow at the bottom of the switch to move the
pedals closer to your body. Press the arrow at the top of
the switch to move the pedals away from your body. Before you start driving, fully press the brake pedal to
confirm the adjustment is right for you. While driving,
make only small adjustments.
The vehicle may have a memory function which lets
pedal settings be saved and recalled. See
Memory
Seat, Mirrors, and Pedals
on page 2‑8for more
information.
Engine Coolant Heater
The engine heater can provide easier starting and
better fuel economy during engine warm-up in cold
weather conditions at or below −18°C (0°F). Vehicles
with an engine heater should be plugged in at least
four hours before starting. An internal thermostat
in the plug-end of the cord may exist which will prevent
engine coolant heater operation at temperatures
above −18°C (0°F).
If the vehicle has the DURAMAX
®Diesel engine, see
the DURAMAX®Diesel manual for more information.
3-26
Page 246 of 626
Outlet Adjustment
Use the air outlets located in the center and on the side
of the instrument panel to direct the airflow. Use the
thumbwheels near the air outlets to open or close off
the airflow.
Operation Tips
.Clear away any ice, snow, or leaves from air inlets
at the base of the windshield that could block the
flow of air into the vehicle.
.Keep the path under the front seats clear of
objects to help circulate the air inside of the vehicle
more effectively.
.Use of non‐GM approved hood deflectors can
adversely affect the performance of the system.
Check with your dealer before adding equipment to
the outside of the vehicle.
Warning Lights, Gauges, and
Indicators
Warning lights and gauges can signal that something is
wrong before it becomes serious enough to cause an
expensive repair or replacement. Paying attention to the
warning lights and gauges could prevent injury.
Warning lights come on when there might be or there is
a problem with one of the vehicle's functions. Some
warning lights come on briefly when the engine is
started to indicate they are working.
Gauges can indicate when there might be or there is a
problem with one of the vehicle's functions. Often
gauges and warning lights work together to indicate a
problem with the vehicle.
When one of the warning lights comes on and stays on
while driving, or when one of the gauges shows there
could be a problem, check the section that explains
what to do. Follow this manual's advice. Waiting to do
repairs can be costly and even dangerous.
4-28
Page 322 of 626
Drivers are encouraged to set up any auxiliary device
while the vehicle is in P (Park). SeeDefensive Driving
on page 5‑2for more information on driver distraction.
To use a portable audio player, connect a 3.5 mm
(1/8 in) cable to the radio's front auxiliary input jack.
When a device is connected, press the radio CD/AUX
button to begin playing audio from the device over the
vehicle speakers.
For optimal sound quality, increase the portable audio
device's volume to the loudest level.
It is always best to power the portable audio device
through its own battery while playing.
O(Power/Volume): Turn clockwise or
counterclockwise to increase or decrease the volume of
the portable player. Additional volume adjustments
might have to be made from the portable device if the
volume is not loud or soft enough.
BAND: Press to listen to the radio when a portable
audio device is playing. The portable audio device
continues playing.
CD/AUX (CD/Auxiliary): Press to play a CD when a
portable audio device is playing. Press again and the
system begins playing audio from the connected
portable audio player. If a portable audio player is not
connected, “No Input Device Found” displays.DVD/CD AUX (CD/Auxiliary):
Press to cycle through
DVD, CD, or Auxiliary when listening to the radio. The
DVD/CD text tab and a message showing track or
chapter number displays when a disc is in either slot.
Press again and the system automatically searches for
an auxiliary input device, such as a portable audio
player. If a portable audio player is not connected, “No
Aux Input Device” displays. If a disc is in both the DVD
slot and the CD slot the DVD/CD AUX button cycles
between the two sources and not indicate “No Aux Input
Device”. If a front auxiliary device is connected, the
DVD/CD AUX button cycles through all available
options, such as: DVD slot, CD slot, Front Auxiliary, and
Rear Auxiliary (if available). See “Using the Auxiliary
Input Jack(s)” later in this section, or “Audio/Video (A/V)
Jacks” under,Rear Seat Entertainment (RSE) System
on page 4‑132for more information.
Using the USB Port
Radios with a USB port can control a USB storage
device or an iPod®using the radio buttons and knobs.
See Using an MP3 (Radios with CD)on page 4‑105or
Using an MP3 (Radios with CD and DVD)on
page 4‑112for information about how to connect and
control a USB storage device or an iPod.
4-104