2010 CHEVROLET SILVERADO load capacity
[x] Cancel search: load capacityPage 216 of 626
Do not exceed the maximum vehicle capacity when
loading the vehicle. For more information on vehicle
capacity and loading, seeLoading the Vehicle
on
page 5‑29.
.If small heavy objects are placed on the roof, cut a
piece of 3/8 inch plywood to fit inside the crossrails
and siderails to spread the load. Tie the plywood to
the siderail supports.
.Tie the load and secure it to the crossrails or the
siderail supports. Use the crossrails only to keep
the load from sliding. To move a crossrail, lift the
release lever up, on both sides of the rail. Then
slide the crossrail to the desired position balancing
the force side to side. Press the release lever
down on both sides of the rail, down to tighten it.
Try to slide the crossrail back and forth slightly to
make sure it is tight.
.To carry long items, move the crossrails as far
apart as possible. Tie the load to the crossrails and
the siderails or siderail supports. Also tie the load
to the bumpers, but do not tie the load so tightly
that the crossrails or siderails are damaged.
.After moving a crossrail, be sure it is securely
locked into the siderail.
A Center High-Mounted Stoplamp (CHMSL) is located
above the rear window glass.
Make sure items loaded on the roof of the vehicle do
not block or damage the CHMSL.
Rear Seat Armrest
Vehicles with a rear seat armrest have two cupholders.
Pull the armrest down from the rear seatback to access
the cupholders.
Sunroof
On vehicles with a power sliding sunroof, the ignition
needs to be turned to RUN, or the Retained Accessory
Power (RAP) must be activated to open or close the
sunroof. When RAP is active, the sunroof will work for
10 minutes after the ignition is turned off, or until the
driver's door is opened. See Retained Accessory Power
(RAP)
on page 3‑23for more information.
Do not leave the sunroof open for long periods of time
while the vehicle is not in use. Debris can collect in the
tracks and damage the sunroof operation and plug the
water draining system.
3-78
Page 258 of 626
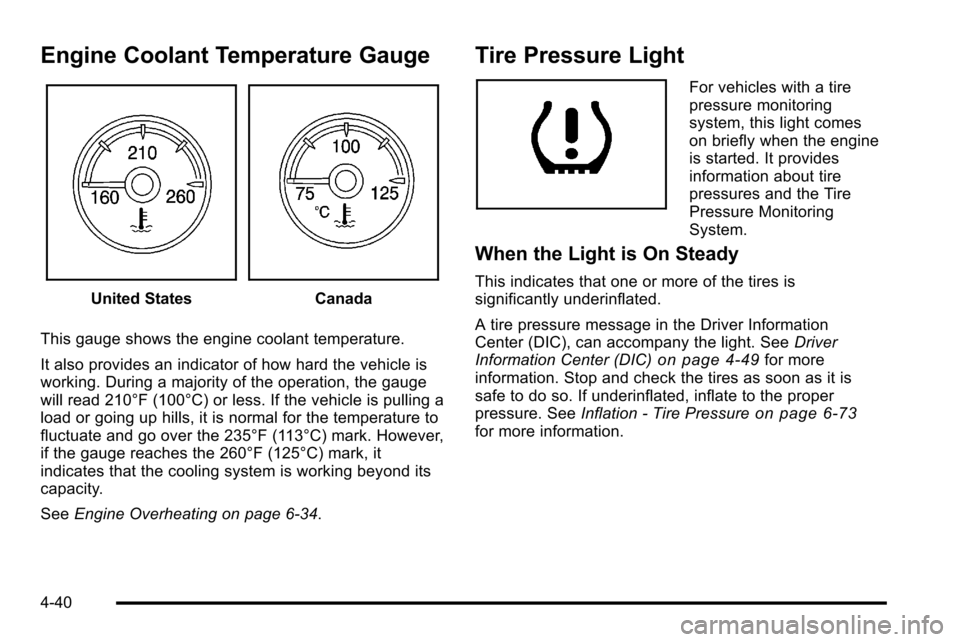
Engine Coolant Temperature Gauge
United StatesCanada
This gauge shows the engine coolant temperature.
It also provides an indicator of how hard the vehicle is
working. During a majority of the operation, the gauge
will read 210°F (100°C) or less. If the vehicle is pulling a
load or going up hills, it is normal for the temperature to
fluctuate and go over the 235°F (113°C) mark. However,
if the gauge reaches the 260°F (125°C) mark, it
indicates that the cooling system is working beyond its
capacity.
See Engine Overheating on page 6‑34.
Tire Pressure Light
For vehicles with a tire
pressure monitoring
system, this light comes
on briefly when the engine
is started. It provides
information about tire
pressures and the Tire
Pressure Monitoring
System.
When the Light is On Steady
This indicates that one or more of the tires is
significantly underinflated.
A tire pressure message in the Driver Information
Center (DIC), can accompany the light. See Driver
Information Center (DIC)
on page 4‑49for more
information. Stop and check the tires as soon as it is
safe to do so. If underinflated, inflate to the proper
pressure. See Inflation - Tire Pressure
on page 6‑73for more information.
4-40
Page 395 of 626
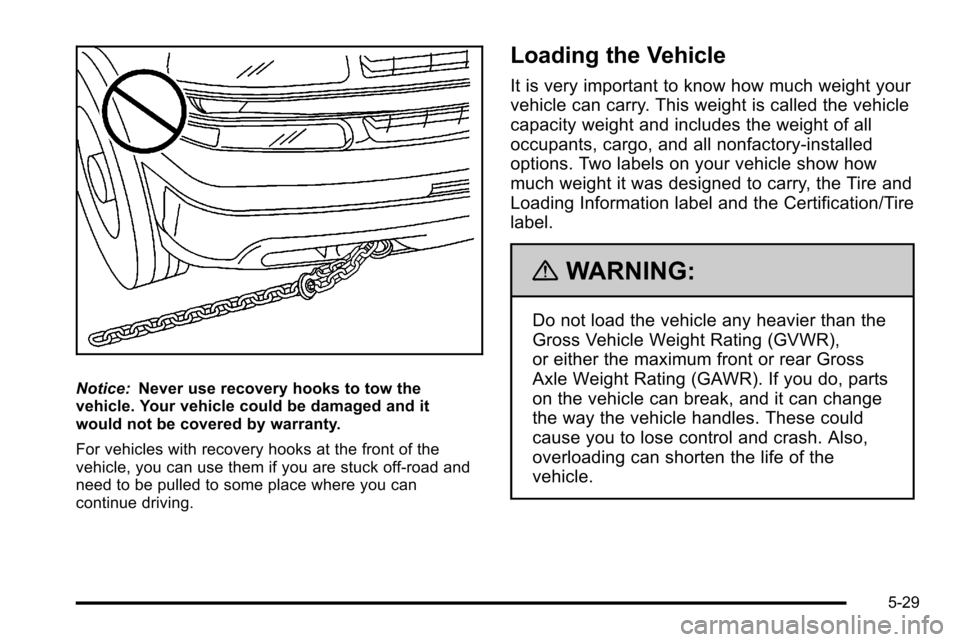
Notice:Never use recovery hooks to tow the
vehicle. Your vehicle could be damaged and it
would not be covered by warranty.
For vehicles with recovery hooks at the front of the
vehicle, you can use them if you are stuck off-road and
need to be pulled to some place where you can
continue driving.
Loading the Vehicle
It is very important to know how much weight your
vehicle can carry. This weight is called the vehicle
capacity weight and includes the weight of all
occupants, cargo, and all nonfactory-installed
options. Two labels on your vehicle show how
much weight it was designed to carry, the Tire and
Loading Information label and the Certification/Tire
label.
{WARNING:
Do not load the vehicle any heavier than the
Gross Vehicle Weight Rating (GVWR),
or either the maximum front or rear Gross
Axle Weight Rating (GAWR). If you do, parts
on the vehicle can break, and it can change
the way the vehicle handles. These could
cause you to lose control and crash. Also,
overloading can shorten the life of the
vehicle.
5-29
Page 396 of 626
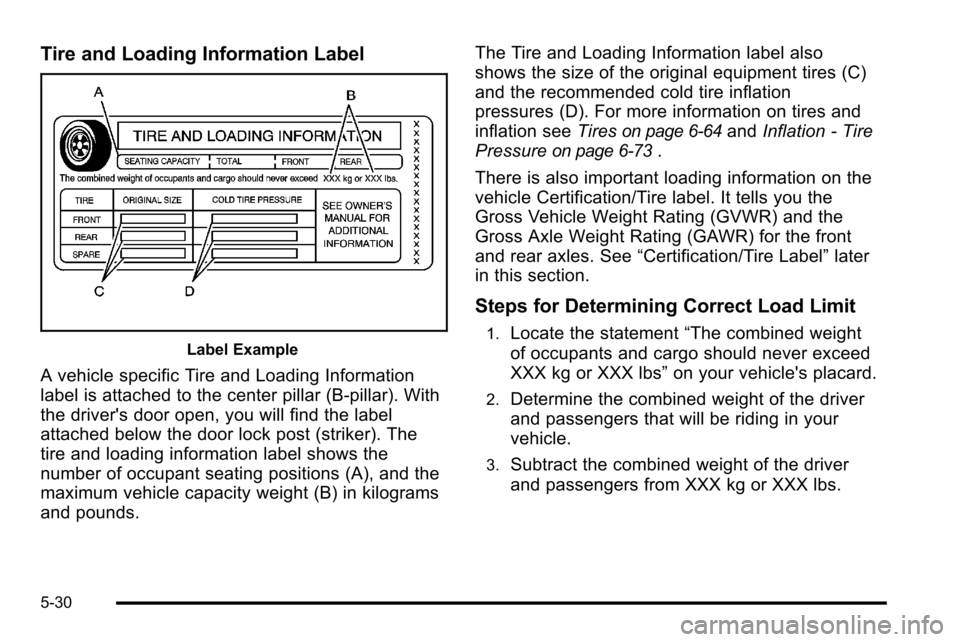
Tire and Loading Information Label
Label Example
A vehicle specific Tire and Loading Information
label is attached to the center pillar (B-pillar). With
the driver's door open, you will find the label
attached below the door lock post (striker). The
tire and loading information label shows the
number of occupant seating positions (A), and the
maximum vehicle capacity weight (B) in kilograms
and pounds.The Tire and Loading Information label also
shows the size of the original equipment tires (C)
and the recommended cold tire inflation
pressures (D). For more information on tires and
inflation see
Tires
on page 6‑64andInflation - Tire
Pressure
on page 6‑73.
There is also important loading information on the
vehicle Certification/Tire label. It tells you the
Gross Vehicle Weight Rating (GVWR) and the
Gross Axle Weight Rating (GAWR) for the front
and rear axles. See “Certification/Tire Label” later
in this section.
Steps for Determining Correct Load Limit
1.Locate the statement “The combined weight
of occupants and cargo should never exceed
XXX kg or XXX lbs” on your vehicle's placard.
2.Determine the combined weight of the driver
and passengers that will be riding in your
vehicle.
3.Subtract the combined weight of the driver
and passengers from XXX kg or XXX lbs.
5-30
Page 397 of 626
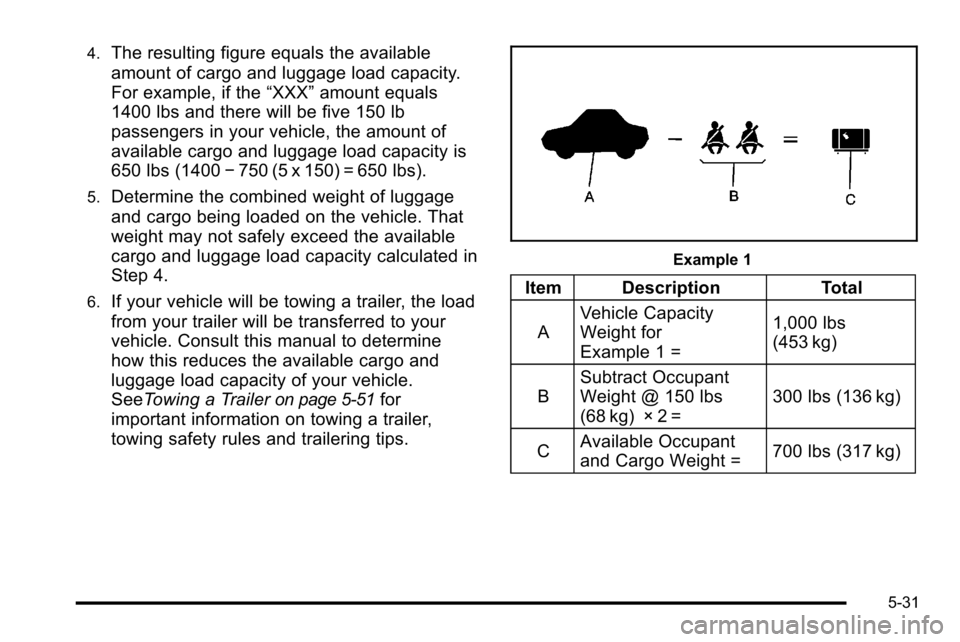
4.The resulting figure equals the available
amount of cargo and luggage load capacity.
For example, if the“XXX”amount equals
1400 lbs and there will be five 150 lb
passengers in your vehicle, the amount of
available cargo and luggage load capacity is
650 lbs (1400 −750 (5 x 150) = 650 lbs).
5.Determine the combined weight of luggage
and cargo being loaded on the vehicle. That
weight may not safely exceed the available
cargo and luggage load capacity calculated in
Step 4.
6.If your vehicle will be towing a trailer, the load
from your trailer will be transferred to your
vehicle. Consult this manual to determine
how this reduces the available cargo and
luggage load capacity of your vehicle.
SeeTowing a Trailer
on page 5‑51for
important information on towing a trailer,
towing safety rules and trailering tips.
Example 1
Item Description Total
A Vehicle Capacity
Weight for
Example 1 = 1,000 lbs
(453 kg)
B Subtract Occupant
Weight @ 150 lbs
(68 kg) × 2 = 300 lbs (136 kg)
C Available Occupant
and Cargo Weight =
700 lbs (317 kg)
5-31
Page 399 of 626
Refer to your vehicle's tire and loading information
label for specific information about your vehicle's
capacity weight and seating positions. The
combined weight of the driver, passengers, and
cargo should never exceed your vehicle's capacity
weight.
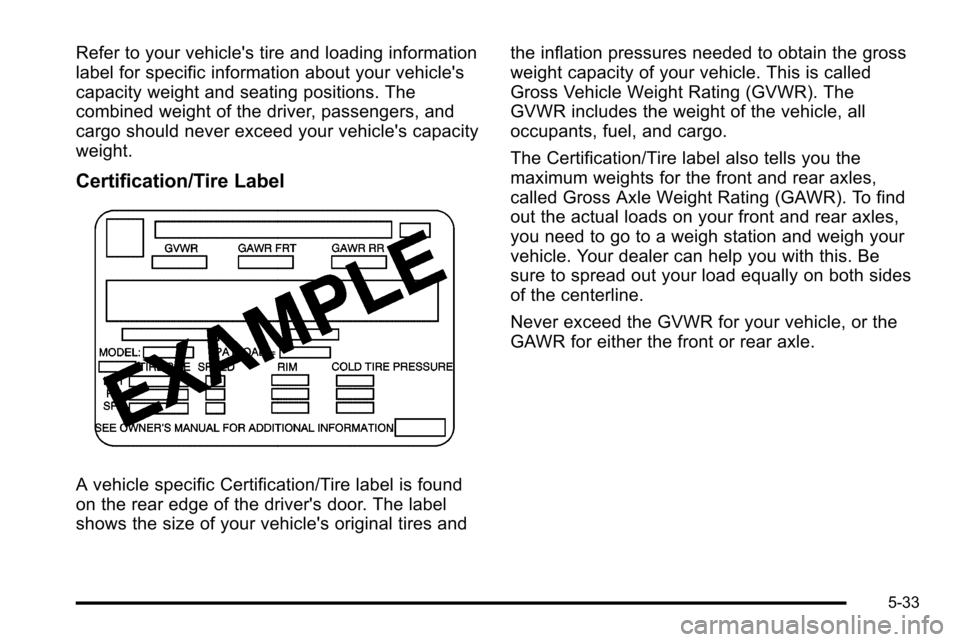
Certification/Tire Label
A vehicle specific Certification/Tire label is found
on the rear edge of the driver's door. The label
shows the size of your vehicle's original tires andthe inflation pressures needed to obtain the gross
weight capacity of your vehicle. This is called
Gross Vehicle Weight Rating (GVWR). The
GVWR includes the weight of the vehicle, all
occupants, fuel, and cargo.
The Certification/Tire label also tells you the
maximum weights for the front and rear axles,
called Gross Axle Weight Rating (GAWR). To find
out the actual loads on your front and rear axles,
you need to go to a weigh station and weigh your
vehicle. Your dealer can help you with this. Be
sure to spread out your load equally on both sides
of the centerline.
Never exceed the GVWR for your vehicle, or the
GAWR for either the front or rear axle.
5-33
Page 400 of 626
The Certification/Tire label also contains important
information about your Front Axle Reserve
Capacity. See“What is front axle reserve capacity,
and how do I calculate it?” underAdding a Snow
Plow or Similar Equipment
on page 5‑37.
{WARNING:
In the case of a sudden stop or collision,
things carried in the bed of your truck could
shift forward and come into the passenger
area, injuring you and others. If you put
things in the bed of your truck, you should
make sure they are properly secured.
{WARNING:
Do not load the vehicle any heavier than the
Gross Vehicle Weight Rating (GVWR),
or either the maximum front or rear Gross
Axle Weight Rating (GAWR). If you do, parts
on the vehicle can break, and it can change
(Continued)
WARNING: (Continued)
the way the vehicle handles. These could
cause you to lose control and crash. Also,
overloading can shorten the life of the
vehicle.
Notice :Overloading the vehicle may cause
damage. Repairs would not be covered by the
vehicle warranty. Do not overload the vehicle.
Using heavier suspension components to get
added durability might not change your weight
ratings. Ask your dealer to help you load your
vehicle the right way.
If you put things inside your vehicle —like
suitcases, tools, packages, or anything
else —they go as fast as the vehicle goes. If you
have to stop or turn quickly, or if there is a crash,
they will keep going.
5-34
Page 406 of 626
You can add heavier equipment on the front of the
vehicle if you compensate for it by carrying fewer
passengers, less cargo, or by positioning cargo toward
the rear. This has the effect of reducing the load on the
front. However, the front GAWR, rear GAWR, and the
Gross Vehicle Weight Rating (GVWR) must never be
exceeded.
{WARNING:
On some vehicles that have certain front mounted
equipment, such as a snow plow, it may be
possible to load the front axle to the front gross
axle weight rating (GAWR) but not have enough
weight on the rear axle to have proper braking
performance. If your brakes can not work properly,
you could have a crash. To help your brakes work
properly when a snow plow is installed, always
follow the snow plow manufacturer or installer's
recommendation for rear ballast to ensure a
proper front and rear weight distribution ratio,
even though the actual front weight may be less
than the front GAWR, and the total vehicle weight
is less than the gross vehicle weight rating
(GVWR). Maintaining a proper front and rear
weight distribution ratio is necessary to provide
proper braking performance.Total vehicle reserve capacity is the difference between
the GVWR and the weight of the truck with full fuel and
passengers. It is the amount of weight that can be
added to the vehicle before reaching the GVWR. Keep
in mind that reserve capacity numbers are intended as
a guide when selecting the amount of equipment or
cargo the truck can carry. If unsure of the vehicle's front,
rear, or total weight, go to a weigh station and weigh the
vehicle. Your dealer can also help with this.
The total vehicle reserve capacity for the vehicle can be
found in the lower right corner of the Certification/Tire
label as shown previously.
See your dealer for additional advice and information
about using a snow plow on the vehicle. Also, see
Loading the Vehicle on page 5‑29.
Emergency Roof Lamp Provisions
Vehicles with the RPO VYU snow plow prep package
also have an emergency roof lamp provision package,
RPO TRW. Wiring for the emergency roof lamp is
provided above the overhead console. See
Auxiliary
Roof-Mounted Lamp
on page 4‑14for switch location.
5-40