2010 CHEVROLET SILVERADO flat tire
[x] Cancel search: flat tirePage 547 of 626
goes on one way. Be sure to line up the tab on the
center cap with the indentation on the wheel. For
bolt-on hub caps, align the plastic nut caps with the
wheel nuts and then tighten by hand. Then use the
wheel wrench to tighten.
Secondary Latch System
This vehicle may have an underbody-mounted tire hoist
assembly equipped with a secondary latch system. It is
designed to stop the spare tire from suddenly falling off
your vehicle. For the secondary latch to work, the spare
must be installed with the valve stem pointing down.
SeeStoring a Flat or Spare Tire and Tools
on
page 6‑106.
{WARNING:
Before beginning this procedure read all the
instructions. Failure to read and follow the
instructions could damage the hoist assembly and
you and others could get hurt. Read and follow
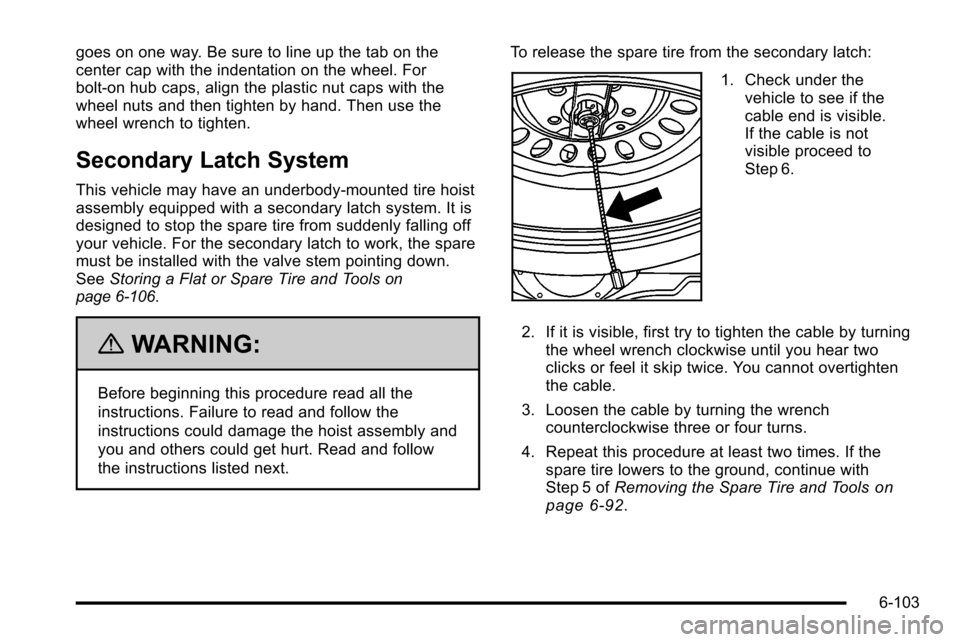
the instructions listed next. To release the spare tire from the secondary latch:
1. Check under the
vehicle to see if the
cable end is visible.
If the cable is not
visible proceed to
Step 6.
2. If it is visible, first try to tighten the cable by turning the wheel wrench clockwise until you hear two
clicks or feel it skip twice. You cannot overtighten
the cable.
3. Loosen the cable by turning the wrench counterclockwise three or four turns.
4. Repeat this procedure at least two times. If the spare tire lowers to the ground, continue with
Step 5 of Removing the Spare Tire and Tools
on
page 6‑92.
6-103
Page 549 of 626
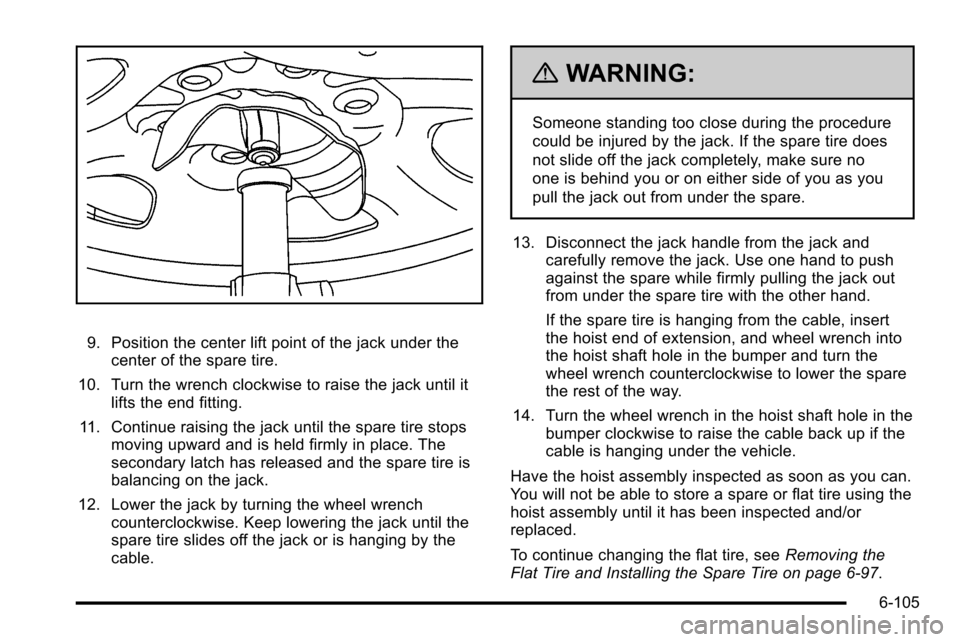
9. Position the center lift point of the jack under thecenter of the spare tire.
10. Turn the wrench clockwise to raise the jack until it lifts the end fitting.
11. Continue raising the jack until the spare tire stops moving upward and is held firmly in place. The
secondary latch has released and the spare tire is
balancing on the jack.
12. Lower the jack by turning the wheel wrench counterclockwise. Keep lowering the jack until the
spare tire slides off the jack or is hanging by the
cable.
{WARNING:
Someone standing too close during the procedure
could be injured by the jack. If the spare tire does
not slide off the jack completely, make sure no
one is behind you or on either side of you as you
pull the jack out from under the spare.
13. Disconnect the jack handle from the jack and carefully remove the jack. Use one hand to push
against the spare while firmly pulling the jack out
from under the spare tire with the other hand.
If the spare tire is hanging from the cable, insert
the hoist end of extension, and wheel wrench into
the hoist shaft hole in the bumper and turn the
wheel wrench counterclockwise to lower the spare
the rest of the way.
14. Turn the wheel wrench in the hoist shaft hole in the bumper clockwise to raise the cable back up if the
cable is hanging under the vehicle.
Have the hoist assembly inspected as soon as you can.
You will not be able to store a spare or flat tire using the
hoist assembly until it has been inspected and/or
replaced.
To continue changing the flat tire, see Removing the
Flat Tire and Installing the Spare Tire on page 6‑97.
6-105
Page 550 of 626
Storing a Flat or Spare Tire and
Tools
{WARNING:
Storing a jack, a tire, or other equipment in the
passenger compartment of the vehicle could
cause injury. In a sudden stop or collision, loose
equipment could strike someone. Store all these
in the proper place.
Notice: Storing an aluminum wheel with a flat tire
under your vehicle for an extended period of time or
with the valve stem pointing up can damage the
wheel. Always stow the wheel with the valve stem
pointing down and have the wheel/tire repaired as
soon as possible.
Store the tire under the rear of the vehicle in the spare
tire carrier.
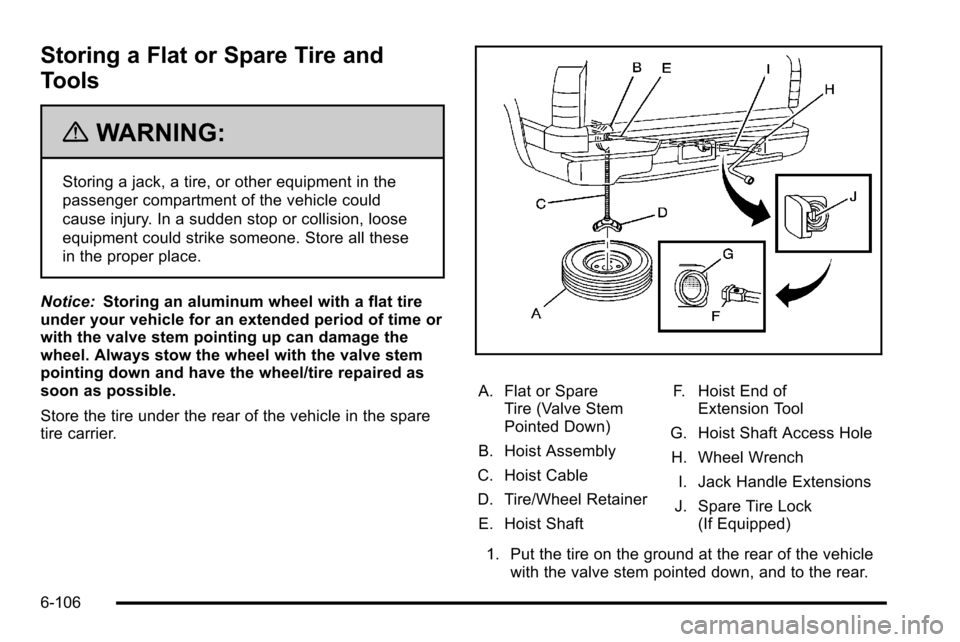
A. Flat or Spare Tire (Valve Stem
Pointed Down)
B. Hoist Assembly
C. Hoist Cable
D. Tire/Wheel Retainer
E. Hoist Shaft F. Hoist End of
Extension Tool
G. Hoist Shaft Access Hole H. Wheel Wrench I. Jack Handle Extensions
J. Spare Tire Lock (If Equipped)
1. Put the tire on the ground at the rear of the vehicle with the valve stem pointed down, and to the rear.
6-106
Page 553 of 626
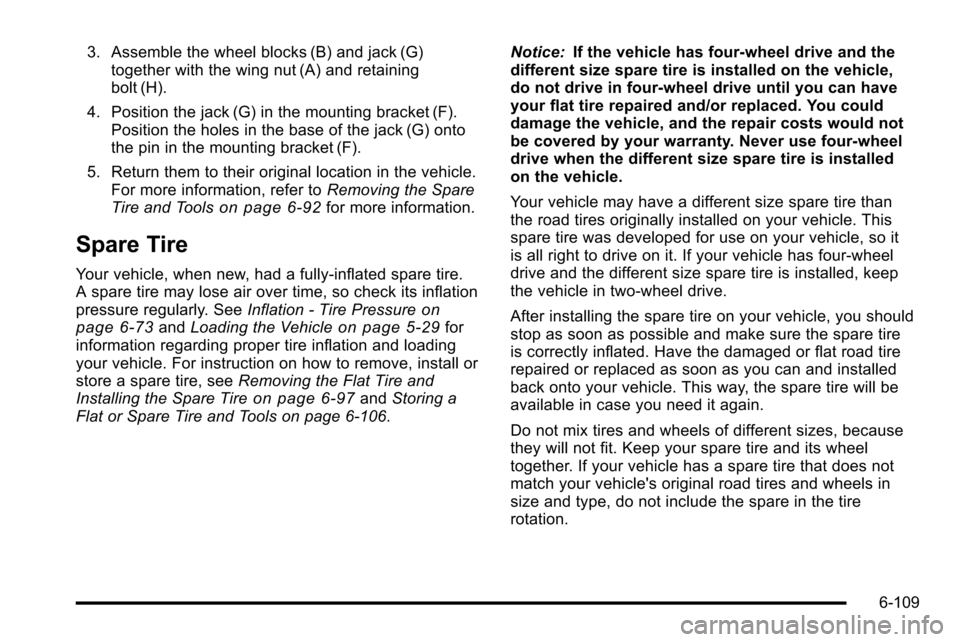
3. Assemble the wheel blocks (B) and jack (G)together with the wing nut (A) and retaining
bolt (H).
4. Position the jack (G) in the mounting bracket (F). Position the holes in the base of the jack (G) onto
the pin in the mounting bracket (F).
5. Return them to their original location in the vehicle. For more information, refer to Removing the Spare
Tire and Tools
on page 6‑92for more information.
Spare Tire
Your vehicle, when new, had a fully-inflated spare tire.
A spare tire may lose air over time, so check its inflation
pressure regularly. See Inflation - Tire Pressure
on
page 6‑73and Loading the Vehicleon page 5‑29for
information regarding proper tire inflation and loading
your vehicle. For instruction on how to remove, install or
store a spare tire, see Removing the Flat Tire and
Installing the Spare Tire
on page 6‑97and Storing a
Flat or Spare Tire and Tools on page 6‑106. Notice:
If the vehicle has four-wheel drive and the
different size spare tire is installed on the vehicle,
do not drive in four-wheel drive until you can have
your flat tire repaired and/or replaced. You could
damage the vehicle, and the repair costs would not
be covered by your warranty. Never use four-wheel
drive when the different size spare tire is installed
on the vehicle.
Your vehicle may have a different size spare tire than
the road tires originally installed on your vehicle. This
spare tire was developed for use on your vehicle, so it
is all right to drive on it. If your vehicle has four-wheel
drive and the different size spare tire is installed, keep
the vehicle in two-wheel drive.
After installing the spare tire on your vehicle, you should
stop as soon as possible and make sure the spare tire
is correctly inflated. Have the damaged or flat road tire
repaired or replaced as soon as you can and installed
back onto your vehicle. This way, the spare tire will be
available in case you need it again.
Do not mix tires and wheels of different sizes, because
they will not fit. Keep your spare tire and its wheel
together. If your vehicle has a spare tire that does not
match your vehicle's original road tires and wheels in
size and type, do not include the spare in the tire
rotation.
6-109
Page 576 of 626
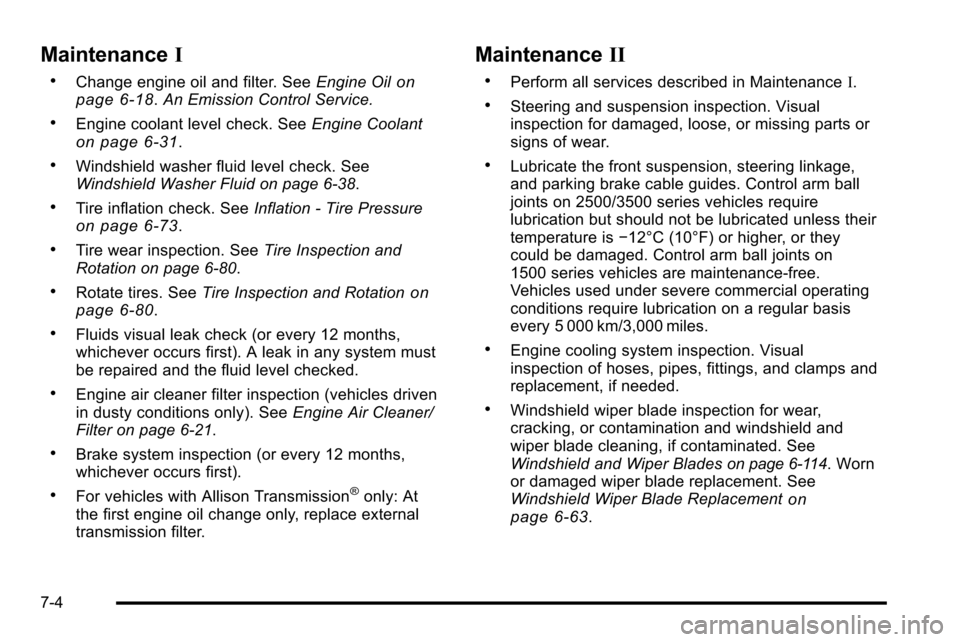
MaintenanceI
.Change engine oil and filter. See Engine Oilon
page 6‑18. An Emission Control Service.
.Engine coolant level check. See Engine Coolanton page 6‑31.
.Windshield washer fluid level check. See
Windshield Washer Fluid on page 6‑38.
.Tire inflation check. SeeInflation - Tire Pressureon page 6‑73.
.Tire wear inspection. See Tire Inspection and
Rotation on page 6‑80.
.Rotate tires. See Tire Inspection and Rotationon
page 6‑80.
.Fluids visual leak check (or every 12 months,
whichever occurs first). A leak in any system must
be repaired and the fluid level checked.
.Engine air cleaner filter inspection (vehicles driven
in dusty conditions only). See Engine Air Cleaner/
Filter on page 6‑21.
.Brake system inspection (or every 12 months,
whichever occurs first).
.For vehicles with Allison Transmission®only: At
the first engine oil change only, replace external
transmission filter.
Maintenance II
.Perform all services described in Maintenance I.
.Steering and suspension inspection. Visual
inspection for damaged, loose, or missing parts or
signs of wear.
.Lubricate the front suspension, steering linkage,
and parking brake cable guides. Control arm ball
joints on 2500/3500 series vehicles require
lubrication but should not be lubricated unless their
temperature is−12°C (10°F) or higher, or they
could be damaged. Control arm ball joints on
1500 series vehicles are maintenance‐free.
Vehicles used under severe commercial operating
conditions require lubrication on a regular basis
every 5 000 km/3,000 miles.
.Engine cooling system inspection. Visual
inspection of hoses, pipes, fittings, and clamps and
replacement, if needed.
.Windshield wiper blade inspection for wear,
cracking, or contamination and windshield and
wiper blade cleaning, if contaminated. See
Windshield and Wiper Blades
on page 6‑114. Worn
or damaged wiper blade replacement. See
Windshield Wiper Blade Replacement
on
page 6‑63.
7-4
Page 577 of 626
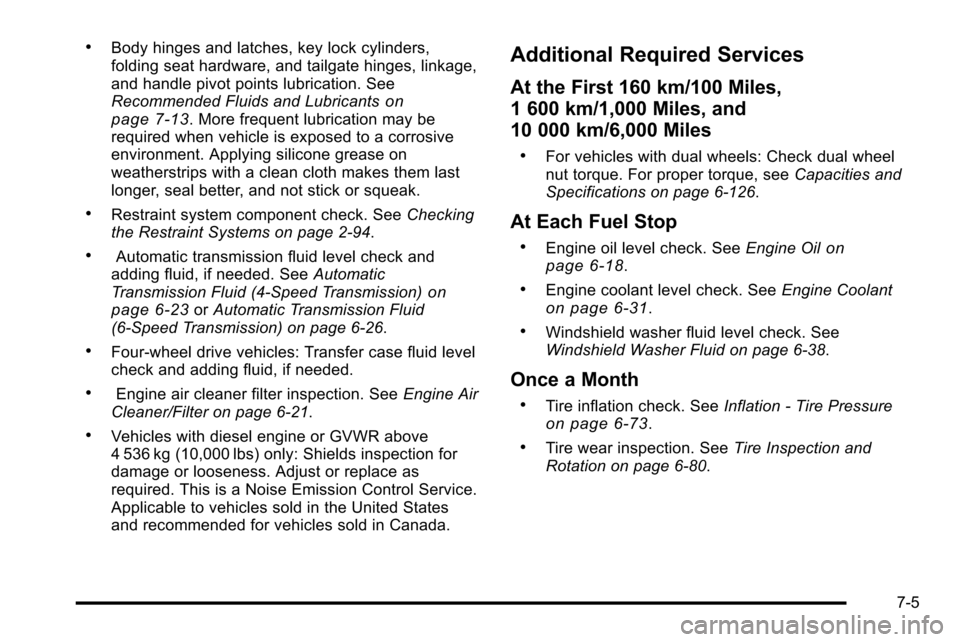
.Body hinges and latches, key lock cylinders,
folding seat hardware, and tailgate hinges, linkage,
and handle pivot points lubrication. See
Recommended Fluids and Lubricants
on
page 7‑13. More frequent lubrication may be
required when vehicle is exposed to a corrosive
environment. Applying silicone grease on
weatherstrips with a clean cloth makes them last
longer, seal better, and not stick or squeak.
.Restraint system component check. See Checking
the Restraint Systems on page 2‑94.
.Automatic transmission fluid level check and
adding fluid, if needed. See Automatic
Transmission Fluid (4-Speed Transmission)
on
page 6‑23or Automatic Transmission Fluid
(6-Speed Transmission) on page 6‑26.
.Four‐wheel drive vehicles: Transfer case fluid level
check and adding fluid, if needed.
.Engine air cleaner filter inspection. See Engine Air
Cleaner/Filter on page 6‑21.
.Vehicles with diesel engine or GVWR above
4 536 kg (10,000 lbs) only: Shields inspection for
damage or looseness. Adjust or replace as
required. This is a Noise Emission Control Service.
Applicable to vehicles sold in the United States
and recommended for vehicles sold in Canada.
Additional Required Services
At the First 160 km/100 Miles,
1 600 km/1,000 Miles, and
10 000 km/6,000 Miles
.For vehicles with dual wheels: Check dual wheel
nut torque. For proper torque, see Capacities and
Specifications on page 6‑126.
At Each Fuel Stop
.Engine oil level check. See Engine Oilon
page 6‑18.
.Engine coolant level check. See Engine Coolanton page 6‑31.
.Windshield washer fluid level check. See
Windshield Washer Fluid on page 6‑38.
Once a Month
.Tire inflation check. SeeInflation - Tire Pressureon page 6‑73.
.Tire wear inspection. See Tire Inspection and
Rotation on page 6‑80.
7-5
Page 581 of 626
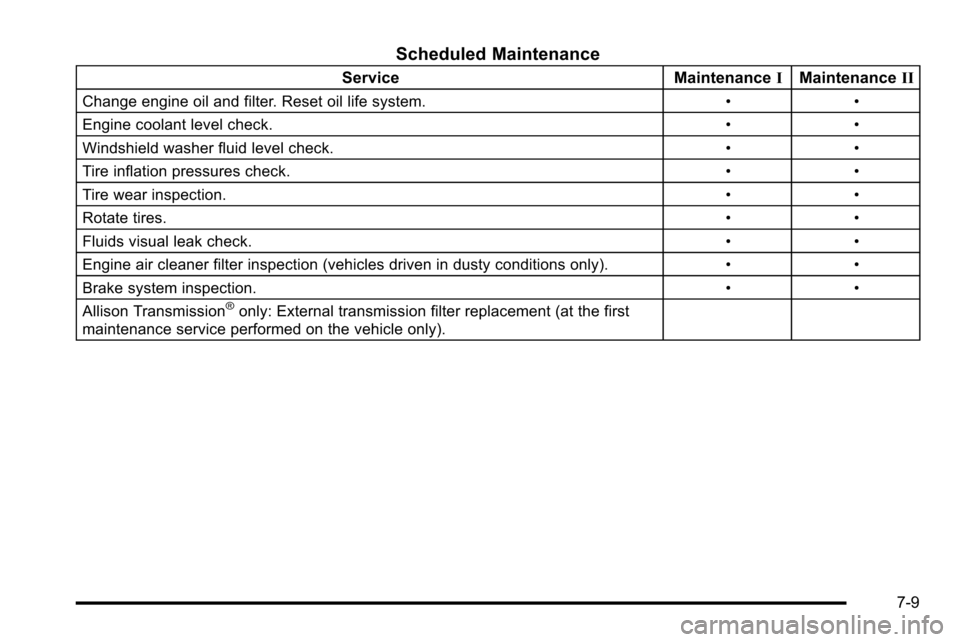
Scheduled Maintenance
ServiceMaintenanceIMaintenance II
Change engine oil and filter. Reset oil life system. • •
Engine coolant level check. • •
Windshield washer fluid level check. • •
Tire inflation pressures check. • •
Tire wear inspection. • •
Rotate tires. • •
Fluids visual leak check. • •
Engine air cleaner filter inspection (vehicles driven in dusty conditions only). • •
Brake system inspection. • •
Allison Transmission
®only: External transmission filter replacement (at the first
maintenance service performed on the vehicle only).
7-9
Page 600 of 626
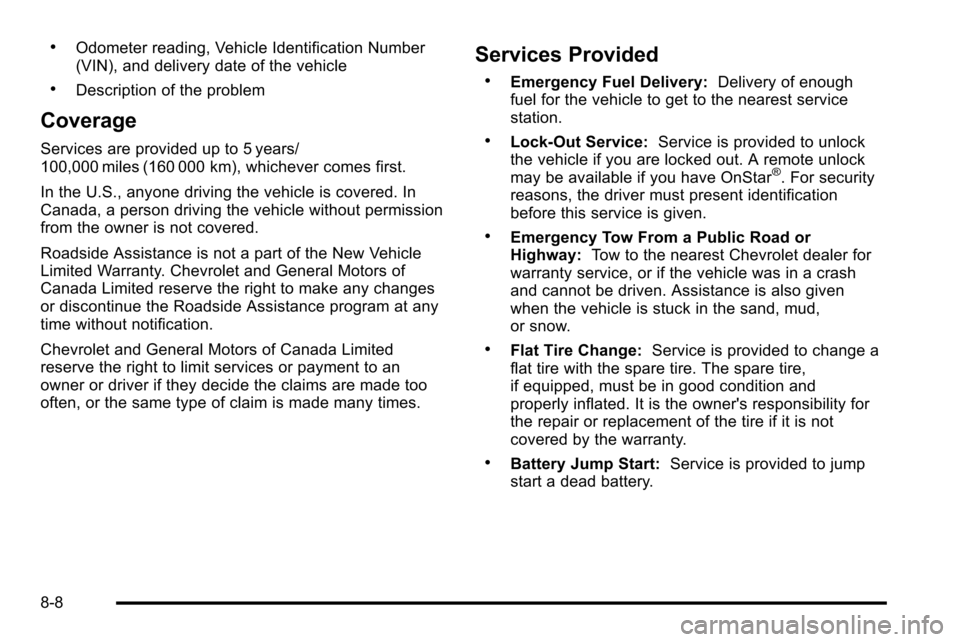
.Odometer reading, Vehicle Identification Number
(VIN), and delivery date of the vehicle
.Description of the problem
Coverage
Services are provided up to 5 years/
100,000 miles (160 000 km), whichever comes first.
In the U.S., anyone driving the vehicle is covered. In
Canada, a person driving the vehicle without permission
from the owner is not covered.
Roadside Assistance is not a part of the New Vehicle
Limited Warranty. Chevrolet and General Motors of
Canada Limited reserve the right to make any changes
or discontinue the Roadside Assistance program at any
time without notification.
Chevrolet and General Motors of Canada Limited
reserve the right to limit services or payment to an
owner or driver if they decide the claims are made too
often, or the same type of claim is made many times.
Services Provided
.Emergency Fuel Delivery:Delivery of enough
fuel for the vehicle to get to the nearest service
station.
.Lock‐Out Service: Service is provided to unlock
the vehicle if you are locked out. A remote unlock
may be available if you have OnStar
®. For security
reasons, the driver must present identification
before this service is given.
.Emergency Tow From a Public Road or
Highway: Tow to the nearest Chevrolet dealer for
warranty service, or if the vehicle was in a crash
and cannot be driven. Assistance is also given
when the vehicle is stuck in the sand, mud,
or snow.
.Flat Tire Change: Service is provided to change a
flat tire with the spare tire. The spare tire,
if equipped, must be in good condition and
properly inflated. It is the owner's responsibility for
the repair or replacement of the tire if it is not
covered by the warranty.
.Battery Jump Start: Service is provided to jump
start a dead battery.
8-8